A Memorable Drive from Bangalore to Hampi
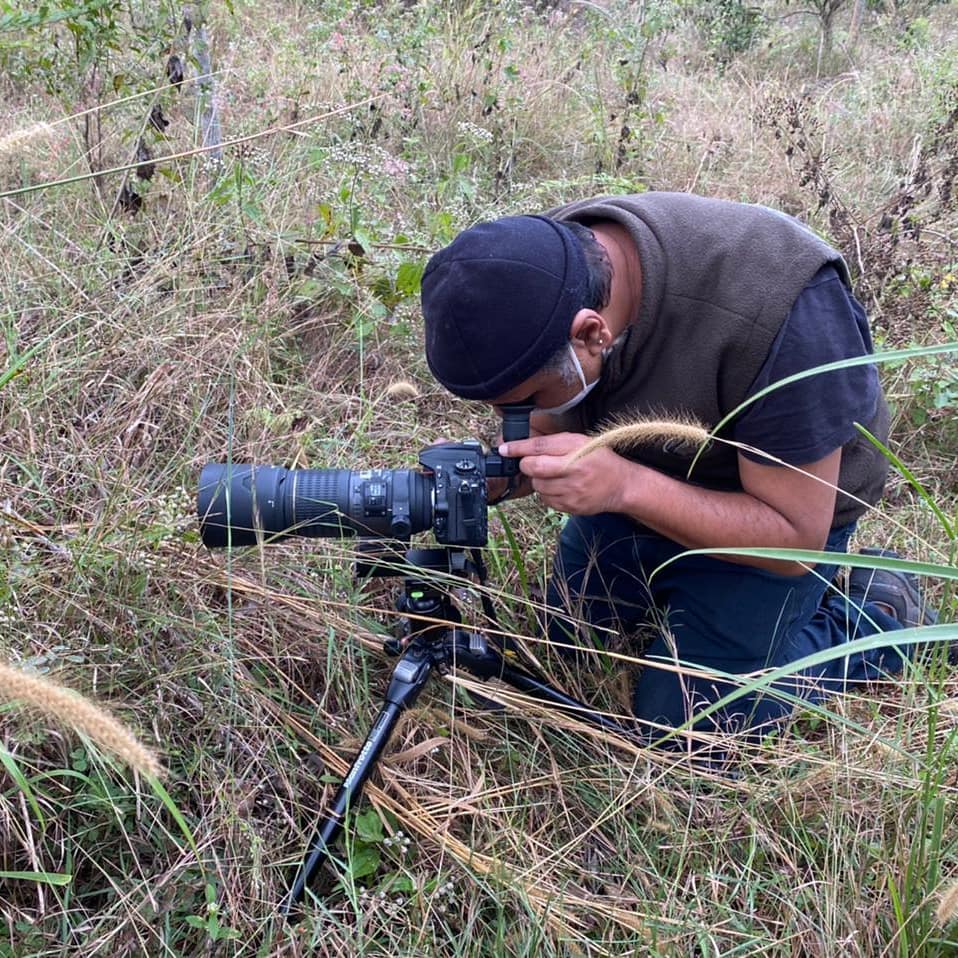
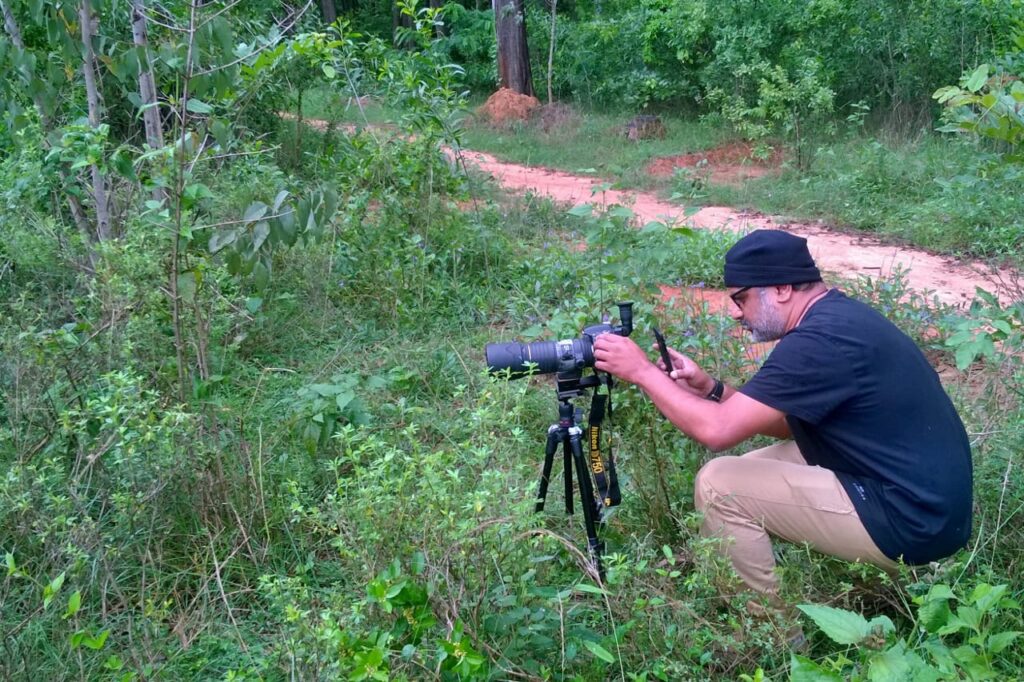
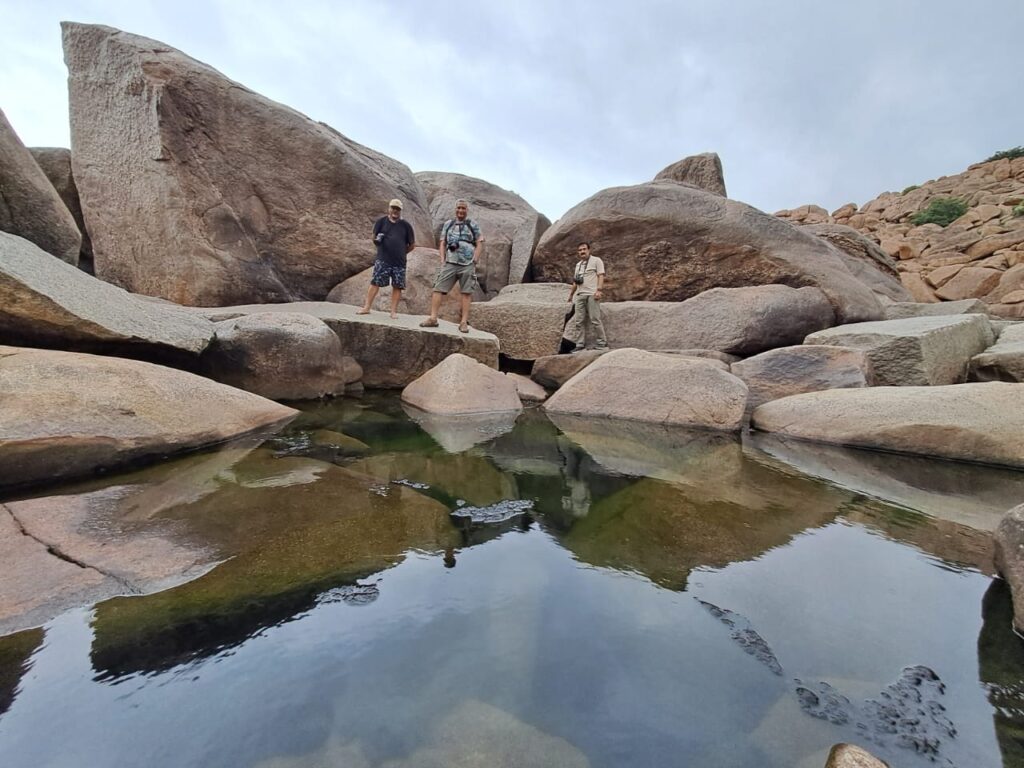
Traveling to Hampi in the monsoon brings together the excitement of seeing historical sites and sculptures with the delight of preserving their enduring beauty. In Bangalore, Harish, GR Pandith, and me, Goutham Ramesh, embarked on our journey in a Suzuki Jimny, full of anticipation for the scenic journey that lay ahead.
The Road to Hampi
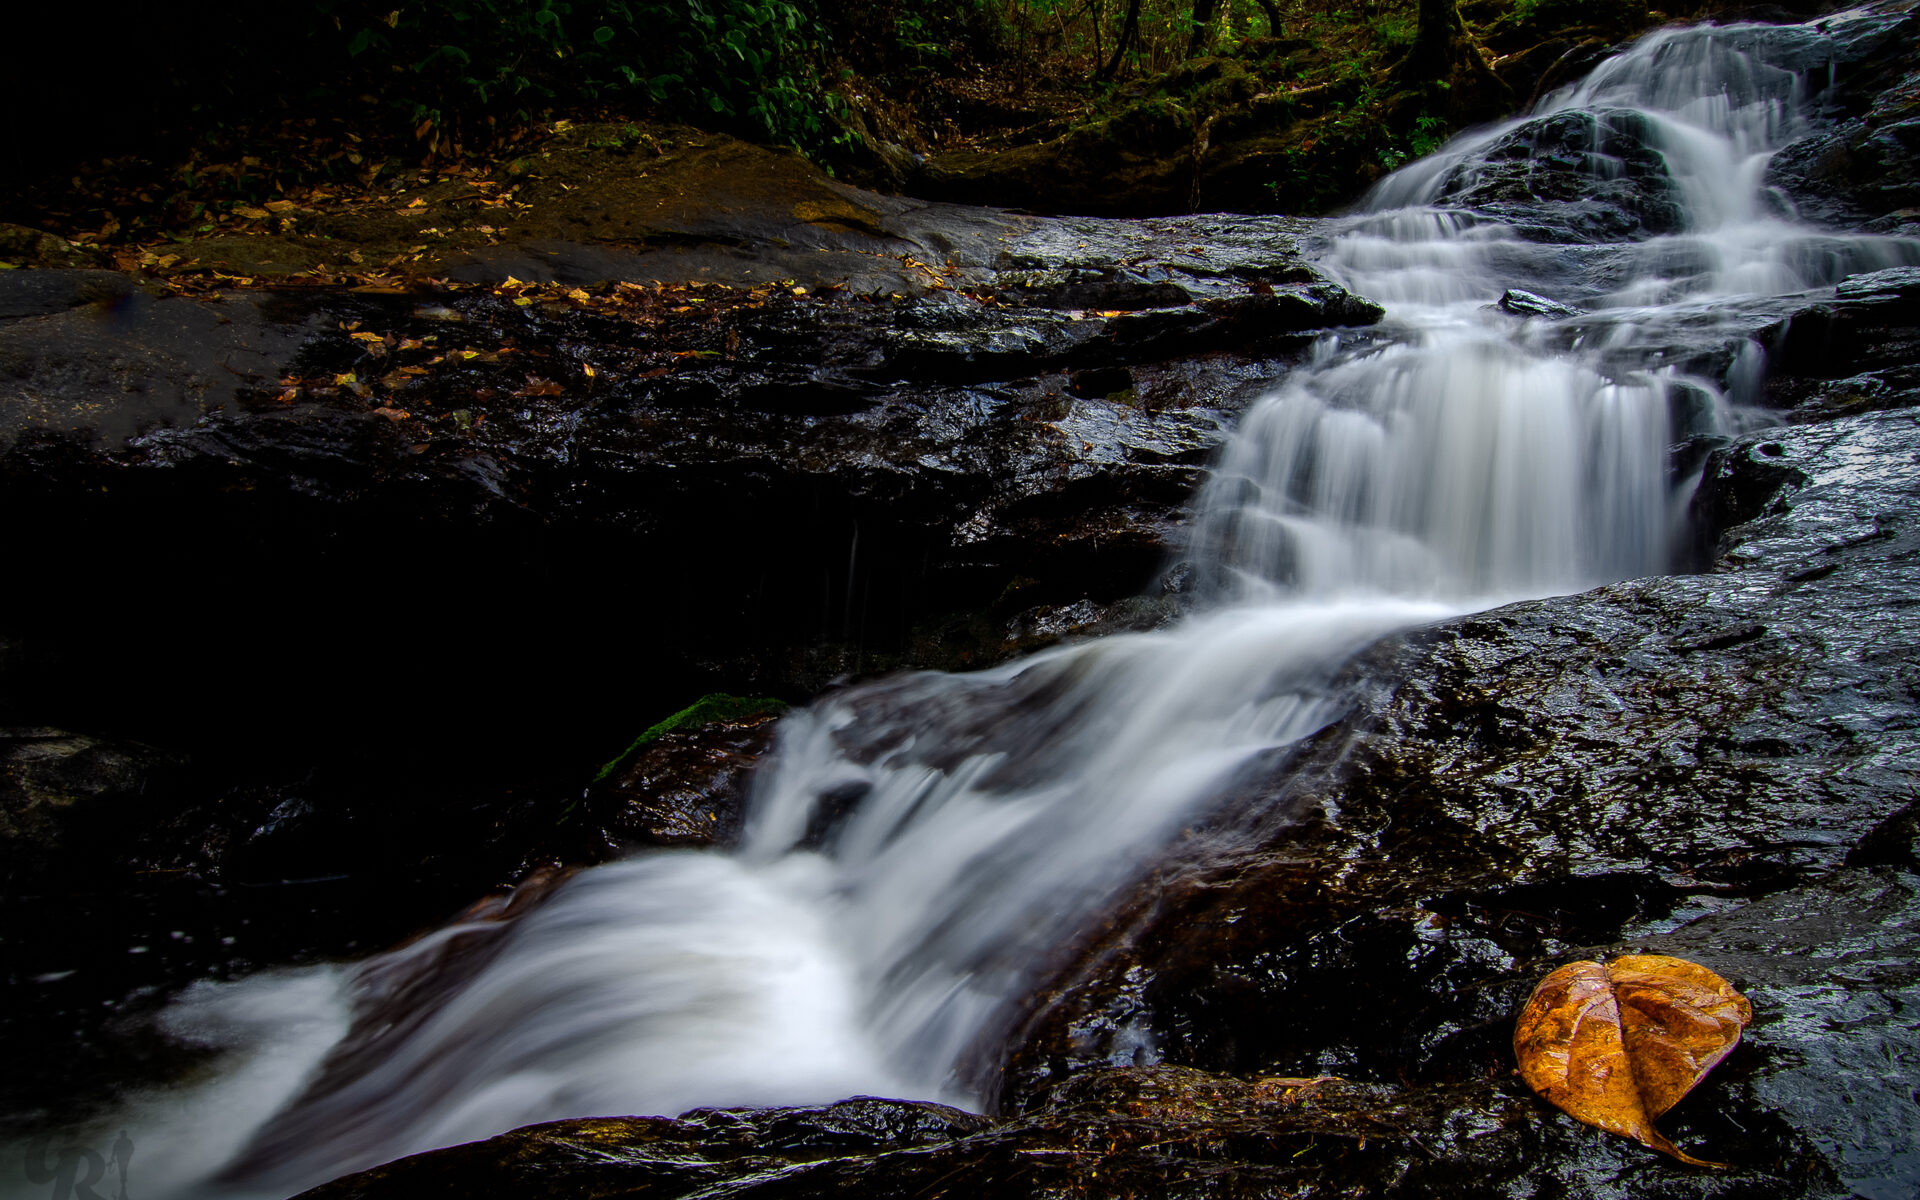
Bangalore and Hampi are about 350 km apart, and depending on traffic and weather, the trip takes six to seven hours. With its reputation for toughness and small size, the Suzuki Jimny turned out to be the ideal car for this trip, particularly given the erratic monsoon weather. The ambiance for our picture adventure was created by the abundant foliage along the path, which was occasionally broken up by showers of rain.

Capturing the Essence of Hampi
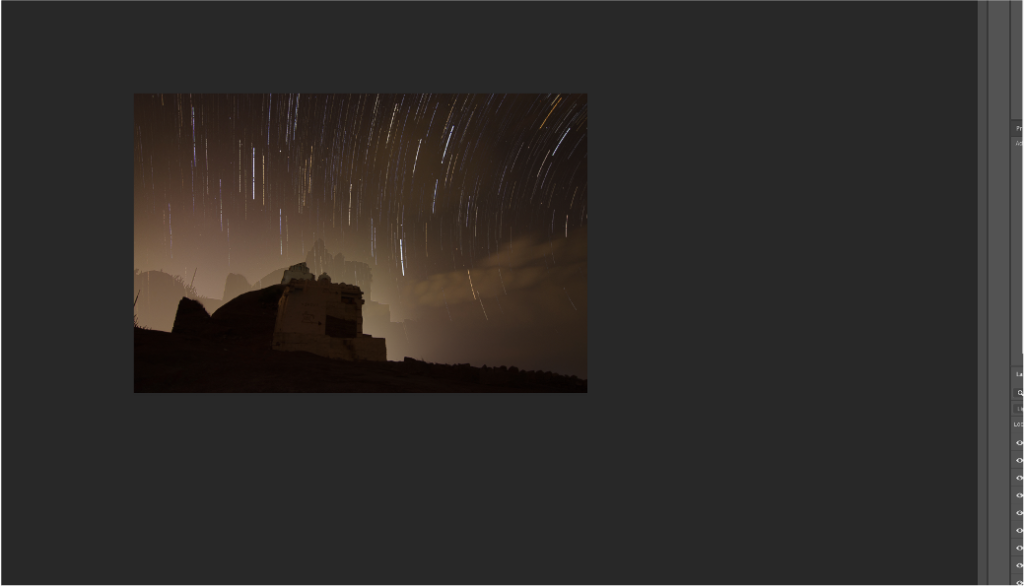
A photographer’s dream come true is Hampi, a UNESCO World Heritage Site. The old ruins are given new life during the monsoon season, when the rains highlight the stone’s textures and colors.
The magnificent backdrop created by the cloudy skies highlights the monuments even more.
Images from Hampi
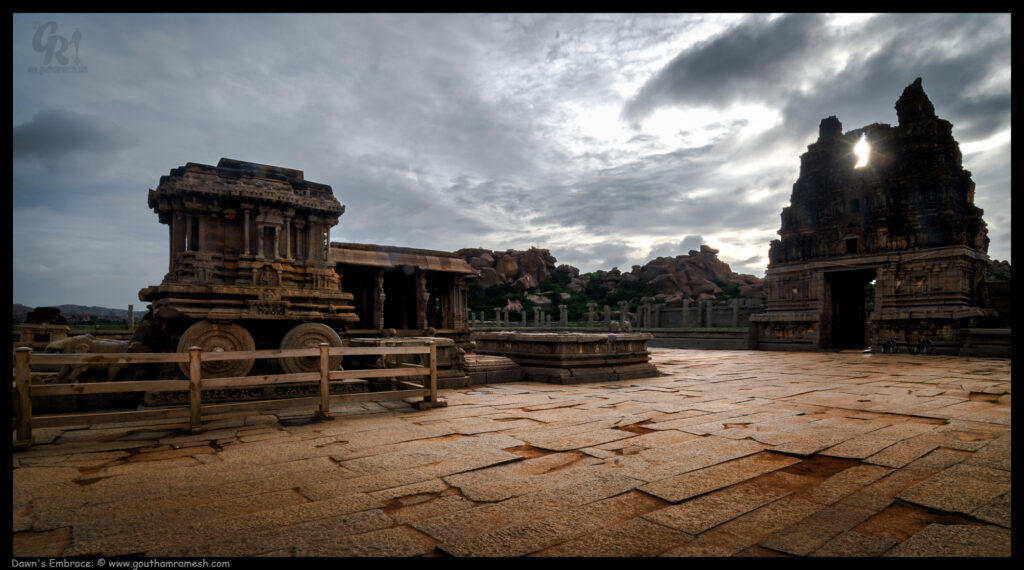
The Vijaya Vittala Temple, with its iconic stone chariot illuminated by the first light of dawn and the sun’s rays shining through the gopuram, is a breathtaking sight. This masterpiece of Indian artistry, carved from stone, showcases the extraordinary skill and creativity of medieval Indian artists. It stands as a timeless testament to their greatness, capturing the essence of an era where art and architecture flourished in harmony. The beauty of this scene, bathed in the soft glow of dawn, reflects the enduring legacy of Hampi’s rich cultural heritage.
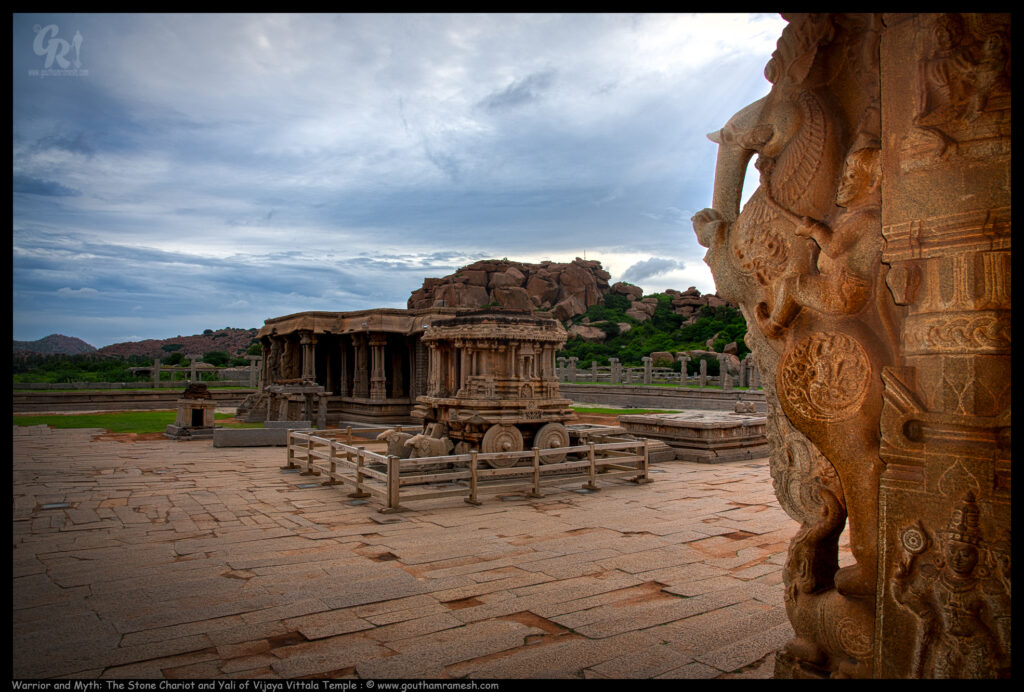
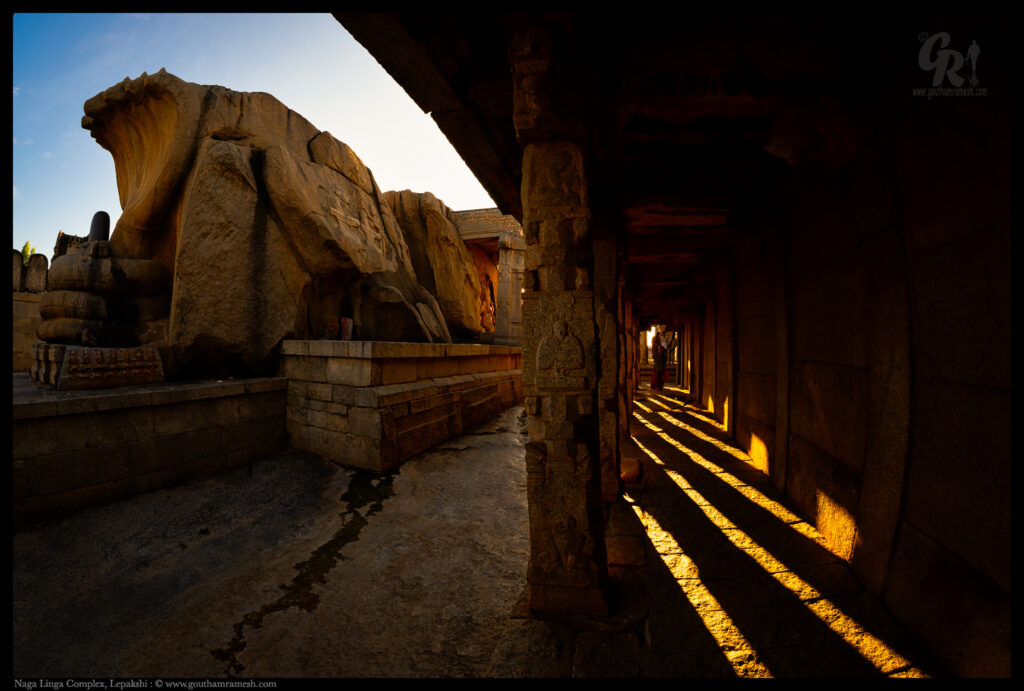
At dawn, the Vijaya Vittala Temple complex in Hampi transforms into a mesmerizing sight, with the stone chariot bathed in the soft morning light. Next to the temple, on the Ranga Mantapa, stands a sculpture of a warrior riding a mythical yali. The yali, a majestic creature combining features of various animals—often with the body of a lion, the head of an elephant, and the tail of a serpent—symbolizes power, protection, and a blend of various strengths. Its fierce and graceful depiction in the sculpture adds a dynamic and mythical element to the scene.
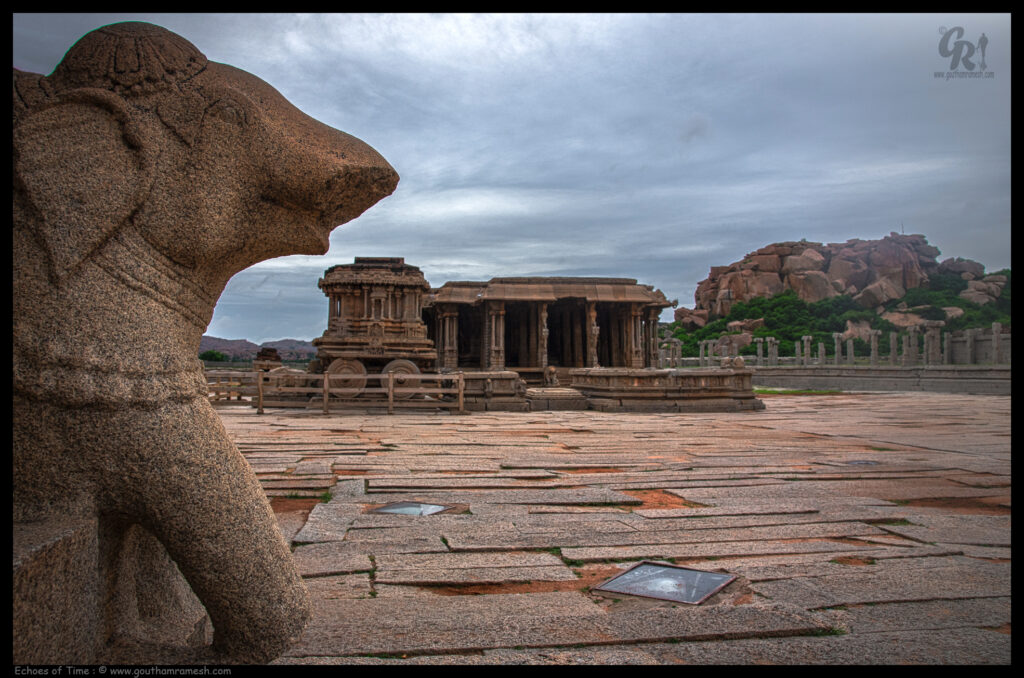
With its recognisable stone chariot, the Vijaya Vitthala Temple complex in Hampi serves as a moving reminder of the area’s turbulent past as well as its rich cultural legacy. I wanted to convey a narrative that combined the architectural magnificence of the stone chariot with remnants of a bygone era characterised by both glory and devastation, which is why I included a broken elephant sculpture in the foreground.
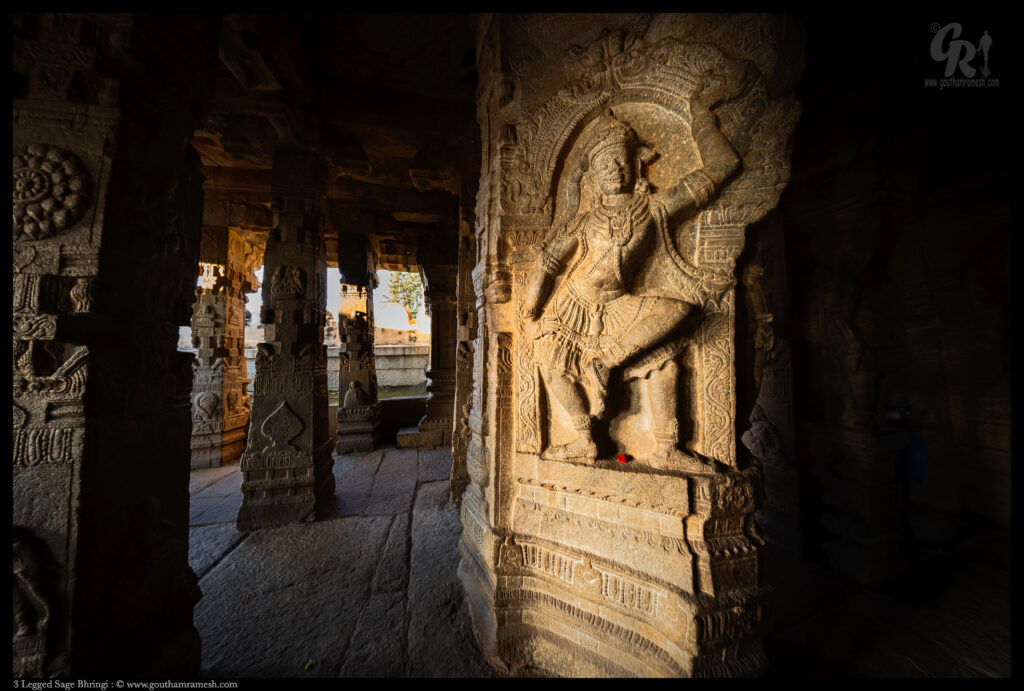
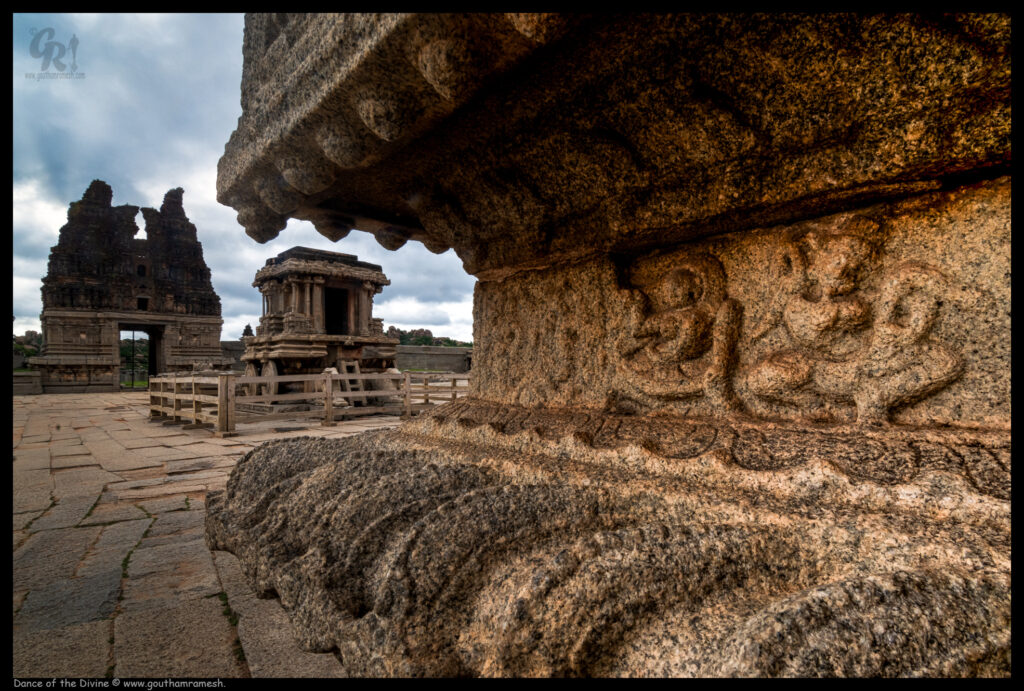
In the heart of the Vittala Temple complex lies the Natya Mantapa, an exquisite pavilion where stone seems to breathe life into the art of dance. Its intricately carved pillars are adorned with celestial dancers, musicians, and mythological figures, each depicting stories from the ancient past and capturing the essence of divine rhythms. The delicate craftsmanship showcases the mastery of Vijayanagara artisans, with every chiseled detail revealing an unparalleled dedication to art and spirituality. The Natya Mantapa stands as a testament to a bygone era, where art, devotion, and architecture converged to create a harmonious symphony in stone, inviting all who visit to immerse themselves in its timeless beauty.
In the ancient heart of Hampi’s embrace, where the sacred stones whisper their tales, the demigods dance with celestial grace, their forms etched in eternal detail. Behind them, the stone chariot stands, majestic and timeless in its regal repose, a testament to the hands that shaped this land, where history and art in harmony compose.
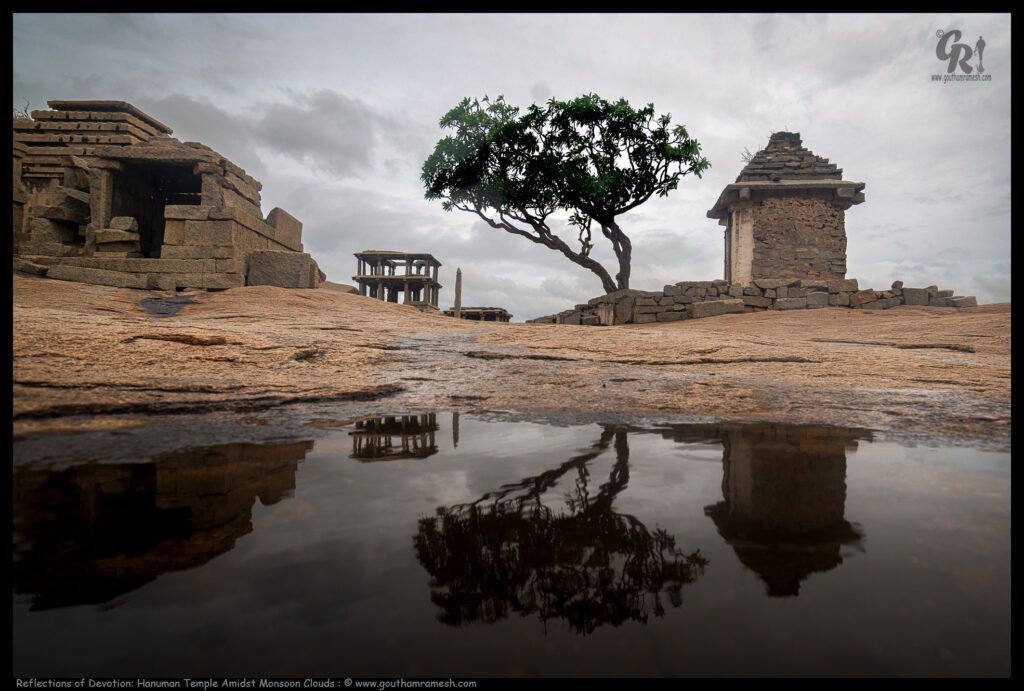
Perched atop Hemakuta Hill, the Hanuman Temple stands against a backdrop of brooding monsoon clouds, its silhouette striking against the dark sky. The temple, dedicated to the monkey god Hanuman, is a simple yet sacred structure that exudes a sense of spiritual serenity. The rain-soaked terrain surrounding the temple creates small puddles, capturing reflections of the temple and the swirling clouds above.
When it rains on Hemakuta Hill in Hampi, small puddles of water form and overflow, creating gentle trickles down the hill. The reflections of the clouds in these puddles, combined with the majestic Gopuram of Virupaksha Temple in the background, create a breathtaking scene. The dark monsoon clouds add a dramatic touch, enhancing the beauty and serenity of the landscape.
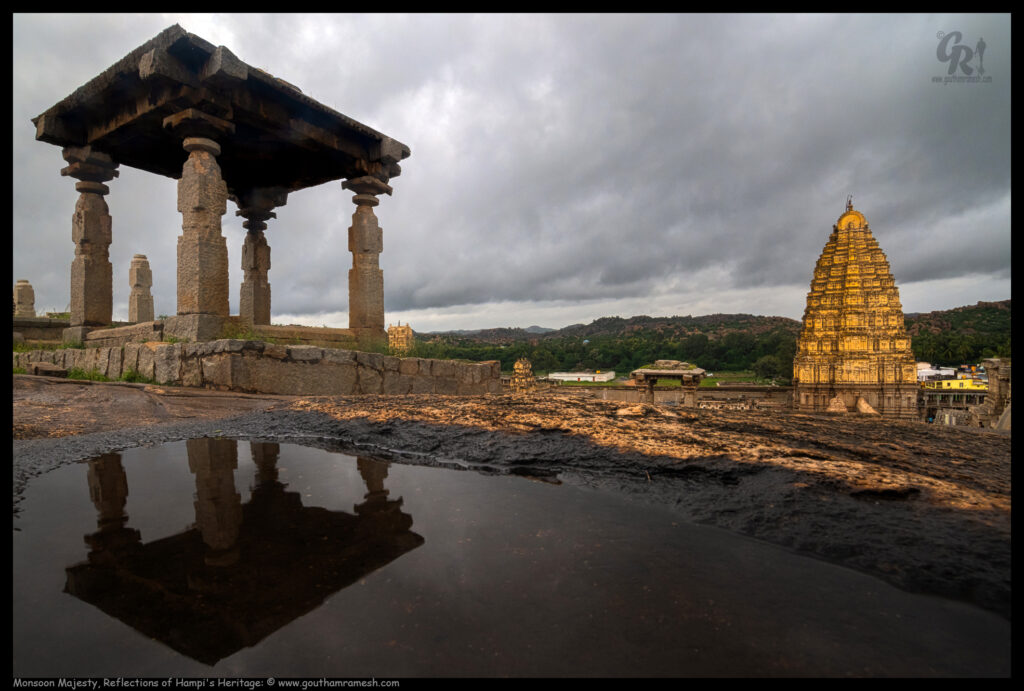
On top of Hemakuta Hills in Hampi, monsoon clouds gather thickly in the sky, their dark, rain-laden masses creating a dramatic backdrop for the ancient landscape. In the foreground, a water puddle forms on the rocky terrain, perfectly reflecting the turbulent sky above. Nearby, a traditional stone Mantapa stands, its intricately carved pillars and timeworn roof echoing the architectural splendor of the region. In the background, the towering gopuram of the Virupaksha Temple rises majestically, a testament to the grandeur of the Vijayanagara Empire.
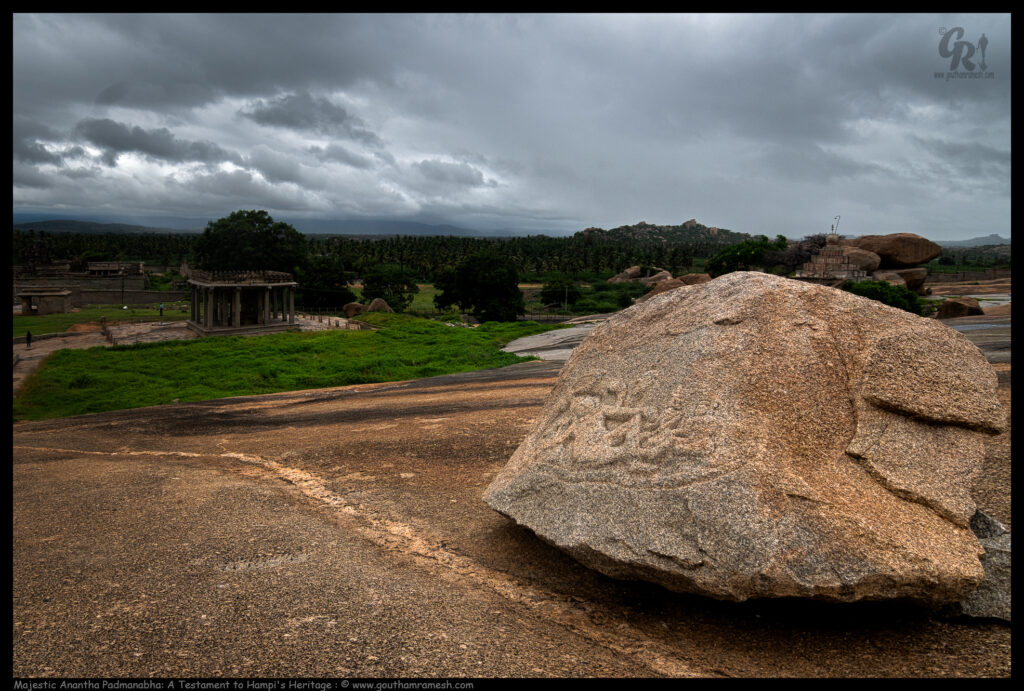
On the way to Hemkuta Hill in Hampi, one encounters the lesser-known but magnificent Anantha Padmanabha sculpture, nestled among the rocky terrain. This intricate carving, often overlooked by the usual throngs of tourists, stands as a testament to the rich heritage and artistry of Hampi. With the monsoon clouds rolling in, the dramatic backdrop enhances the beauty and mystique of this ancient site. The nearby Sasvekalu Ganapathi Temple further enriches the historical landscape, making this spot a serene and poignant reminder of the grandeur that once defined the Vijayanagara Empire. Amidst the monsoon’s embrace, this sculpture and its surroundings capture the timeless spirit of Hampi, inviting those who venture off the beaten path to witness its silent splendor.
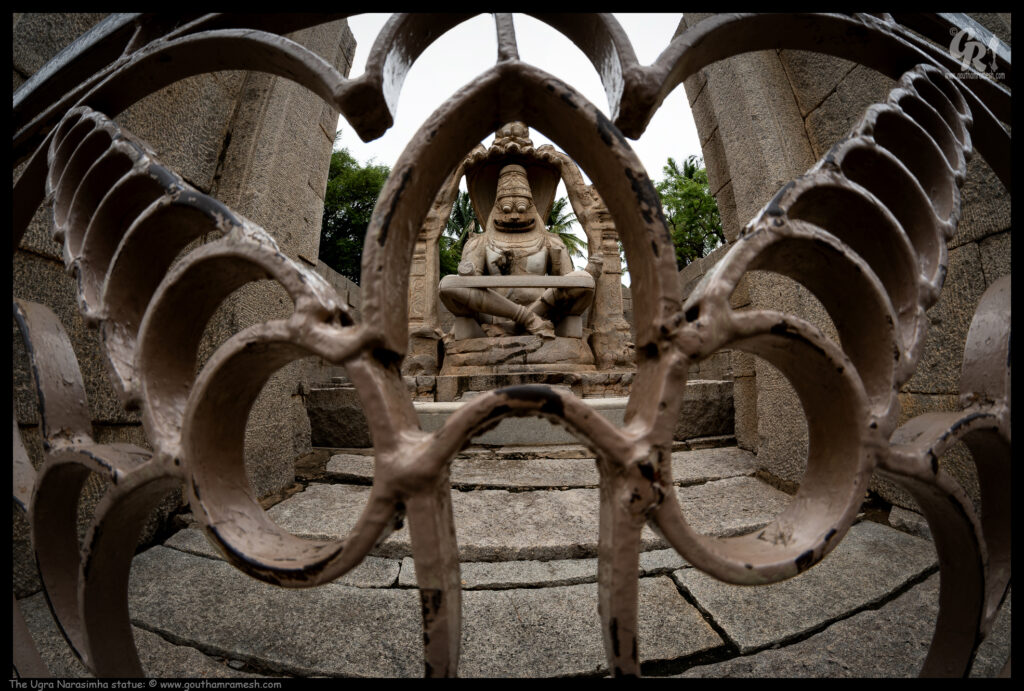
The Ugra Narasimha statue in Hampi is a monumental 6.7-meter tall sculpture, depicting the fierce incarnation of Lord Vishnu as Narasimha, the half-lion, half-human deity. Carved out of a single granite boulder, the statue radiates raw power and divine ferocity, with its bulging eyes and majestic mane. Despite being damaged over time, the statue remains a symbol of the Vijayanagara Empire’s artistic brilliance and spiritual devotion. Set against the backdrop of Hampi’s ancient ruins , the Ugra Narasimha exudes a timeless aura, captivating all who behold its magnificence.
At the entrance of the Hazara Rama Temple in Hampi, a delicate flower embellishes the ancient stone frame, adding a touch of natural elegance to the historic structure. This floral motif, intricately carved by skilled artisans of a bygone era, stands out against the weathered stone, symbolizing the harmonious blend of nature and artistry. As sunlight filters through the temple courtyard, the flower’s details come to life, offering a glimpse into the rich cultural heritage and artistic mastery of the Vijayanagara Empire. This exquisite carving serves as a reminder of the temple’s spiritual significance and the timeless beauty of its architectural design.
The courtyard of the Hazara Rama Temple in Hampi is a captivating space that echoes the grandeur and spiritual essence of the Vijayanagara Empire. Surrounded by intricately carved walls that depict scenes from the Ramayana, the courtyard serves as a tranquil sanctuary, inviting visitors to step back in time.
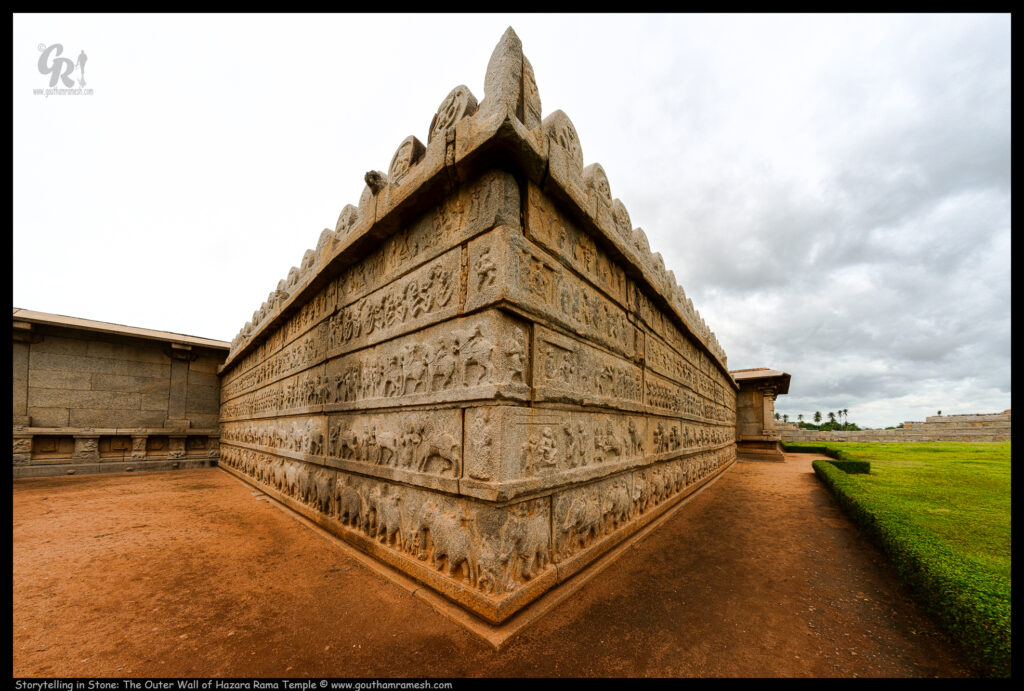
The outer wall of the Hazara Rama Temple in Hampi is a magnificent tapestry of stone carvings that brings to life the epic tales of the Ramayana. These intricate reliefs, carved with remarkable precision, depict scenes of divine battles, royal processions, and mythical creatures, showcasing the artistic excellence of the Vijayanagara artisans. Each panel tells a story, inviting visitors to trace the narrative of Rama’s journey through the skillful hands of ancient craftsmen. As light and shadow play across the weathered stone, the carvings reveal their timeless beauty and historical significance, offering a profound glimpse into the spiritual and cultural legacy of the Vijayanagara Empire.
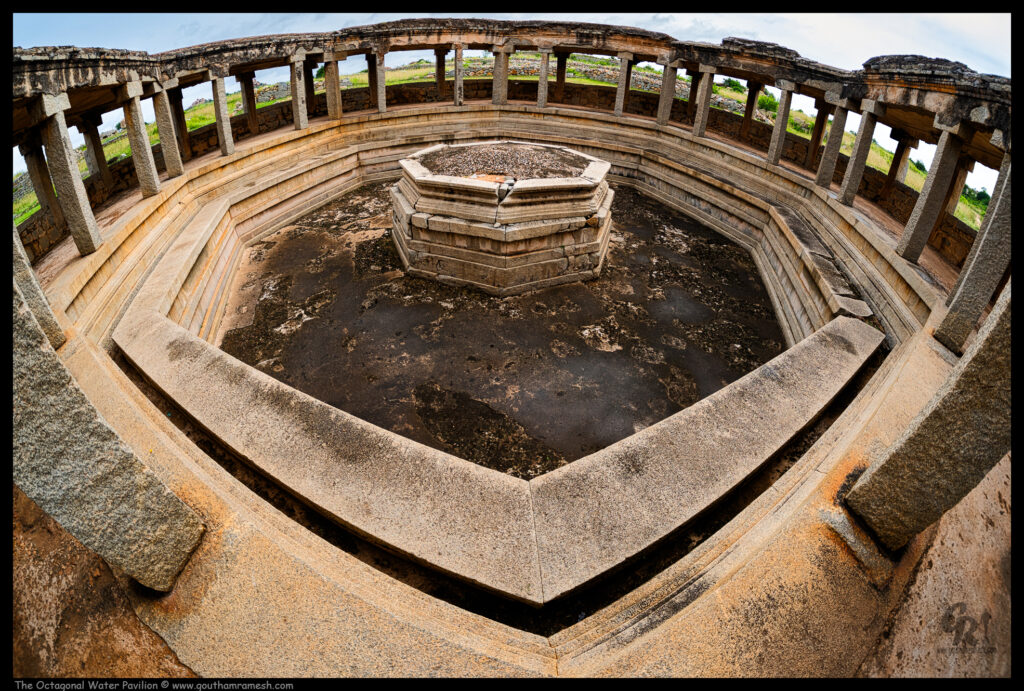
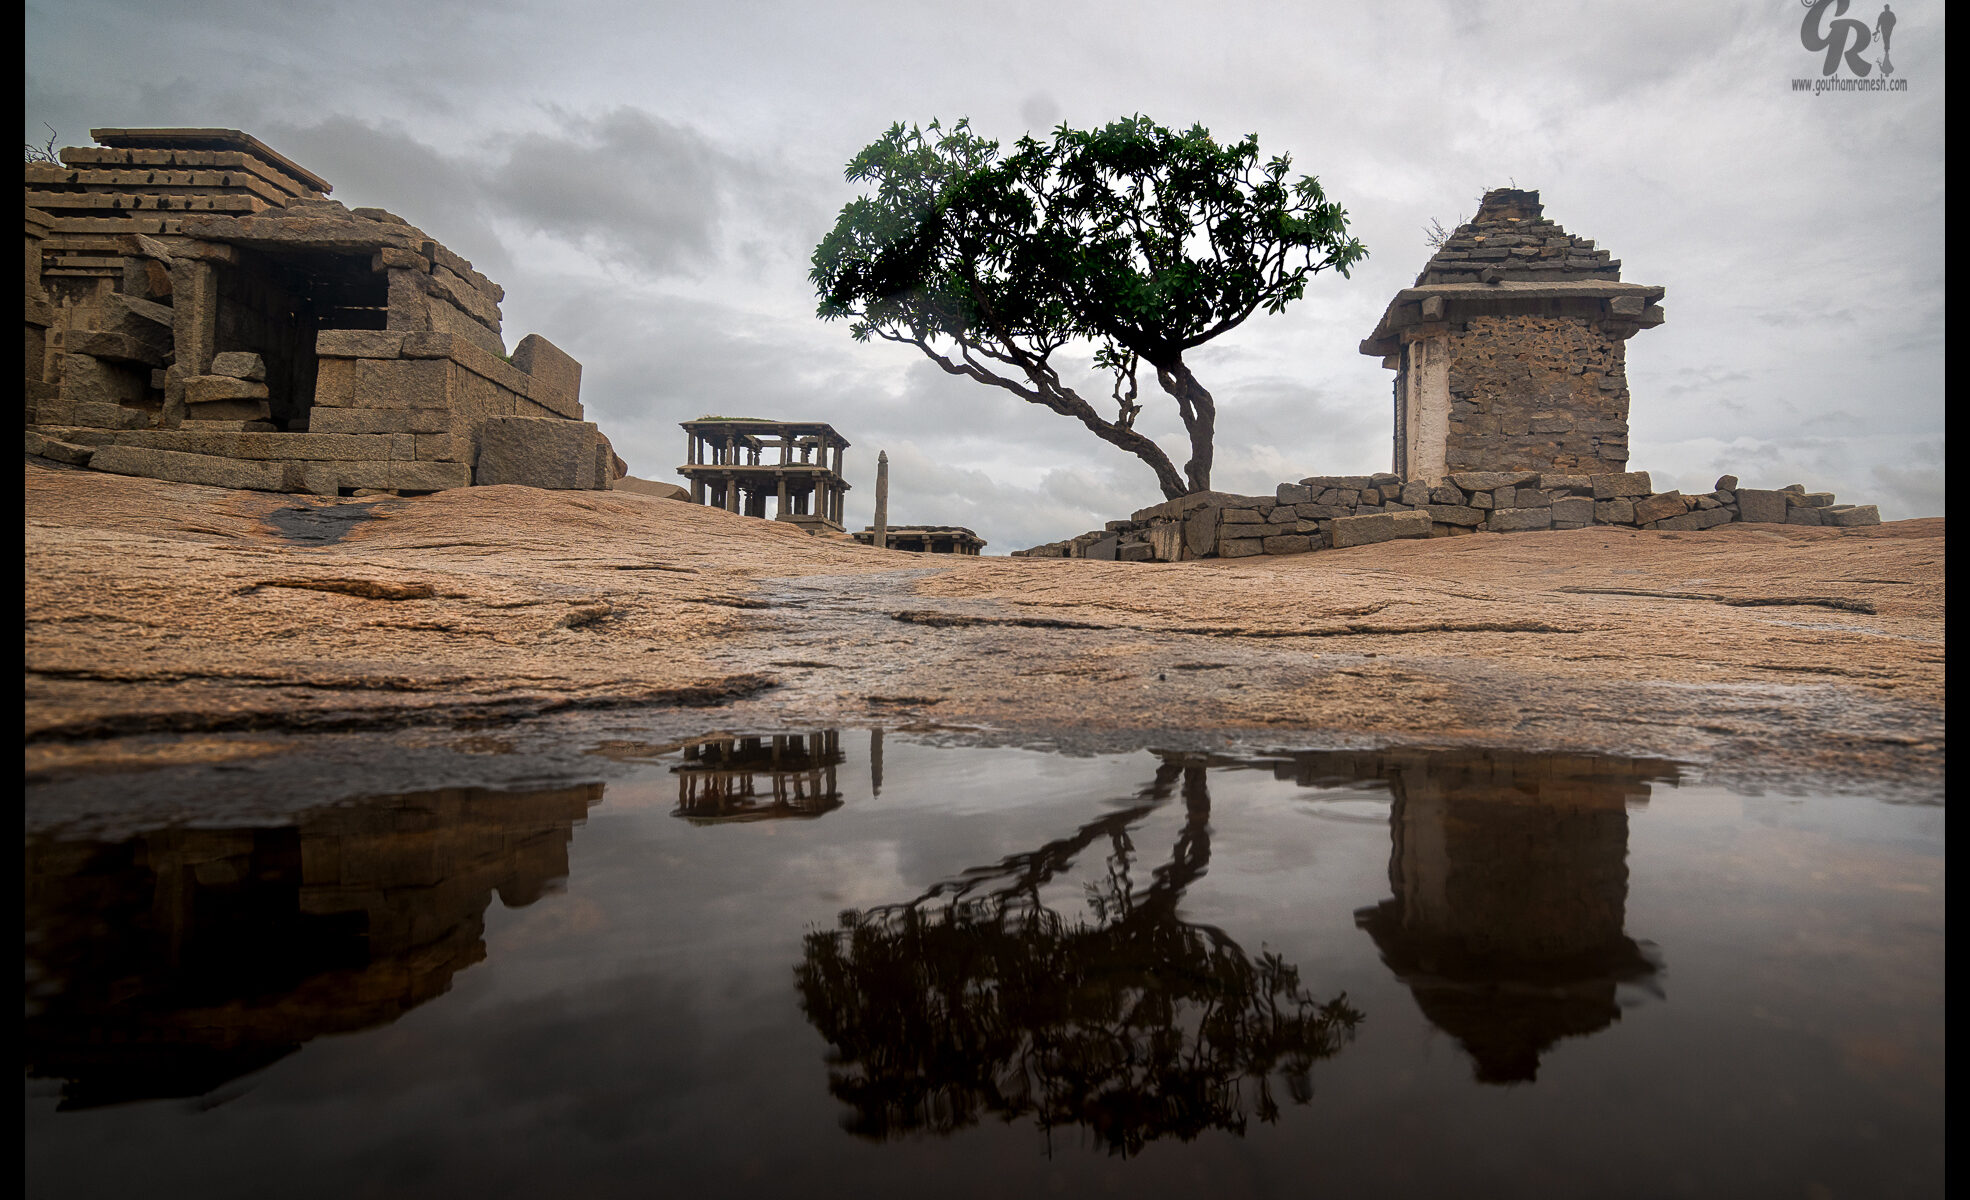
The Octagonal Water Pavilion at Hampi stands as a testament to the ingenuity and grandeur of the Vijayanagara Empire. This architectural marvel, with its unique eight-sided design, is set amidst lush greenery, creating a serene oasis that captivates visitors. The pavilion, once part of the royal enclosure, showcases a harmonious blend of form and function, highlighting the empire’s mastery in water management and architectural aesthetics. As sunlight dances on the surface of the ancient water tank, the pavilion reflects the timeless beauty and rich cultural heritage of Hampi, offering a peaceful retreat and a glimpse into the past.
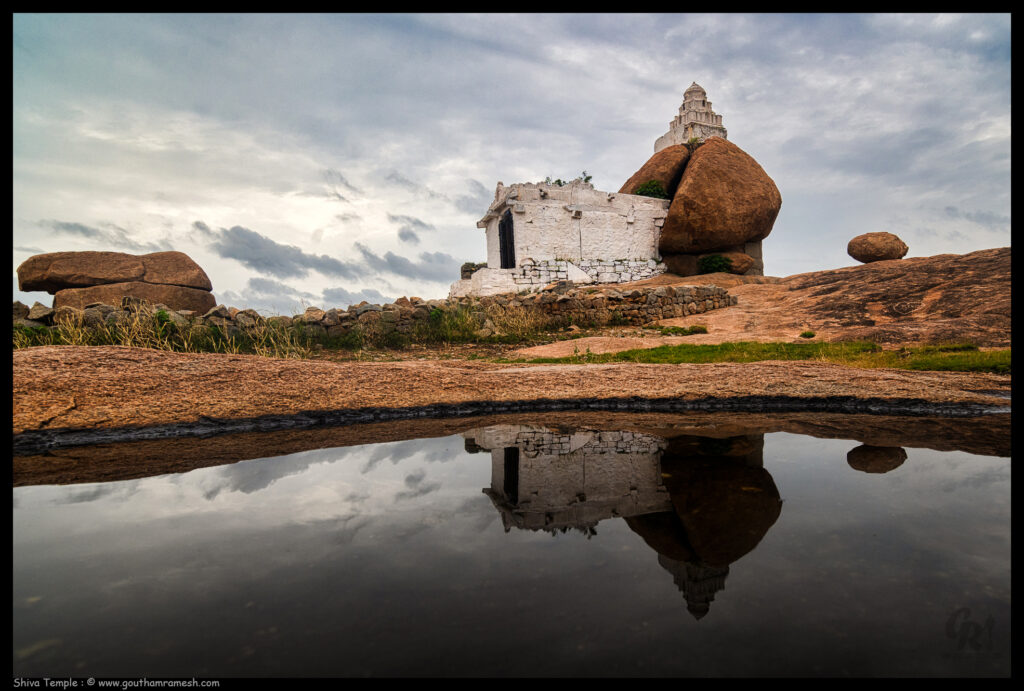
On a monsoon day atop Malvantha Raghunatha Hill, the Shiva Temple stands serenely amid the wet rocks . Heav clouds loom overhead, casting a mystical ambiance over the landscape. The rain-soaked ground around the temple forms puddles that perfectly reflect the temple’s majestic structure and the brooding sky above. These reflections create a mirror-like effect, blending the earthly and the divine…
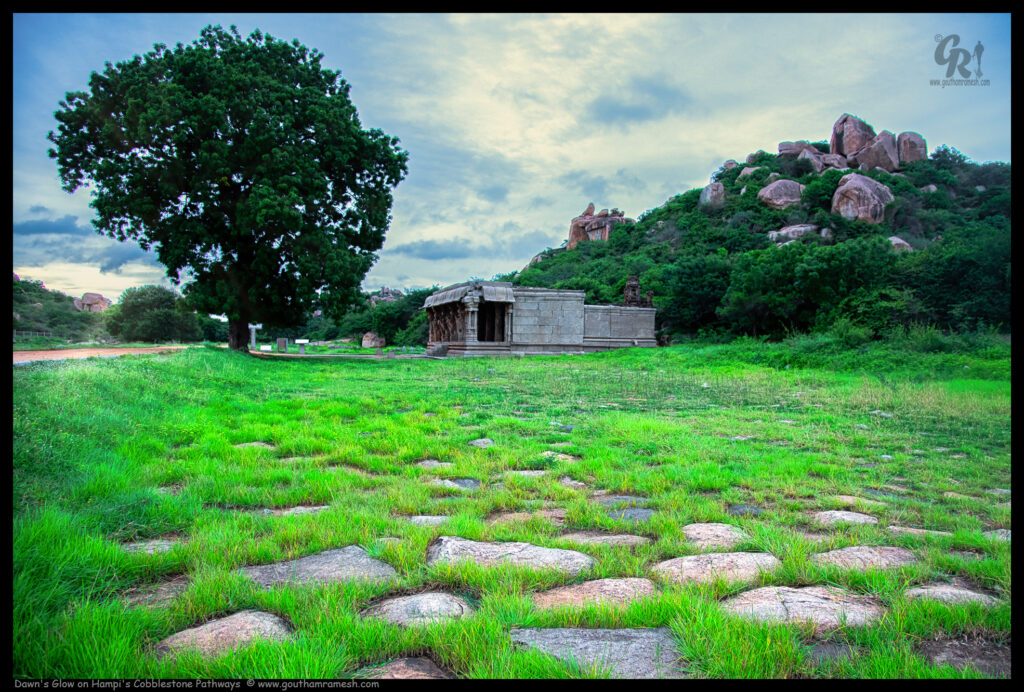
At dawn, the medieval cobblestone roads of Hampi come alive, creating a breathtaking scene as the first light of the day spills over the ancient landscape. These historic pathways, gracefully aged and partially covered with lush grass, whisper tales of bygone eras. The soft morning light casts a golden hue on the stones, highlighting their uneven surfaces and revealing the vibrant greens that weave through the cracks. As the mist lifts, the tranquil ambiance and rich history of this UNESCO World Heritage Site unfold, offering a mesmerizing glimpse into the past amid the serene beauty of the present.
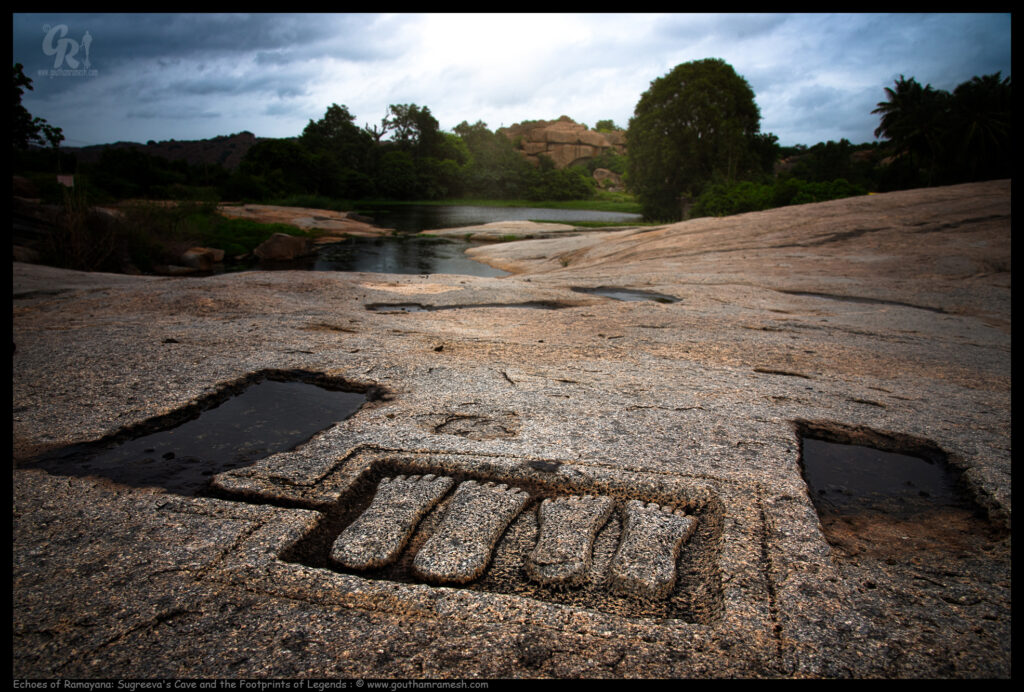
In the heart of Hampi lies Sugreeva’s Cave, a place steeped in legend and history. This cave is believed to be where Sugreeva, the exiled Vanara king, sought refuge. Hampi itself is often identified as the ancient kingdom of Kishkinda, the realm of the Vanaras from the epic Ramayana. Near Sugreeva’s Cave, visitors can find intriguing sculptures of two feet, thought to commemorate the presence of Rama and Lakshmana during their quest to rescue Sita. These footprints, etched in stone, serve as a poignant reminder of the timeless tales and heroic figures that have shaped the cultural and spiritual landscape of this enchanting region.
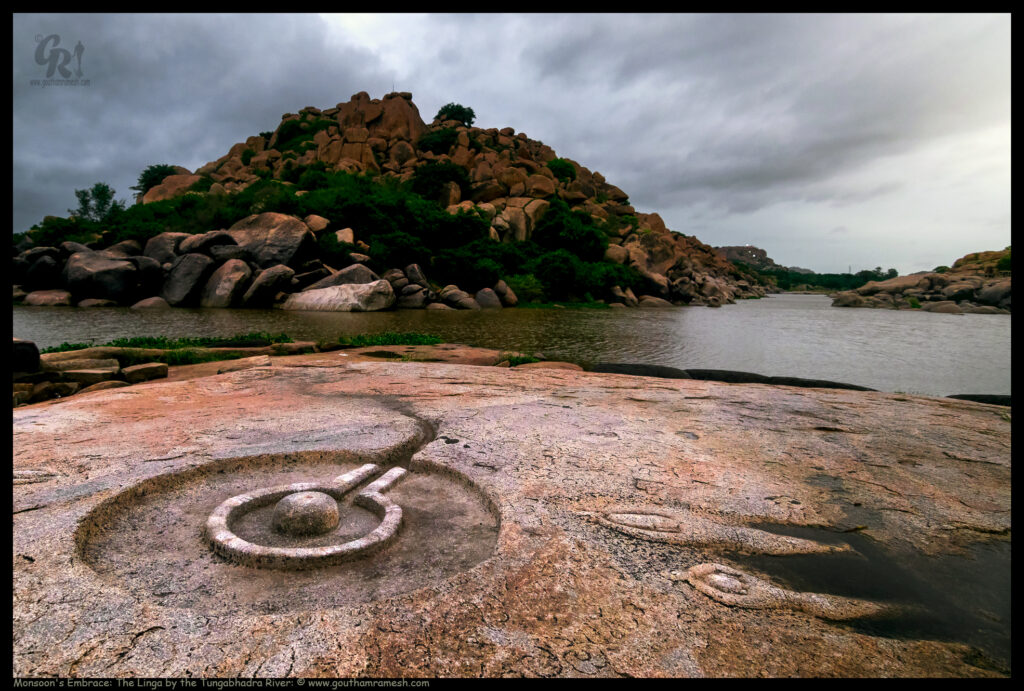
Carved on the banks of the Tungabhadra River, the Linga stands amidst the lively dance of monsoon breezes that ripple across the water. The river, touched by the refreshing gusts, swirls energetically around the ancient sculpture, creating a dynamic interplay of light and movement. With Rushya Mukha Hill rising majestically in the background, this scene becomes a vivid reflection of Hampi’s timeless beauty and spiritual depth. The combination of the lively river and the serene backdrop offers a profound sense of peace and connection, inviting contemplation amid the vibrant energies of nature.
A Bonus Trip to Daroji Bear Sanctuary
On our first day, we took a diversion to the Daroji Bear Sanctuary after the first session in Hampi. The Indian sloth bear resides in this sanctuary, which is roughly 15 kilometers from Hampi. The 82 square-kilometer Daroji Bear Sanctuary was created in 1994 and offers a safe refuge for bears like these as well as other animals like hyenas, leopards, and numerous bird species.
We had the good fortune to see several sloth bears searching for food with their babies while we were there. During the monsoon, the sanctuary’s lush, green scenery was a joy to behold and offered fantastic chances for wildlife photography. The informed staff at the sanctuary assisted us in learning more about the behavior and conservation activities pertaining to these amazing animals.
Images from Daroji
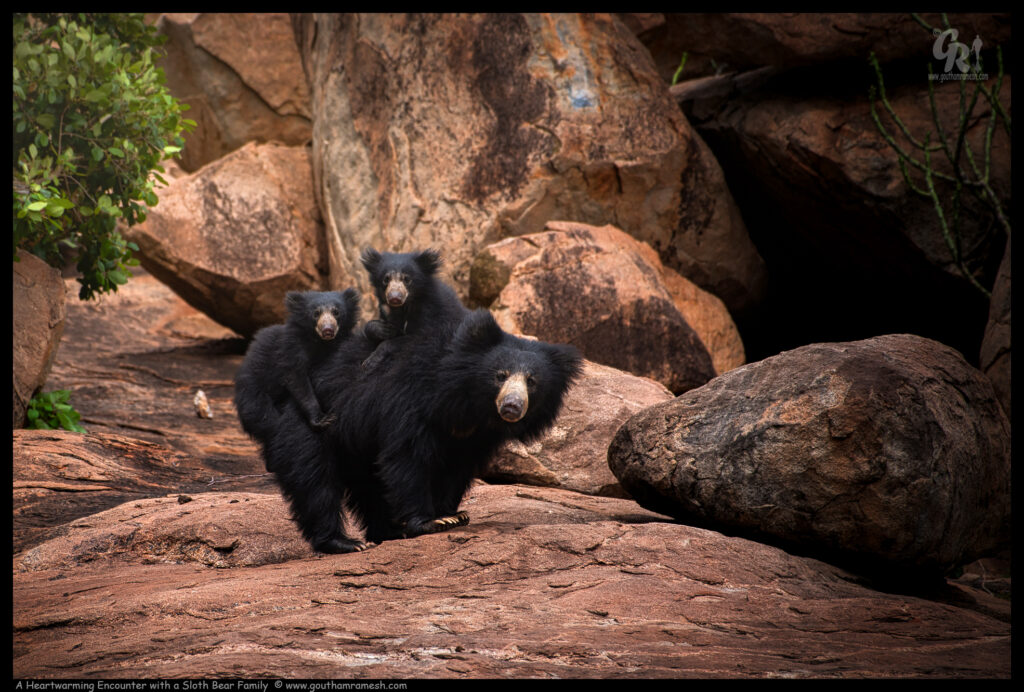
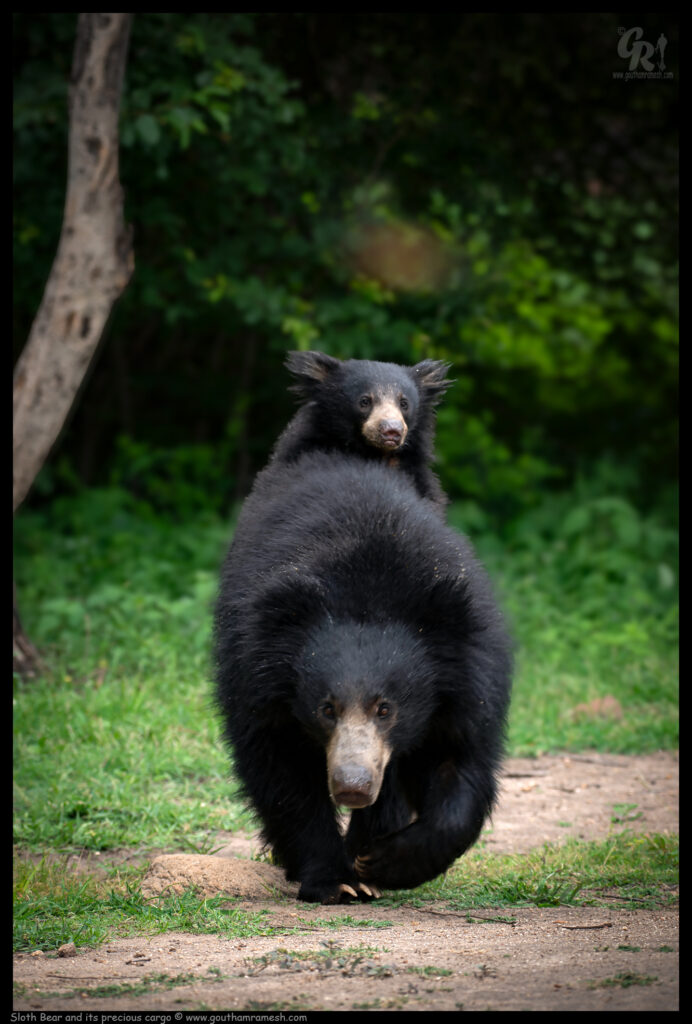
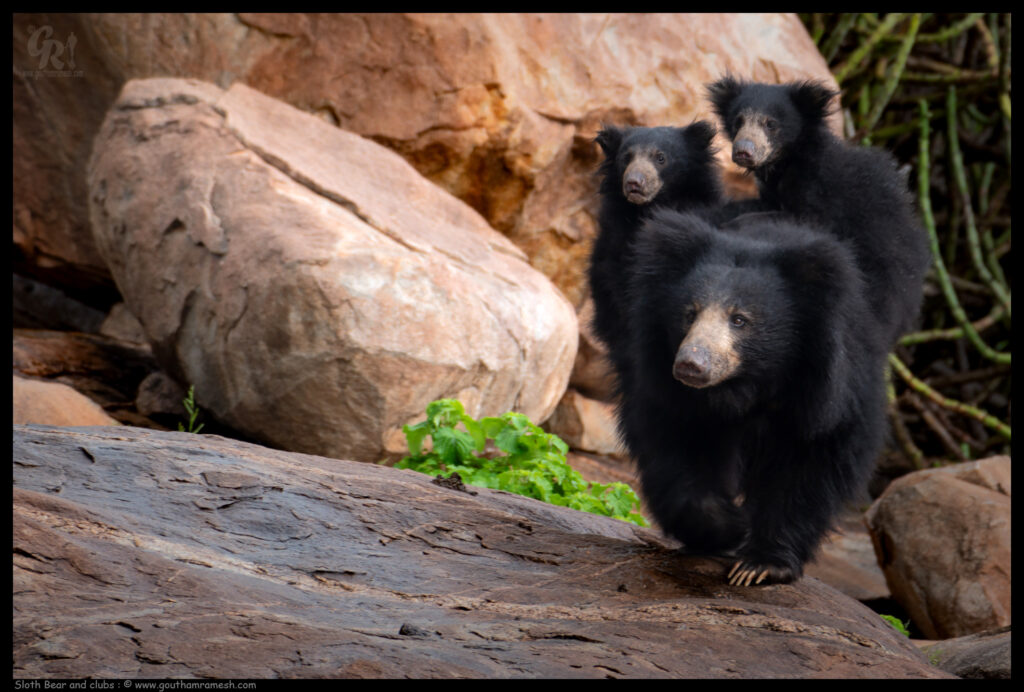

In the serene wilderness, we were fortunate to witness an enchanting sight: a sloth bear with her playful cubs clinging to her back as they navigated the rocky terrain and forest floor with grace and curiosity. The mother bear, ever watchful and protective, carried her cubs over the uneven ground, their tiny paws gently wrapped around her fur. This unforgettable moment,epitomized the raw beauty and tender bond of wildlife in their natural habitat.
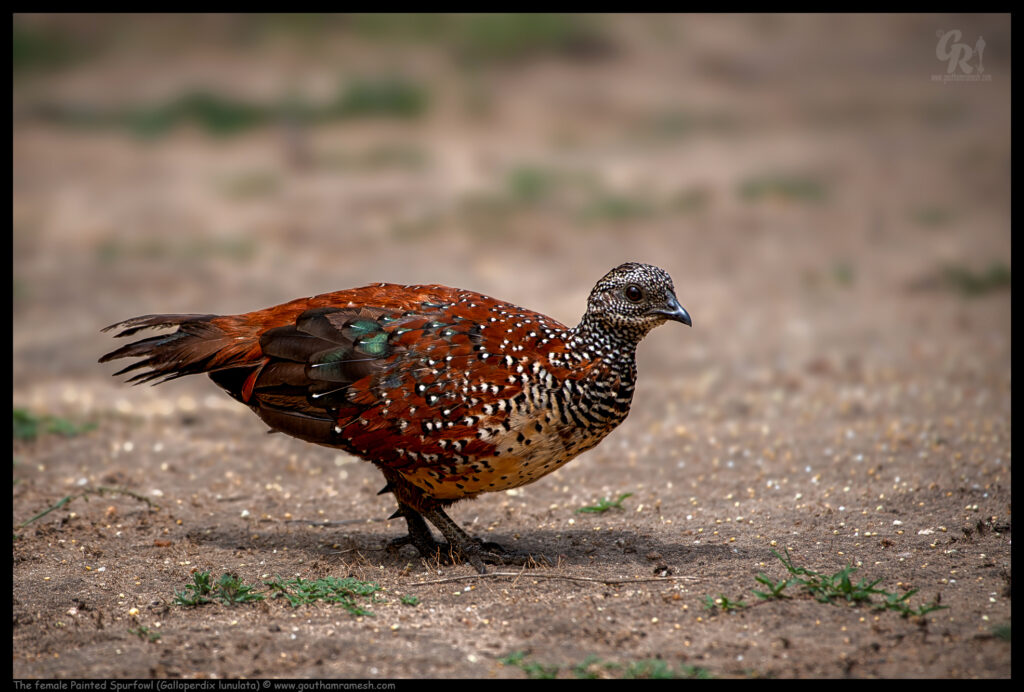
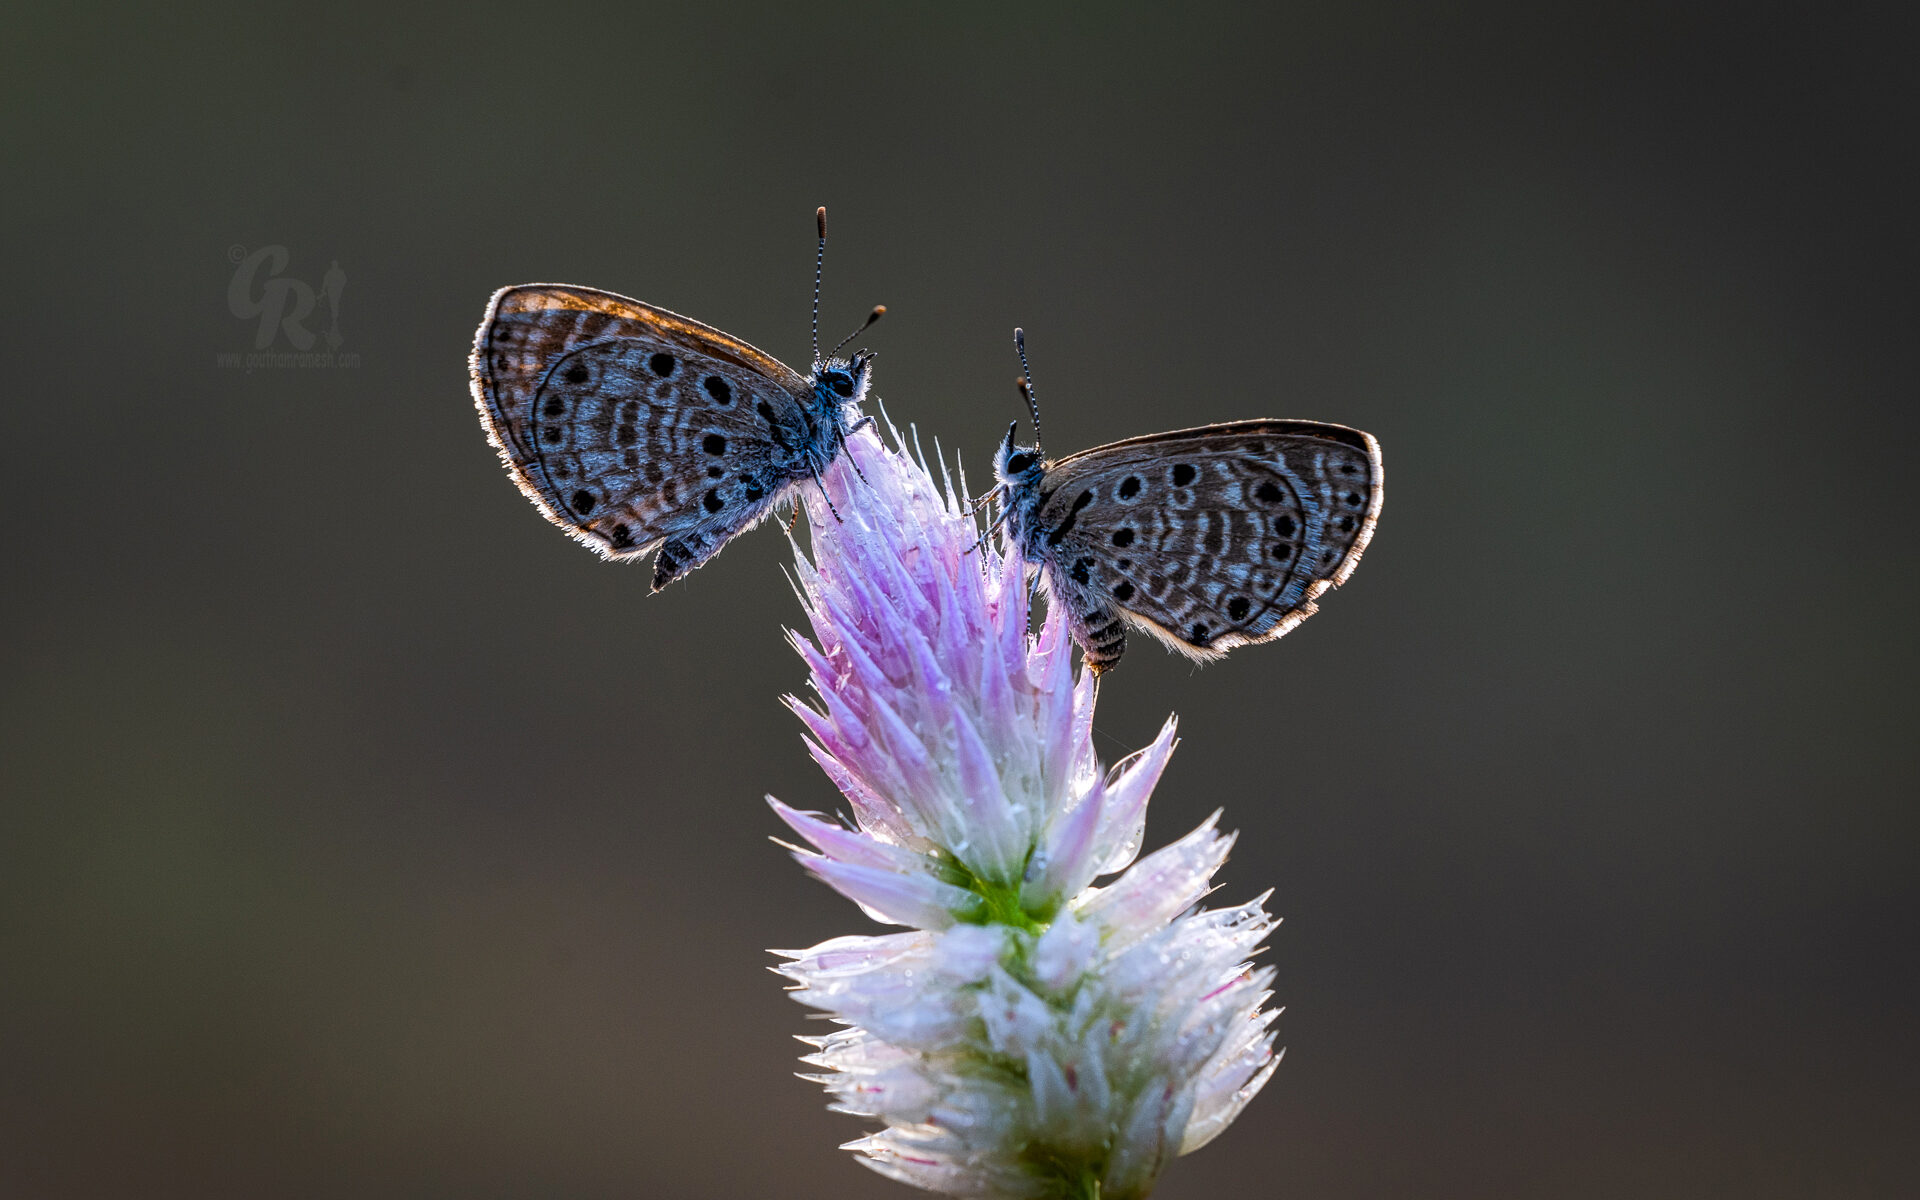
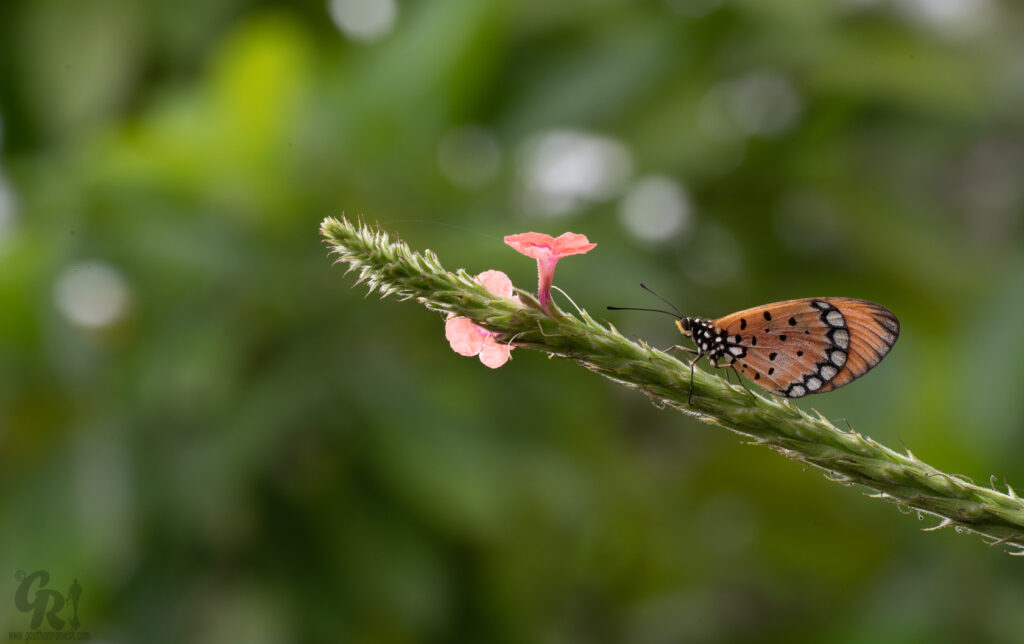
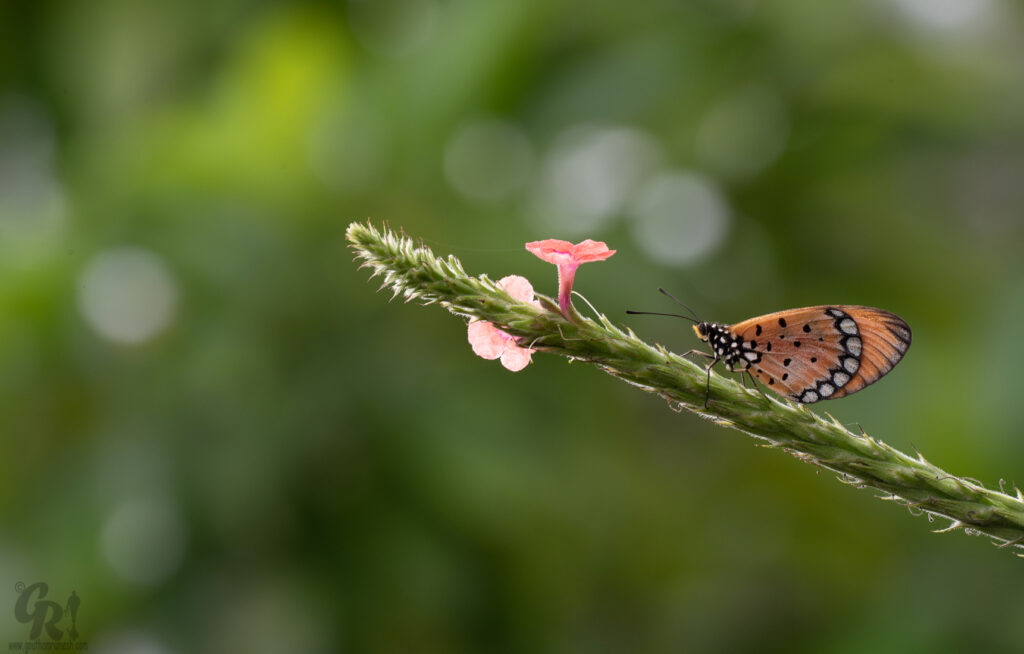
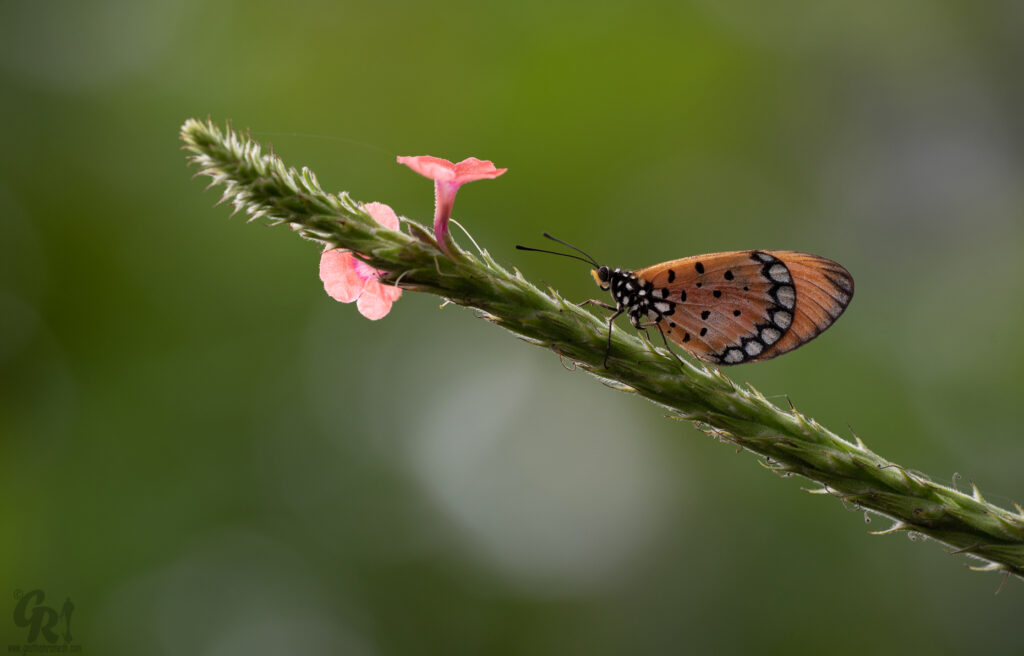
The female Painted Spurfowl (Galloperdix lunulata) is an understated beauty, adorned with earthy browns and subtle patterns that provide excellent camouflage in her natural habitat. Unlike the more vividly colored males, the female’s plumage consists of muted shades and intricate markings that blend seamlessly with the rocky hillsides, dry deciduous forests, and scrublands where she resides. These ground-dwelling birds are adept foragers, searching for seeds, insects, and small invertebrates among the underbrush. The female’s elusive nature and preference for dense cover make her a rewarding but challenging find for birdwatchers and photographers. Her quiet elegance and vital role in the ecosystem highlight the intricate balance of biodiversity in the Indian subcontinent.
Tips for Monsoon Photography in Hampi
- Carry Weather Protection: Ensure your camera and lenses are well-protected from the rain. A weather-sealed camera or protective cover can be very useful.
- Use a tripod: The low light conditions during the monsoon can result in longer exposure times. A tripod helps keep your shots sharp. However, it’s important to note that using a tripod within the protected monuments requires permission from the Archaeological Survey of India (ASI). Make sure to obtain the necessary permits beforehand or be ready to use higher ISO.
- Explore Different Perspectives: Wet surfaces can create beautiful reflections. Look for puddles and wet stones to add a unique perspective to your shots.
- Capture the Mood: The monsoon season adds a mystical aura to Hampi. Embrace the moody skies and the interplay of light and shadows.
A Journey to Remember
There was more to our monsoon vacation to Hampi than merely taking pictures. Exploring the rich history and architecture of this historic city was like taking a trip back in time. From the breathtaking trip in our Suzuki Jimny to the breathtaking views of Hampi’s monuments and sculptures, Harish, GR Pandith, and I relished every second of it. The addition of a layer of enchantment by the monsoon made our recollections and photos much more spectacular.
Whether you love history or photography, a trip to Hampi in the monsoon season is sure to enthrall and inspire you.
Thank you if you like the blog, You can leave a comment on Home page.

Cheers ,
Goutham Ramesh