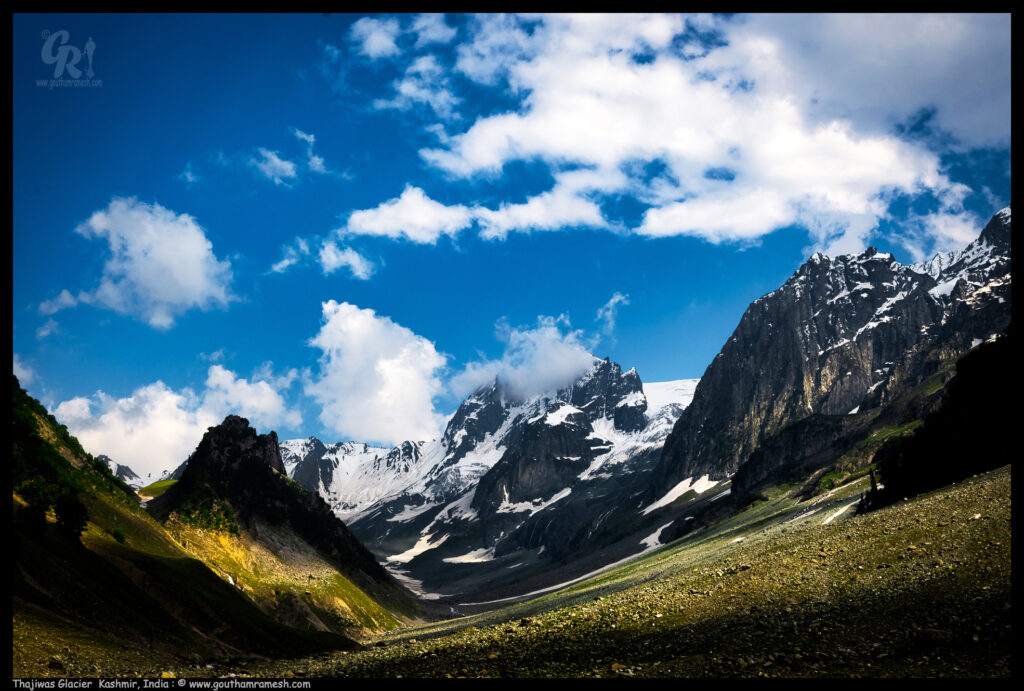
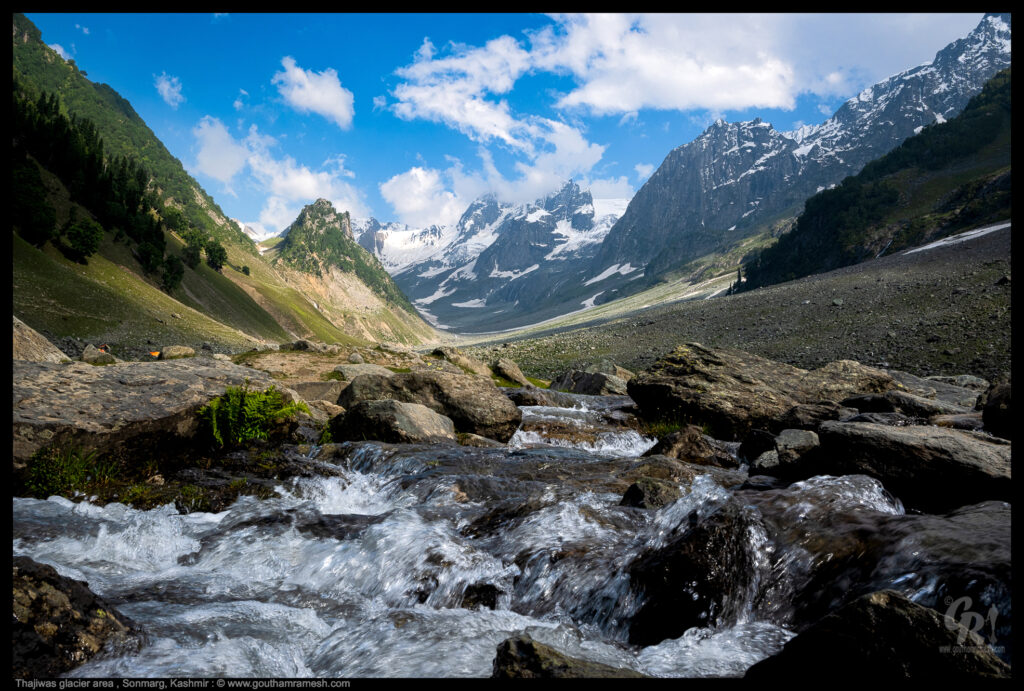
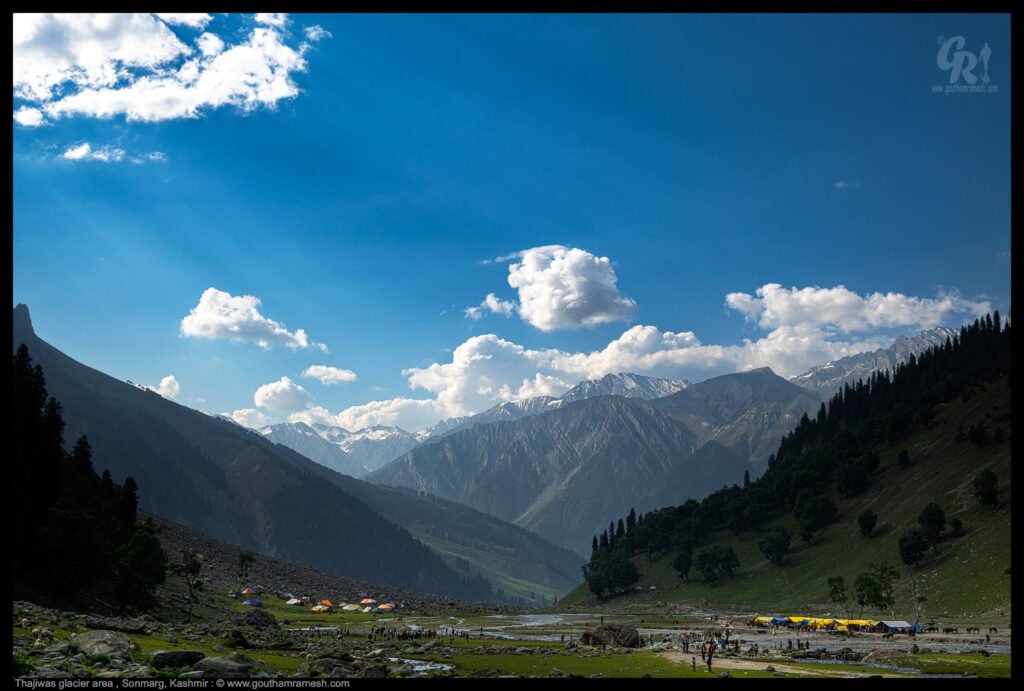
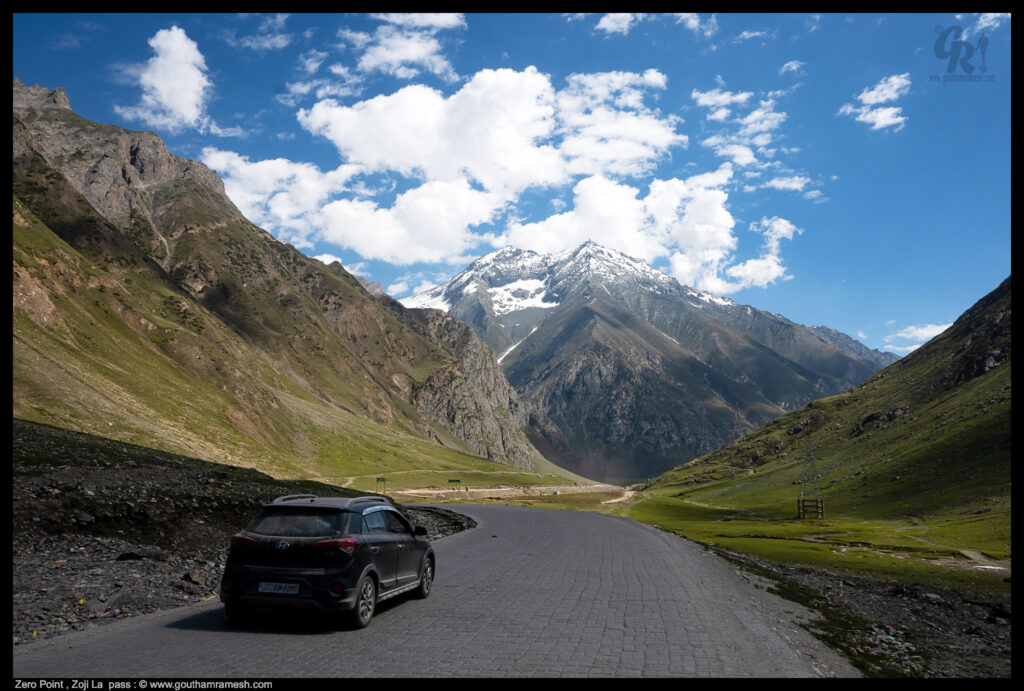
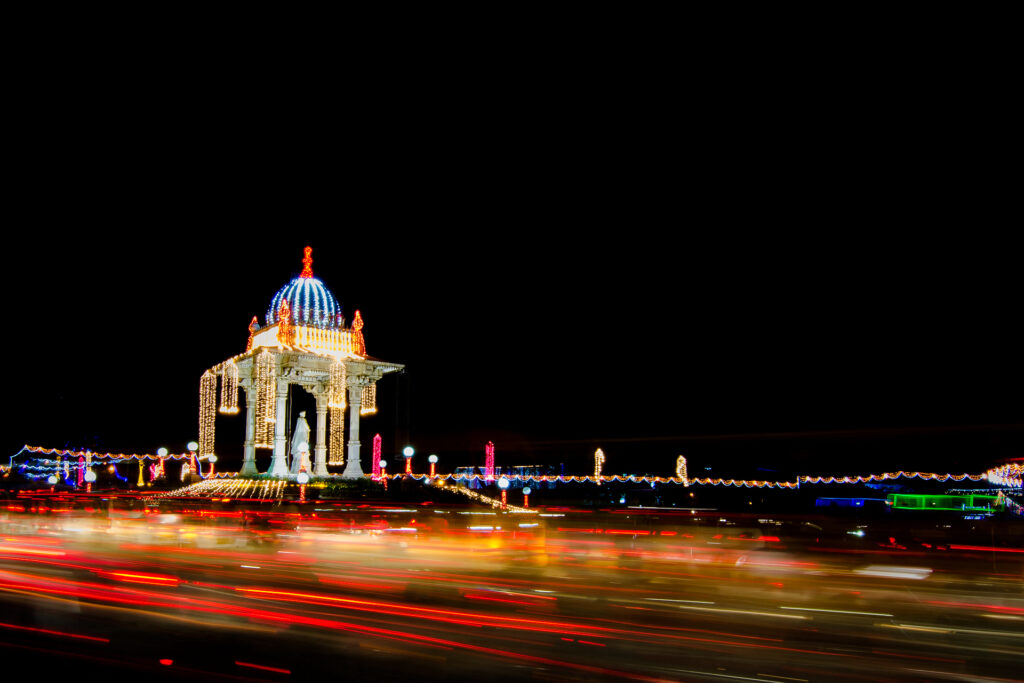
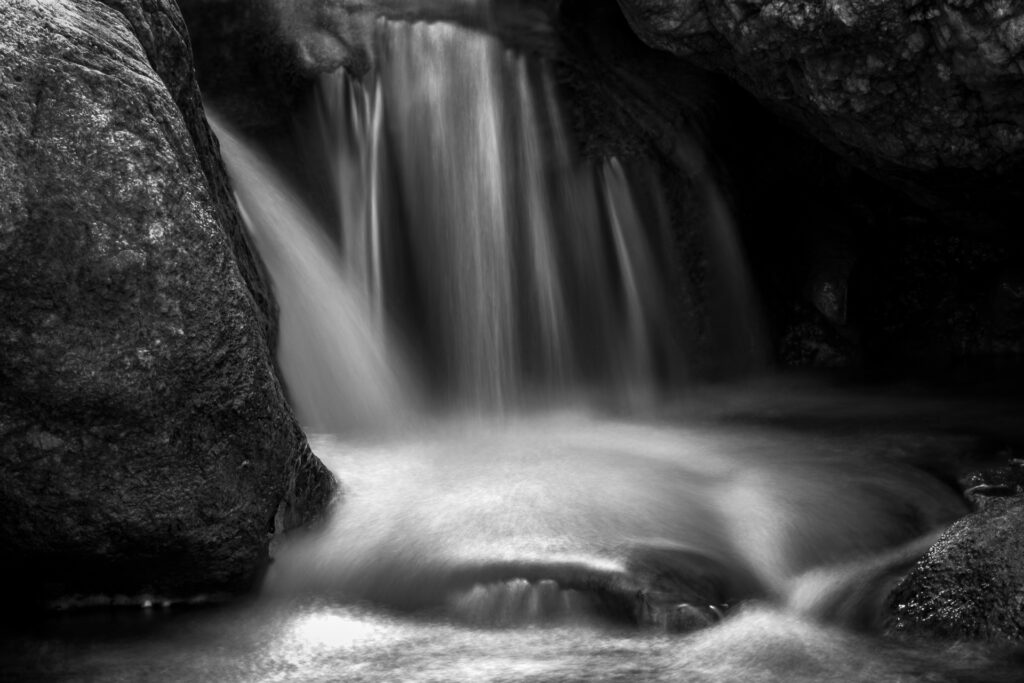
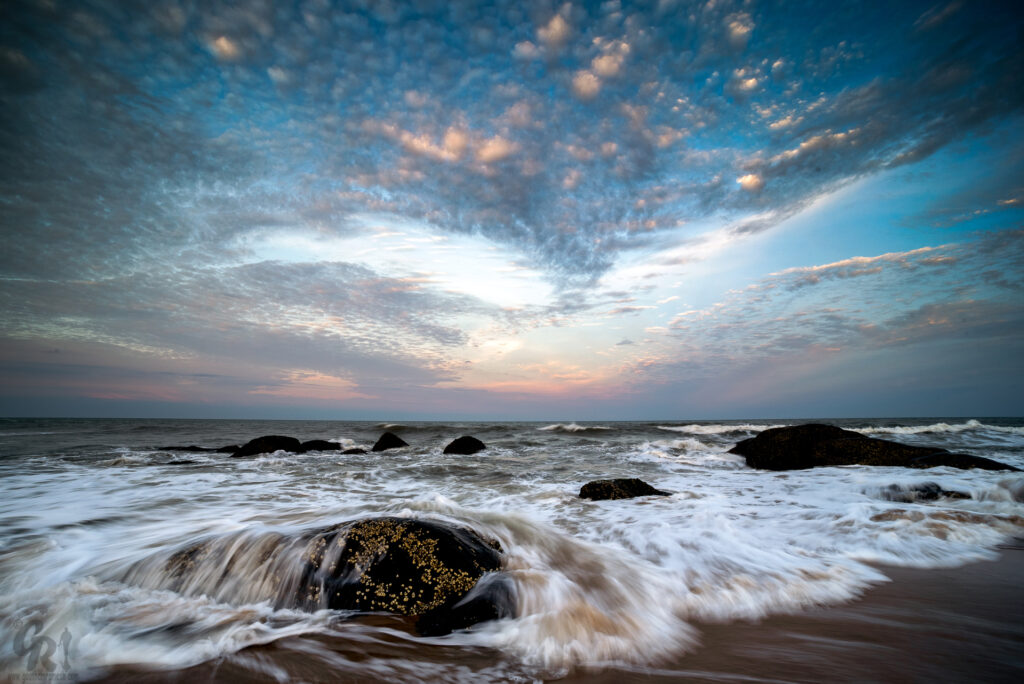
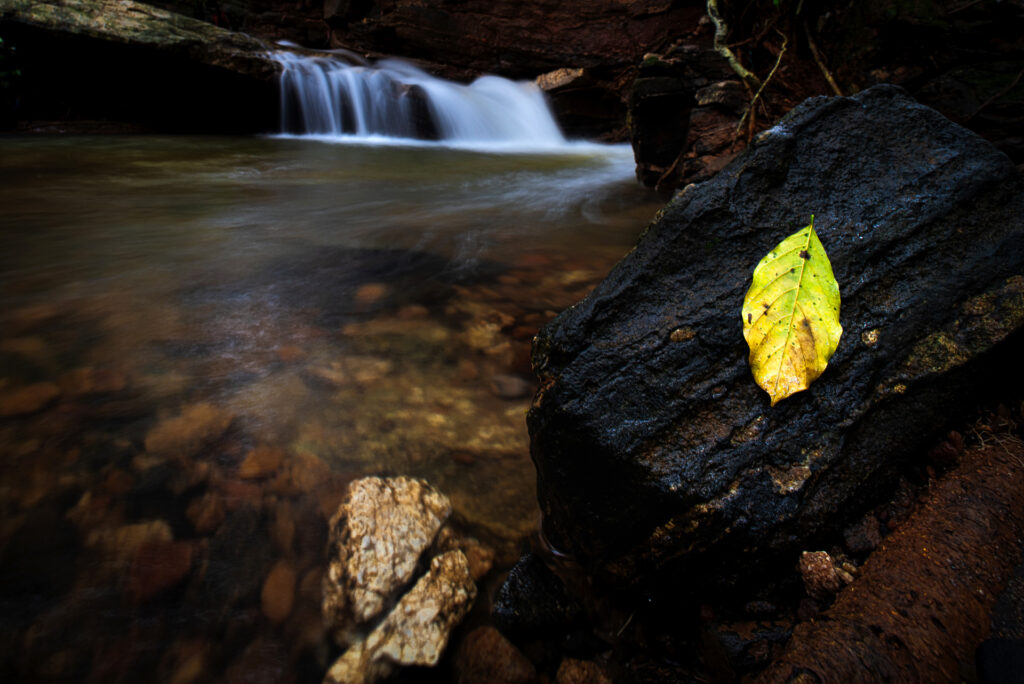
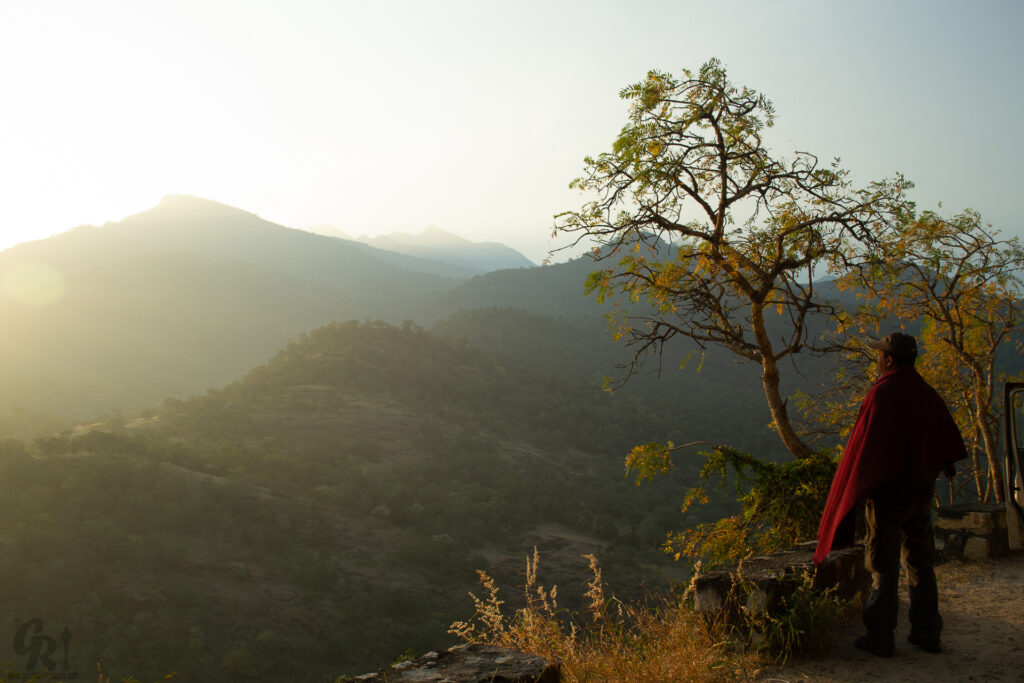
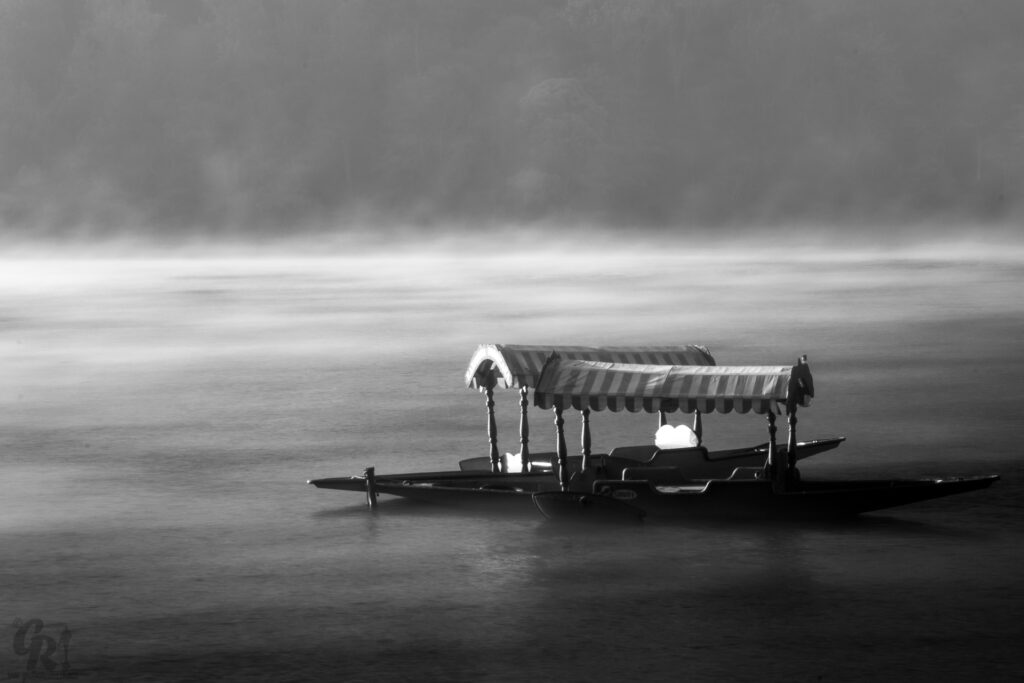
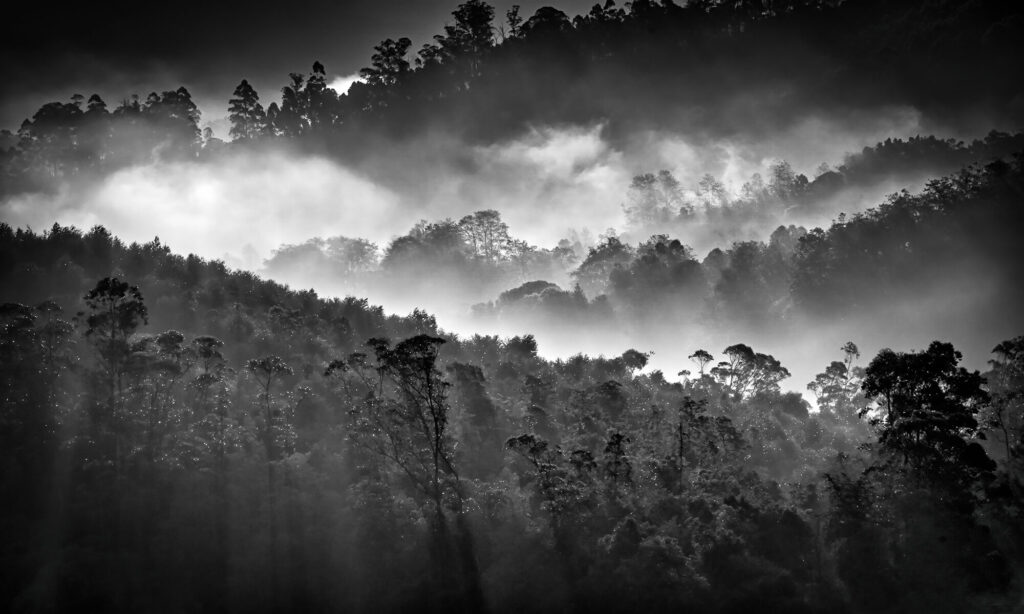
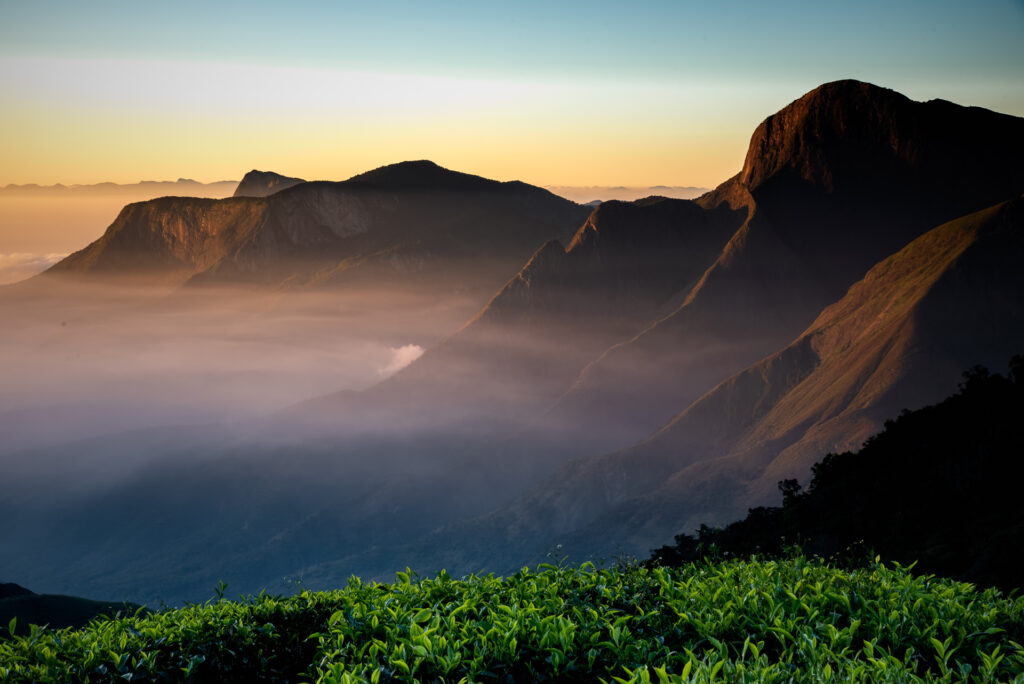
Kashmir and Ladakh road trip-2022

Kashmir and Ladakh

Dream that came true.

Some dreams come true as a surprise. I always wanted to visit Kashmir and Ladakh for a long time and had been pestering my colleague and buddy Tanveer to take me there. Tanveer is a tech entrepreneur, an avid traveler and photographer. One day during lunch in office we just decided to escape this madness called corporate life and travel to this beautiful place and the tickets were booked within minutes. (Yes, we booked tickets without even planning). The plan was to drive from Srinagar to Ladakh!

Planning:

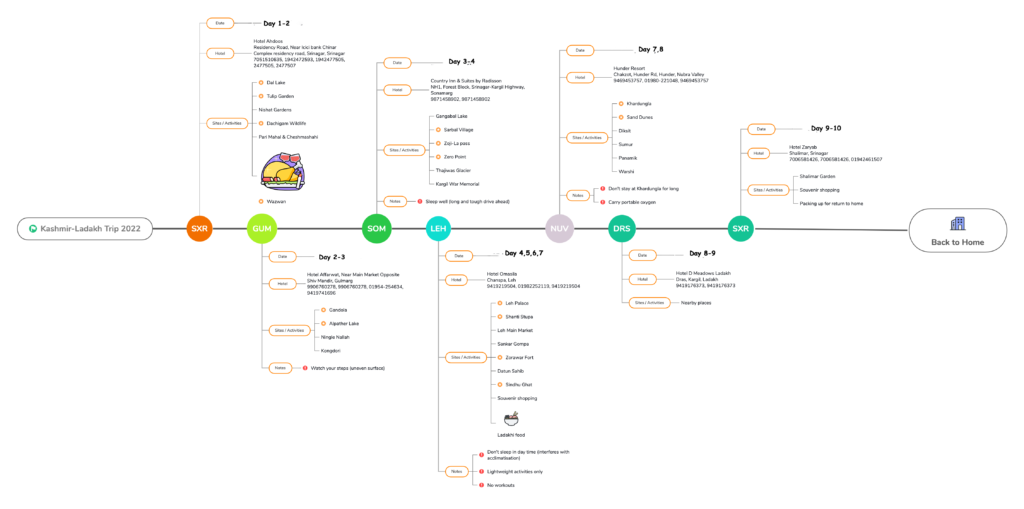
Next came the planning, Tanveer with his excellent planning skills created a plan for the trip which was fool-proof and amazing with the minutest detail.  

Plan … Zoom to read

Bengaluru to Srinagar:

With great excitement we took an early morning flight to Srinagar on Day-1 and immediately I started clicking some pictures from aircraft.

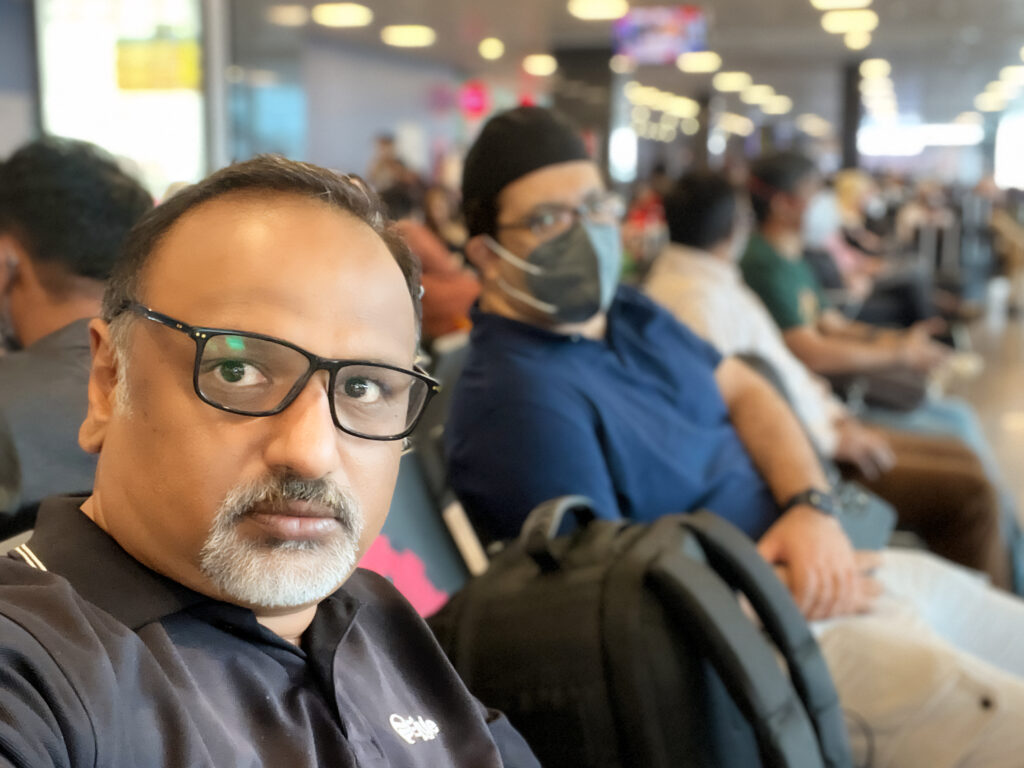
Tanveer and Myself at Bengaluru International Airport
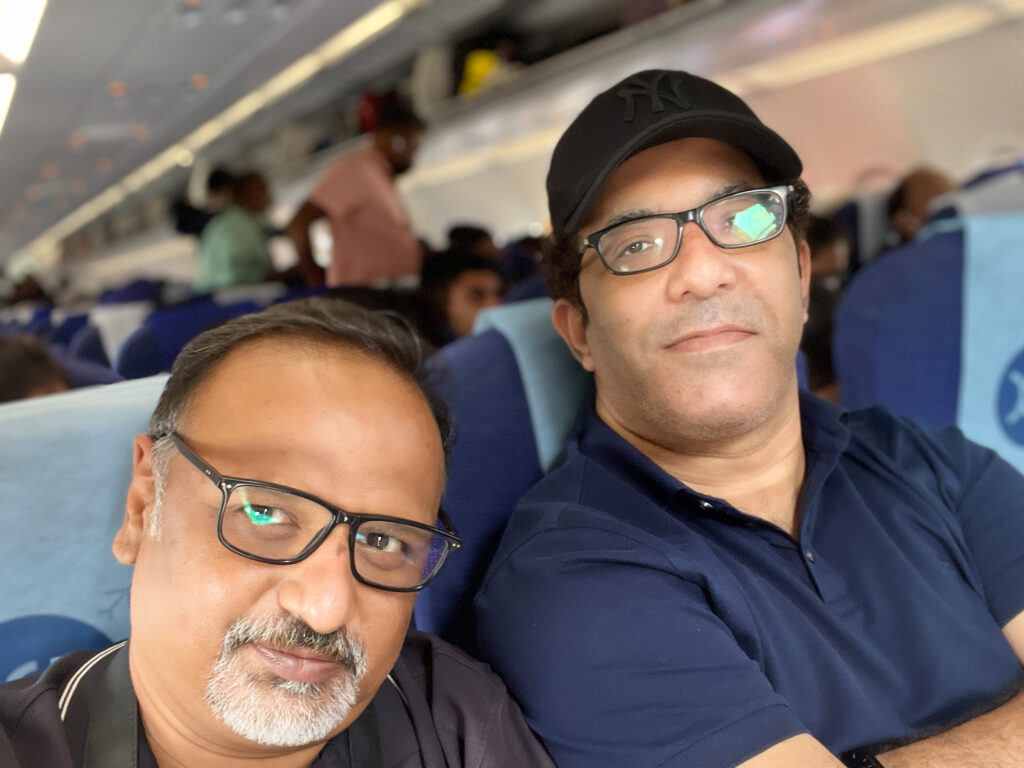
Inside flight on the way to Srinagar
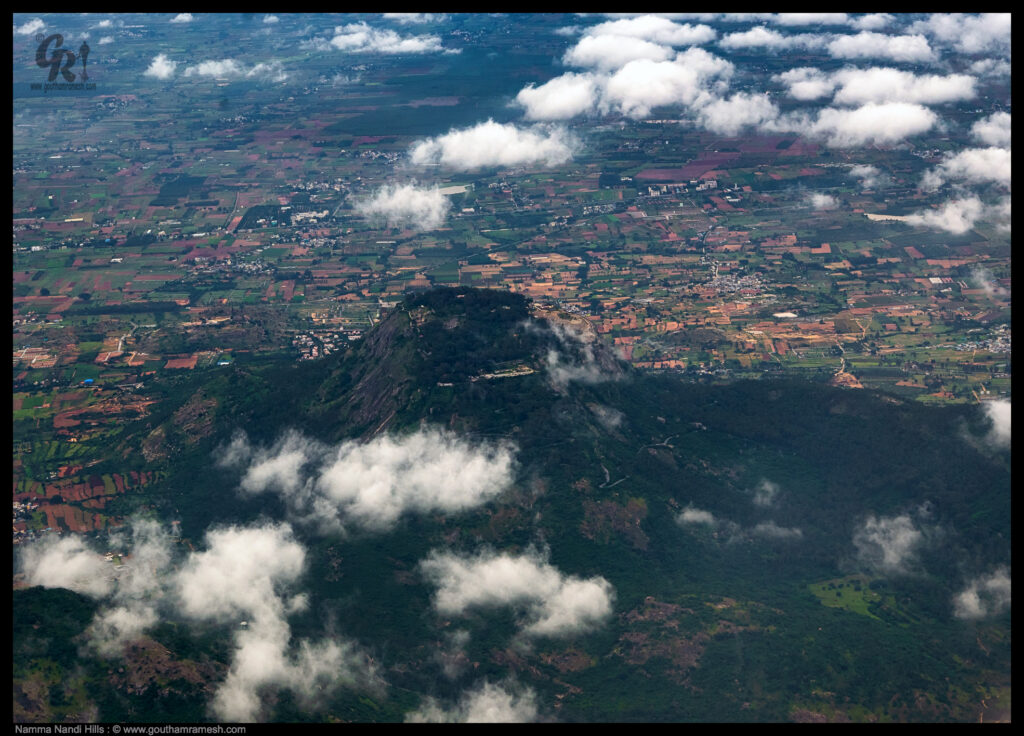
Nandi Hills, Near Bengaluru after take off

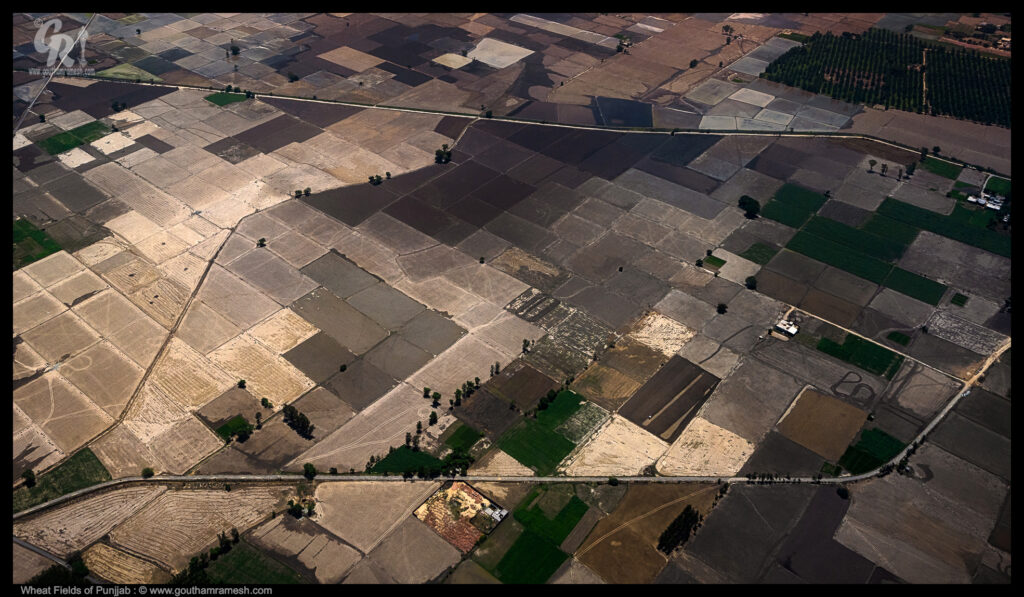
In India, wheat crop is grown mainly in the Northern states, with Uttar Pradesh being the top-most contributor of wheat with a total production of 25.22 million tonnes, followed by Punjab (15.78 MT) and Madhya Pradesh (14.18 MT). Here is the aerial shot of wheat fields of Punjab

Wheat Fields of Punjab

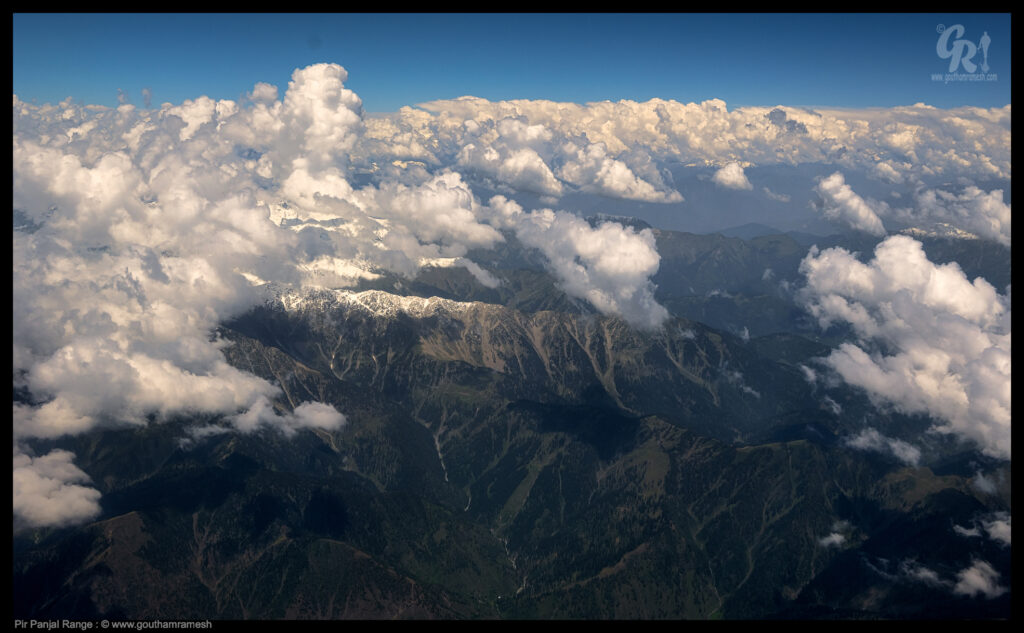
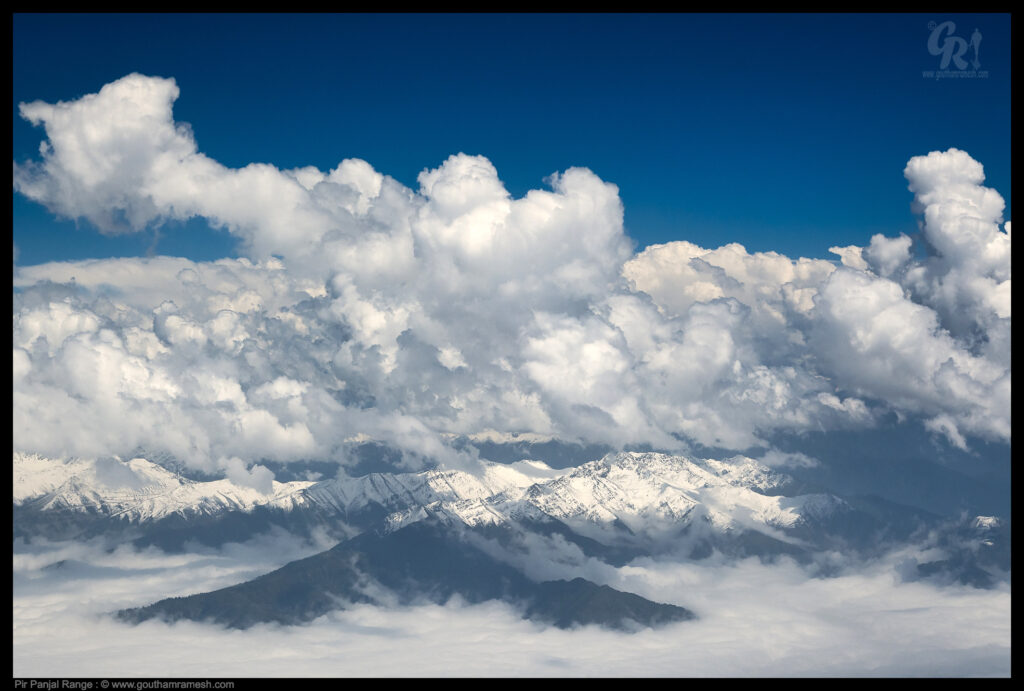
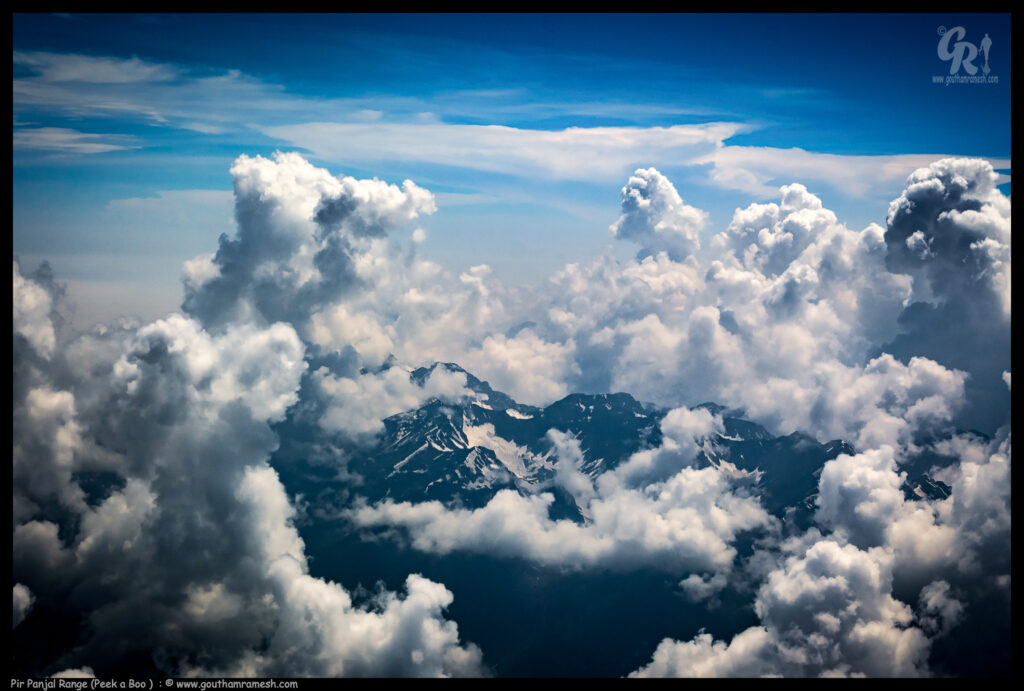
As we fly into Kashmir Valley, we fly through “Pir Panjal Range”. The Pir Panjal Range is a group of mountains in the inner Himalayan region, the largest in the lower group of the majestic Himalayas. It lies south of the main outer Himalayan chain of mountains.

Pir Panjal Range extends from the Nilam River in western Kashmir, to the upper Beas River in the North-Western part of Himachal Pradesh. Running from the West-Northwest direction to East-Southeast direction, the Pir Panjal Range covers a distance of more than 200 miles or 320 kilometres

Pir Panjal Range
Pir Panjal Range

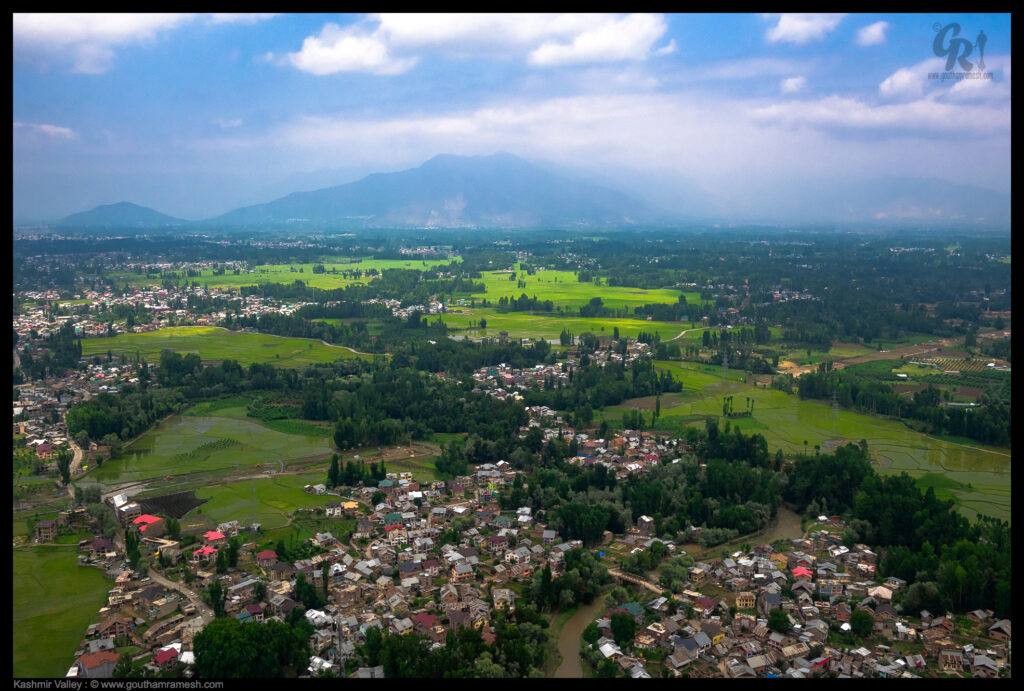
Once we cross Pir Panjal Range, the beautiful Kashmir valley can be seen and it is a sight to behold.

The Kashmir Valley, also known as the Vale of Kashmir, is a valley concentrated in the Kashmir of India, it is bounded on the southwest by the Pir Panjal Range and on the northeast by the main Himalayan range.

The Valley, paradise on earth

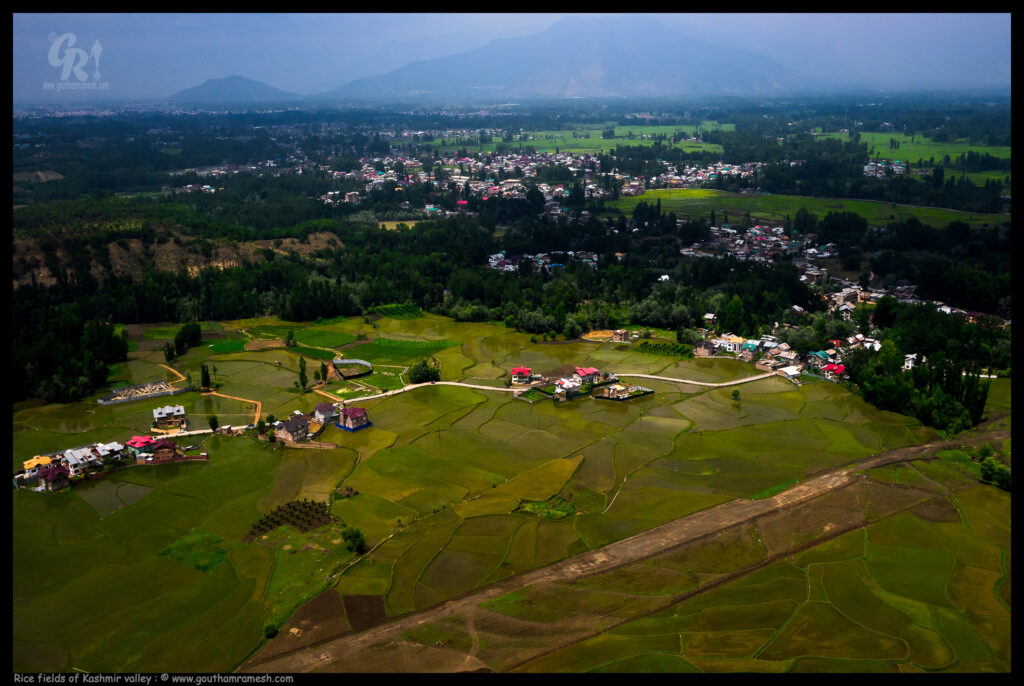
Jammu & Kashmir is an agri-horticulture state where a large population is economically dependent to agriculture and horticulture, directly or indirectly for livelihood, food and nutritional security. Rice, the staple food of majority population is cultivated in diverse agro-ecological situations extending from subtropical area of Jammu, through temperate valley to cold high altitudes regions of Kashmir, and therefore rice biodiversity is rich in Kashmir.

Rice fields of Kashmir

Day 1-2 : Srinagar

Once in Srinagar, we started exploring the local tourist places and also the famous gardens and Dal Lake.

I Love Srinagar

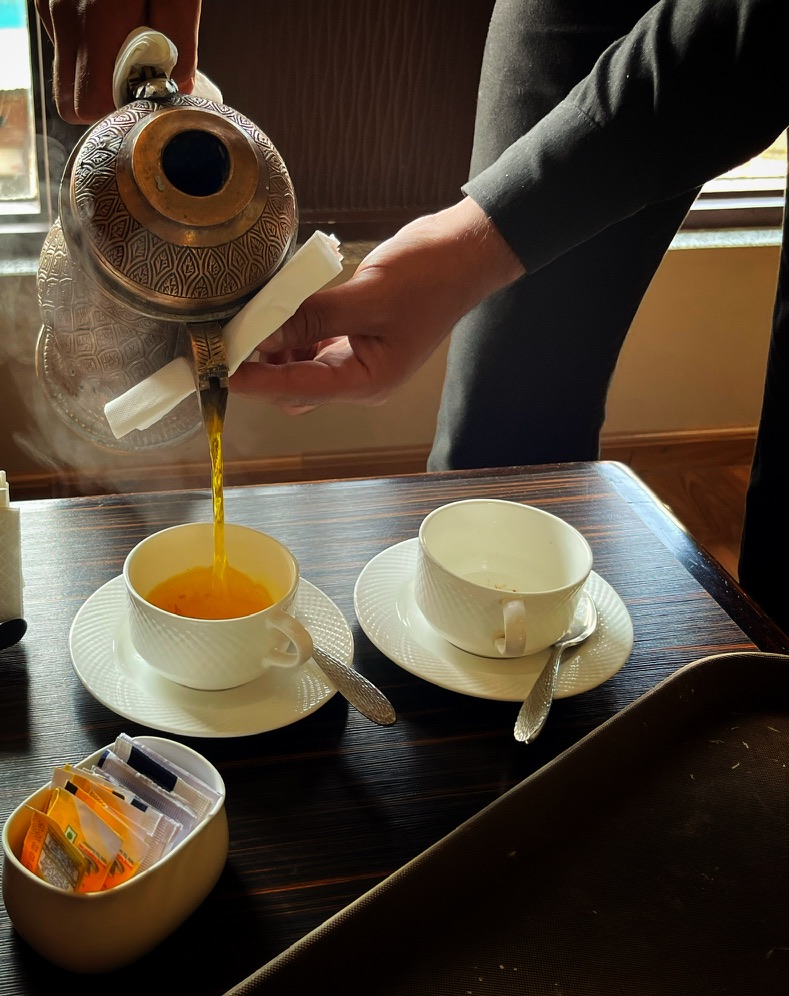
Khawa

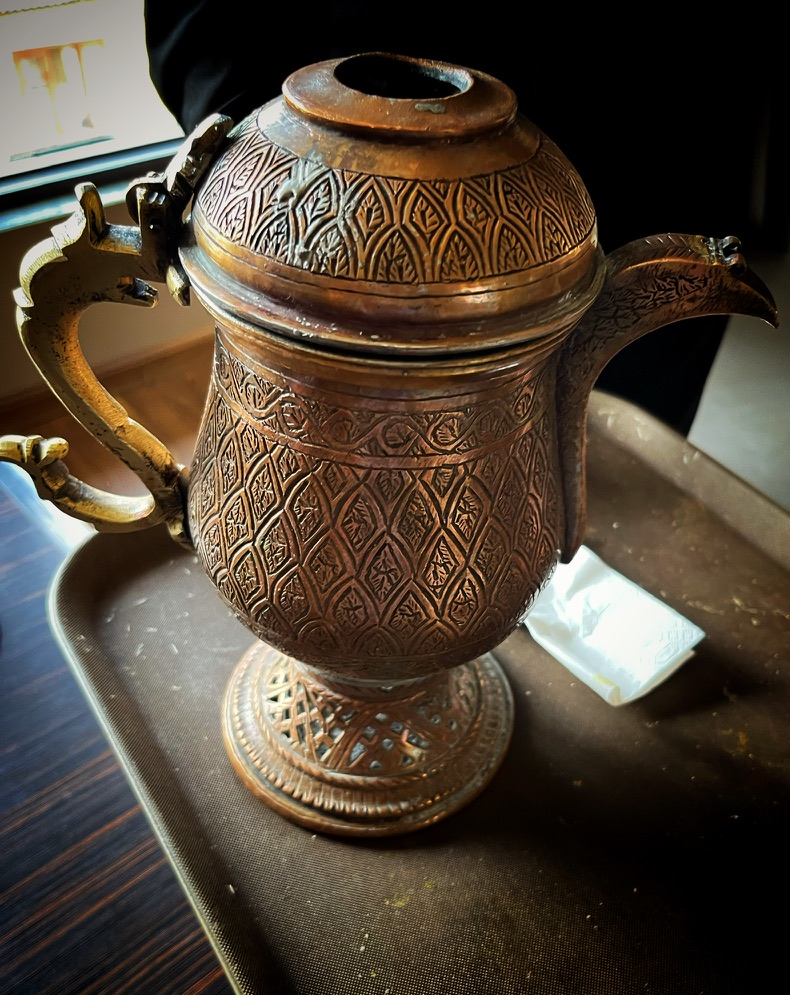
Khawa is a Kashmiri tea flavored with cinnamon, cardamom, and saffron. It is a great drink to sip on cold winter days but can be had throughout the year. Khawa is served in a traditional samovar! A samovar (Kashmiri: samavar) is a traditional Kashmiri kettle used to brew, boil and serve Kashmiri salted tea and Khawa. Kashmiri samovars are made of copper with engraved or embossed calligraphic motifs. The Samovar is an all-time favourite domestic utensil in the entire valley of Kashmir. It is one of the finest examples of the splendid art or craftsmanship and is known for its superb quality and distinct design.

Samavar
Khawa

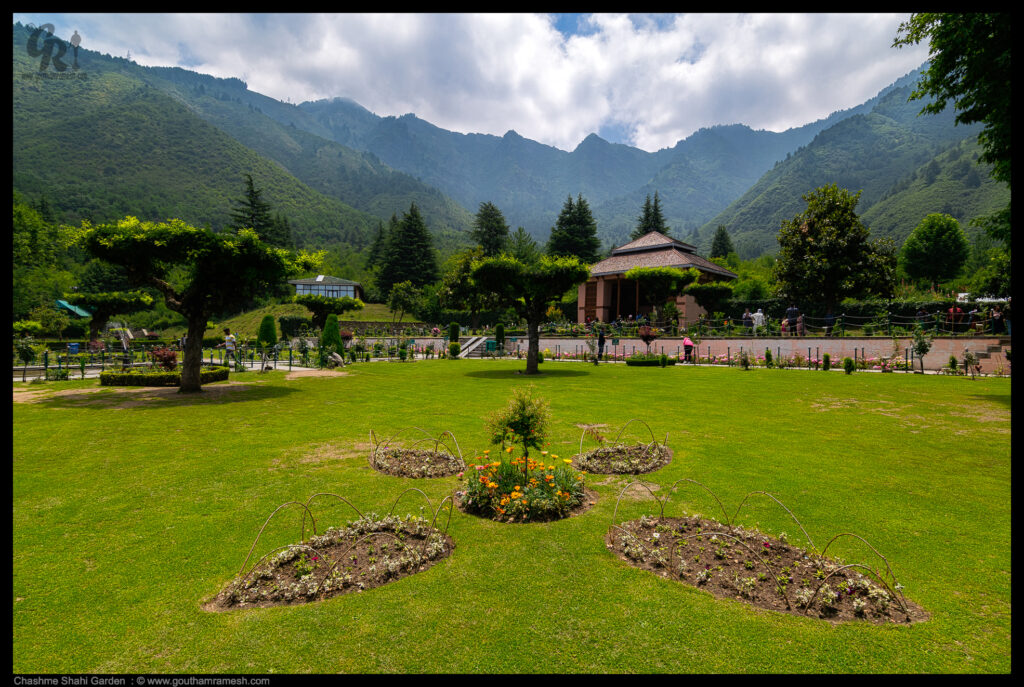
Chashme Shahi

Chashme Shahi is one of the Mughal gardens built in 1632 AD around a spring by Ali Mardan Khan, a governor of Mughal emperor Shah Jahan as per the orders of the Emperor, as a gift for his eldest son Prince Dara Shikoh. The garden is located in the Zabarwan Range, near Raj Bhawan (Governor’s house) overlooking Dal Lake in Srinagar, Kashmir, India.

Chasme Shahi Garden

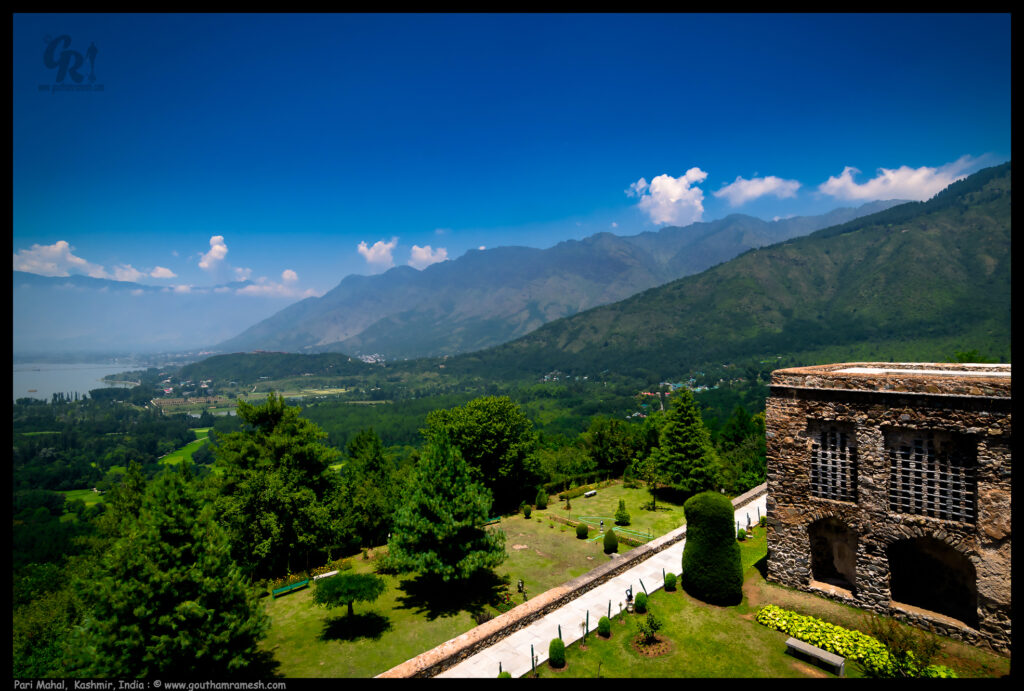
Pari Mahal

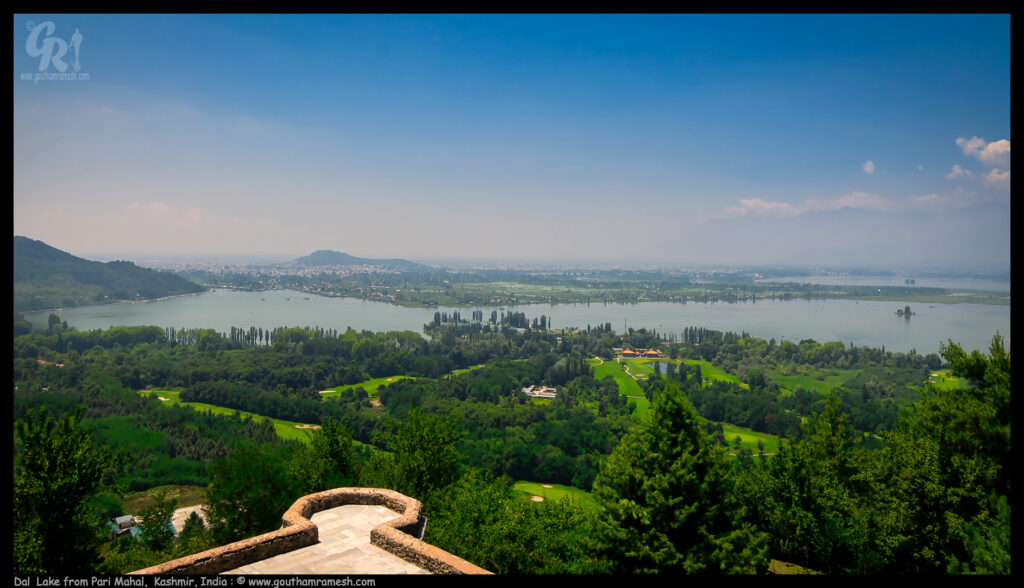
Pari Mahal or Peer Mahal, also known as The Palace of Fairies, is a seven-terraced garden located at the top of Zabarwan mountain range, overlooking the city of Srinagar and the south-west of Dal Lake

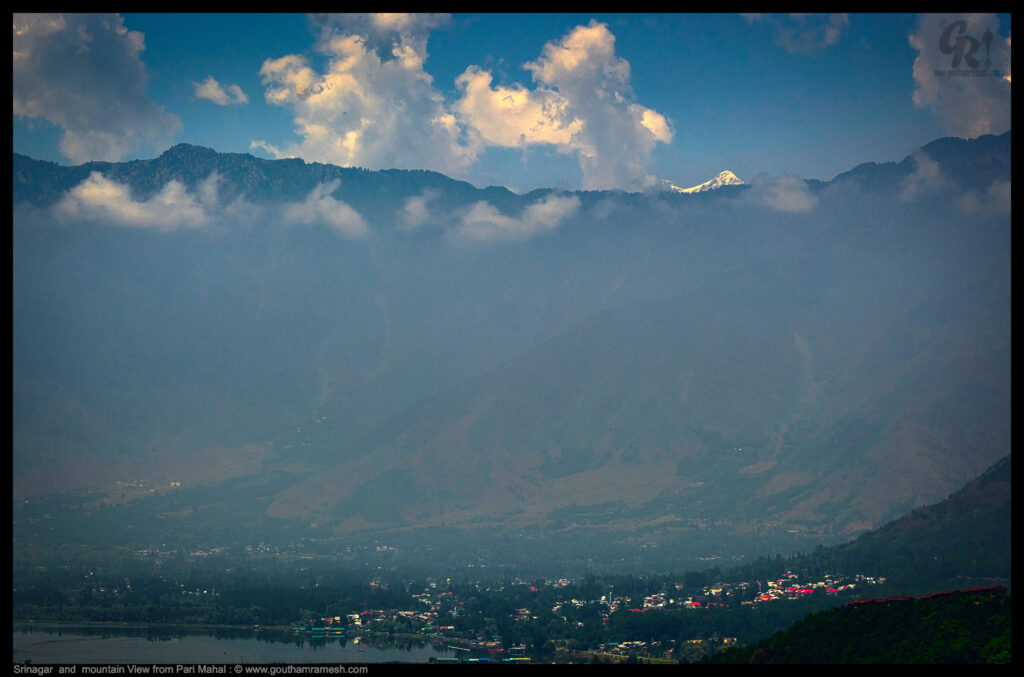
Srinagar Shalimar area from Pari Mahal
Pari Mahal
Dal Lake from Pari Mahal

Day 2-3 : Gulmarg

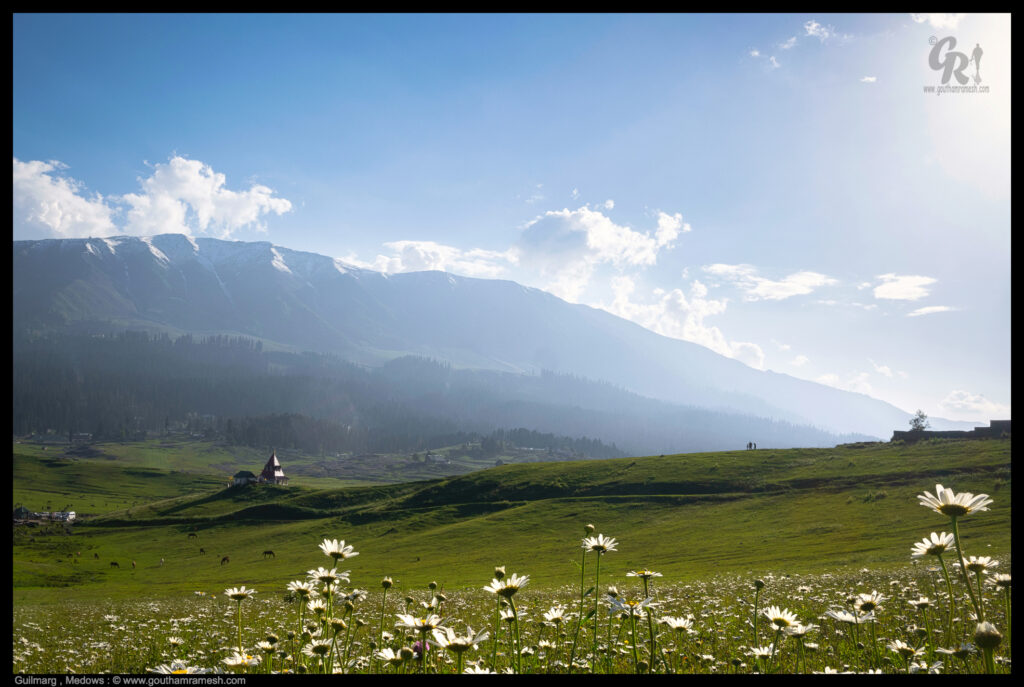
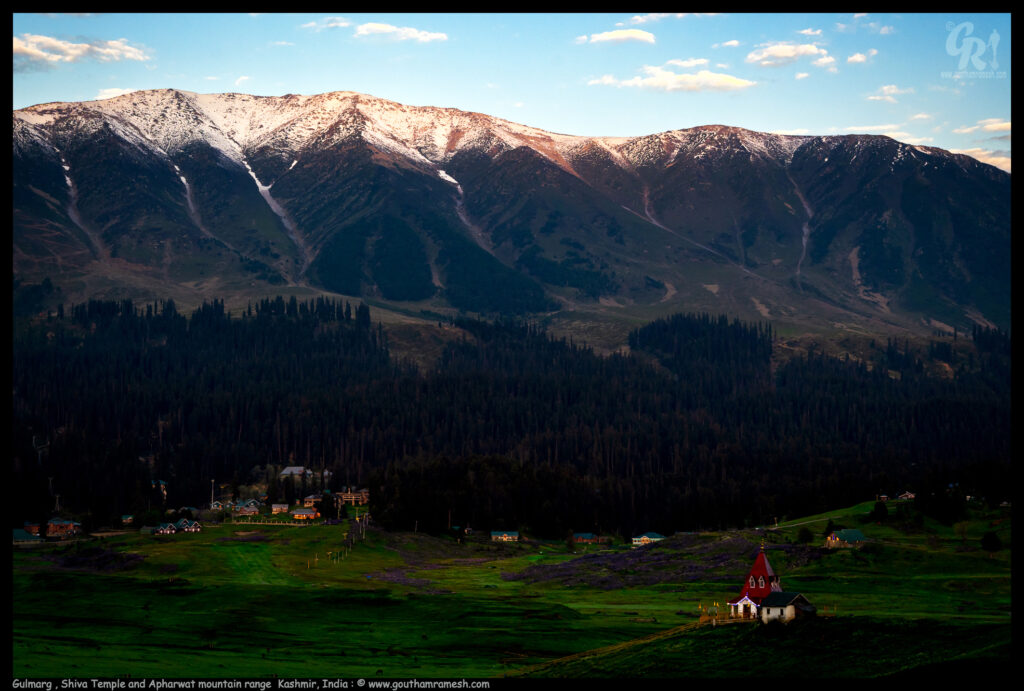
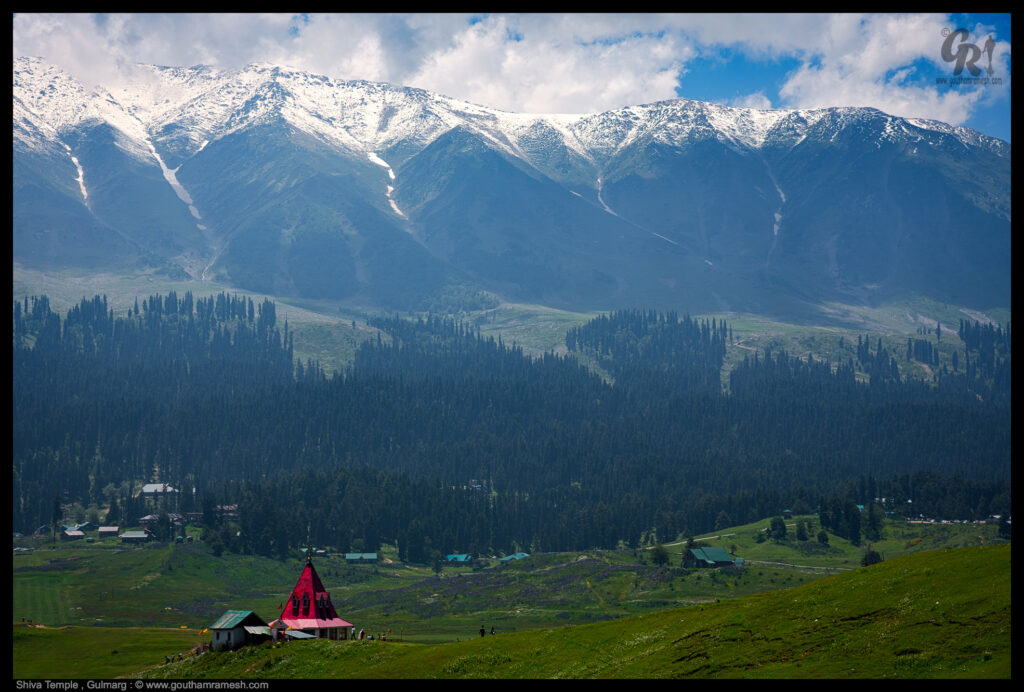
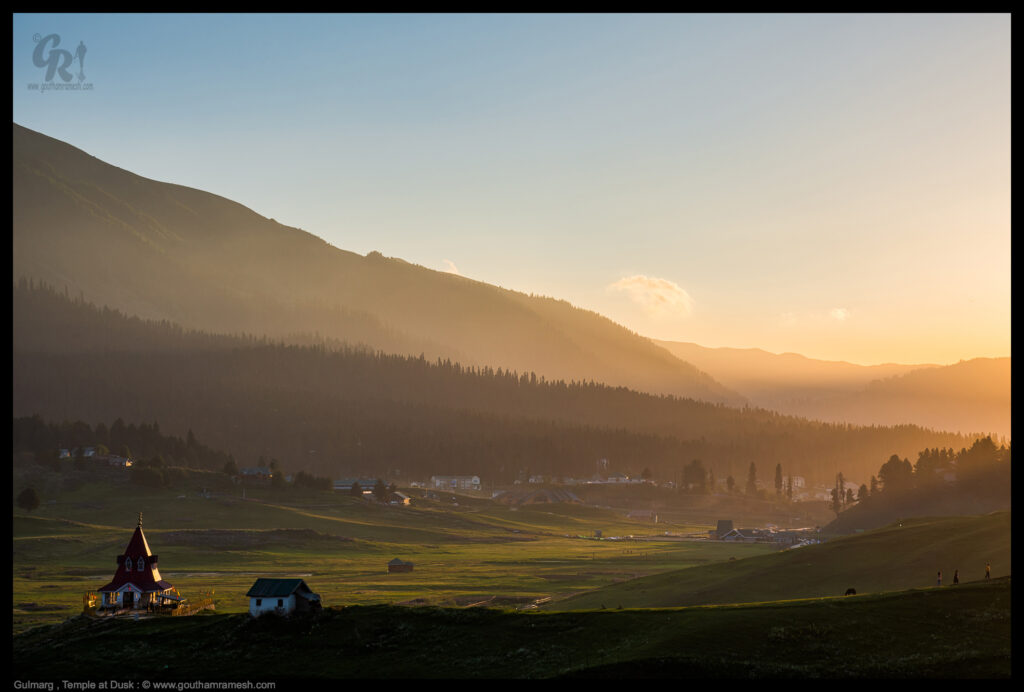
Our next stop was Gulmarg! Gulmarg also known as Gulmarag in Kashmiri, is a town, hill station, popular skiing destination, and notified area committee in the Baramulla district of Jammu and Kashmir, India. It is located at a distance of 31 km from Baramulla and 49 km from Srinagar.

Gulmarg with its flowers
Shiva Temple with Mount Afarwat in the background
Shiva Temple
At Dusk

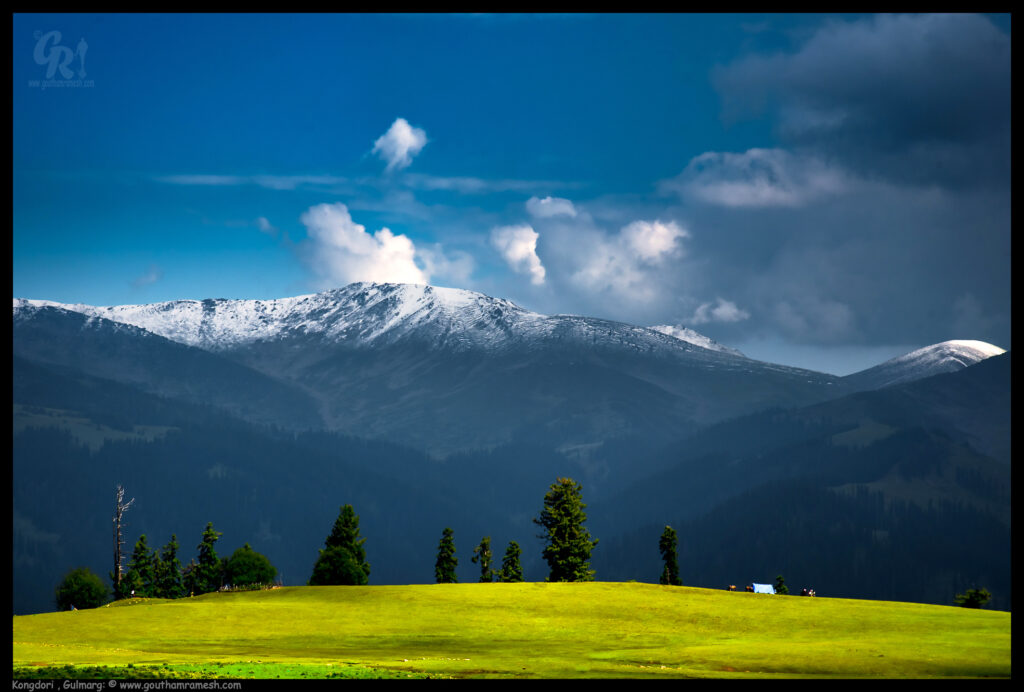
Kongdoori ( Gulmarg )

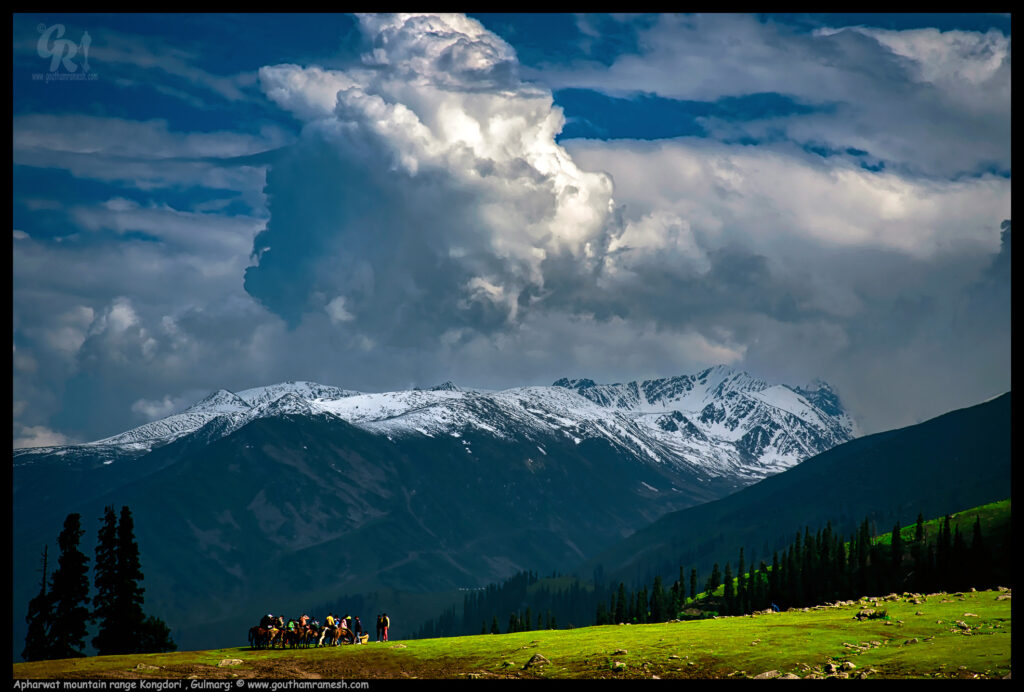
Kongdori is a bowl-shaped area that lies between Gulmarg and the summit on the Apharwat mountain range. Kongdori is also a stop or a station during the Gulmarg Gondola Cable Car journey. The popular cable car’s first stage was a transfer to the Kongdori Valley station (10,500 ft); the optional second stage takes visitors to the Afarwat Mountaintop (13,500 ft). There are glorious views of the rolling meadows at the foot of the Afarwat Mountains, in the Pir Panjal ranges surrounding Gulmarg.

Kongdoori
Tourists with pony’s at Kongdoori

Day 3-4 : Sonamarg

From Gulmarg we drove to Sonamarg.

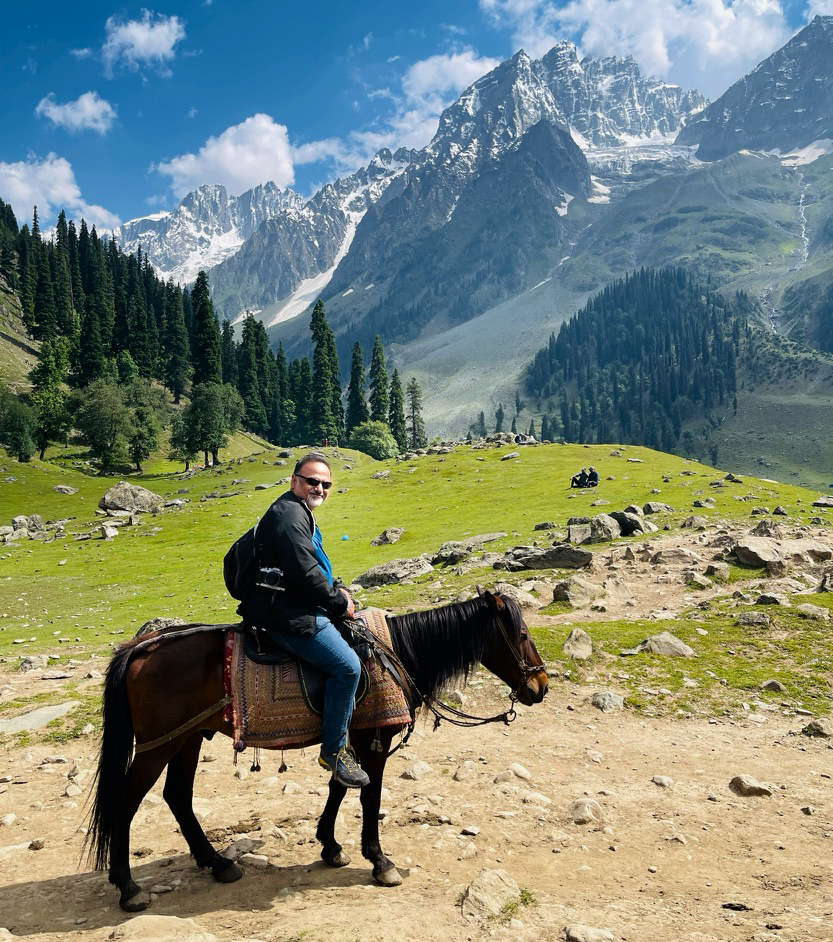
Sonamarg or Sonmarg, known as Sonamarg in Kashmir, is a hill station located in the Ganderbal District of Jammu and Kashmir, India. It is located about 62 Kilometers from Ganderbal Town and 80 kilometres northeast of the capital city, Srinagar and it is on the way to Leh.

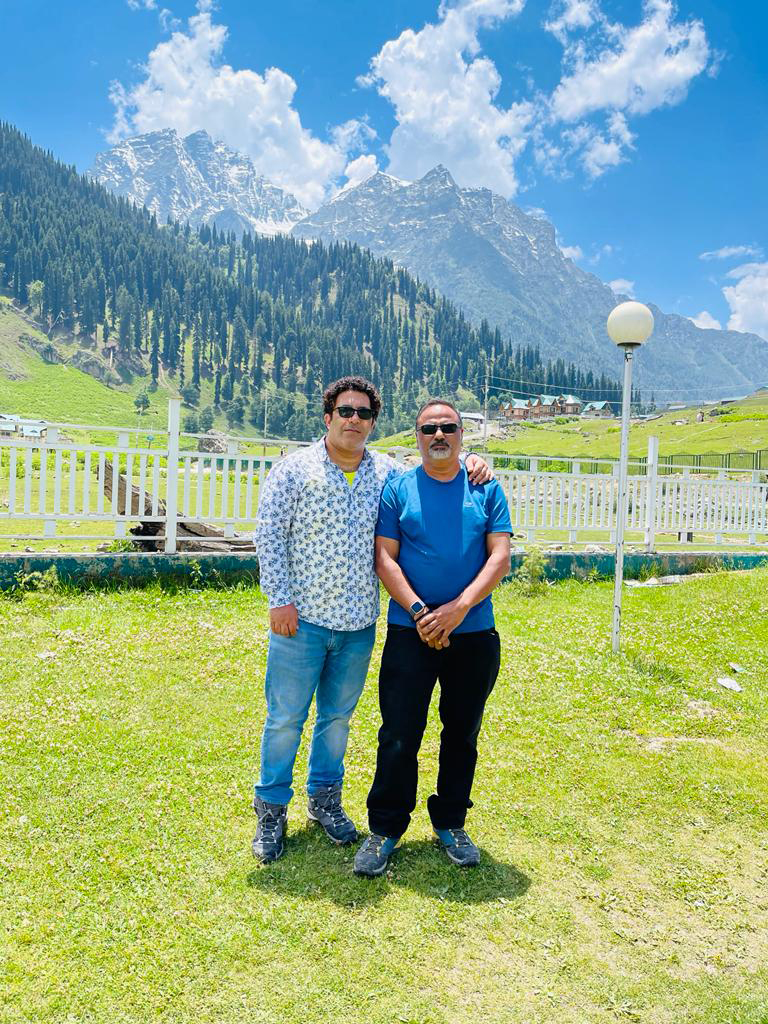
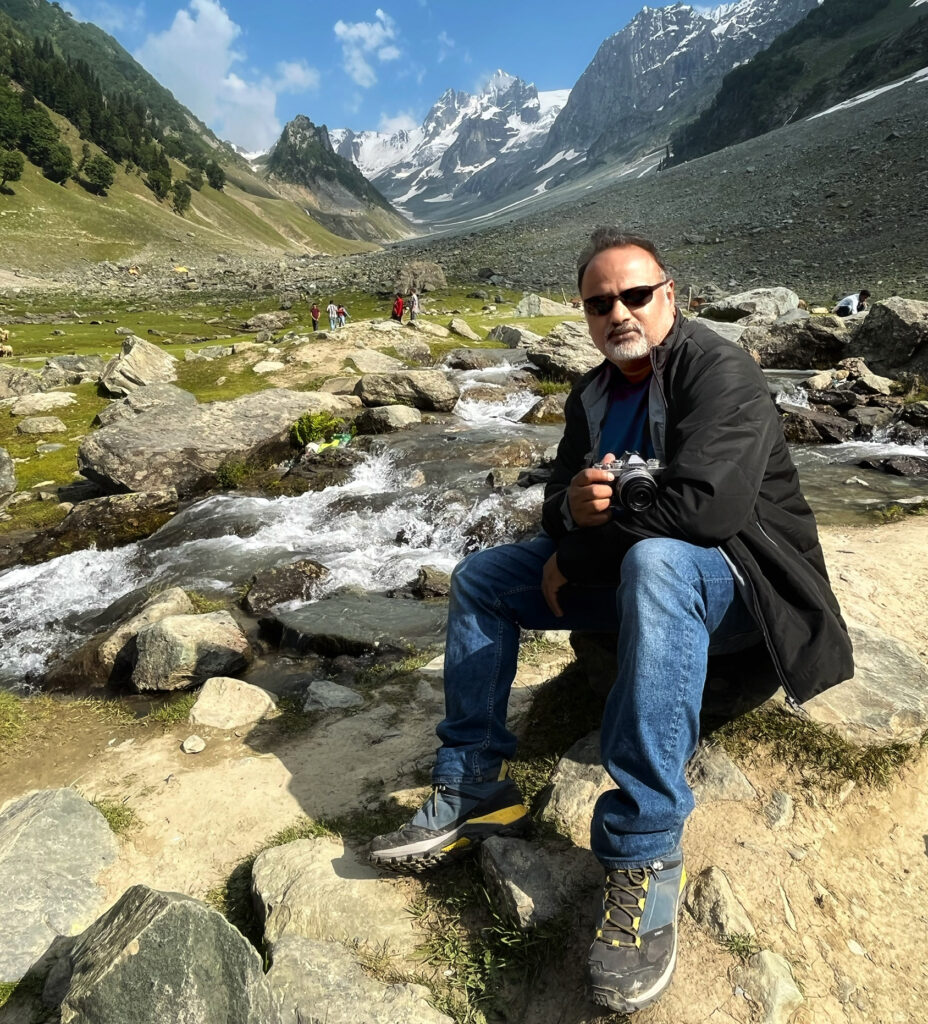
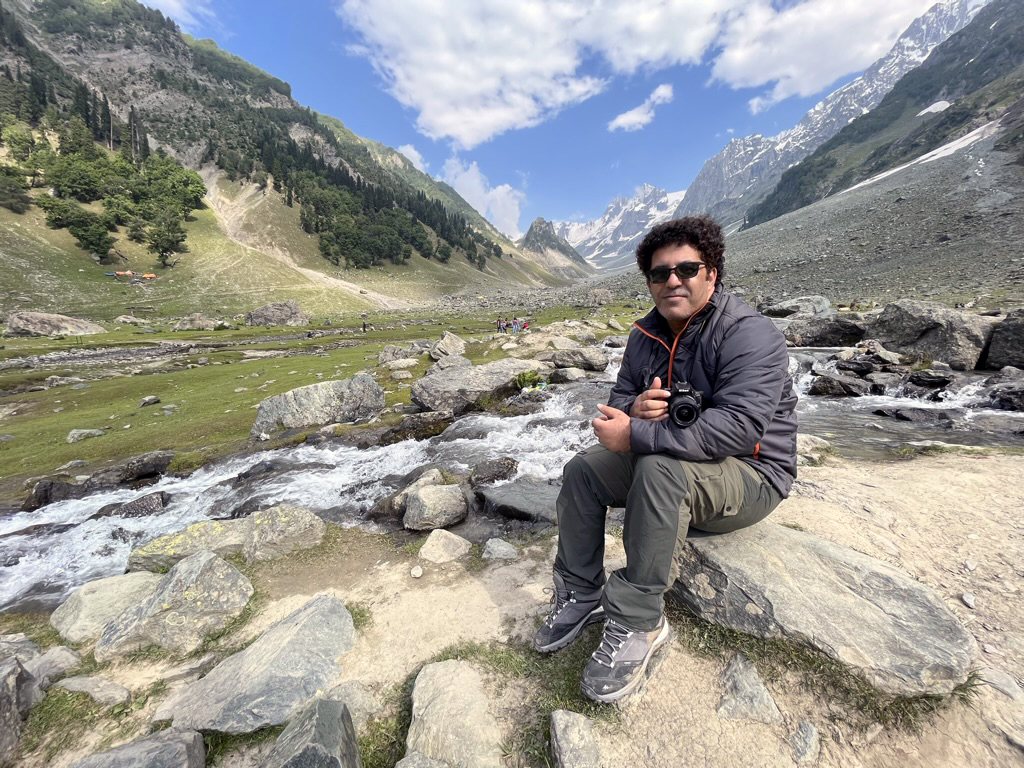
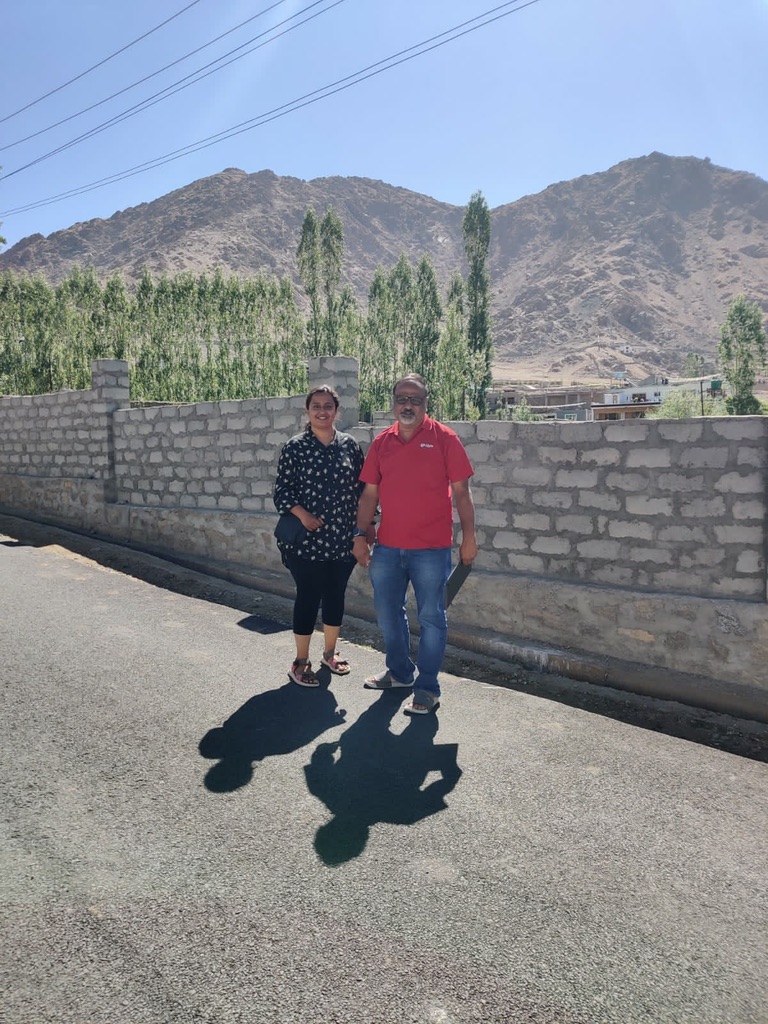
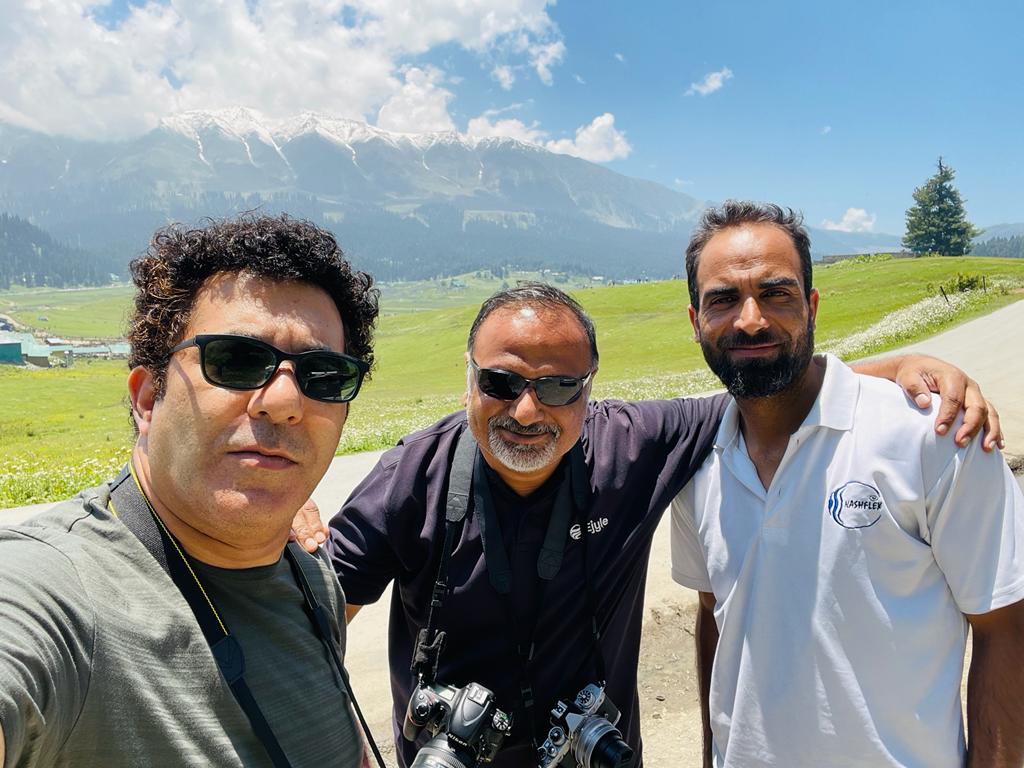
Tanveer and Myself at Sonamarg


Thajiwas Glacier

No Visit to Sonamarg is complete without visiting Thajiwas Glacier. Thajiwas Glacier, located at an altitude of 9,186 feet at a short distance from Sonmarg in Jammu & Kashmir, is enormous and blessed with magnificent beauty. Overlooked by the Thajiwas mountain and surrounded by meadows, conifer trees and frozen lakes, it is one of the most beautiful sights you will ever come across. Tourists visit Thajiwas Glacier for enjoying its breathtaking sights, building snowmen & enjoying a sledding ride. You can also take a short hike to the several waterfalls surrounding the Thajiwas Glacier

On the way to the Glacier
My self at glacier
Tanveer at Thajiwas

At the glacier area you will find lot of Bakarwal tribe with their sheep. The Bakarwal community is listed as Scheduled Tribes along with Gujjars in Jammu and Kashmir in 1991. They are a nomadic tribe and they spread over a large part starting from Pir Panjal Range to Hindukush to Ladakh located in Himalayan mountains of South Asia. They are goat herders and shepherds at large and seasonally migrate from one place to another with their herds. They are found in the entire Kashmir region between India and Pakistan, and in the Nuristan Province of northeast Afghanistan

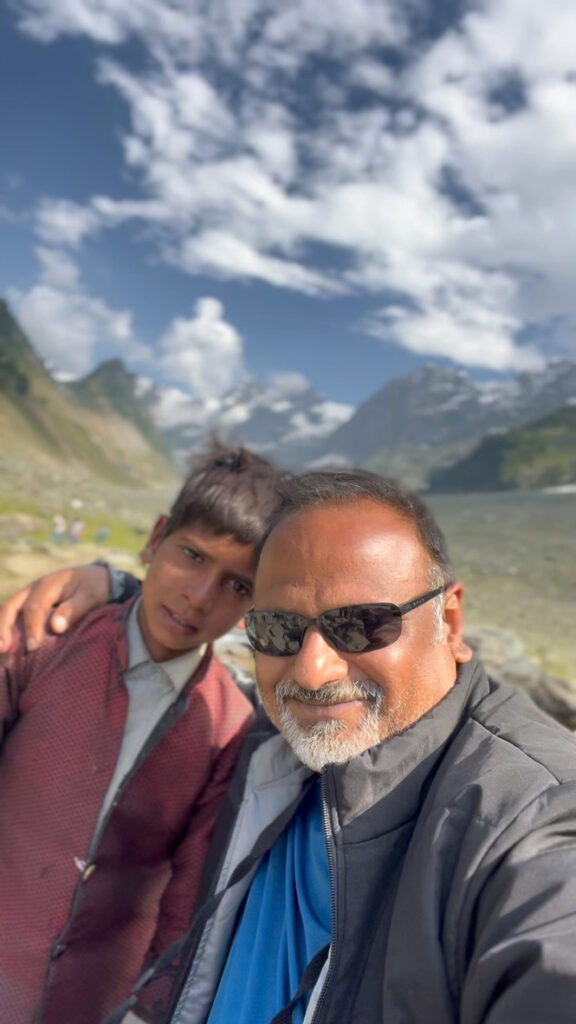
Myself with a Bhkarwal Kid!
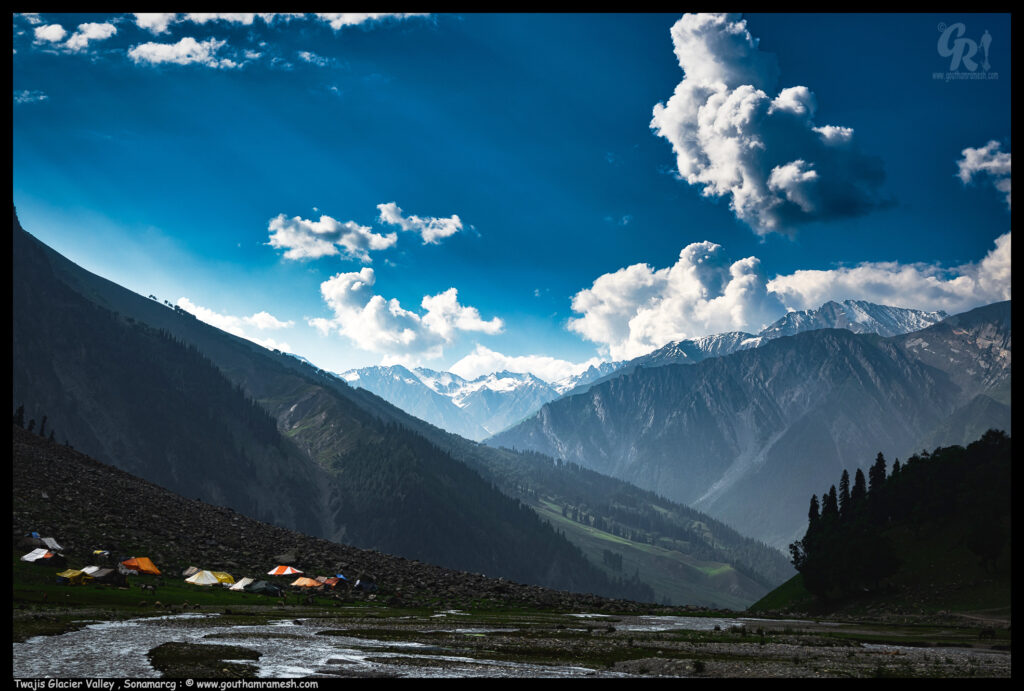
Thajiwas landscape dotted with Bhakarwal Tents
Glacier area
Water gushing through Glacier area
The Valley with tourists

Day 5 : Sonamarg to Leh

This was an adventure of a lifetime, we drove from Sonamarg to Leh via Zoji la pass.

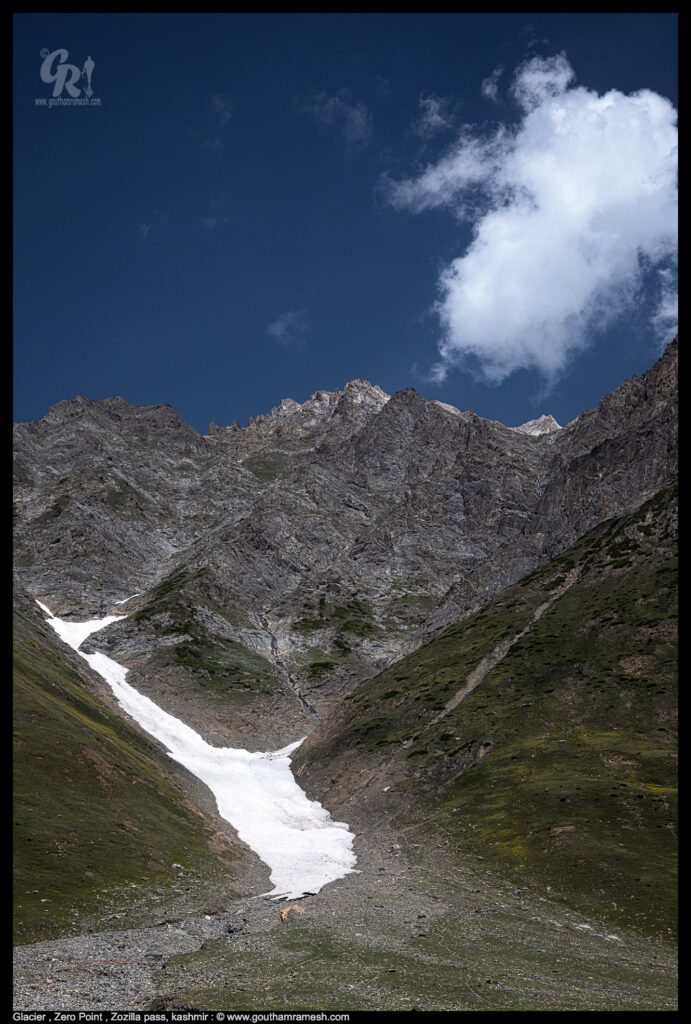
Zoji La is a high mountain pass at an elevation of 3.528m (11,575ft) above the sea level, located in the Kargil district of Ladakh, in India. This strip of rock is not the place for a Sunday drive. It’s said to be one of the most treacherous passes in the world.Don’t go by my image , this was after we passed shivering and chilling mountain pass.

The road over the pass is termed as the gateway to the majestic Ladakh.

Zoji-la Road
Glacier at Zoji-La
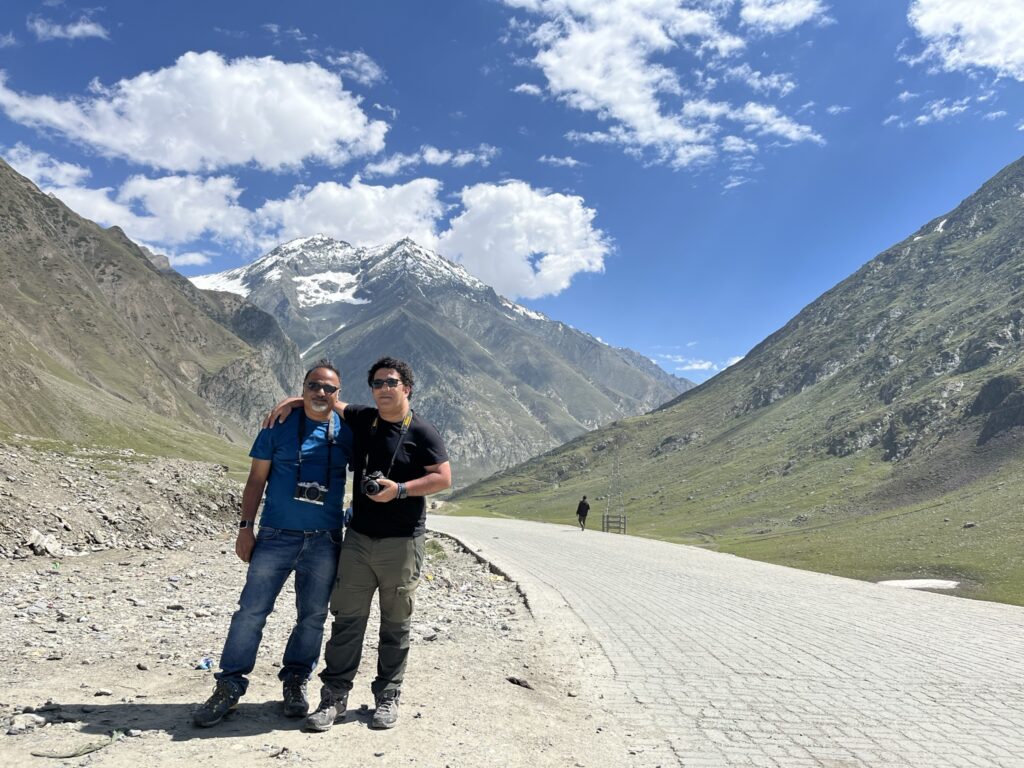
Myself and Tanveer at Zoji-La

Towards Ladakh a drastic change in landscape

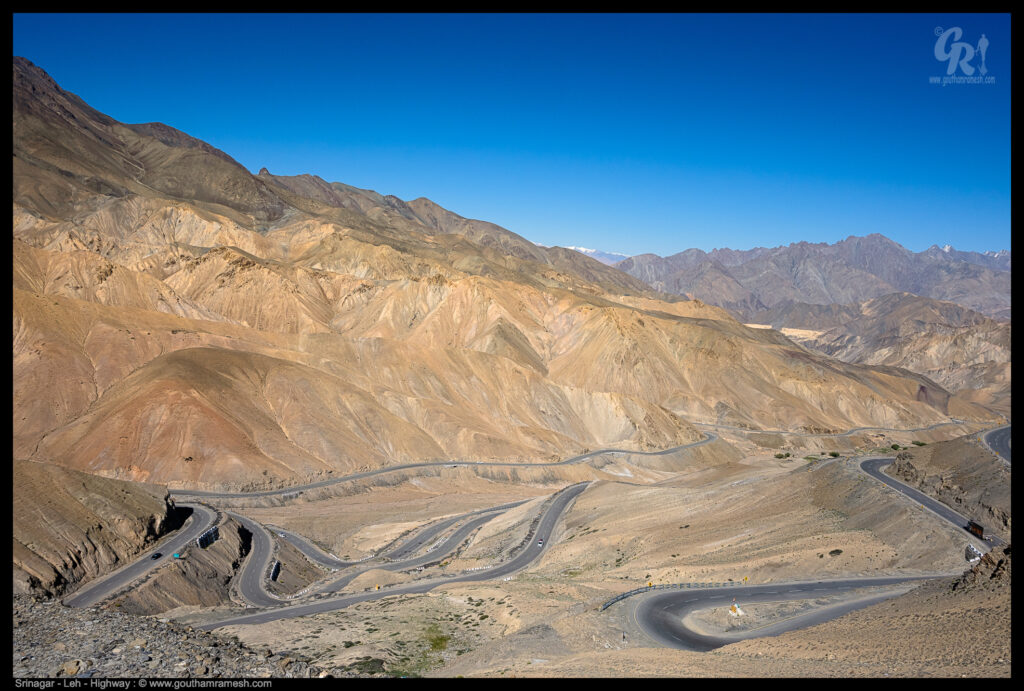
The drive through Srinagar to Leh is amazing and it lets you experience a wide variety of landscapes like green valley surrounded by snow covered peaks to mount passes , but once you cross kashmir valley the landscape of Ladakh is so different , desolate yet beautiful . This drive from Srinagar to Leh is highly recommended for ppl who love driving.

Road to Leh

As we drive towards Leh, not only the landscape changes but also the culture and you can see many small stupas dotting the landscape. Stupas are a monument, originally in the shape of a hemispherical mound, that contains the bodily relics or possessions of the Buddha or a revered teacher

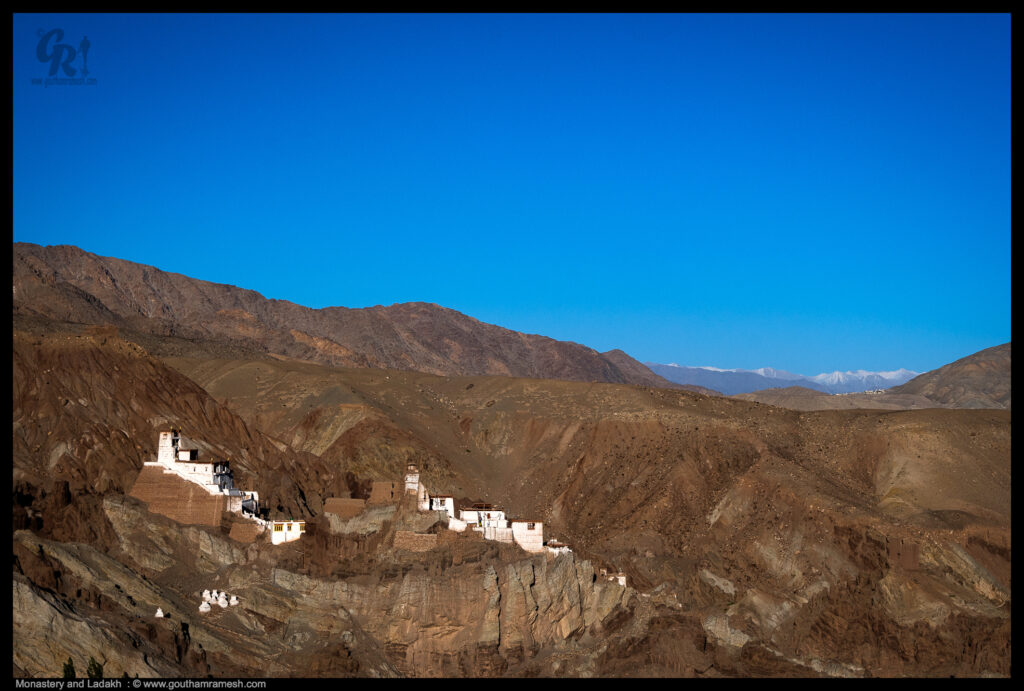
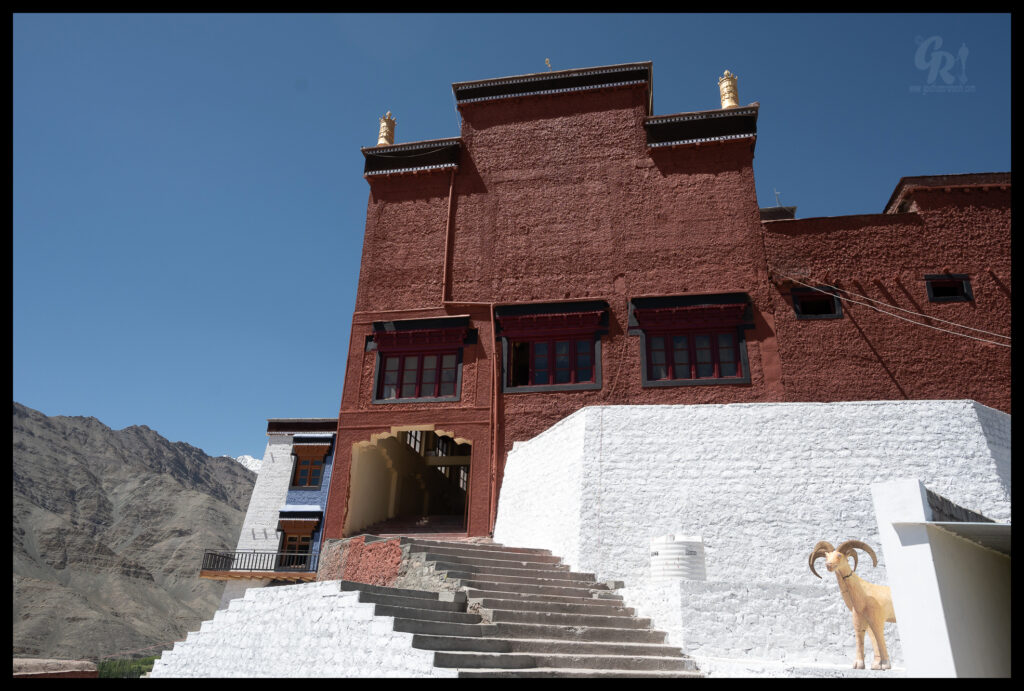
Monasteries in Ladakh are much more than religious centres. Located in heaven that Ladakh is, these famous monasteries are purifying havens where one can find inner peace. This is one such Monastery that dots the landscape .

Monastery

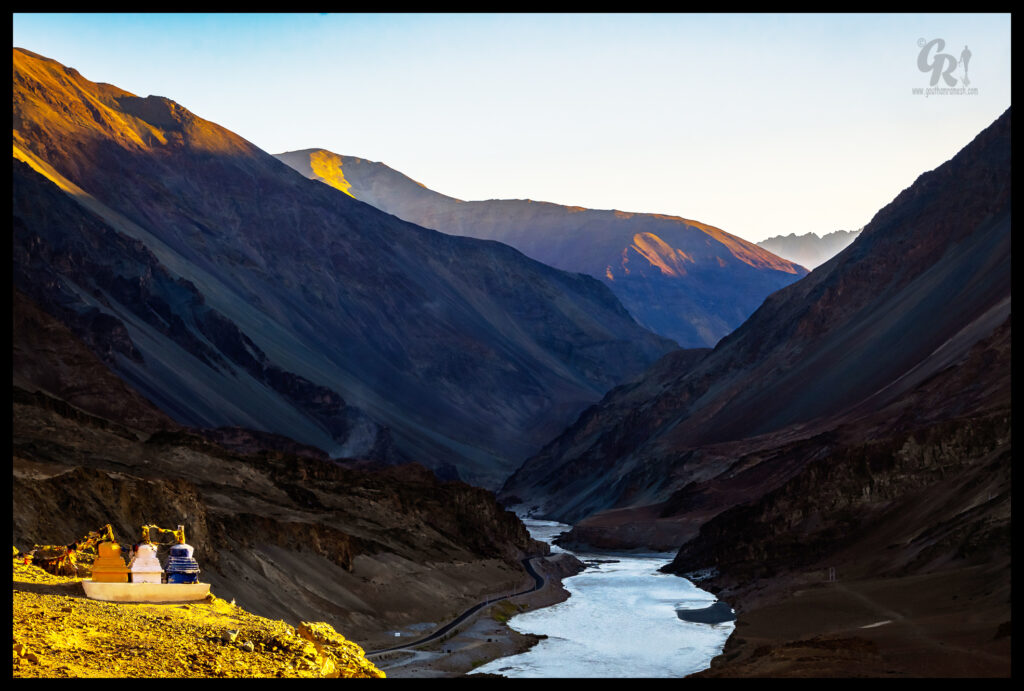
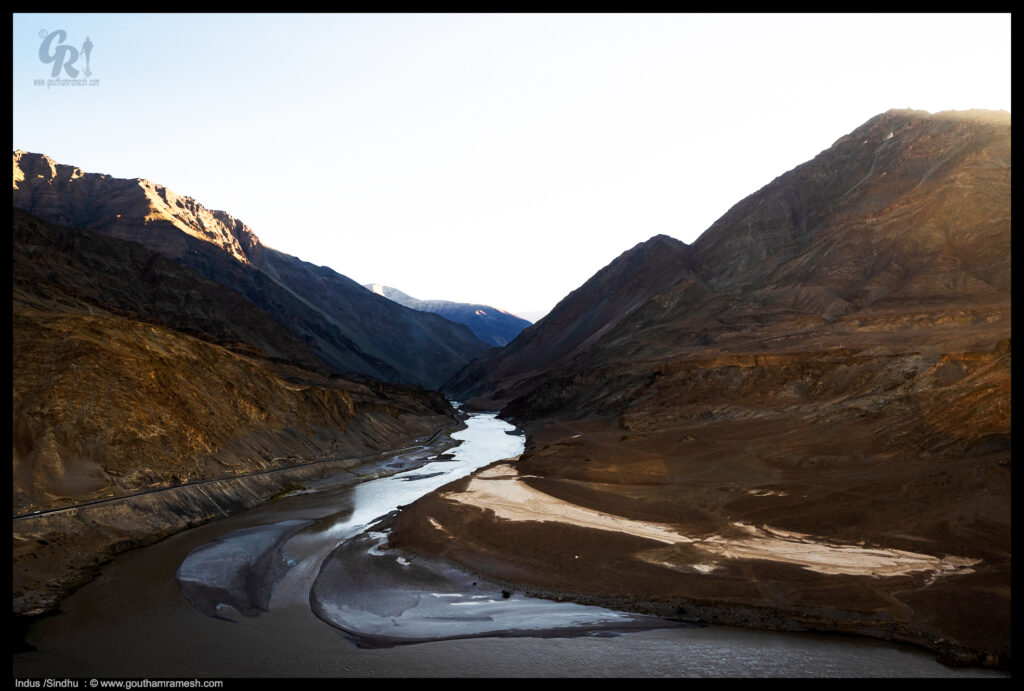
Indus River, Tibetan and Sanskrit Sindhu, Sindhi Sindhu or Mehran, great trans-Himalayan river of South Asia. It is one of the longest rivers in the world, with a length of some 2,000 miles (3,200 km). Its total drainage area is about 450,000 square miles (1,165,000 square km), of which 175,000 square miles (453,000 square km) lie in the ranges and foothills of the Himalayas, the Hindu Kush, and the Karakoram Range;

Indus

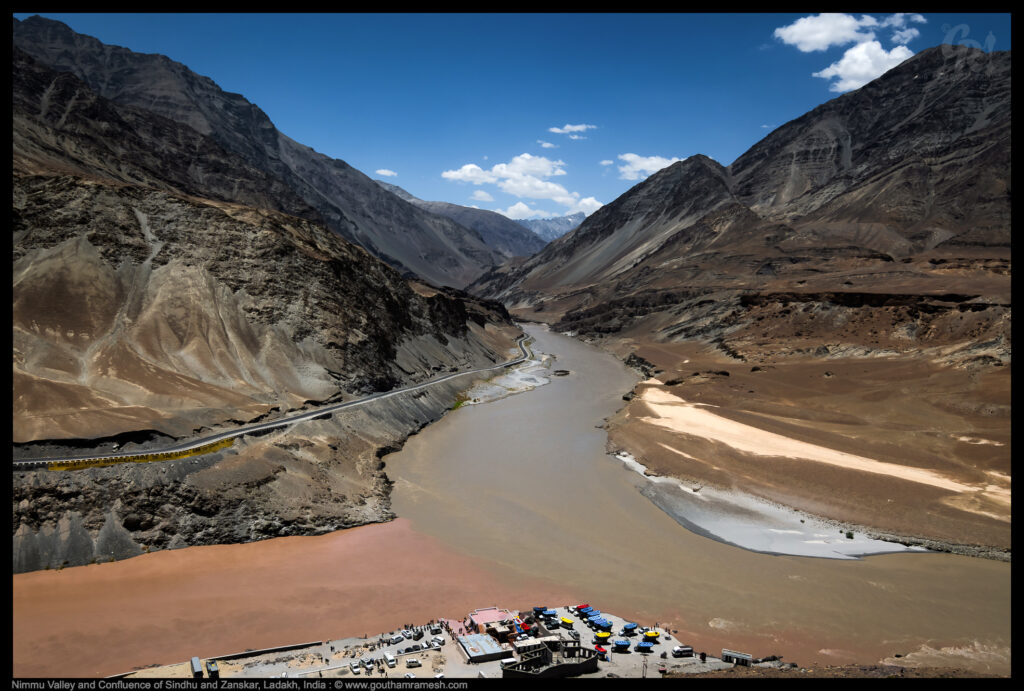
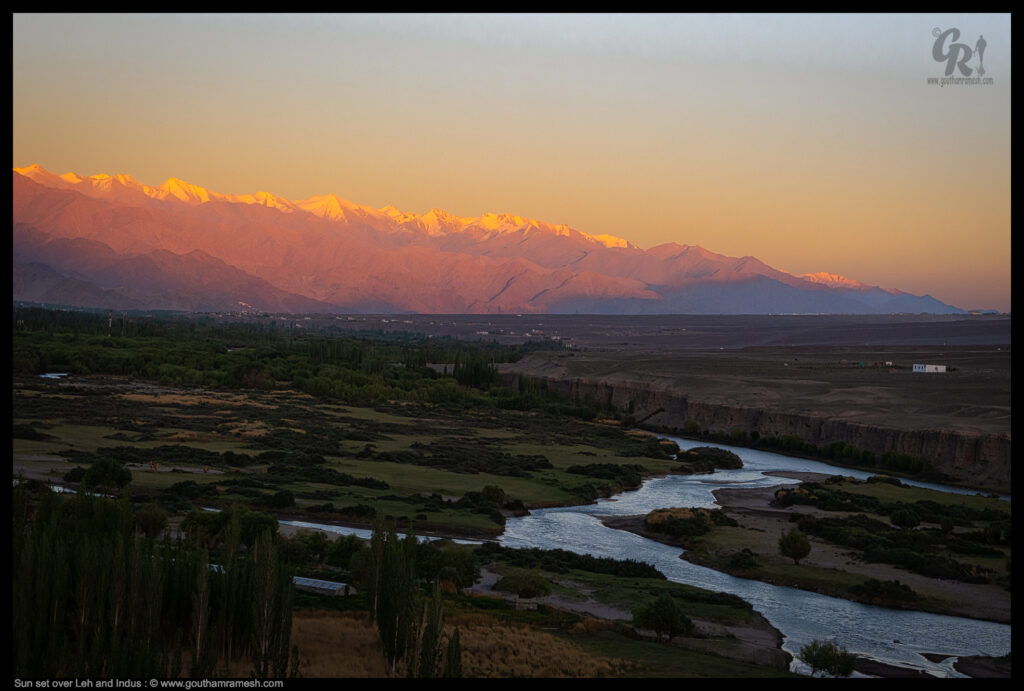
The Indus river originates in the Tibetan Plateau near the Manasarovar range, whereas the Zanskar has its source in the Zanskar valley. Both the rivers kiss each other near the scenic Nimmu valley, that falls between Leh and Kargil. The rivers are clearly distinguished by their colours and the confluence can be best viewed during the spring-summer months, from March to May.

Confluence of Indus and Zanskar

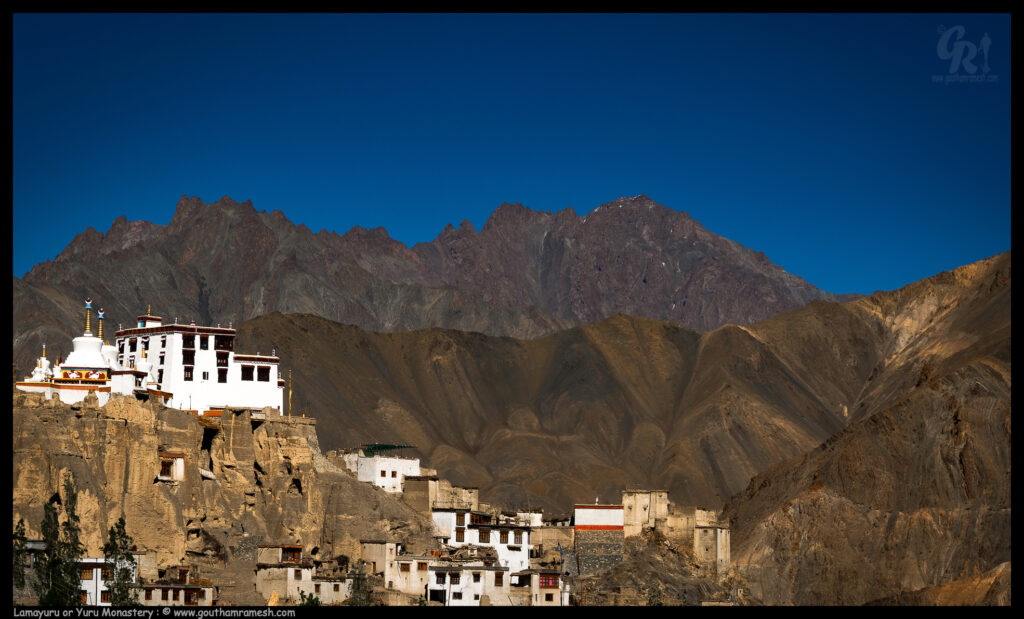
Lamayuru or Yuru Monastery is a Tibetan Buddhist monastery in Lamayouro, Leh district, Ladakh, India. It is situated on the Srinagar-Leh highway 15 kilometres east of the Fotu La at a height of 3,510 metres.

Lamayaru

After a 12 hour journey we reached Leh

Leh

Day 5-6-7 : Leh

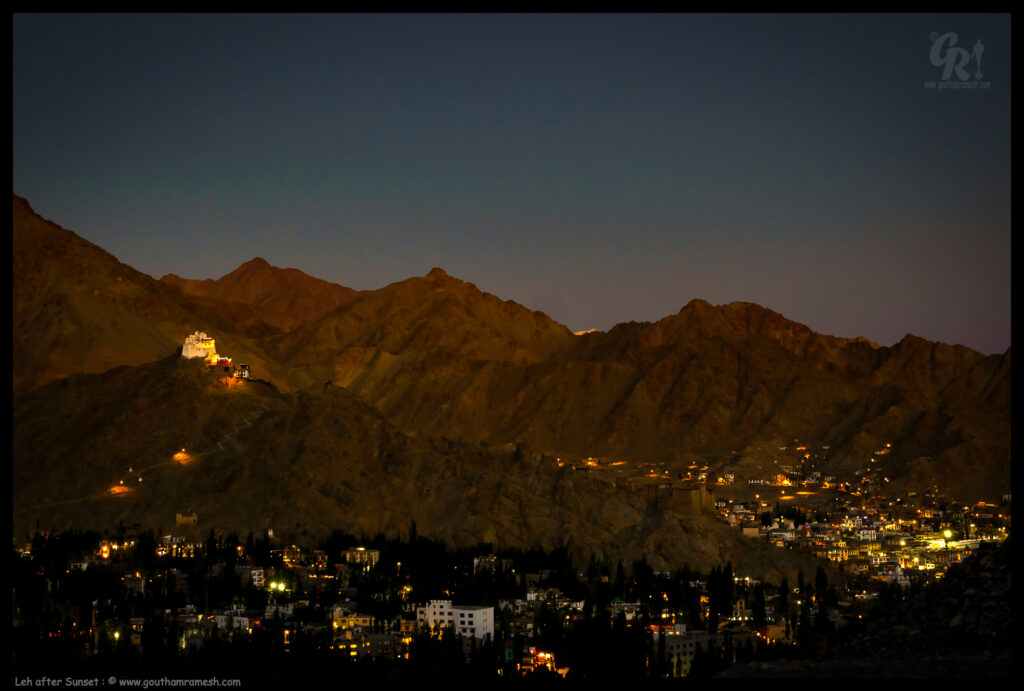
Leh is the joint capital and largest city of the region administered by India as a union territory of Ladakh, Here we had to rest at acclimatize for 2 days to get used to Low oxygen levels. But we did some local sightseeing alone with some rest.

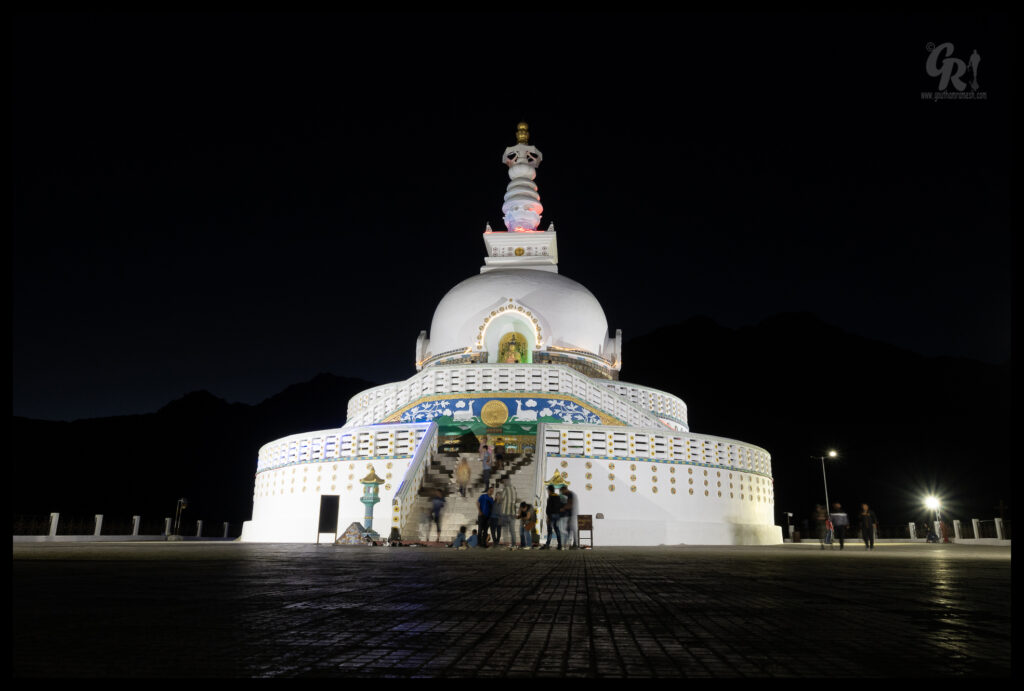
Shanti Stupa

Shanti Stupa is a Buddhist white-domed stupa (chorten) on a hilltop in Chanspa, Leh district, Ladakh, in North India. It was built in 1991 by Japanese Buddhist Bhikshu, Gyomyo Nakamura and part of the Peace Pagoda mission. The Shanti Stupa holds the relics of the Buddha at its base, enshrined by the 14th Dalai Lama. The stupa has become a tourist attraction not only due to its religious significance but also due to its location which provides panoramic views of the surrounding landscape.

Shanti Stupa
Leh after Sunset

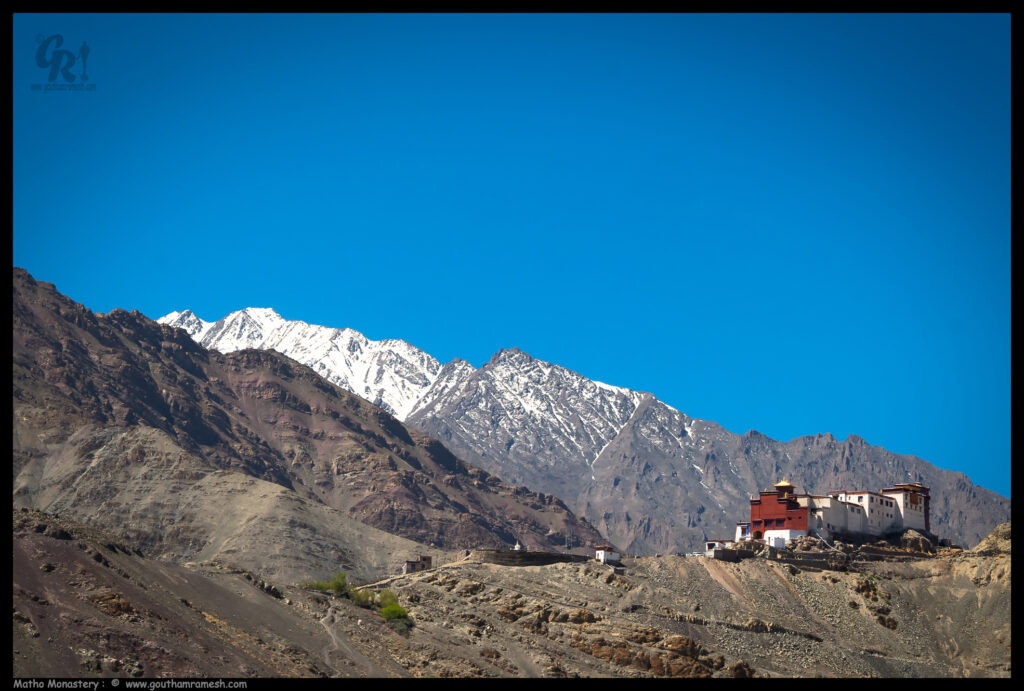
Matho Monastery

Matho Monastery, or Matho Gonpa or Mangtro Monastery or Mangtro Gonpa, from the Tibetan “mang” that means “many” and “tro” that means “happiness”, is a Tibetan Buddhist monastery located 26 kilometres southeast of Leh in Ladakh, Northern India, on the banks of the Indus River. The village of Matho is located at the mouth of a deep gorge running out of the Zanskar Range and across the Indus. It is directly opposite Thikse Monastery.

Matho Monastery
Stairs to matho
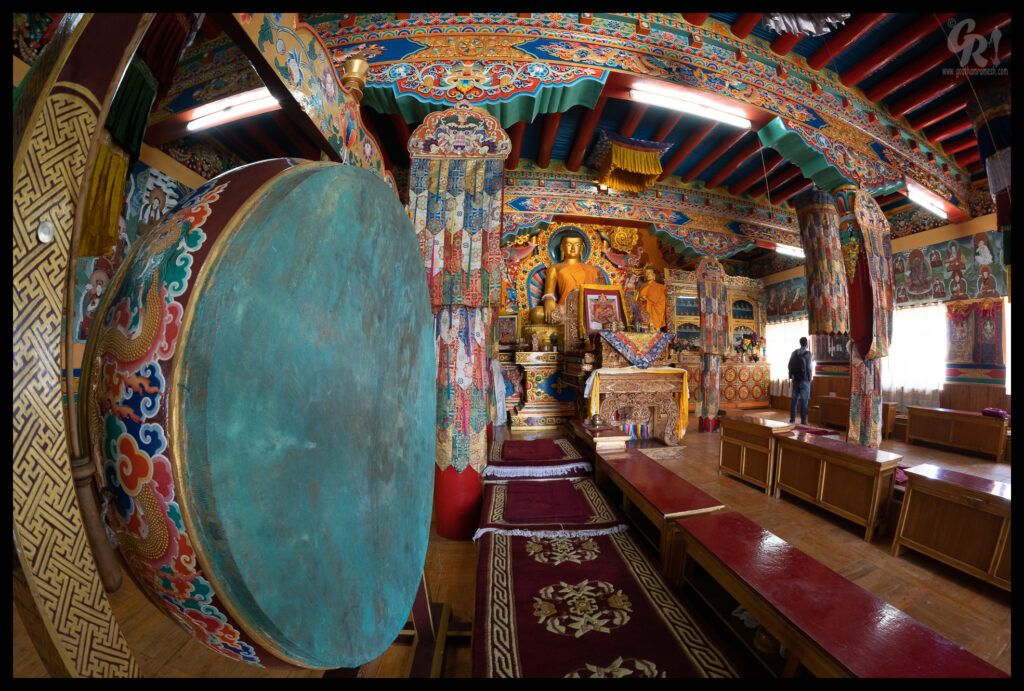
Shrine Inside Matho Monastery

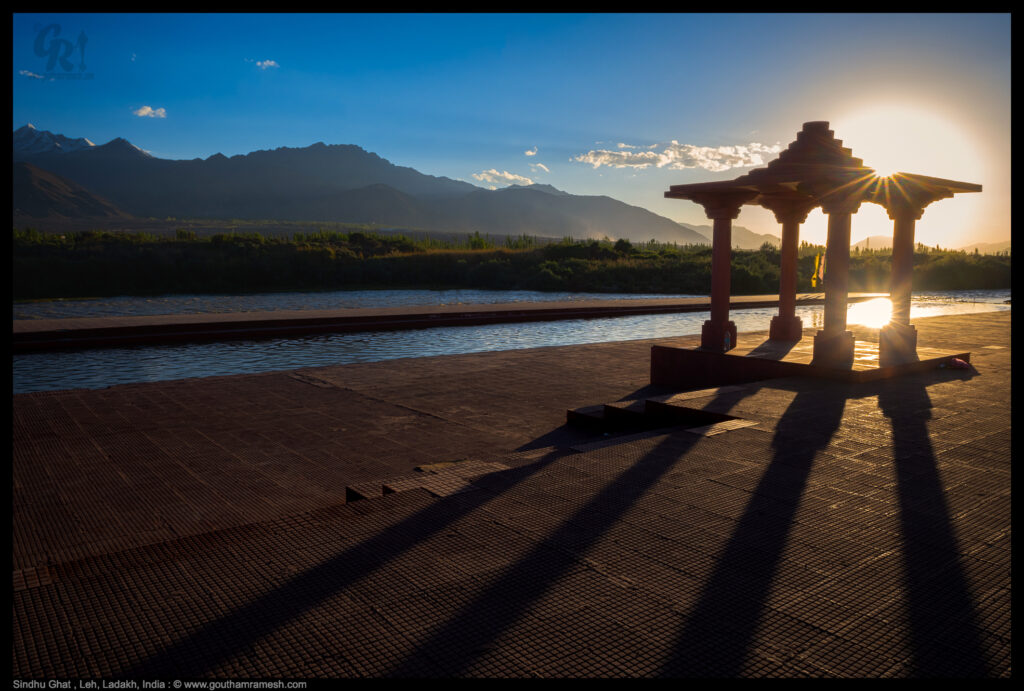
Sindhu Ghat

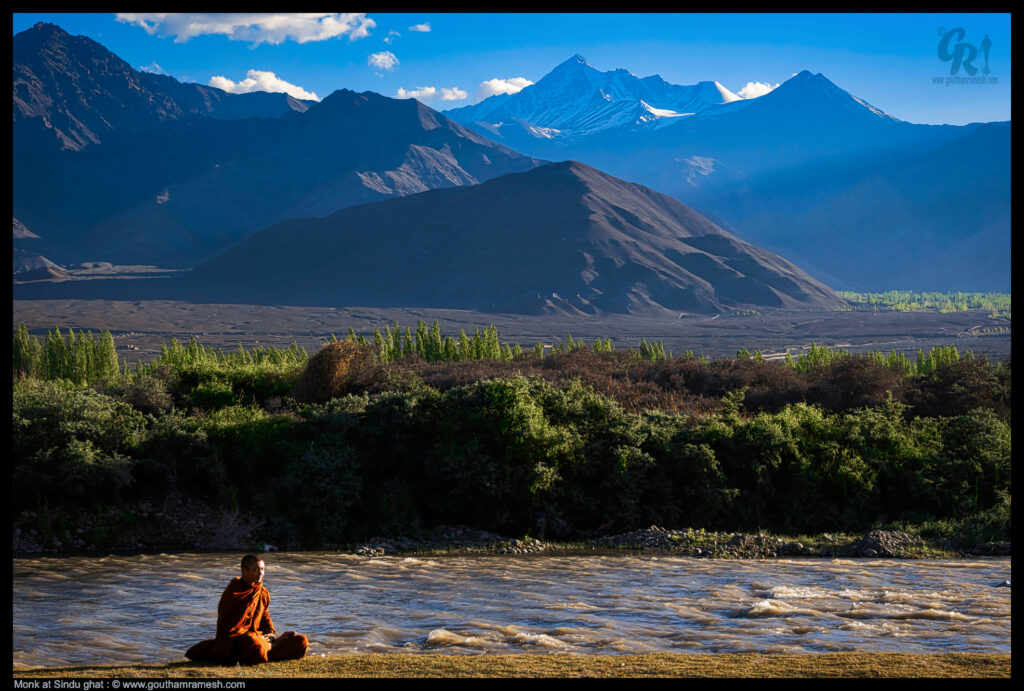
Sindhu Ghat is the banks of the Indus River in the Ladakh. It is a very peaceful river-bank in the surreal landscape of the Ladakh. Sindhu ghat is quite close to Leh and can be easily combined with a visit to Shey palace and Stok village.

Sindhu Ghat
Monk at Sindhu Ghat

Teju!

Tejaswini is a cousin of mine and I met her in Leh! She is a a brave and adventurous soul who stayed Himalayas for couple of months and who travelled Himachal pradesh and Ladakh on a scooty. You can see her images on her instagram page. https://www.instagram.com/tejaswini_manohar/

With Teju , Leh

Day 7-8 : Leh to Nubra

After 2 days of acclimatization we started driving towards Nubra Valley.

Leh-Ladakh- Land of high passes is the epitome of unlimited adventure and unfathomable beauty. One of the gems of this newly made union territory is the mesmerizing Nubra Valley. This is a fantastic stretch of trail and Leh to Nubra Valley is enjoyed by every traveler. Starting from the capital of Ladakh you get to cross one of the highest motorable roads- Khardung La. From there you will go ahead to Khalsar which is another wonderful spot on this trail.

Crossing the Shyok River, you then have to ride along the Nubra River to reach Nubra Valley. It is a tri-armed valley that sees a separation from Shyok and Siachen Rivers. Nubra is unlike any other valley in the entire country because of the magnificence it has on offer. This breathtakingly beautiful valley is popular for its picturesque landscapes and cold desert. Being the top tourist attraction of Ladakh, Nubra Valley is also famous for Hundar Village and Diskit Monastery. These are two of many go-to attractions in Nubra Valley.

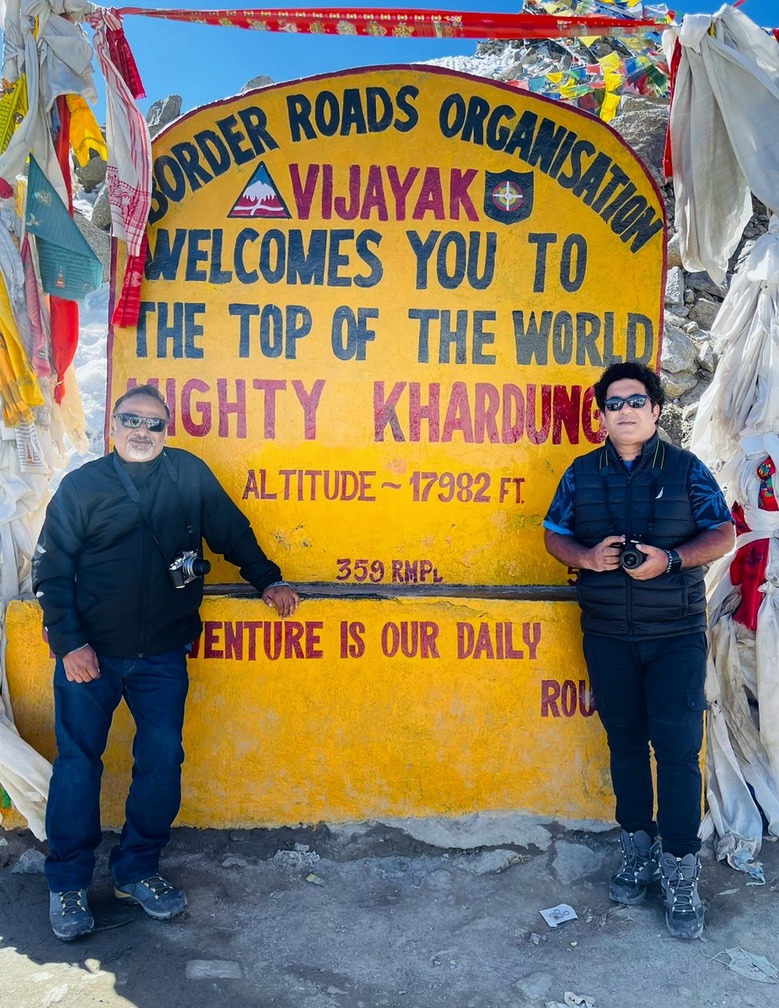
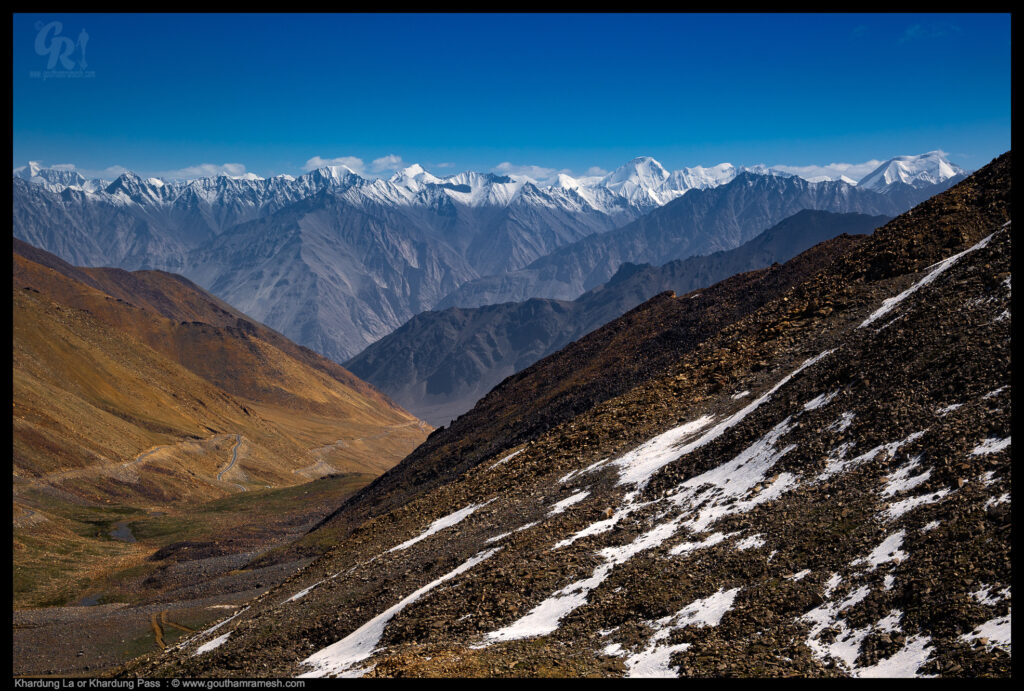
Khardungla Pass!

Khardung La or Khardung Pass is a mountain pass in the Leh district of the Indian union territory of Ladakh. The pass is on the Ladakh Range, North of Leh, and connects the Indus river valley and the Shyok river valley. It also forms the gateway to the Nubra valley, beyond which lies the Siachen Glacier. A motorable road through the pass was built in 1976, and opened to public motor vehicles in 1988. Maintained by the Border Roads Organisation, the pass is important to India as it is used to carry supplies to the Siachen Glacier. The road is one of the world’s highest motorable roads

Tanveer and Myself at khardungla
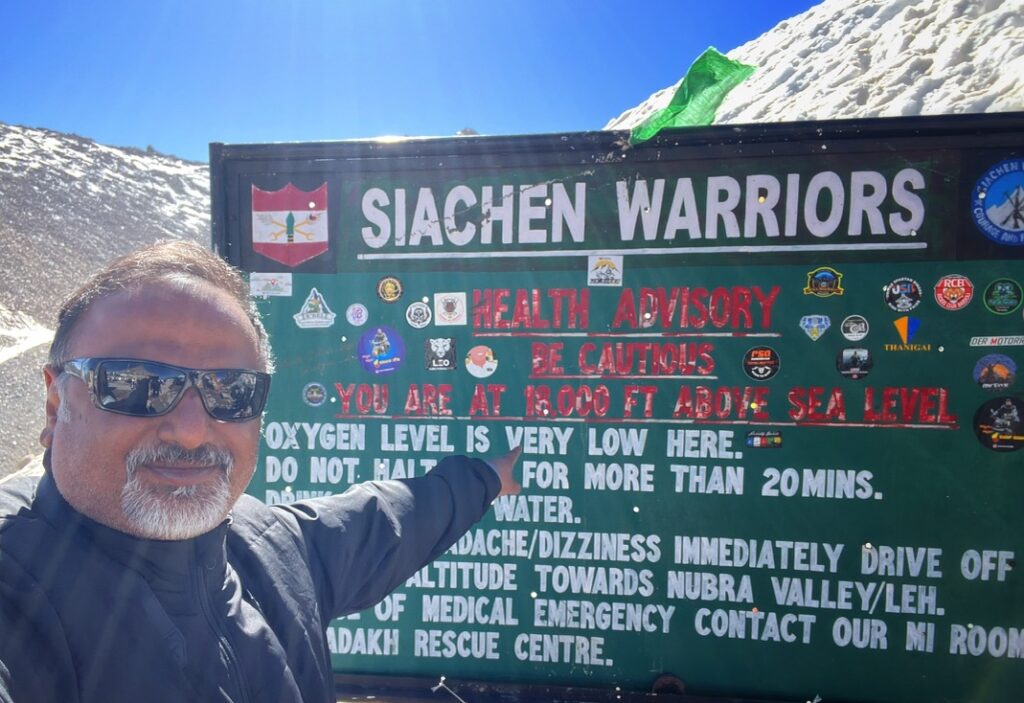
At 17,600 Ft above Sea level and health advisory
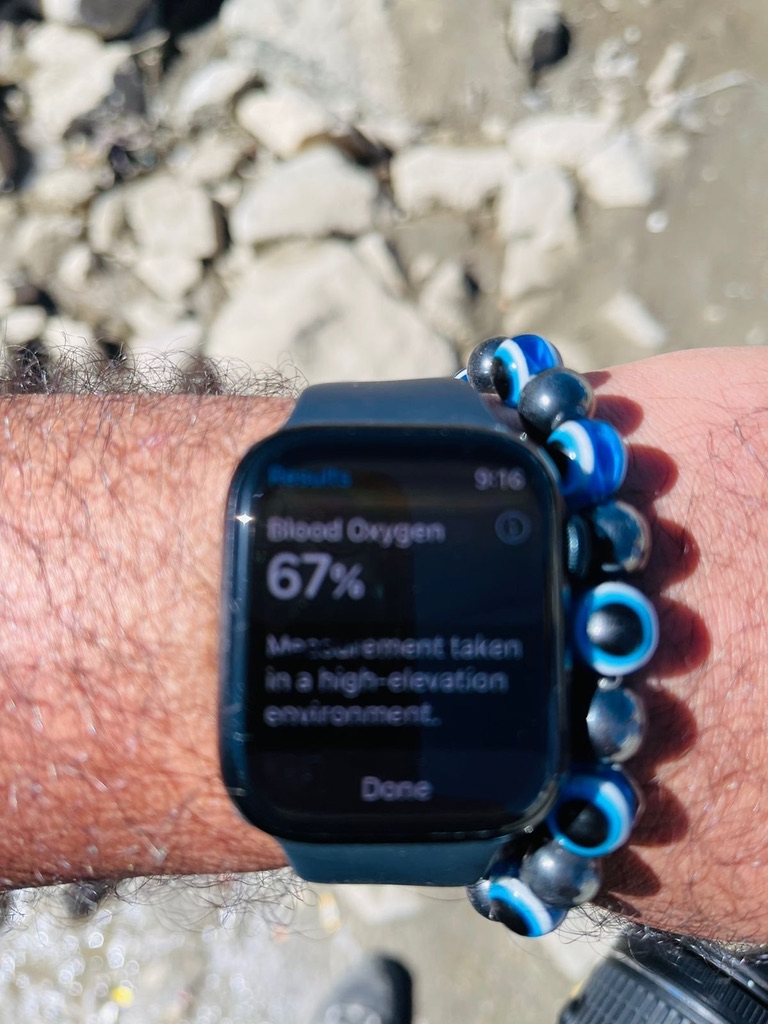
Blood Oxygen at 67 %, This means time to move on
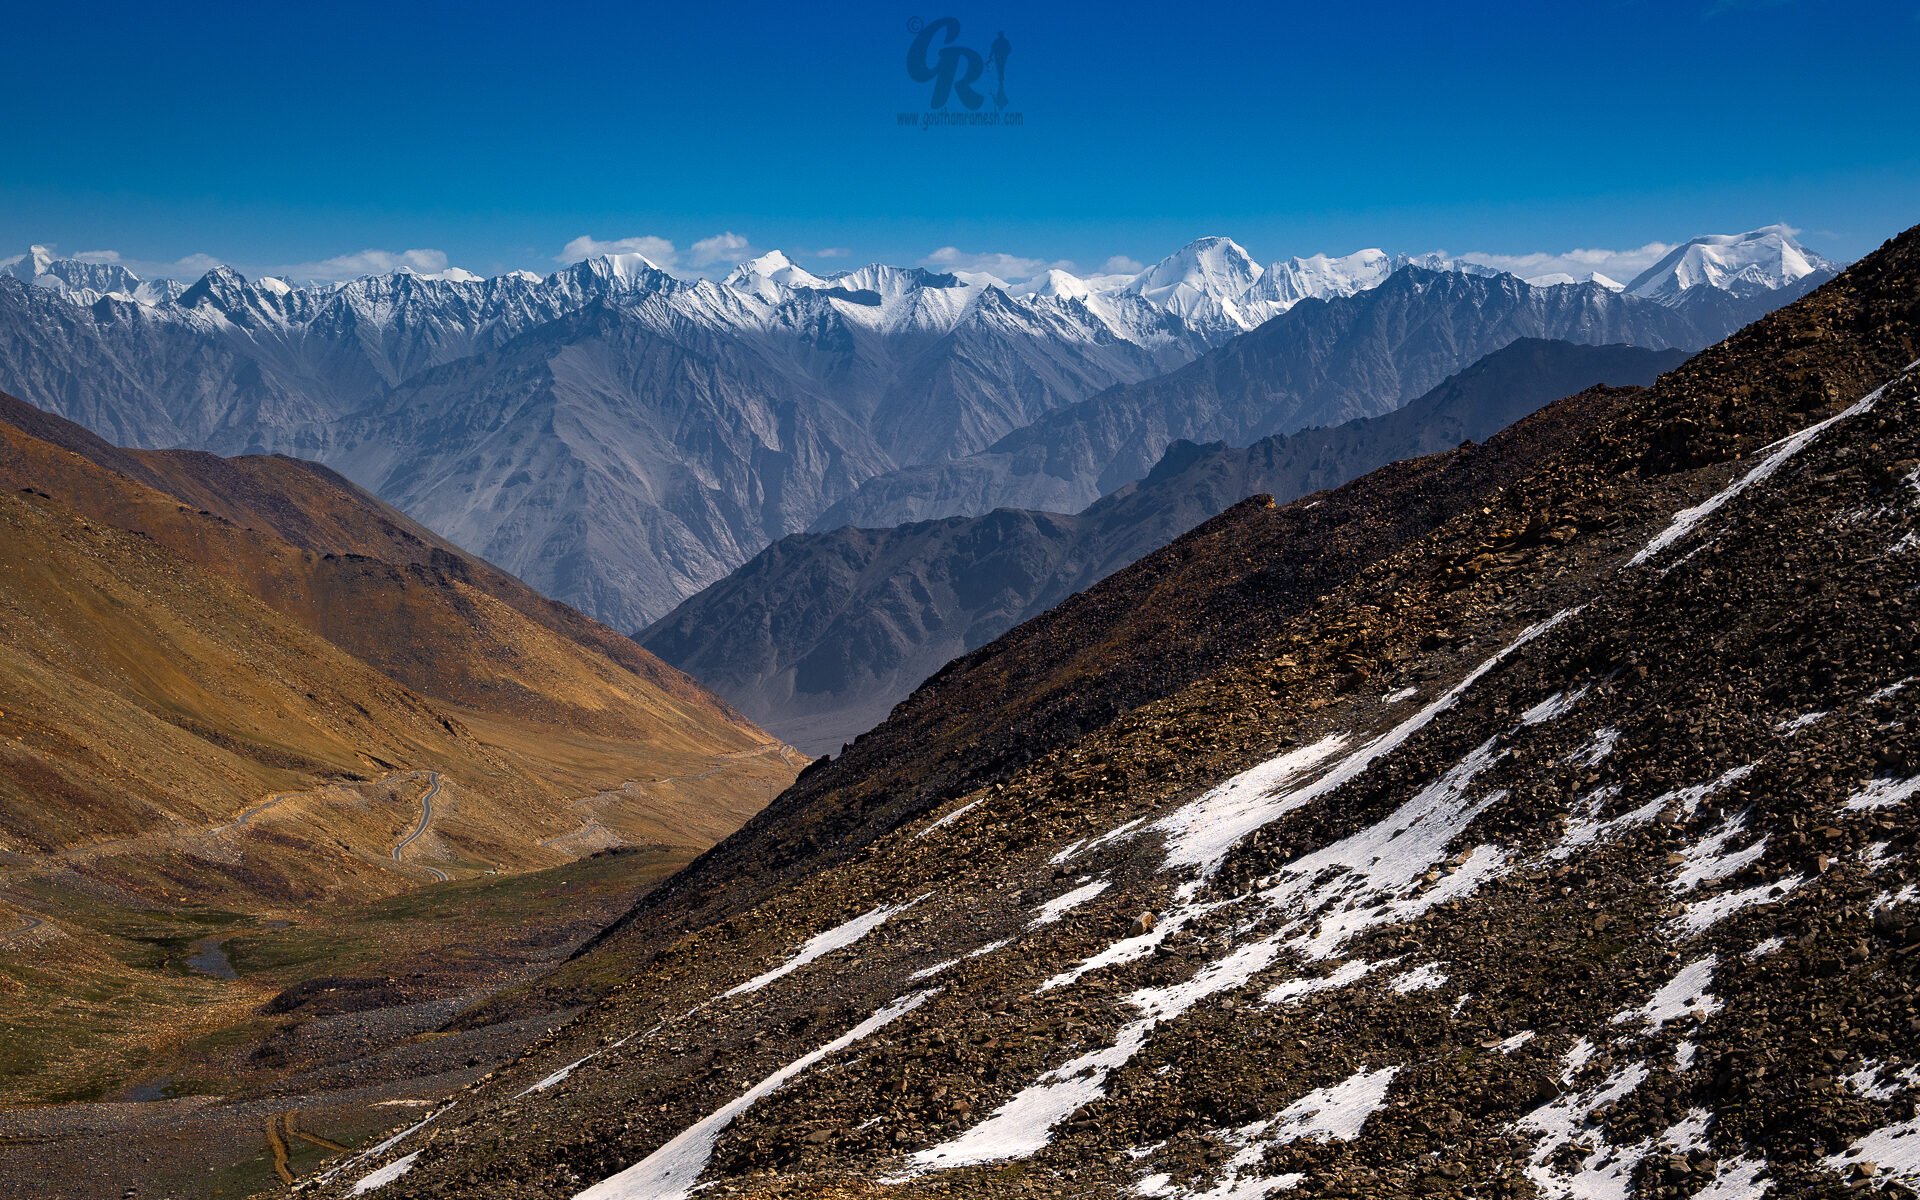
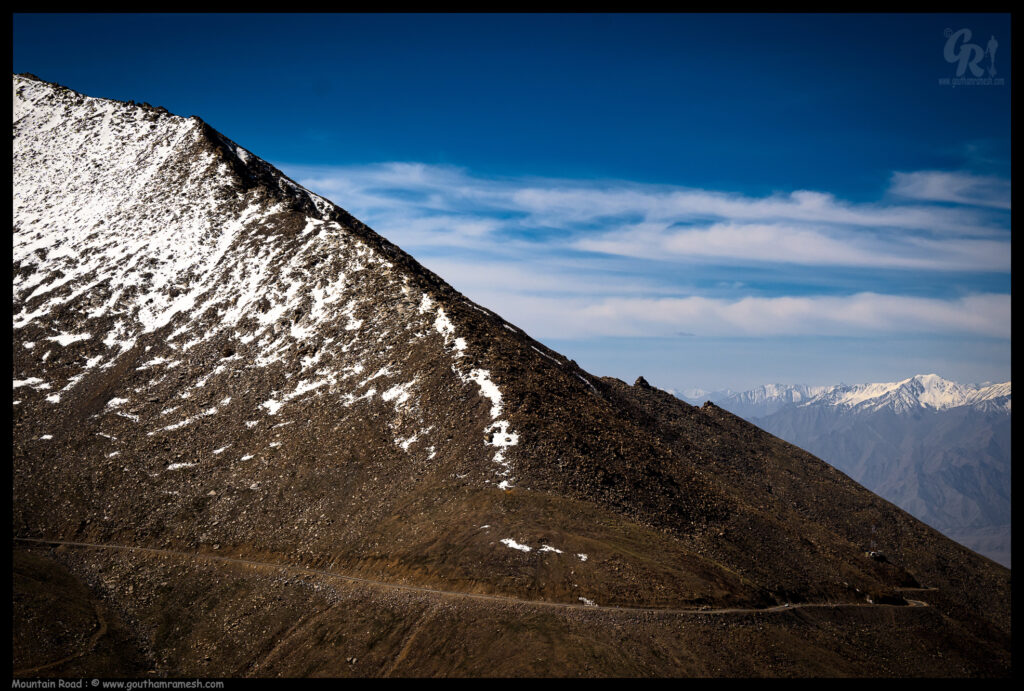
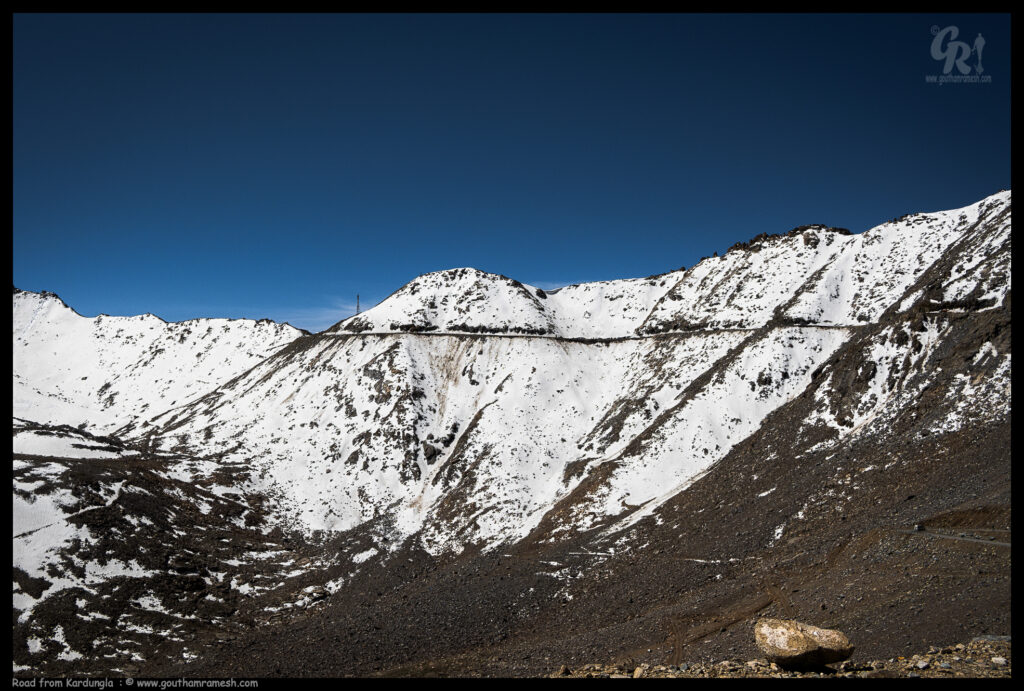
Road to Nubra from Khardungla
Mountain Road, Khardungla

Khardungla Pass!

Nubra

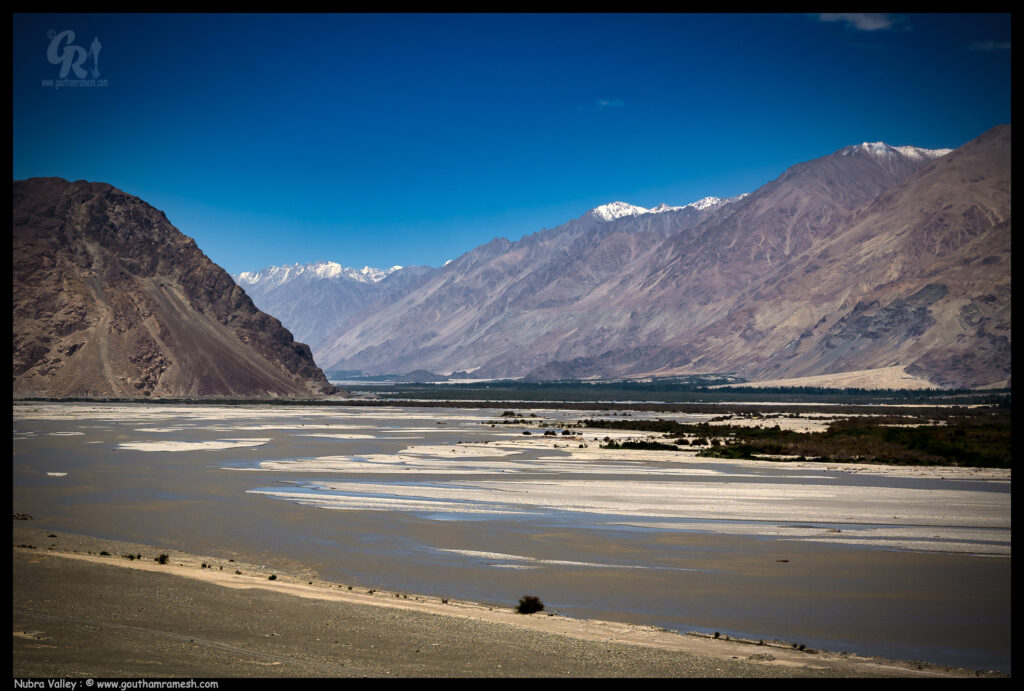
Known for its orchards, scenic vistas, Bactrian camels and monasteries; Nubra Valley is the Northernmost part of Jammu and Kashmir. Situated about 150 km from Leh, Nubra Valley is known as the Orchard of Ladakh and was originally called Ldumra which meant the valley of flowers.

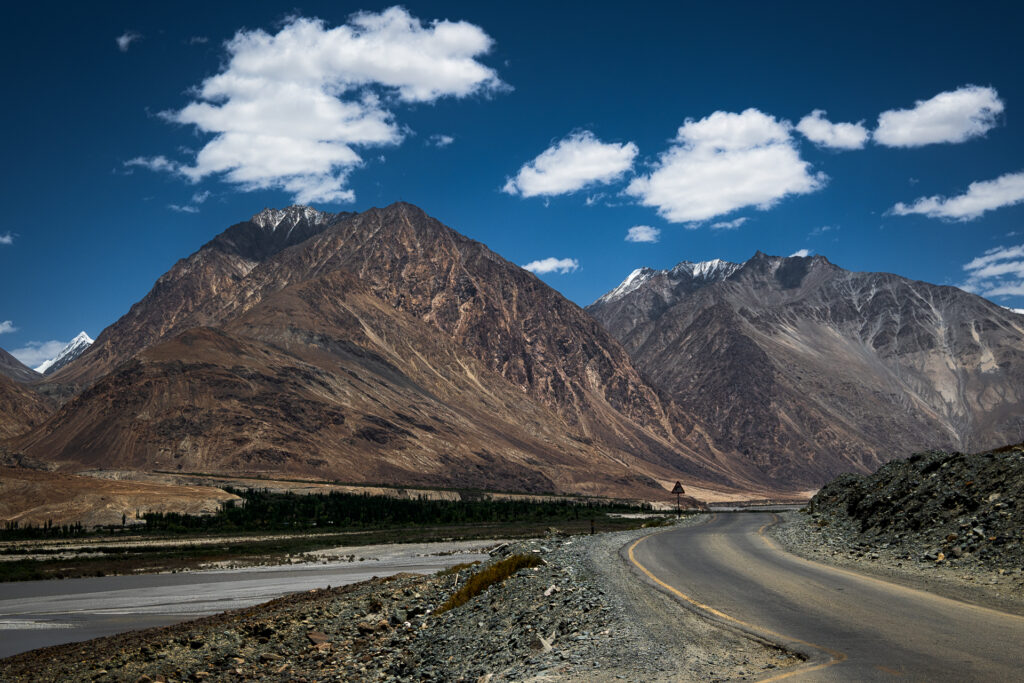
Surrounded by snowcapped Himalayan ranges, Nubra valley lies sandwiched between Tibet and Kashmir. The view of the valley is picturesque and breathtaking. During winter, the whole valley looks like landscape of the moon (reason for calling Moonland) and in summer full of greenery.

Road to Nubra valley
Confluence of Rivers Nubra valley

Hunder

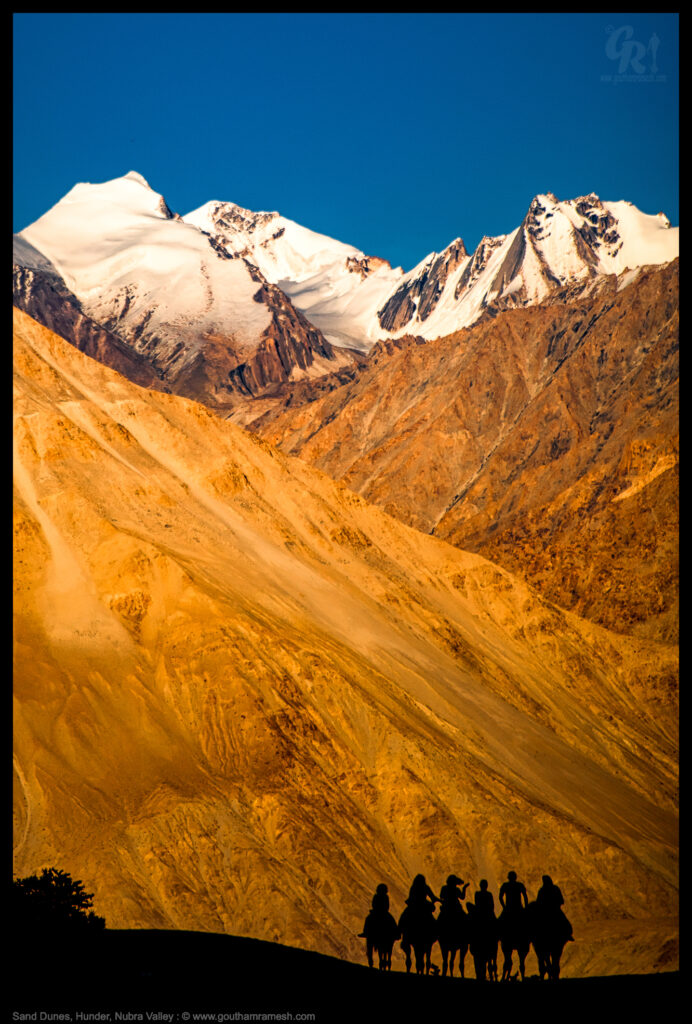
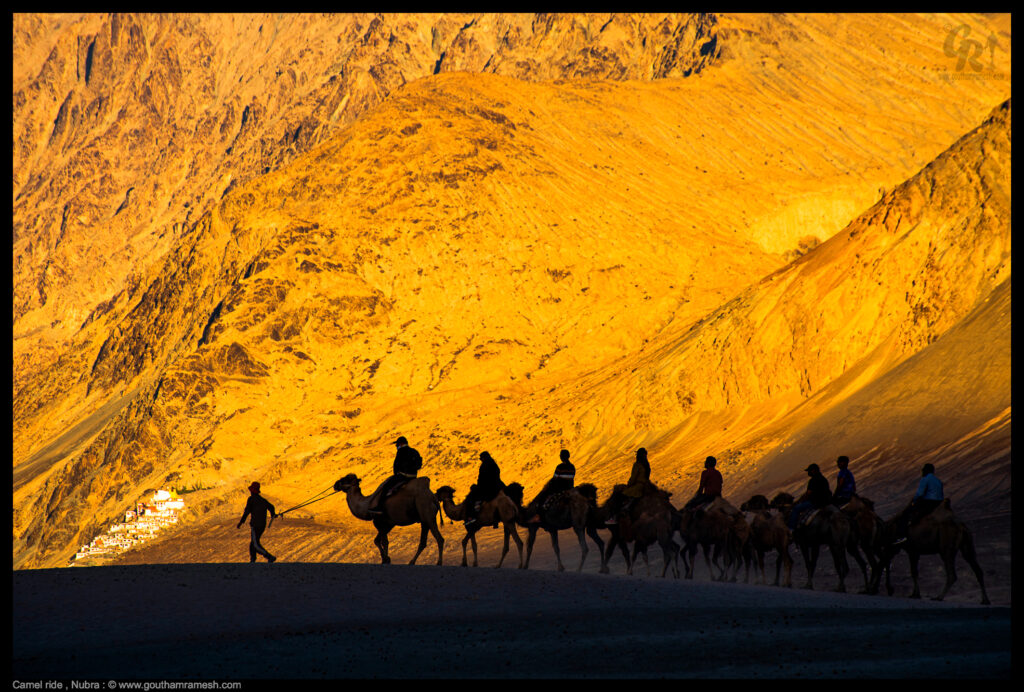
Nubra Valley in Ladakh holds so many surprises for the visitors. One such surprise awaits you at the Hunder Sand Dunes, located about 10 kilometers from Diskit village. Usually, people think of brown sand & one humped camels when the word desert visits their mind, but a different picture awaits you in Hunder. They are famous because of their white rolling sands, with a river flowing close by, trees & snow-capped mountains in the distance. It is unbelievable, when one thinks of it, that a desert could exist at so high an altitude! Equally surprising is the sight of the double humped Bactrian camels, whose two humps enable them to develop resistance to cold, drought & high altitudes. As the evening approaches, and the barren mountains are covered with the crimson hues of the sun, you wonder how such a place could exist in this mad chaotic world of ours.

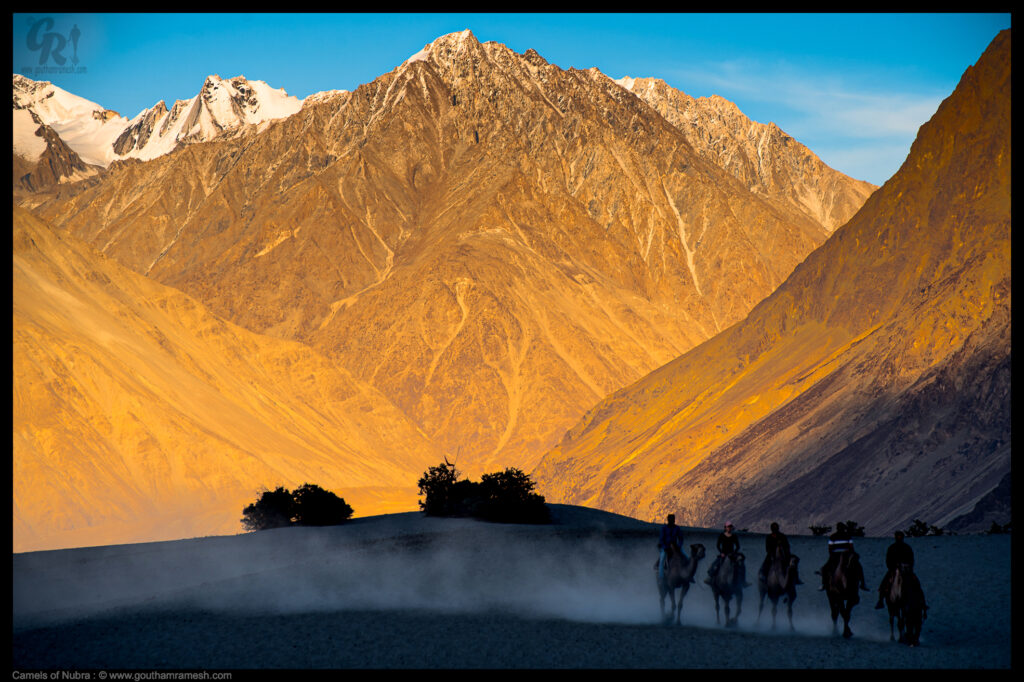
As sun sets, the colors that the mountains take are breathtaking and with bactrian camels dotting the landscape its a paradise.

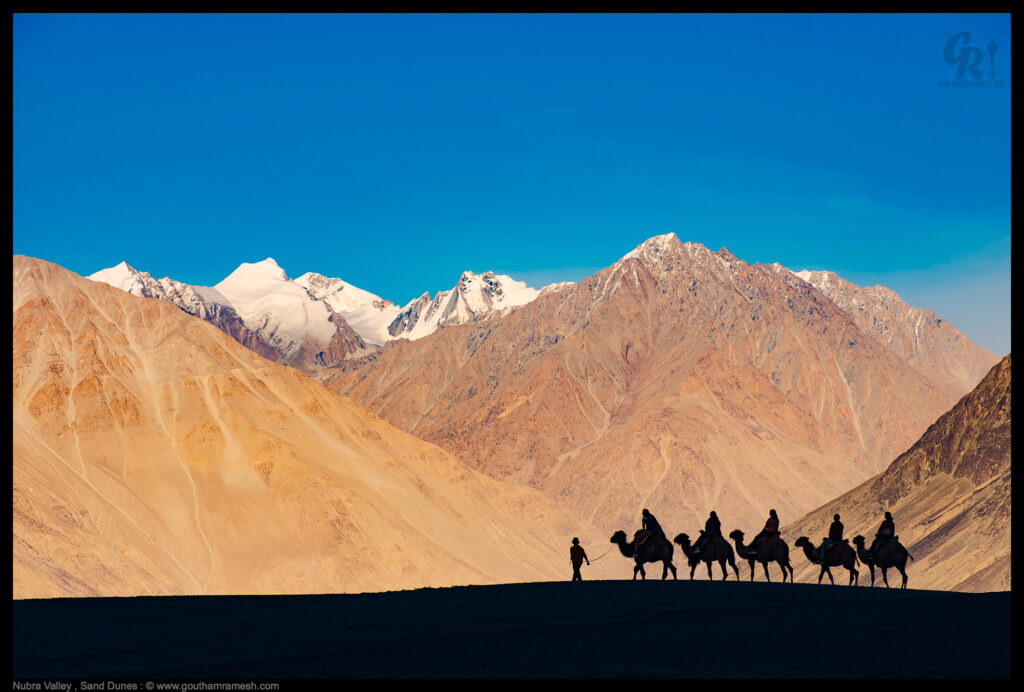
Nubra Camel Ride

The Bactrian or double-humped camel is one of the last remnants of the Silk Road trade in India. These camels, from China and central Asian countries such as Mongolia and Kazakhstan, would carry heavy loads along the rugged terrain of the trade route via Ladakh.

With the closure of the Silk Road, many were left abandoned in Ladakh’s Nubra Valley. The development of modern transport facilities in the remote areas meant the animals weren’t needed anymore. Overlooked and uncared for, their numbers dwindled, pushing them to the brink of extinction in the country.

Since the early 2000s though, the number of Bactrian camels in Nubra has increased—thanks to the residents of the Hunder village in the valley. In 2003, they decided to start camel safaris. As the initiative grew in popularity, the villagers formed the Central Asia Camel Safari, a registered cooperative society in 2009. Other villages in the region, such as Sumoor, Diskit, and Tigger, also jumped on the bandwagon, forming their own camel unions.

Today these safaris, whether along the breathtakingly beautiful Shyok River in the Nubra valley or in areas close to the base camp of the Siachen Glacier, are a big draw with tourists.

Camel Safari
Camel Safari at Hunder
Camels with Diskit Monastery in the background

Day 8-9 : Nubra – Drass

The return leg of our journey started from Hunder to Drass. It was a fantastic drive back and we drove through Kargil and stayed at Drass.

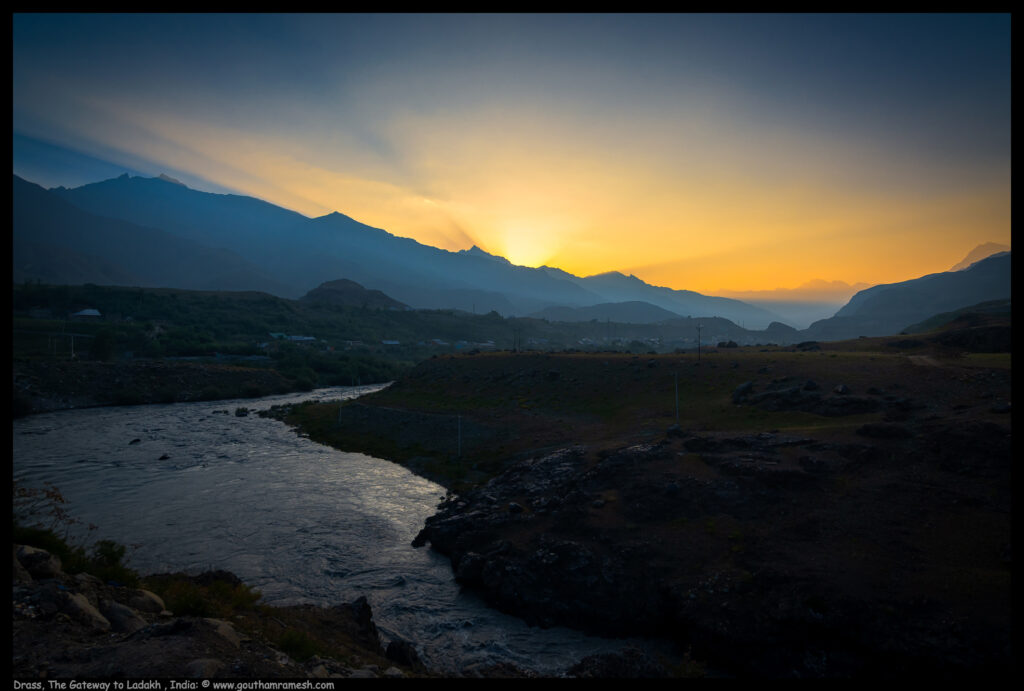
Drass

Dras (also spelt Drass) is a hill station in the Kargil district of the union territory of Ladakh in India. It is on the NH 1 (former name NH 1D before renumbering of all national highways) between Zoji La pass and Kargil town. A tourist hub for its high altitude trekking routes and tourist sites, it is often called “The Gateway to Ladakh”. The government’s official spelling of the town is Drass.

Traditionally, Dras is known as Hem-babs, which means “snow land” with the word “Hem” meaning snow. The average temperature of Dras in winter is -20 degrees Celsius and Dras is the coldest place in India, experiencing an altitude-influenced Continental Mediterranean climate.

Dawn at Drass

Pizza at D’Meadows Drass ( One of the best I ever had )

Day 9-10: Drass- Srinagar

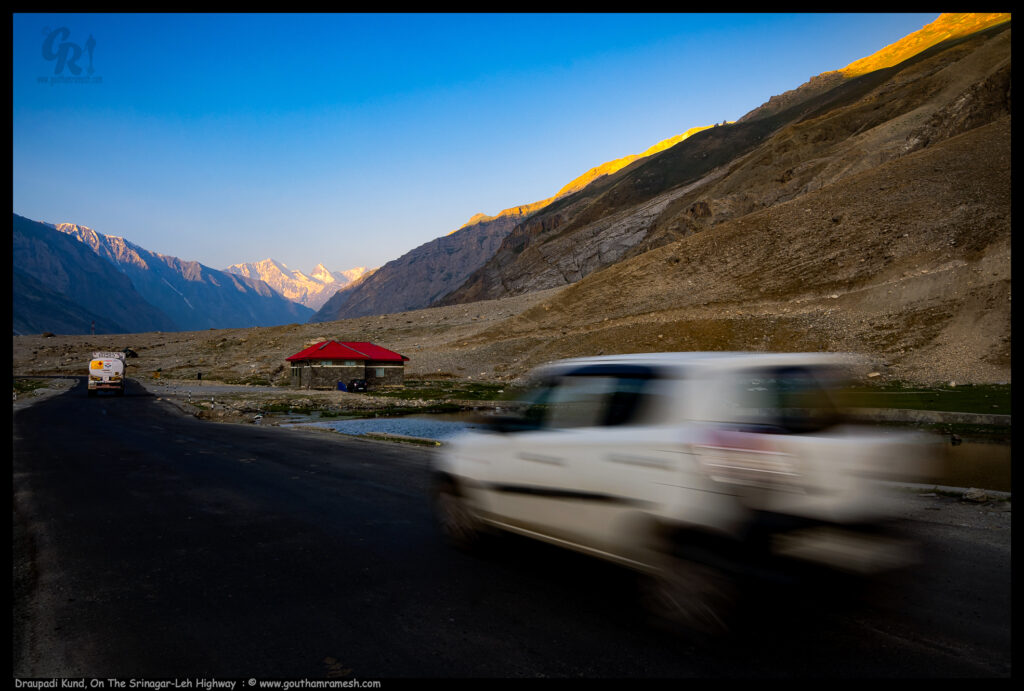
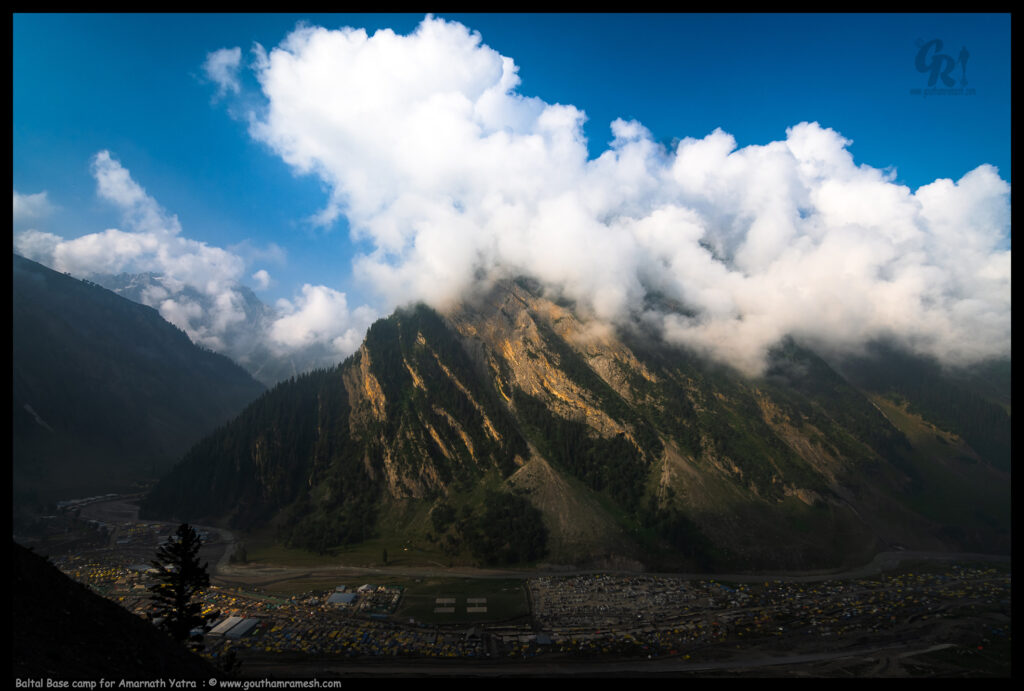
On this day we drove from Drass to Srinagar and also passed through Zojila pass again and had a view of Baltal Base camp and Draupadi Kund

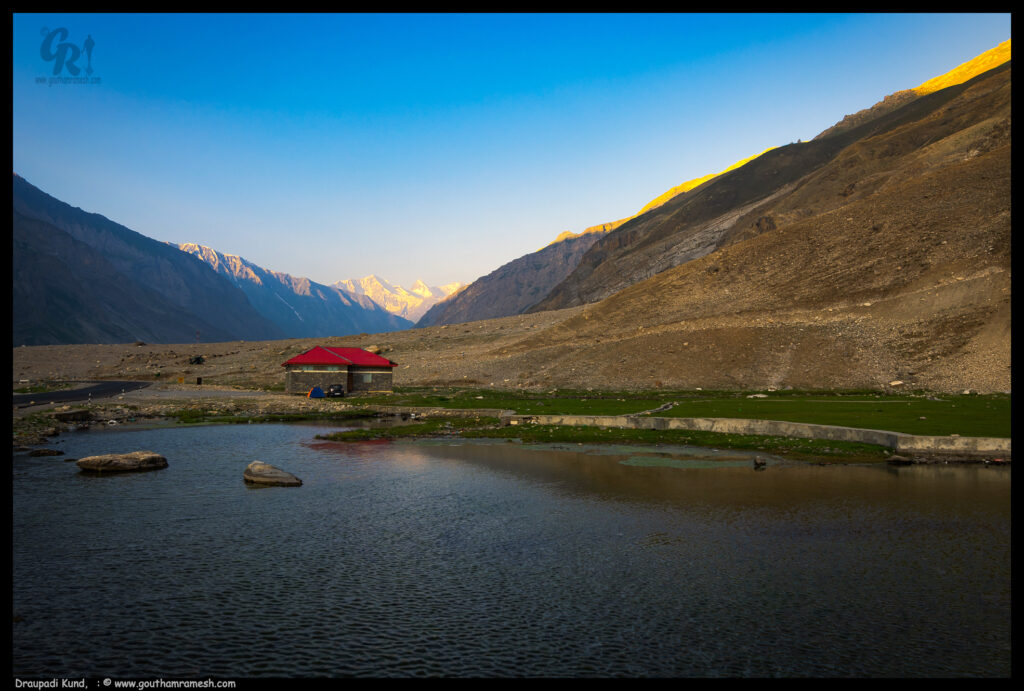
As a child, I often wondered if destinations described in mythical stories were real. One such destination en route Drass from Zoji La, is Draupadi Kund, a magical little lake, surrounded by capped peaks and the misty blue sky. There are many stories attached to this lake. A belief exists that here in Pandaras, a village on the outskirts of Drass is where Draupadi, the daughter of King Panchala in Mahabharata, bathed before finally ascending to the heavens in reach of the higher Himalayas.

You might easily miss this place while you drive, so look out for boards.

Draupadi Kund
Draupadi Kund
Baltal Base camp for Amarnath Yatra

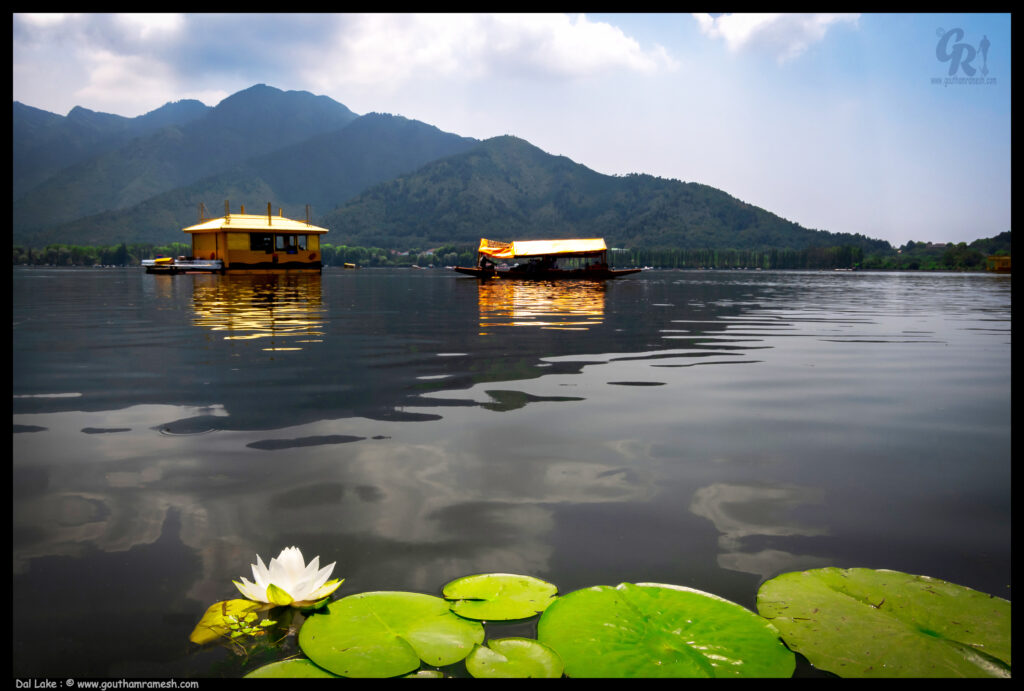
Srinagar Dal lake

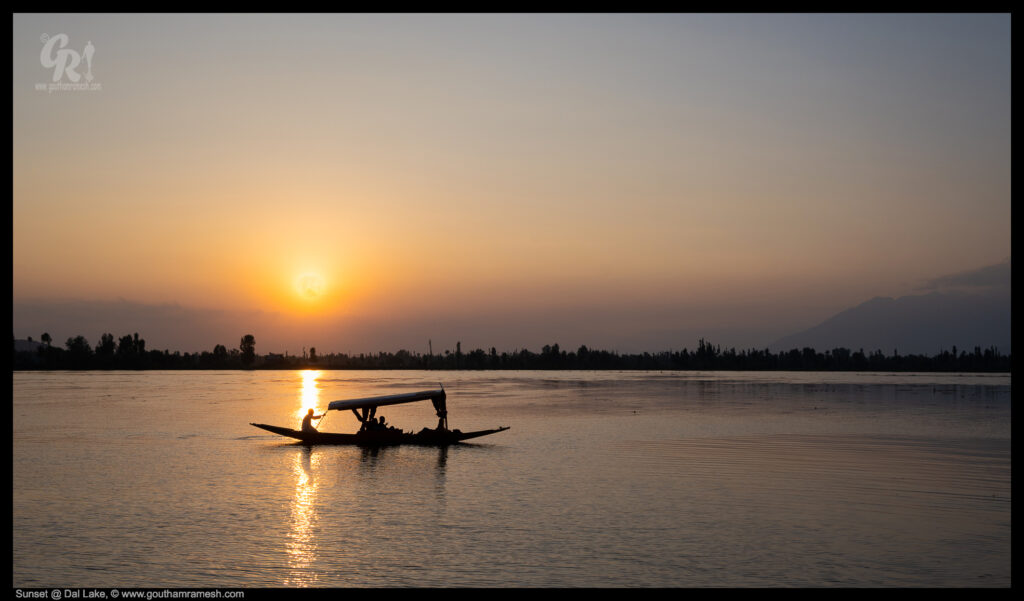
Dal is a lake in Srinagar, the summer capital of Jammu and Kashmir. It is an urban lake, the second largest lake in Jammu and Kashmir, and the most visited place in Srinagar by tourists and locals.

Dal Lake
Sunset Dal Lake

Day 11 : Srinagar- Bengaluru

We concluded our trip by returning back to Bengaluru and I took some shots of Pir Panjal Range again!

Credits

That’s all, readers. Before I conclude I would like to thank Tanver and this trip would not have been possible without Tanveer, who organized this and I learnt a lot from him.

Also my thanks to Mr Javed ( Javed Bhai ) our driver who was with us for 10 days and also let me drive his car at times.

With Javed and Tanveer

Thanks if you like the blog, you can leave a comment at Home Page

Cheers

This image has an empty alt attribute; its file name is TransparentImage-4.png
Goutham Ramesh


Comments:

From: Hema Narayanan ( https://www.hemanarayanan.com/ )

Subject: Travel is oxygen…


… to me! It always has been.  It seemed, after reading your travelogue, that it is for you and Tanveer too. I am so in awe with your images.  Having been to Ladakh 5 times,  I never get enough dosage of oxygen,  blame it on the altitude:). I liked the way you measured the O2 level at Khardungla.

Nothing beats a drive towards Leh.  And you both have explored both Kashmir and Ladakh like true  “travellers” and this is the best way to explore a land.  Be it the authentic Khawa brewing tea pot or the bactrian camels at Nubra, I could feel the pulse of your travel.  Well written Logue.

I have one request to both of you – next time,  take me along :-).

A fellow traveler,
– Hema

 Art and Science of Image critiquing 

Image Critique

 I have been a creator and moderator of a photo critique and sharing platform called CPA (https://creativephotoartist.org/) for last 14 years and the whole idea was to create a platform for photographers to share images and comment on them constructively. While the site has seen its good and bad days the whole crux of the platform was to provide a critique on the images and this made me wonder what is the best way to critique an image. This write up is all about science and art of image critiquing. 

In photography, we have use the term “photo critique” to judge an image and provide feedback to the photographer about that image!

Now, “judge” may be a strong word to use, but the term simply implies that we create a conclusion about something based on a standard. Now what is that standard there must be basis for that standard and what should be the basis for that judgement? 

In art forms which photography is one such form it becomes a subjective issue and we can’t keep subjectivity out of it and the same picture might be judged differently by different people. Some may critique based on technique and technicality, whereas others may use intuition. A few more will use pure bias or feelings, and there are those who will even critique based on their favourite colour. If we want to provide critique effectively, it’s good to be aware of what you’re using as your standards of judgment, even if they’re subjective. 

Is there a method? 

 Yes there is a method for giving critiques as well as receiving it and I will list out some of them. 

 For the critic: 

 First understand why you are giving a critique, here intention matters: Most of the time the author would have posted an image not only to get the viewers impression of it also to get the advice from the viewer with respect to what it means to him and how a picture can be improved. So the first intent of a person giving a critique should be as constructive as possible and explain what the pictures conveys to him and how it can be improved. Great care must be taken to avoid misunderstanding and sarcasm ( we see this a lot) , please do understand photography more or less in art form is a personal feeling, Sarcastic comment or a poorly written comment can be concluded as an assessment of the photographers ability (or lack of it) and it also reflects poorly on the critic as a person. 

 Some tips: 

  1. Study the image technically as well as aesthetically and take your time to understand the reasons behind the shot. Also consider asking these questions “What works? and “What does not work ?). 
  2. Analyse the image based on fundamental areas ( camera knowhow, composition, lighting, visual storytelling, subject selection, post-processing, and specific areas of study). 
  3. After studying the image , list out the technical and aesthetic qualities of the image that appeal and also that do not appeal. 
  4. Start the critique by writing what you like about the image. It is a misconception that a critique should only nitpick. 
  5. List out the technical and aesthetic qualities of the image that needs improvement. 
  6. Whenever possible offer suggestions and improvements. 

 Points to avoid: 

  1. Sarcasm: Being sarcastic and taunting is a strict NO. it indicates a person with high ego and narcissistic mentality and it’s of no use to the author. 
  2. Personal comments: Avoid making personal comments on the author; an image is not an reflection of a person. In civilized world personal attacks and comments do not hold any value and will undermine your intent. 

For the Photographer: 

Let us also discuss how we should receive a critique. First understand receiving a critique is all about learning and it’s feedback to improve. 

Points to consider: 

  1. Do not post images and expect only affirmation (Great Image , Lovely etc. ). 
  2. Respect the person who is critiquing the image, after all he is taking his time to critique an image. 
  3. Leave your EGO behind: we are humans and sometimes critiques can hurt your ego especially if it is negative feedback given by someone who you do not like or whose work you do not appreciate! Please remember every viewpoint is important to improve, photography is a viewer’s art, and every view should matter. 
  4. Study the critique and do the following:
    • What does the feedback tell me about what I can improve on?
    • Based on what I need to improve on, what specific skill in photography do I need to learn more about?
    • Ask questions if you do not understand and seek help 
  5. There might be times where you do not agree, do not get into arguments take it sportively. 
  6. Remember no comments is worse than negative comments. 
  7. Get sociable. 

Credits

https://www.naturephotographers.network/the-art-of-image-critique/

https://photzy.com/learning-the-art-of-effective-photo-critique/

Thanks if you like the blog, you can leave a comment at Home Page

Cheers

This image has an empty alt attribute; its file name is TransparentImage-4.png
Goutham Ramesh

Pulicat Lagoon!

Flamingo

Pulicat Lagoon is the second largest brackish water lagoon in India, after Chilika Lake. Pulicat Lagoon or Pulicat Lake on  the East Coast of India is located 60 kilometres north of Chennai City, in Nellore District of Andhra Pradesh.

In this blog , I will share some pictures of birds shot from this beautiful Lagoon and the Lagoon itself

The lagoon comprises of the following regions, Pulicat Lake in Tamil Nadu & Andhra Pradesh, Marshy Wetland Land Region of Andhra Pradesh, Venadu Reserve Forest of Andhra Pradesh and Pernadu Reserve Forest of Andhra Pradesh. The lagoon is divided in the middle by Sriharikota Link Road, The barrier island of Sriharikota home to the Satish Dhawan Space Centre, ISRO separates the lagoon from the Bay of Bengal.

How to reach.

Pulicat is located 54 km away from Chennai. It can be reached in 1 hour 20 minutes. There are 2 routes to reach Pulicat. One can opt to drive via SH104. On this route, one has to follow Sydenhams Rd, Elephant Gate St and Basin Bridge Rd to Erukkancheri High Rd/Grand Northern Trunk Rd in Vasuki Nagar. From there on, you can continue onto Erukkancheri High Rd/Grand Northern Trunk Rd, 100 Feet Rd and SH 104 to Pulicat. The other route involves driving via SH 56 and SH 104.

Where to Stay

There are very options to stay at Pulicat , however if you need a comfortable stay look for hotels in Gummidipoondi / Ponneri ( 1 hr drive from Pulicat )

Hiring a Boat

I strongly recommend @pulicatlakeboating for anyone wanting to shoot Birds in Pulicat lake. Luke and his son Franklin are experts in tracking birds and are one of the finest you can hire.

Pulicat team!
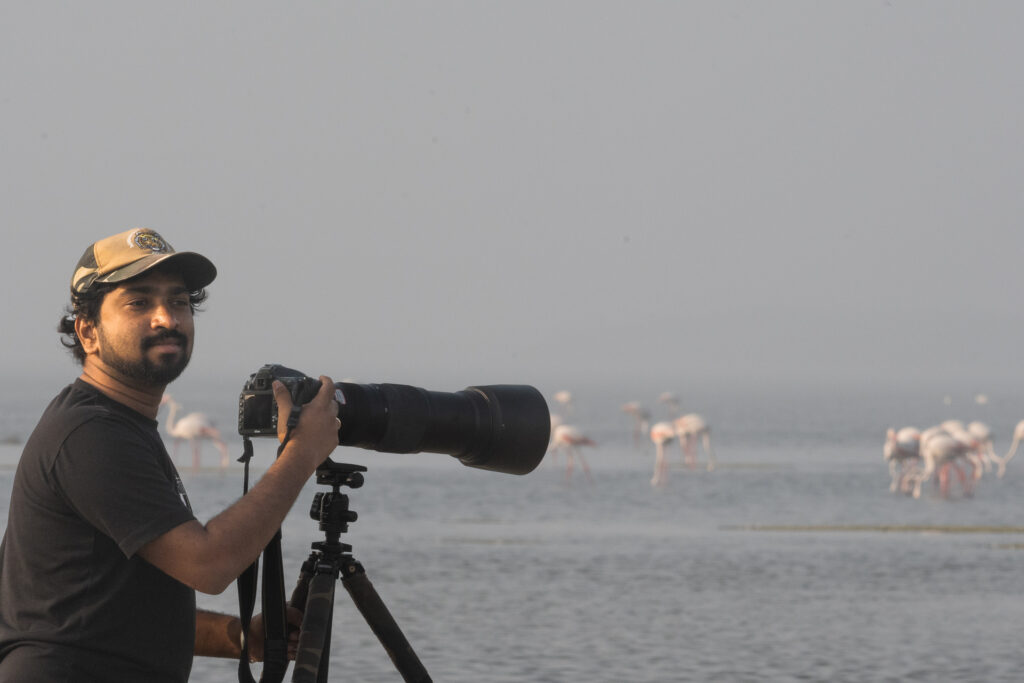
Arjun, Shooting Flamingoes

Best Time to Visit

The best time to visit Pulicat Lake Bird Sanctuary is between October to March. The temperature is mild and pleasant and makes travelling to the area easy. This is also the best time to observe the migratory birds and especially the flamingos.

Some Shots

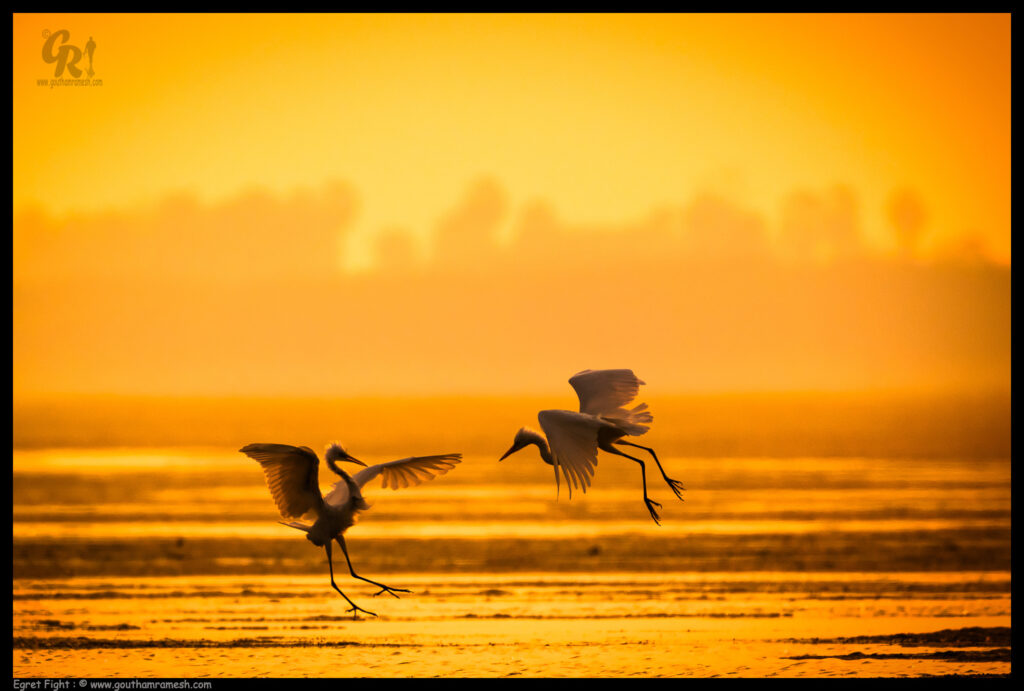
Egret fight 

Exposure: F5.6 1/4000 , ISO 400 , Natural Sunlight.

Grear:
Nikon Zfc
Nikkor VR 200-500mm F5.6ED + 1.4 TC

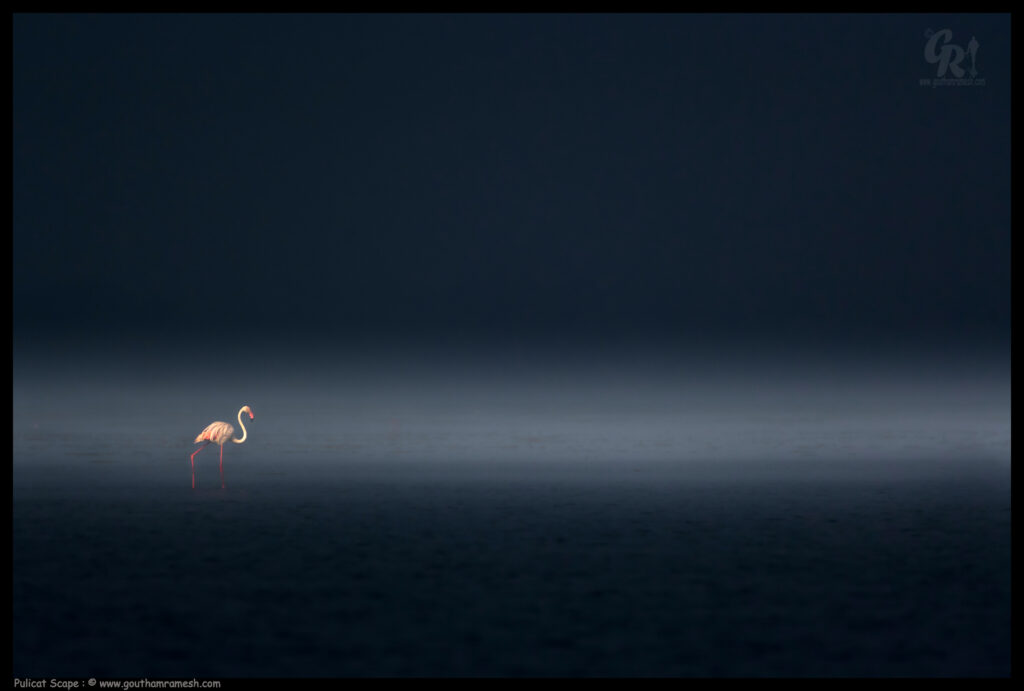
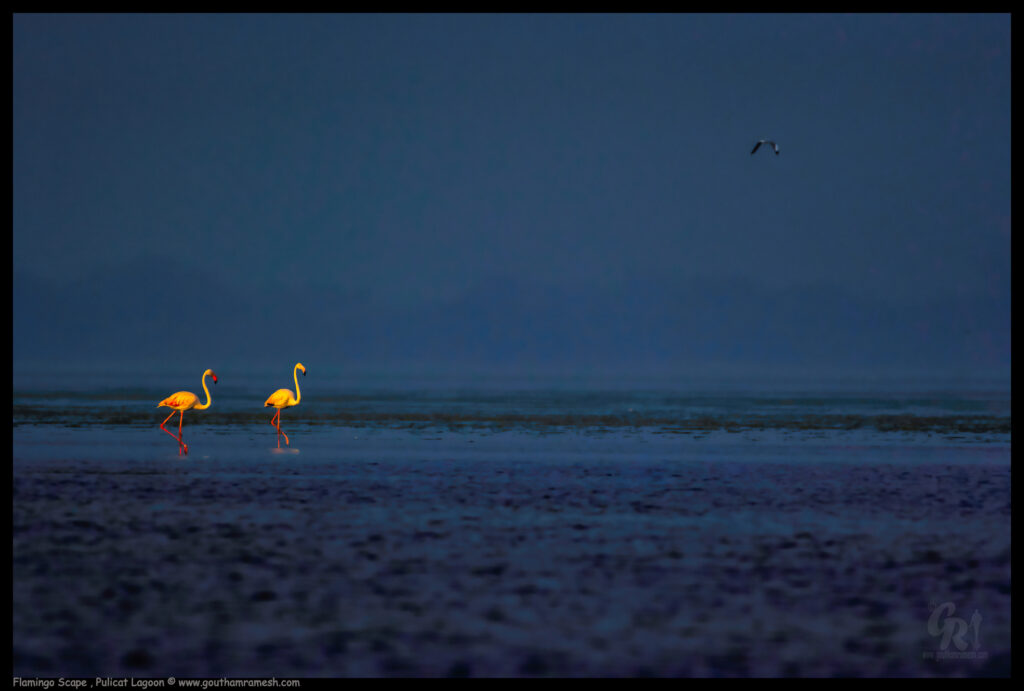
Pulicat Scape with a distance flamingo

Our eye is the best camera , however we take and whatever we use .. sometimes in hazy conditions we can’t get what our eye sees.
I tried to selectively process mist using layered mist to create a almost surreal yet natural looking pulicat scape with a distant flamingo.

Exposure: F8 1/2000 , ISO 800 , Natural Sunlight.

PP: Selective processing for mist /fog

Grear:
Nikon Zfc
Nikkor VR 200-500mm F5.6ED + 1.4 TC

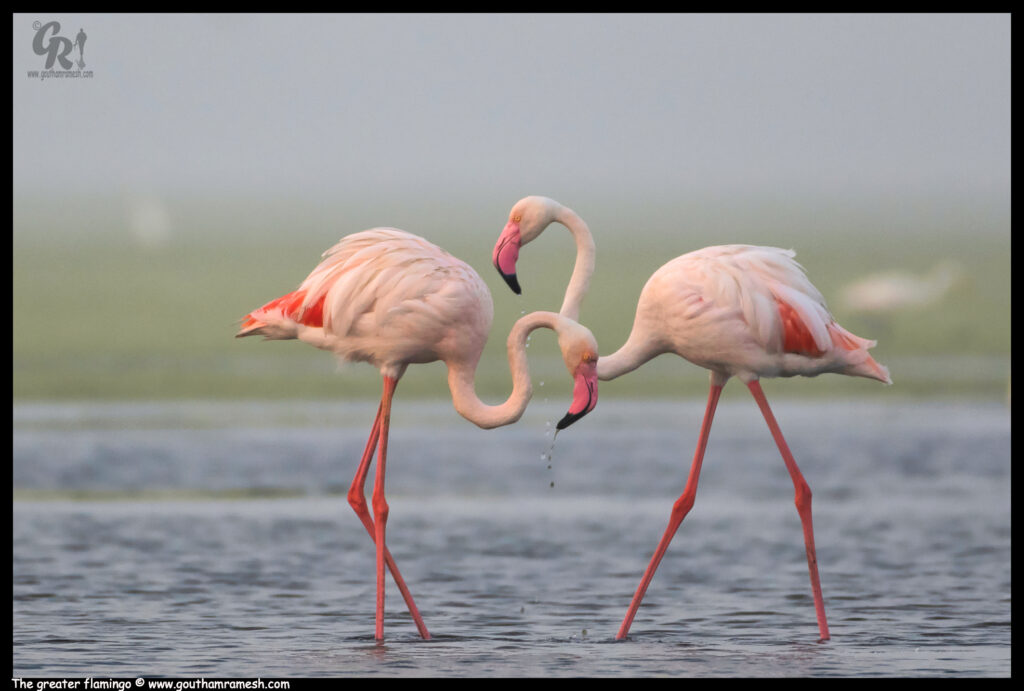
The greater flamingos

The greater flamingo is the most widespread and largest species of the flamingo family. It is found in Africa, the Indian subcontinent, the Middle East, and in southern Europe

Exposure: F8 1/320 , ISO 800 , Natural Sunlight.

Grear:
Nikon Zfc
Nikkor VR 200-500mm F5.6E with 1.4 TC

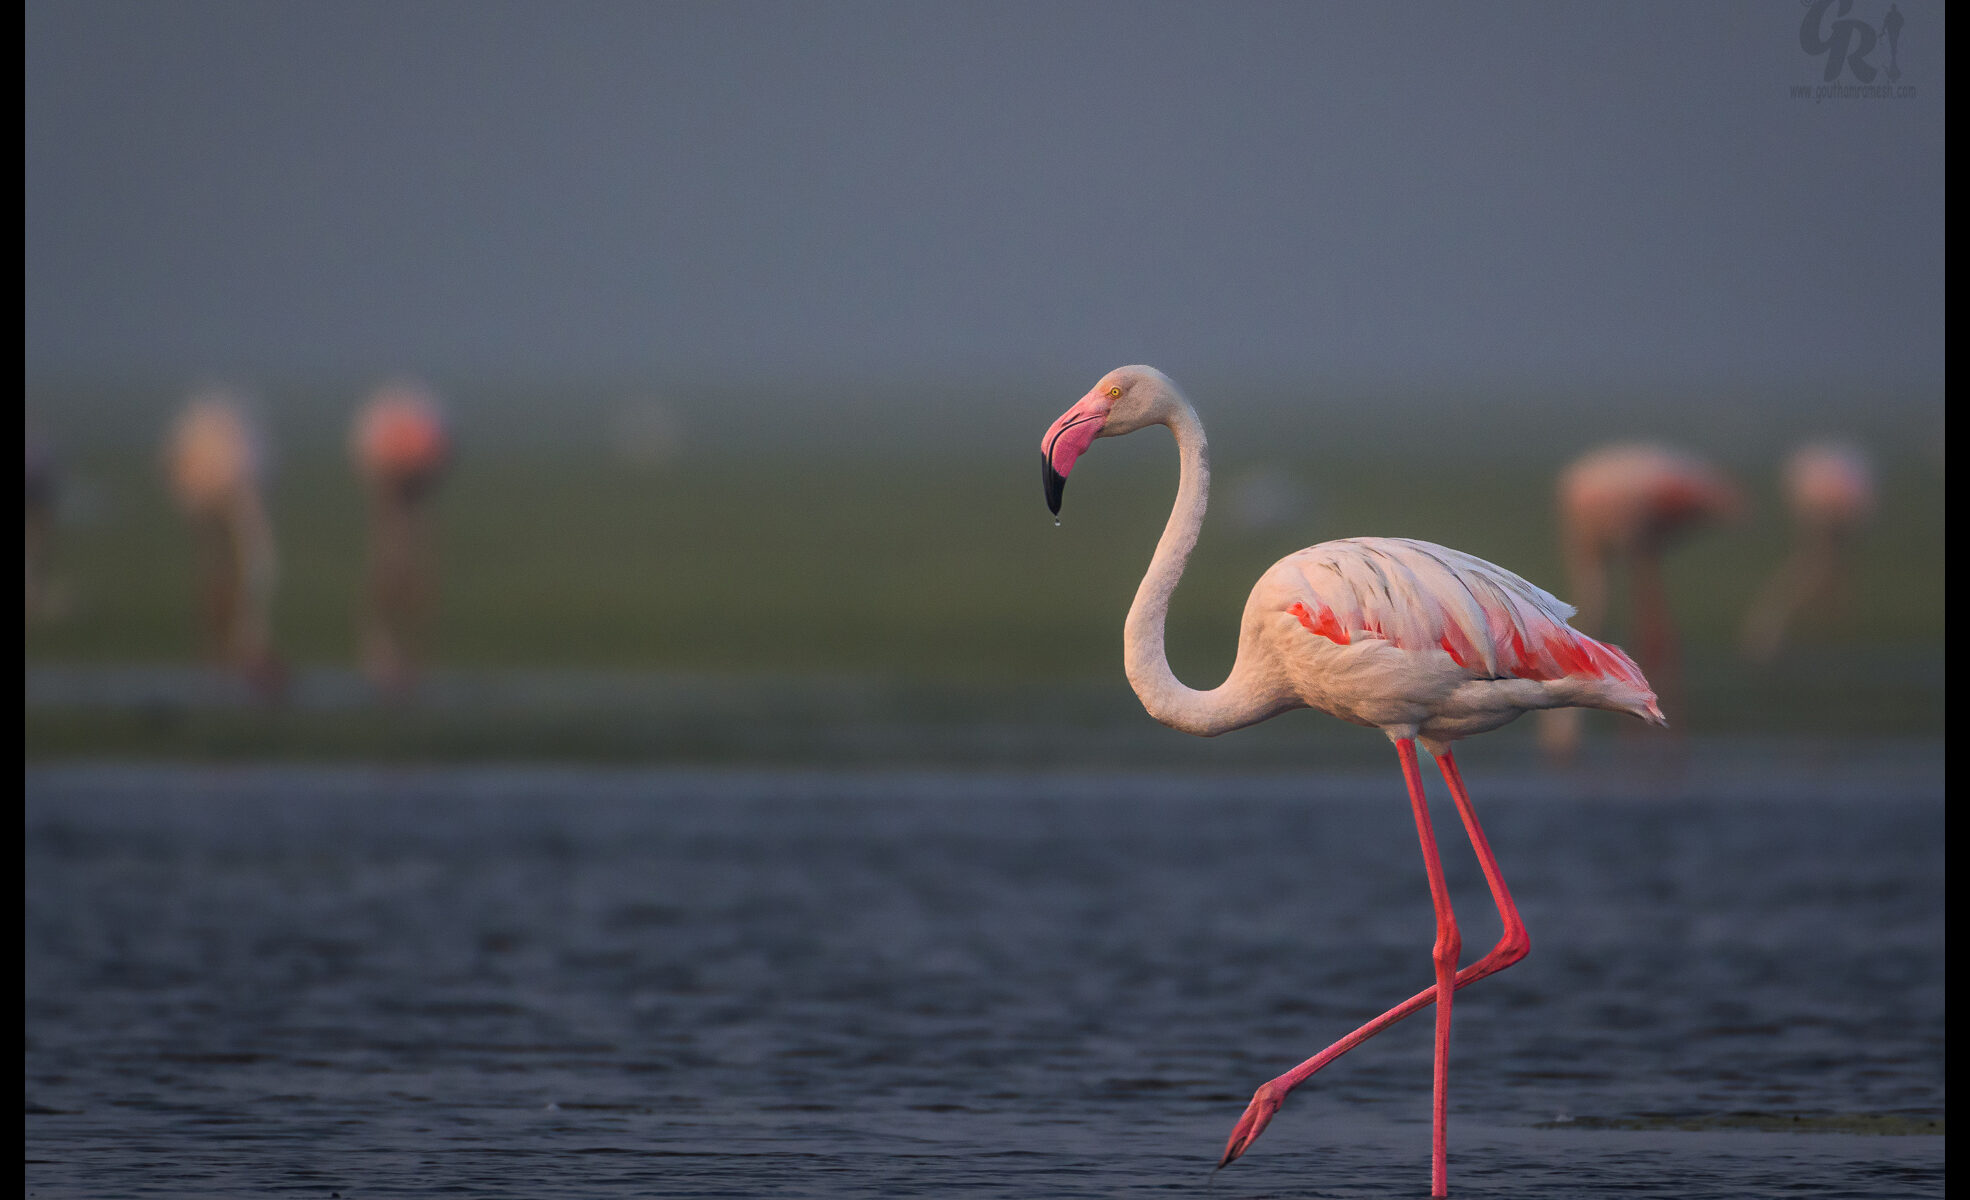
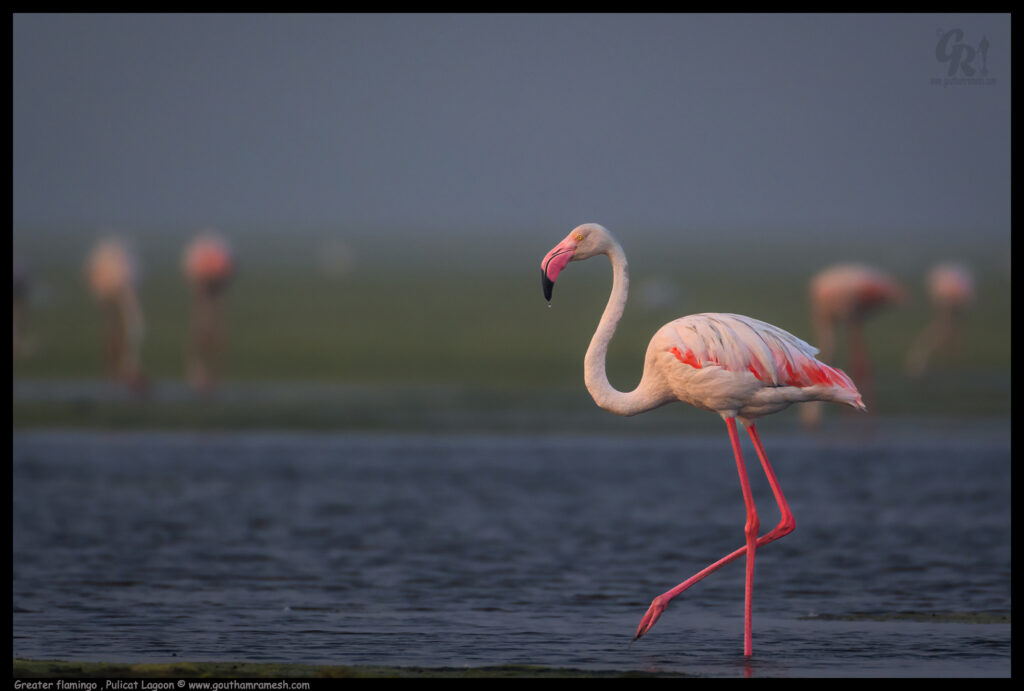
Greater Flamingo

This is the main attraction in pulicat … these are magnificent and graceful birds .. they have inspired a ballet and many dance forms

Exposure: F8 1/400 , ISO 800 , Natural Sunlight.

Grear:
Nikon Zfc
Nikkor VR 200-500mm F5.6ED with 1.4x TC


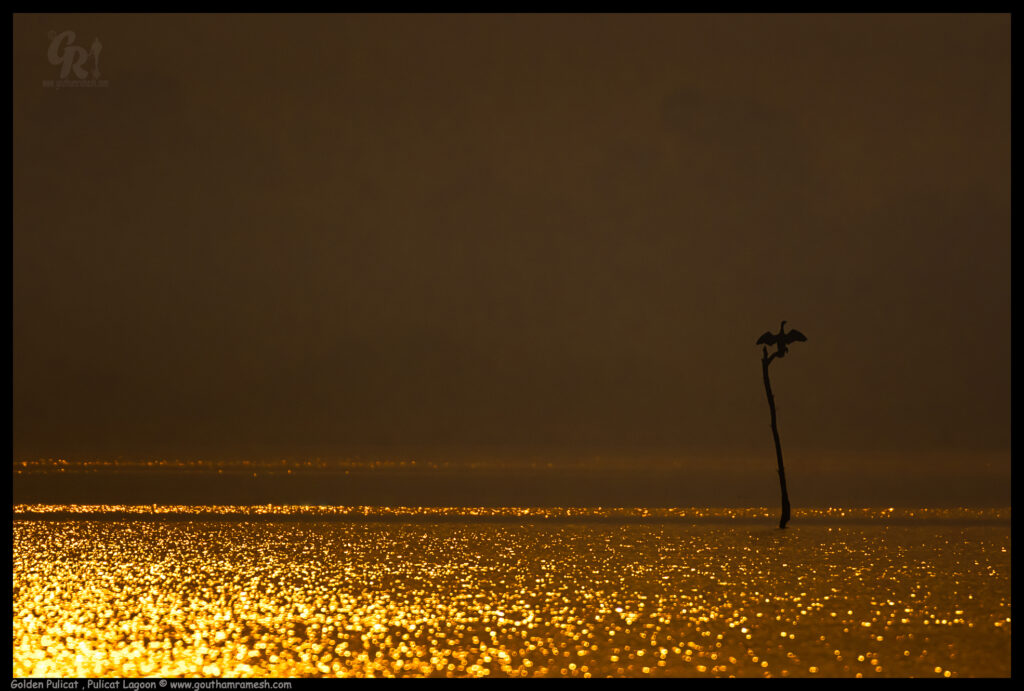
Golden Pulicat 

Sun set is special in pulicat .. with golden hues of setting sun lighting up water … and what a way to show with a distant cormorant basking

Exposure: F8 1/4000 , ISO 800 , Natural Sunlight.

Grear:
Nikon Zfc
Nikkor VR 200-500mm F5.6E + 1.4x TC

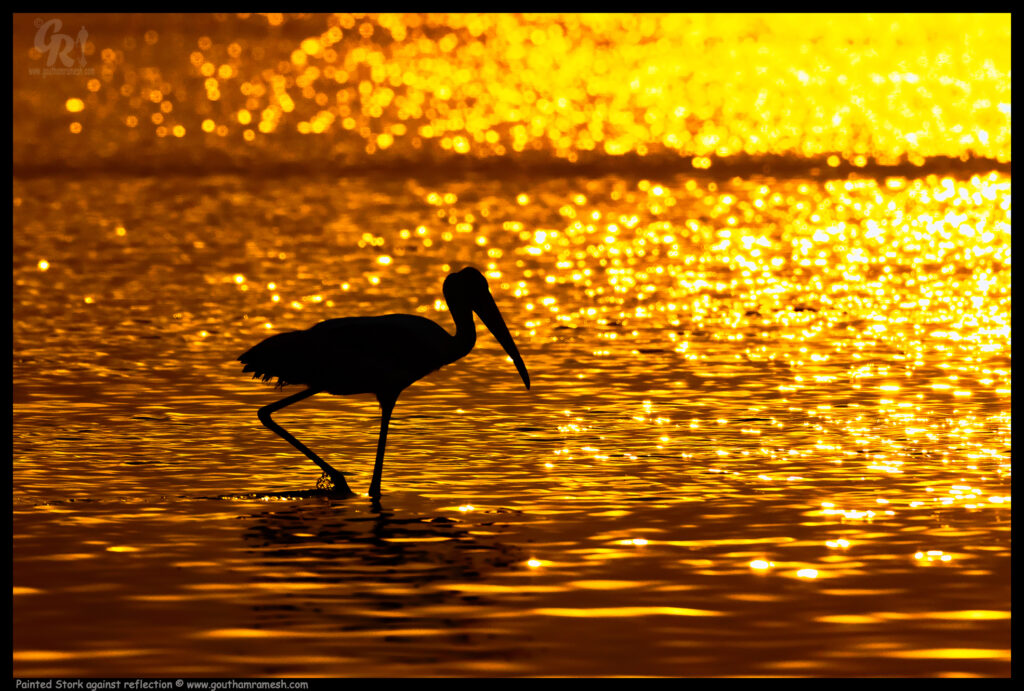
Painted Stork against setting sun reflection

Exposure: F8 1/4000 , ISO 800 , Natural Sunlight.

Grear:
Nikon Zfc
Nikkor VR 200-500mm F5.6ED

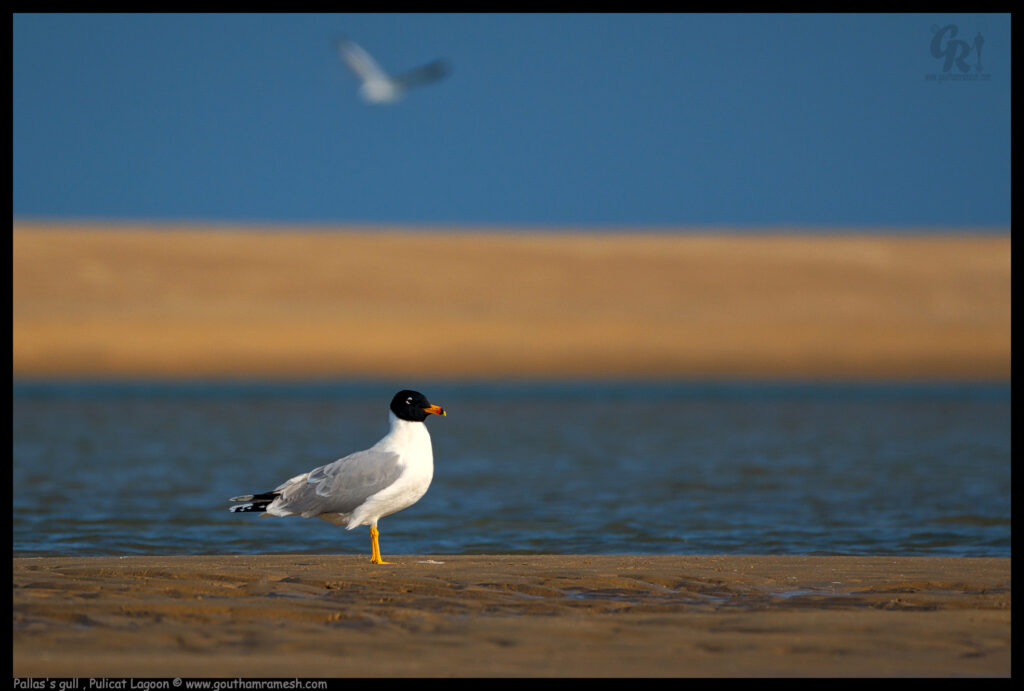
Palla’s Gull

Pallas’s gull (Ichthyaetus ichthyaetus), also known as the great black-headed gull, is a large bird species.
This species breeds in colonies in marshes and islands from southern Russia to Mongolia. It is migratory, wintering in the eastern Mediterranean, Arabia and India. This gull nests on the ground, laying between two and four eggs.

Exposure: F5.6 1/2000 , ISO 400 , Natural Sunlight.

Grear:
Nikon Zfc
Nikkor VR 200-500mm F5.6E

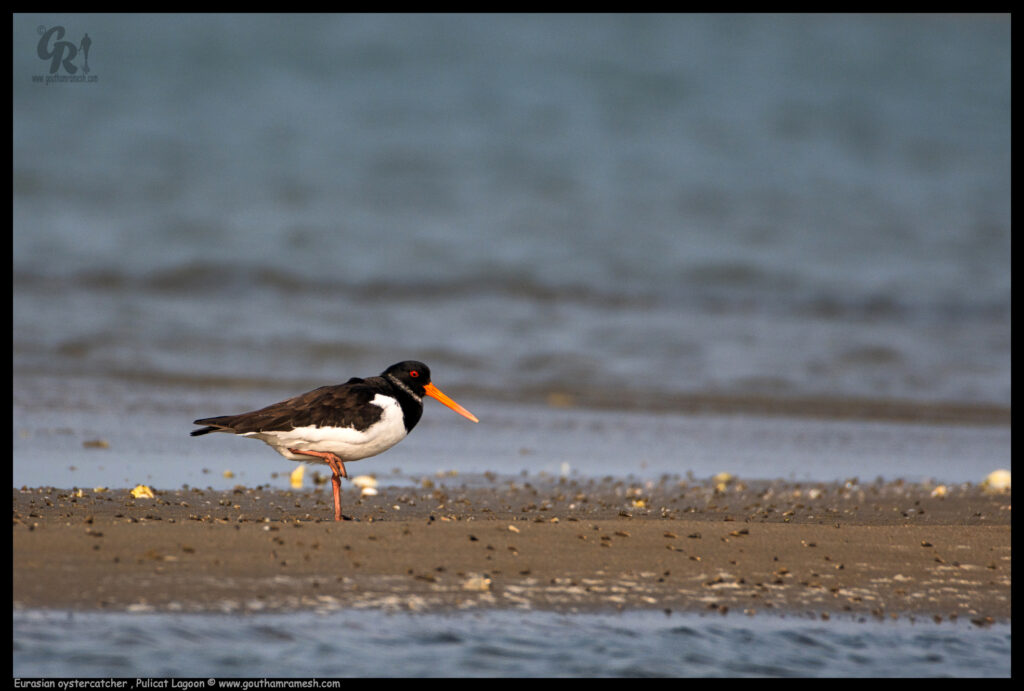
Eurasian oystercatcher

The Eurasian oystercatcher (Haematopus ostralegus) also known as the common pied oystercatcher, or palaearctic oystercatcher, or (in Europe) just oystercatcher, is a wader in the oystercatcher bird family Haematopodidae

Exposure: F0 1/250 , ISO 400 , Natural Sunlight.

Grear:
Nikon Zfc
Nikkor VR 200-500mm F5.6E + 1.4x TC

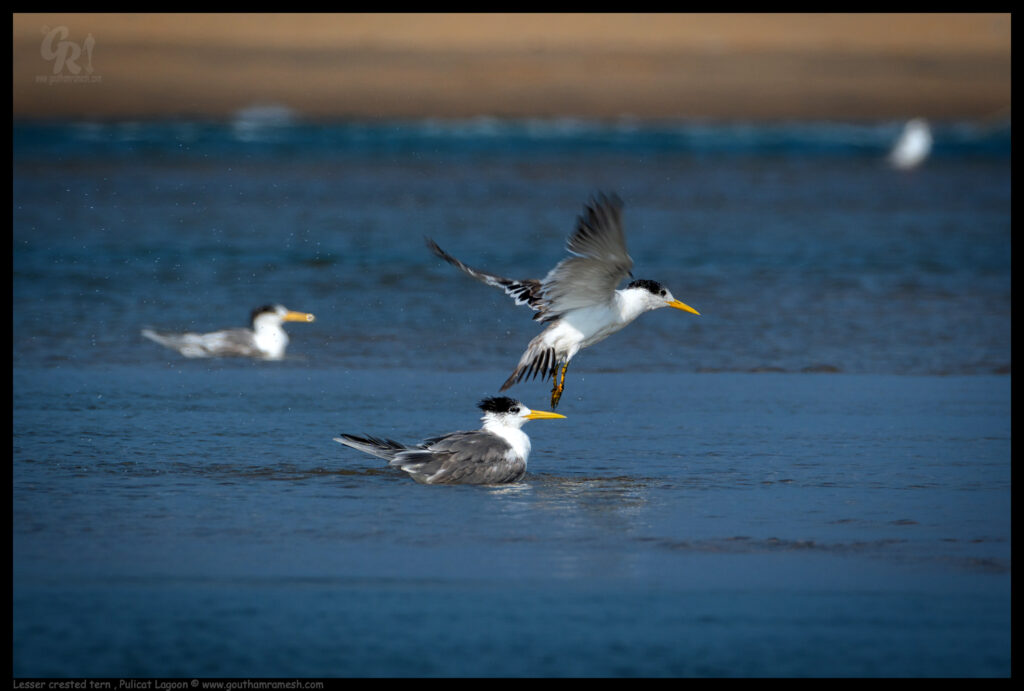
The lesser crested tern (Thalasseus bengalensis)is a tern in the family, Laridae. It breeds in subtropical coastal parts of the world mainly from the Red Sea across the Indian Ocean to the western Pacific, and Australia, with a significant population on the southern coast of the Mediterranean on two islands off the Libyan coast. Accidental breeding has also been reported in Italy and France. The Australian birds are probably sedentary, but other populations are migratory, wintering south to South Africa.

Exposure: F10 1/640 , ISO 200 , Natural Sunlight.

Grear:
Nikon Zfc
Nikkor VR 200-500mm F5.6E

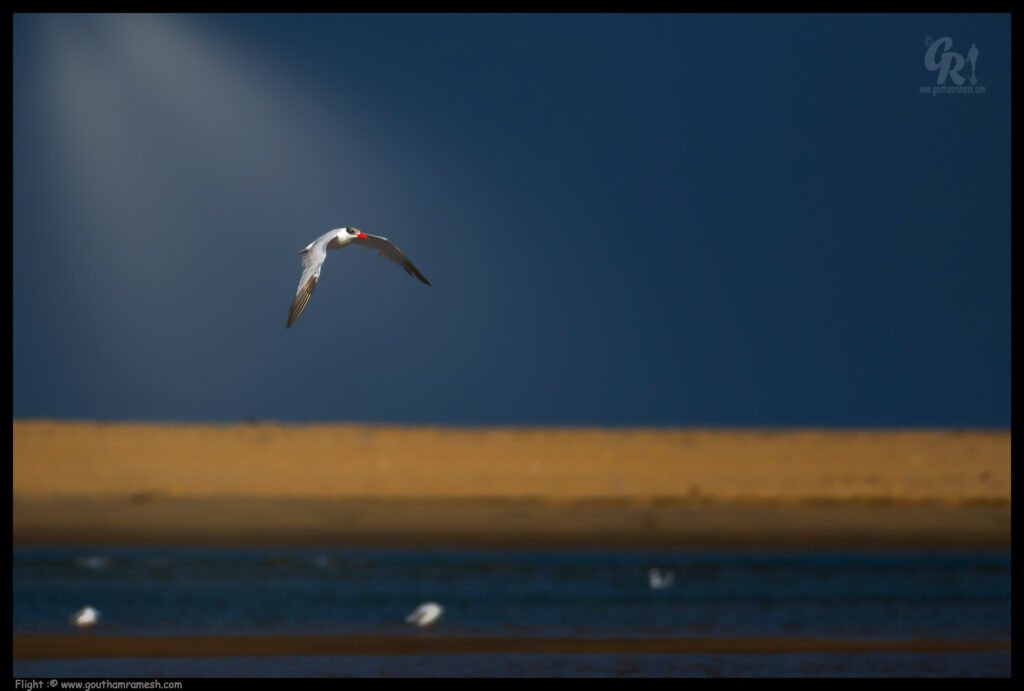
Tern Scape , Surrealism

Love shooting and creating scapes to show minimalist surrealism

PP: Selective processing for sunrays

Grear:
Nikon Zfc
Nikkor VR 200-500mm F5.6ED + 1.4 TC

Flamingoes

Exposure: F8 1/2000 , ISO 800 , Natural Sunlight.

Grear:
Nikon Zfc
Nikkor VR 200-500mm F5.6E + 1.4x TC

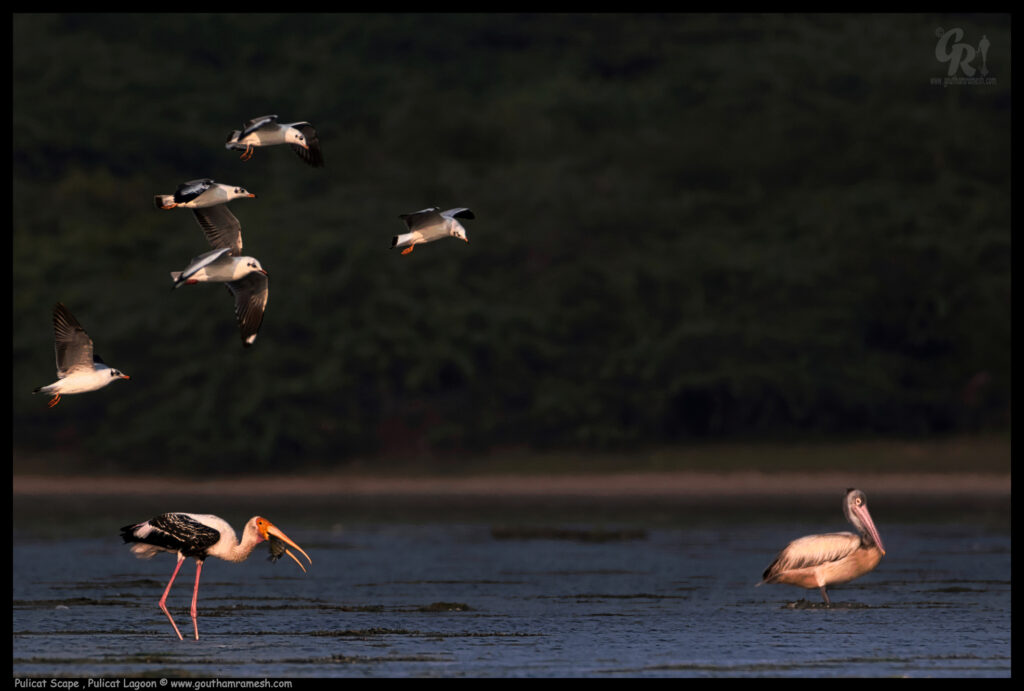
Evening Pulicat Scape

This is a typical activity in a lagoon as sun goes down . PS : This is as shot not a composite 🙂

1. Painted Stork with Fish
2. Lesser terns mobbing it
3. Pelican is checking what’s the commotion

Exposure: F8 1/500 , ISO 400 , Natural Sunlight.

Grear:
Nikon Zfc
Nikkor VR 200-500mm F5.6E + 1.4x TC

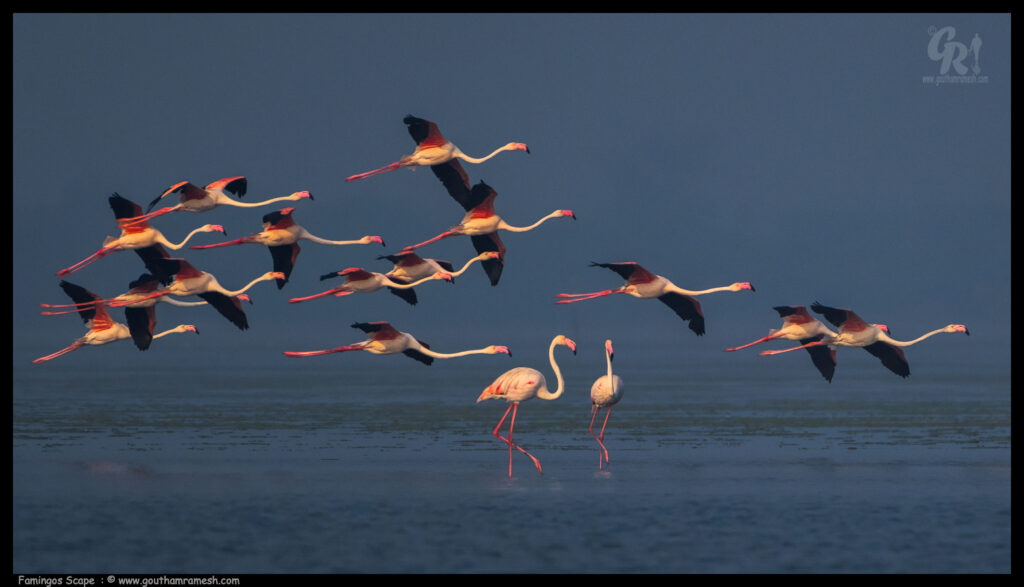
Flamingoes In flight

xposure: F8 1/2000 , ISO 800 , Natural Sunlight.

Grear:
Nikon Zfc
Nikkor VR 200-500mm F5.6E + 1.4x TC

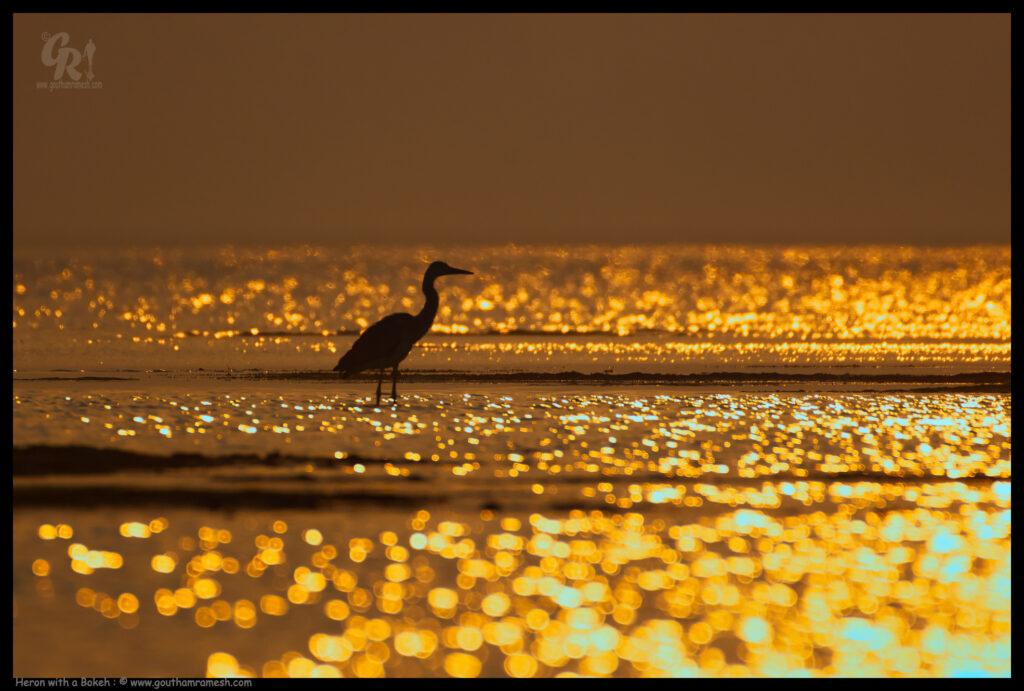
Bokeh and Heron

A good photograph is not just about subject , its about other elements too.. Bokeh is one such element .. use it to create pleasing images.

Read more about bokeh in my blog https://gouthamramesh.com/bokeh/

Grear:
Nikon Zfc
Nikkor VR 200-500mm F5.6ED + 1.4 TC

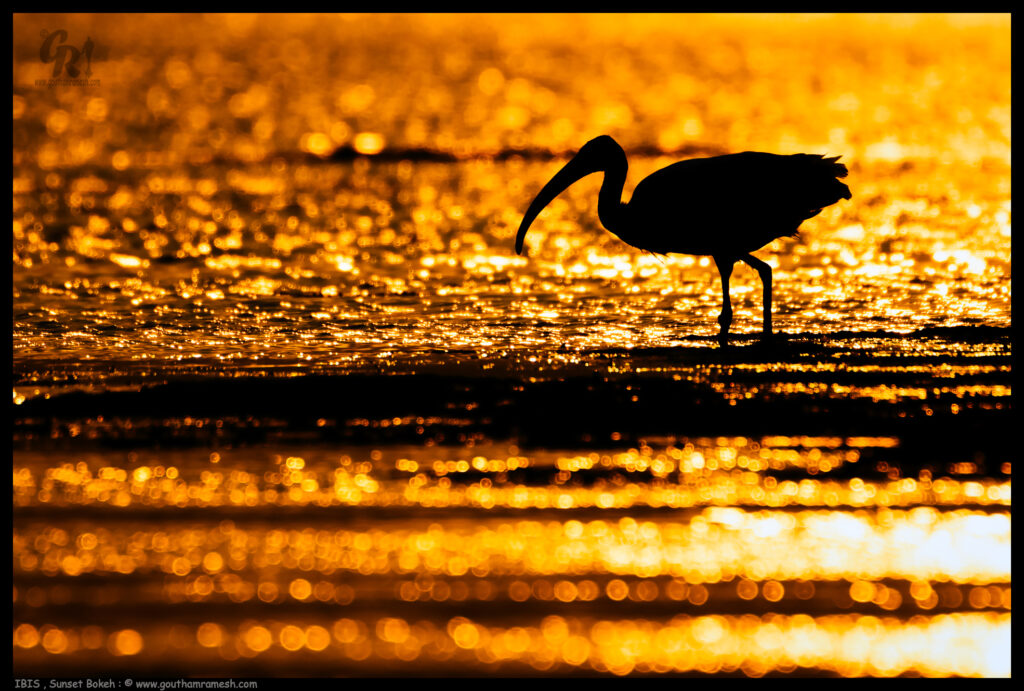
Ibis

Pulicat gives you an opportunity to shoot birds almost at eye level and when you shoot a silhouette of a bird against the reflection of setting sun … you can see bokeh…

Exposure: F8 1/4000 , ISO 400 , Natural Sunlight.

Grear:
Nikon Zfc
Nikkor VR 200-500mm F5.6ED + 1.4 TC

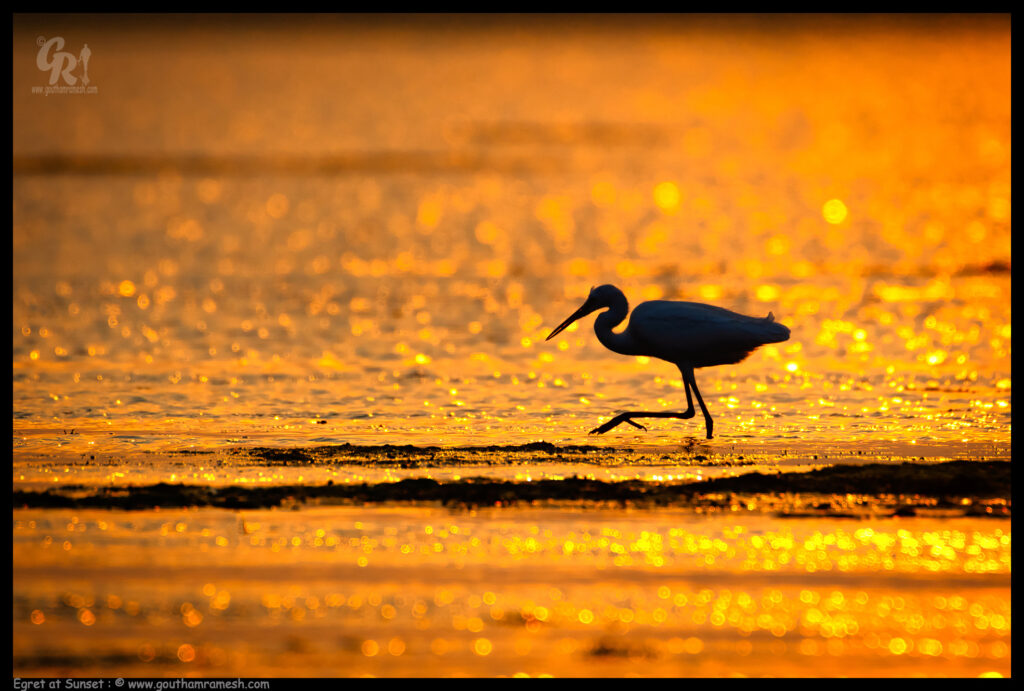
Egret

Exposure: F8 1/2000 , ISO 400 , Natural Sunlight.

Grear:
Nikon Zfc
Nikkor VR 200-500mm F5.6E with 1.4 TC

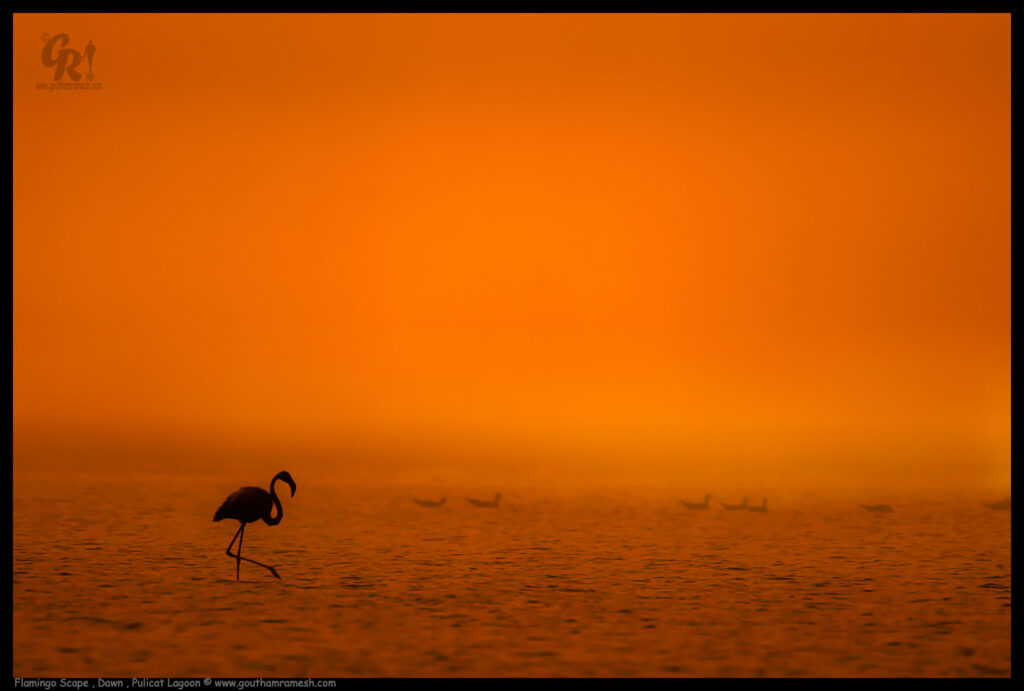
Flamingo and Dusk

Pulicat is a paradise ,, fog in the morning can be an issue for ppl who want to shoot flamingoes .. but with certain through process you can shoot landscapes by playing with white balance

Exposure: F8 1/3200 , ISO 400 , Natural Sunlight.

Grear:
Nikon Zfc
Nikkor VR 200-500mm F5.6E

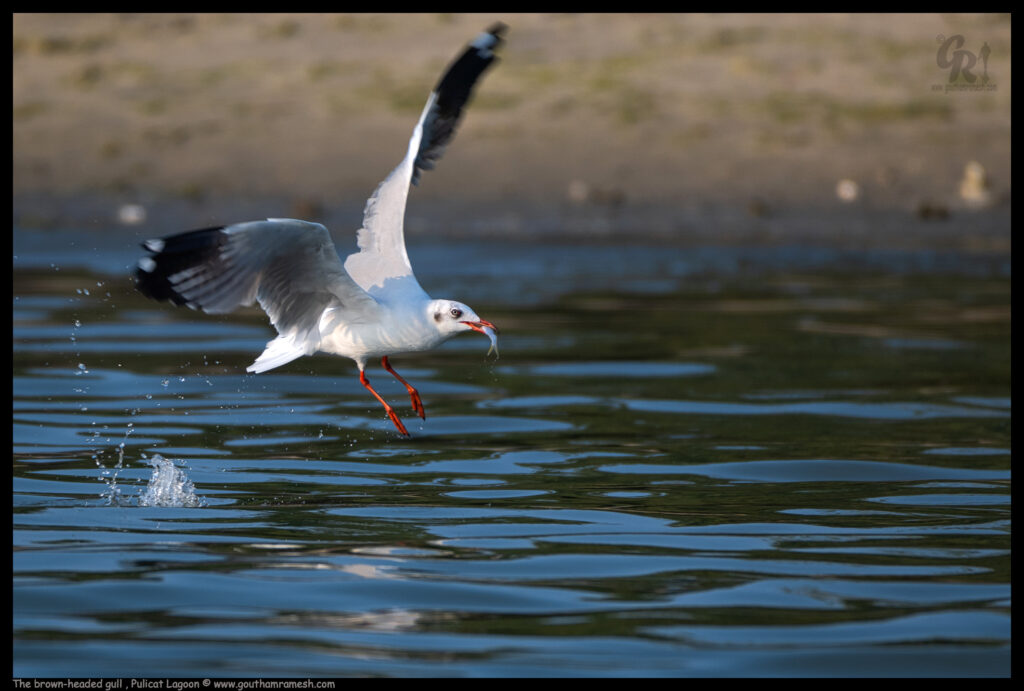
Gull with Fish

The brown-headed gull (Chroicocephalus brunnicephalus) is a small gull which breeds in the high plateaus of central Asia from Tajikistan to Ordos in Inner Mongolia. It is migratory, wintering on the coasts and large inland lakes of the Indian Subcontinent.

Exposure: F5.6 1/1000 , ISO 200 , Natural Sunlight.

Grear:
Nikon Zfc
Nikkor VR 200-500mm F5.6E

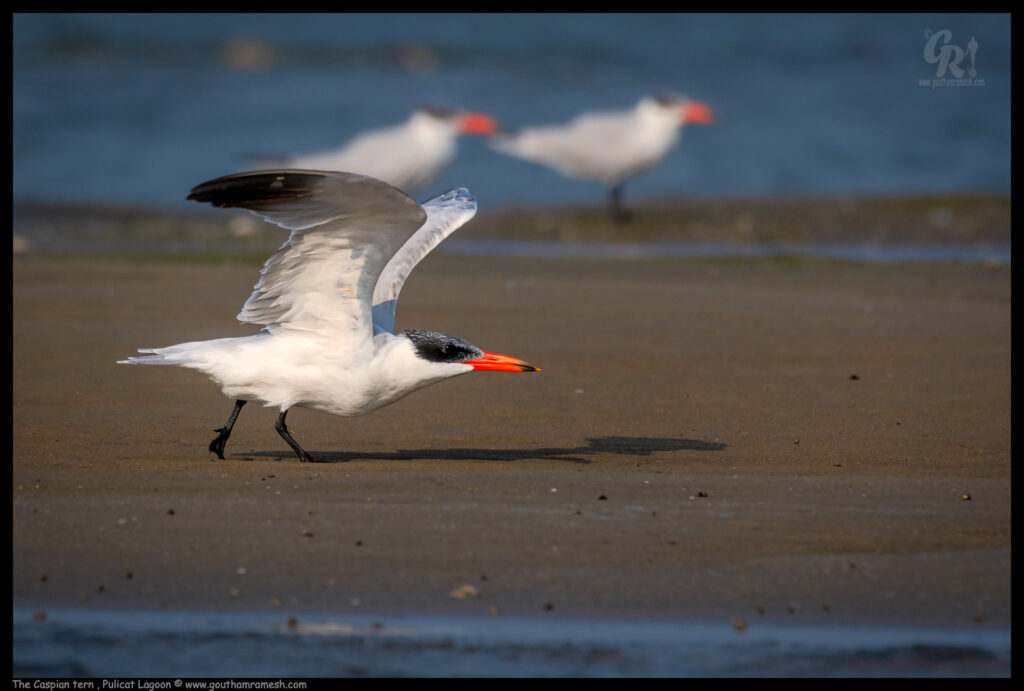
The Caspian tern 

The Caspian tern is a species of tern, with a sub cosmopolitan but scattered distribution. Despite its extensive range, it is monotypic of its genus, and has no accepted subspecies.

Exposure: F8 1/2500 , ISO 400 , Natural Sunlight.

Grear:
Nikon Zfc
Nikkor VR 200-500mm F5.6ED

Thanks if you like the blog, you can leave a comment at Home Page

Cheers

This image has an empty alt attribute; its file name is TransparentImage-4.png
Goutham Ramesh

Shilabhalika’s of Belur

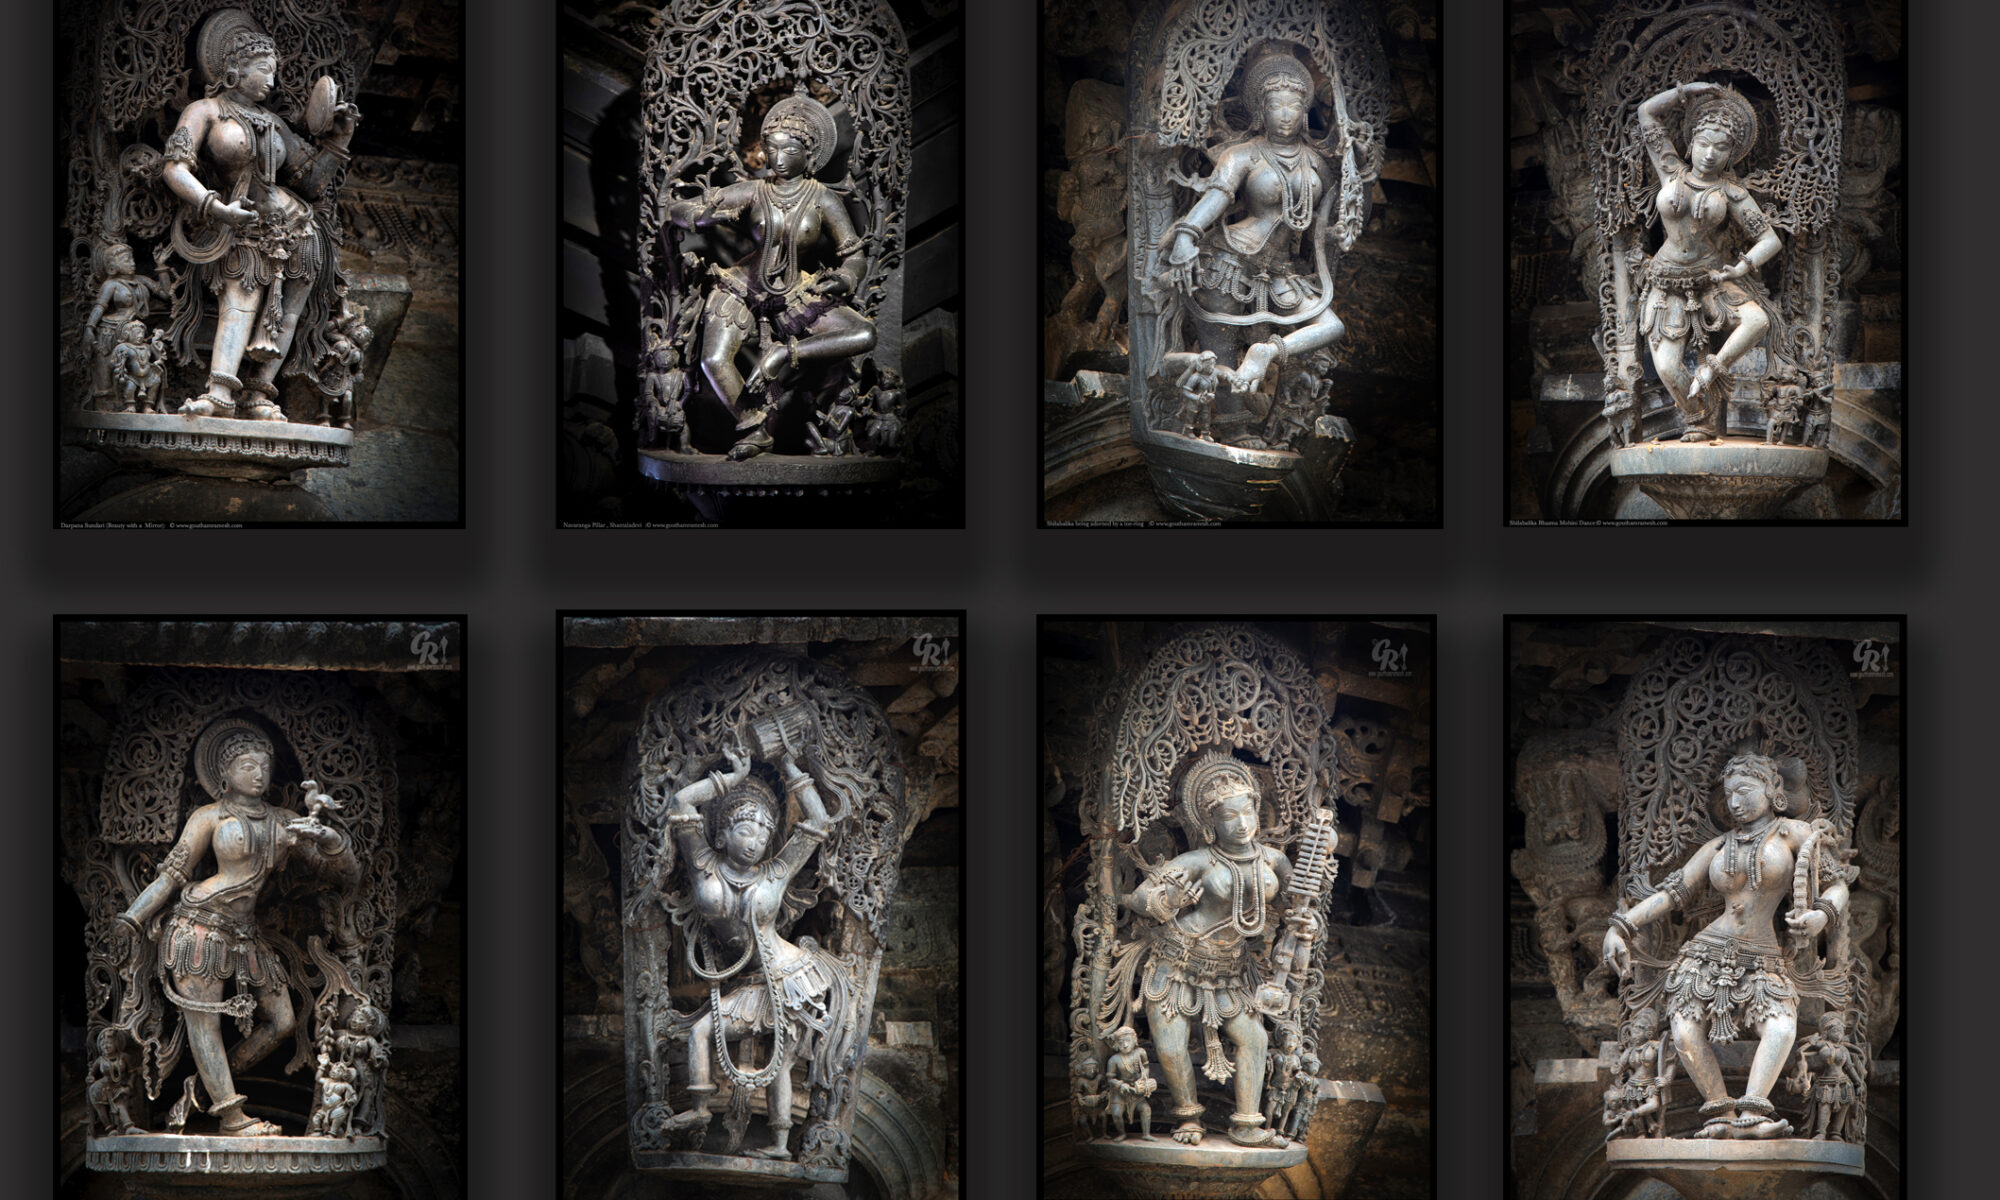
Madanika Series collage

The sculptural details on the walls of the Chennakeshava Temple, Belur is captivating. An aesthete is often drawn to this famous Hoysala temple town.

The graceful statue of Chennakeshava, mesmerising Mohini, the details in the ceiling make the temple interiors most beautiful among the Hoysala temples.

However the  bracket figures, popularly called madanike or Shilabhalike , on the outer walls make me spend hours for their intricate details; They represent beautiful damsels in various moods representing feminine charm and grace, this perhaps are one of the best creations of the Hoysala sculptors of the Belur temple

In this blog I will show most of the madanike or Shilabhalike I captured recently! Hope you will like them as much as I did capturing them.

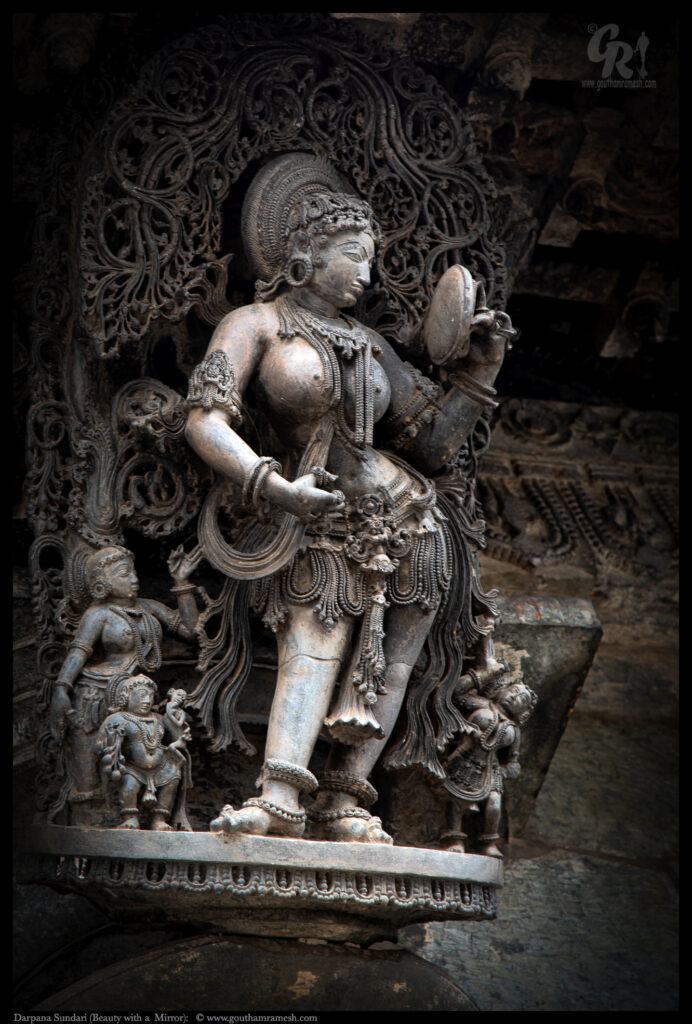
Darpana Sundari

This is a the most popular all the Shilabalike’s The Darpana Sundari is right at the main entrance of the temple and it is lady holding mirror in her left hand and looking at her beauty in it.

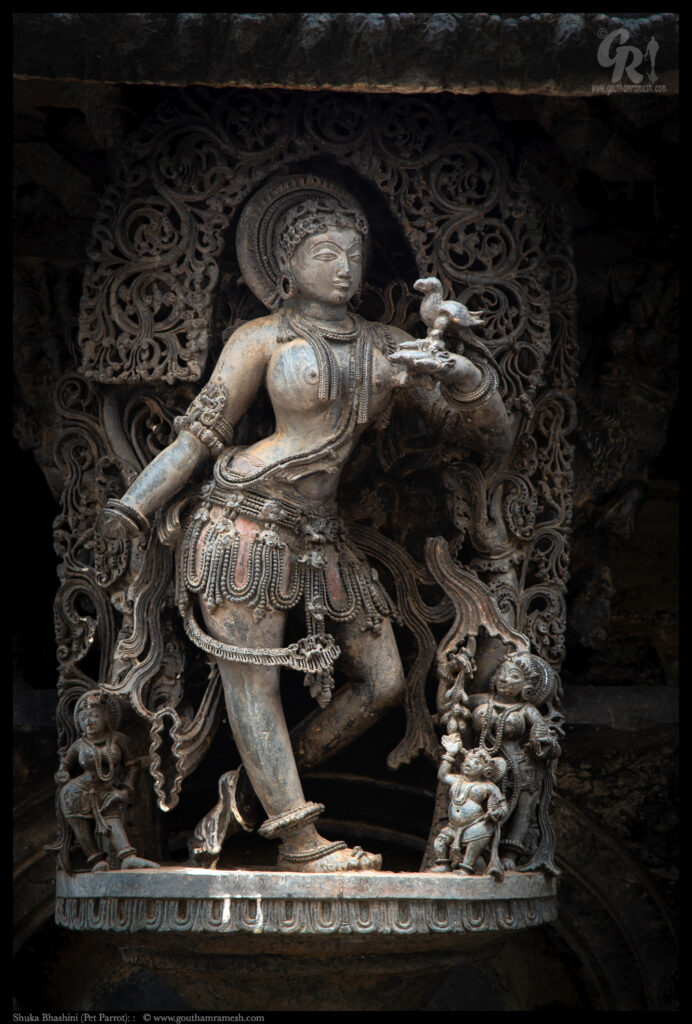
Shuka Bhashini

This is a beauty with a pet parrot talking to it .. Shuka Bhasini means sweet talker.

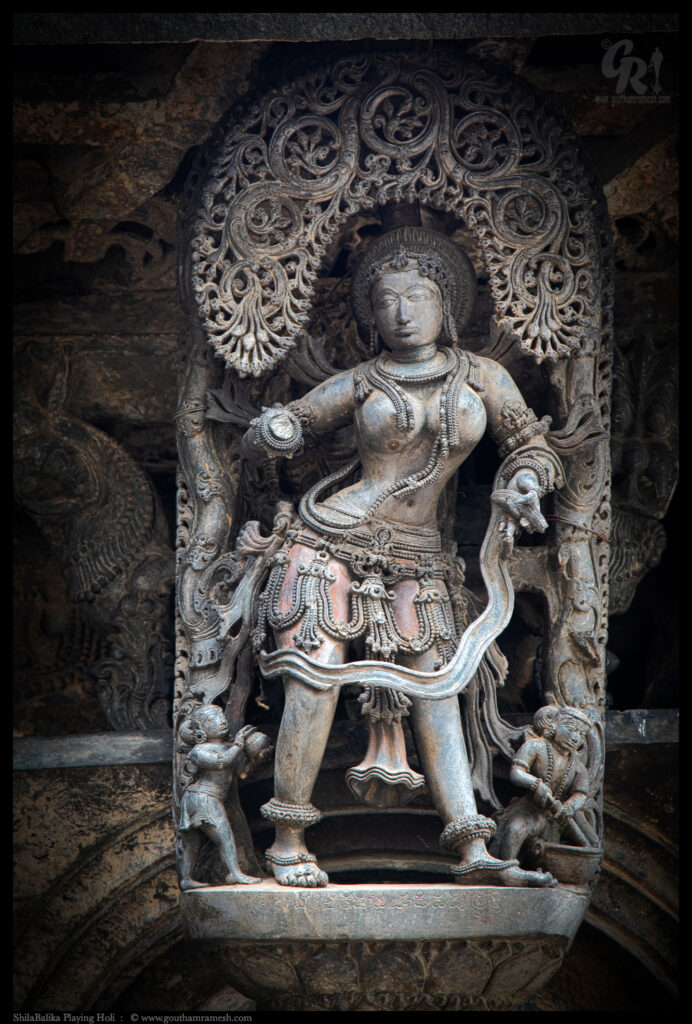
Playing Holi

This beautiful sculpture has her one hand damaged and missing maybe she was holding a color pump ( Pichkari ) , As per local guide looking at the smaller form on the right , filling color this might have been a figure playing holi .. so in 11-12 century AD maybe playing with colors was predominant in south india also 

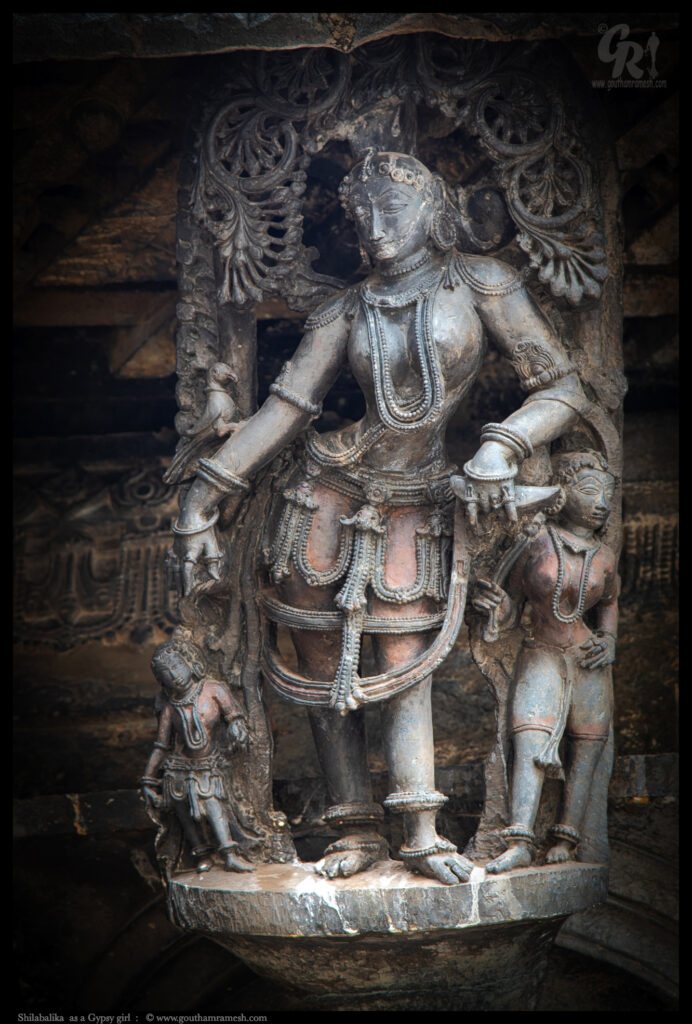
Gypsy girl

This Balika has dressed like a gypsy girl as per the hair style and she has a parrot on her arm.

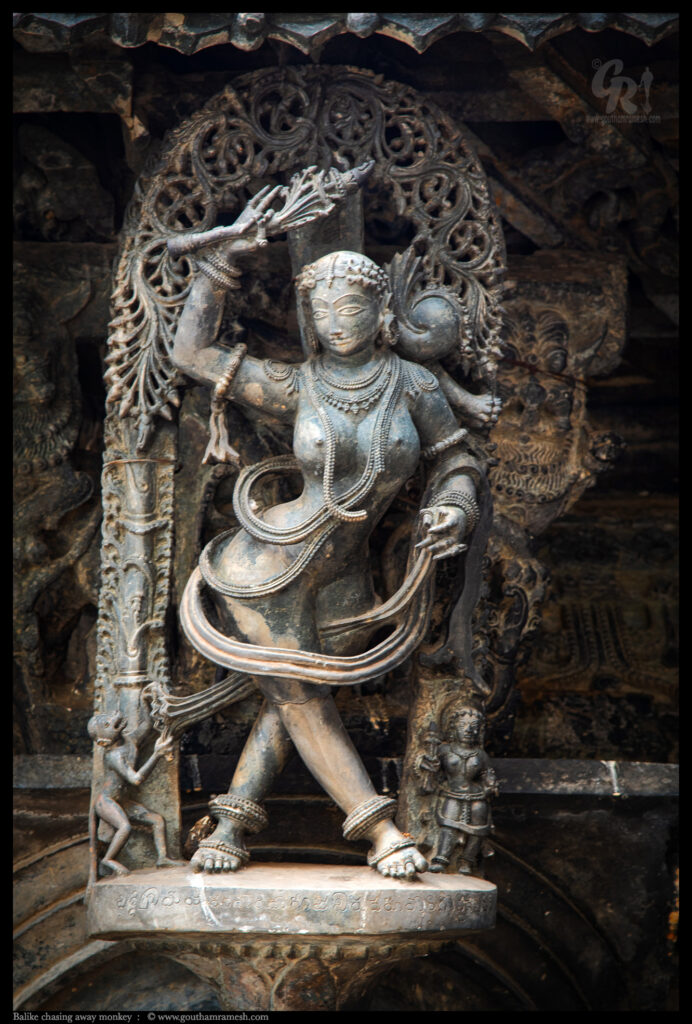
Balike chasing away monkey

This Balika has dressed like a gypsy girl and chasing away the monkey which is pulling her dress , the feet is decorated with anklets and toe ring like all other sculptures.. this one is just shows a very pure feminine posture.

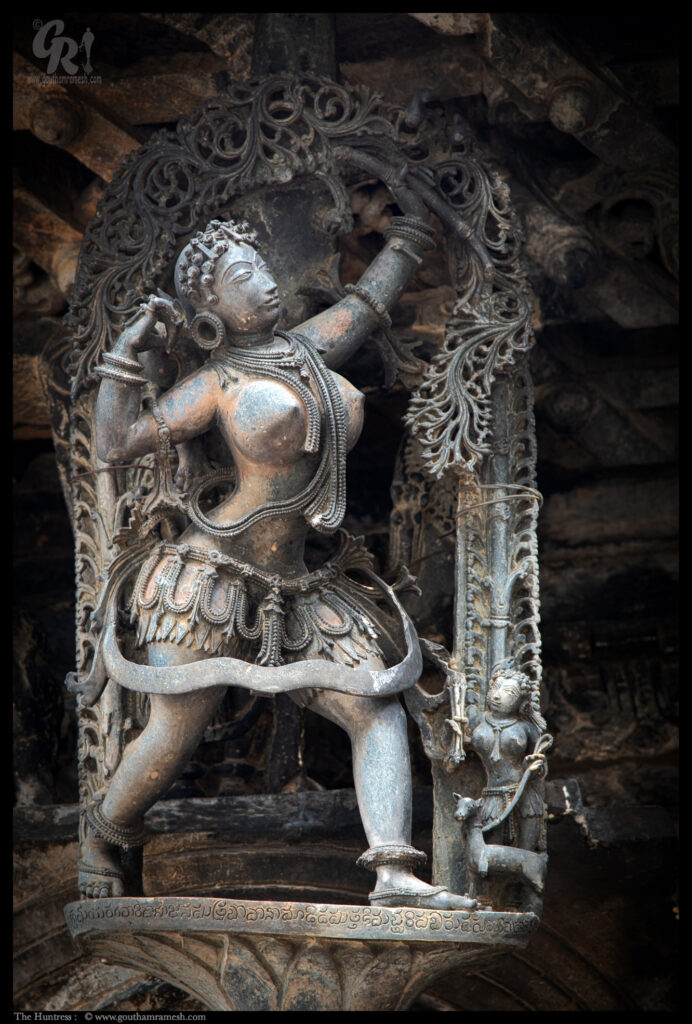
The Huntress

A beautiful Balike aiming het arrow at a bird sitting on the canopy

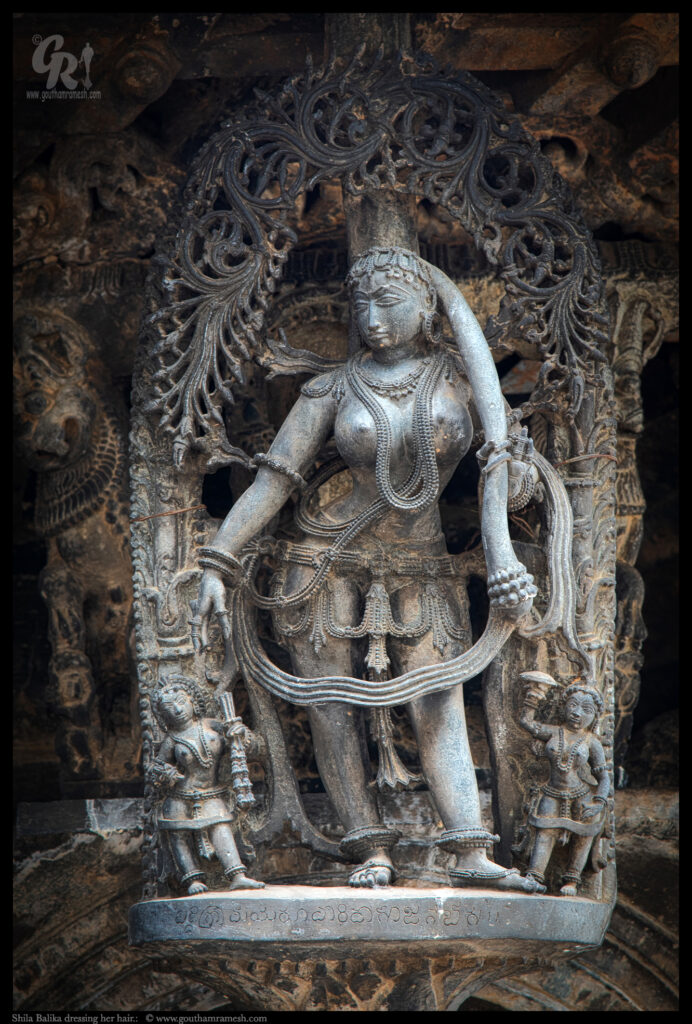
Dressing her hair.

She is dressing her hair after bath. The attendants are holding flowers and toiletry. This madanika has washed her hair and is squeezing the water out of it. This depiction is seen on a sculpture inside the temple too

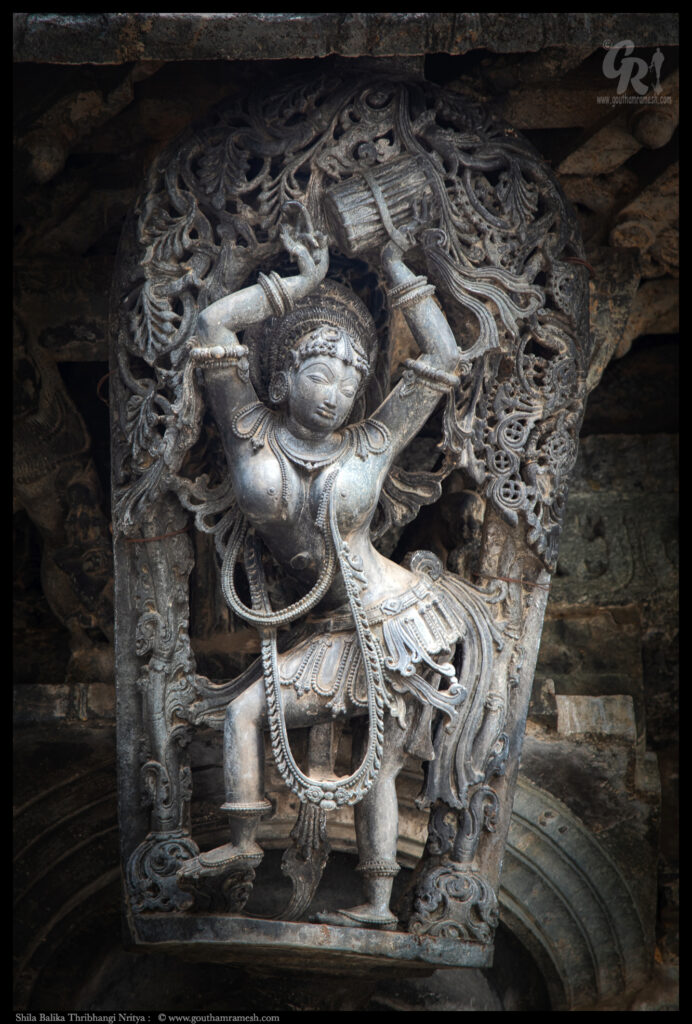
Thribhangi Nritya

A lady is dancing stylishly by bending her body into three portions, one from the waist downward, other from the waist to the chest and another upwards. This is said to be the most difficult one to exhibit. This is apparently one of the most difficult postures to achieve in Bharatanatyam

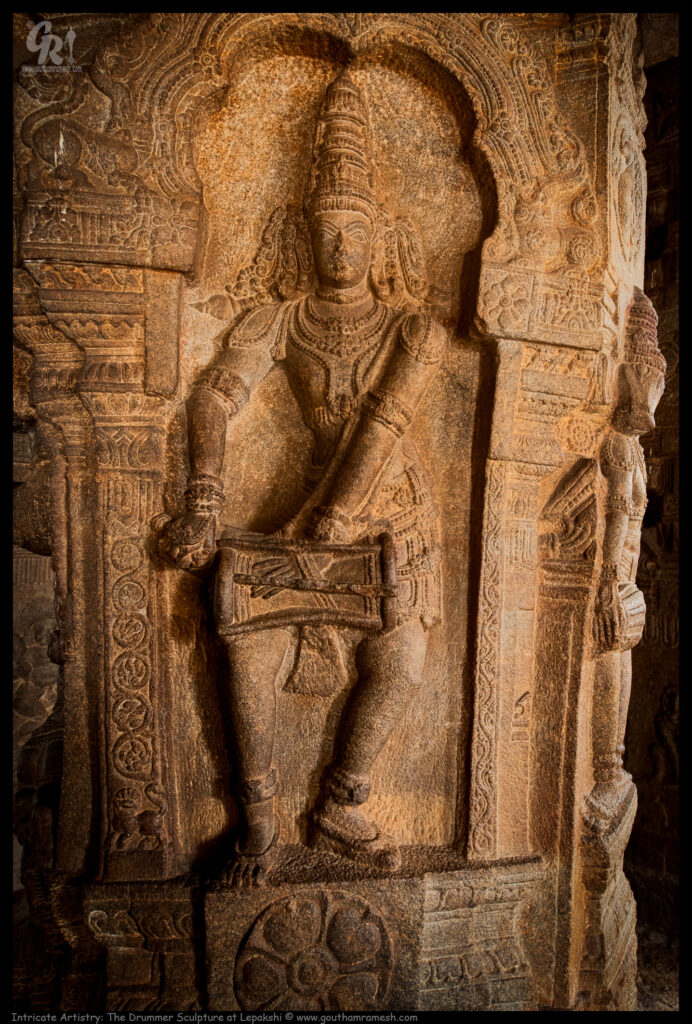
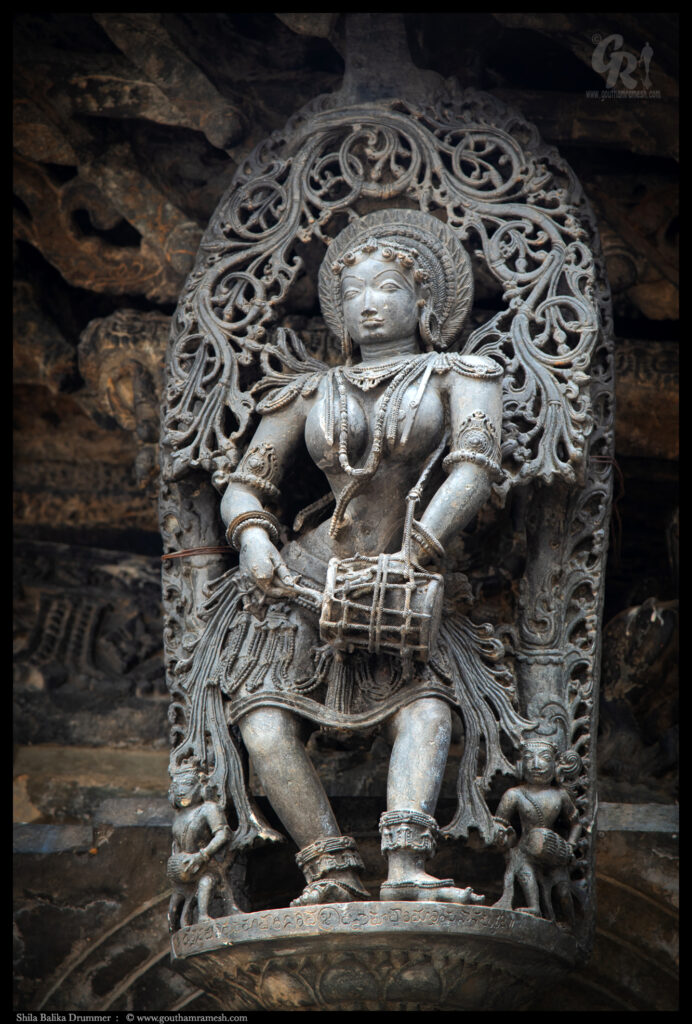
Drummer ( Drum Dance )

She holds in her left hand a drum and she is playing upon it with her right hand.If you look closely , the hand that is holding the drum is inside the strings that hold the membrane .. such mastery over sculpting is worth noticing

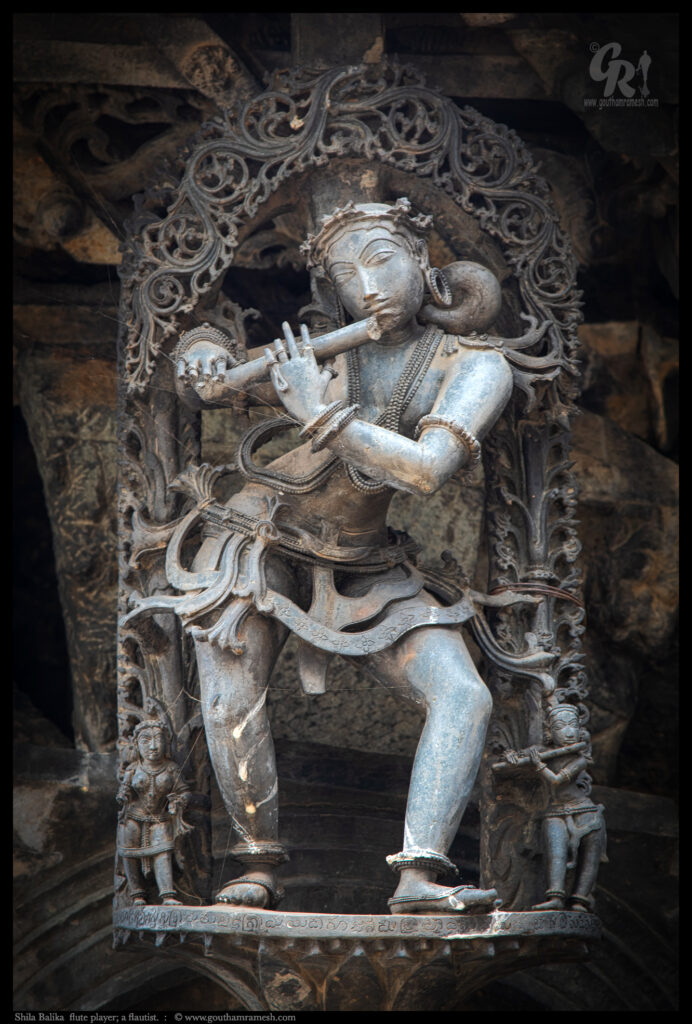
A flute player; a flautist.

She is playing on her flute. Her maid on the left side is accompanying her to the tune of the flute with her own flute

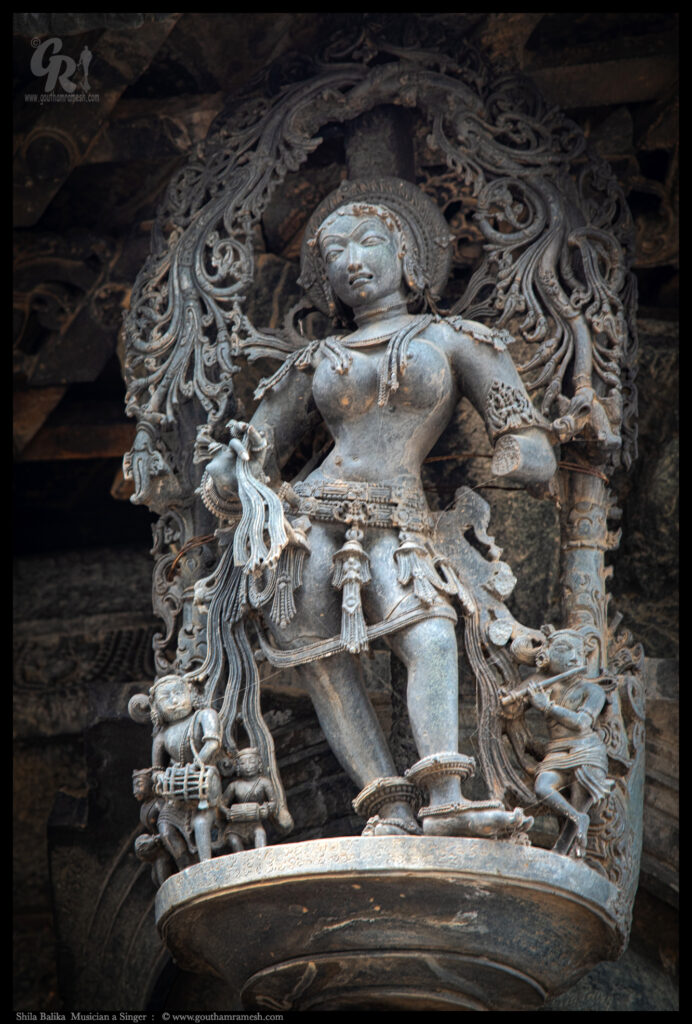
Musician, Singer

If you look closely she is singing with her mouth open and there are musicians with instruments accompanying her.

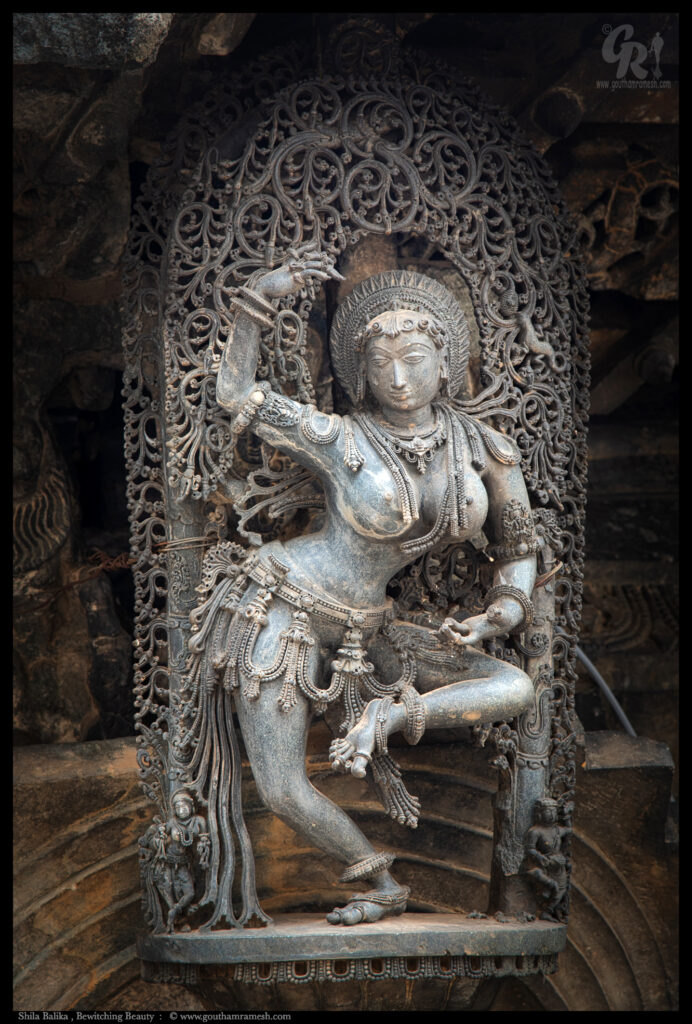
Bewitching Beauty

This is one of the most beautiful shila balika .Her hands and legs are cut out very nicely. Look at the canopy above her left shoulder. You can see a jackfruit and a fly on it ( If zoom , this picture does not do justice to this amazing art ) .

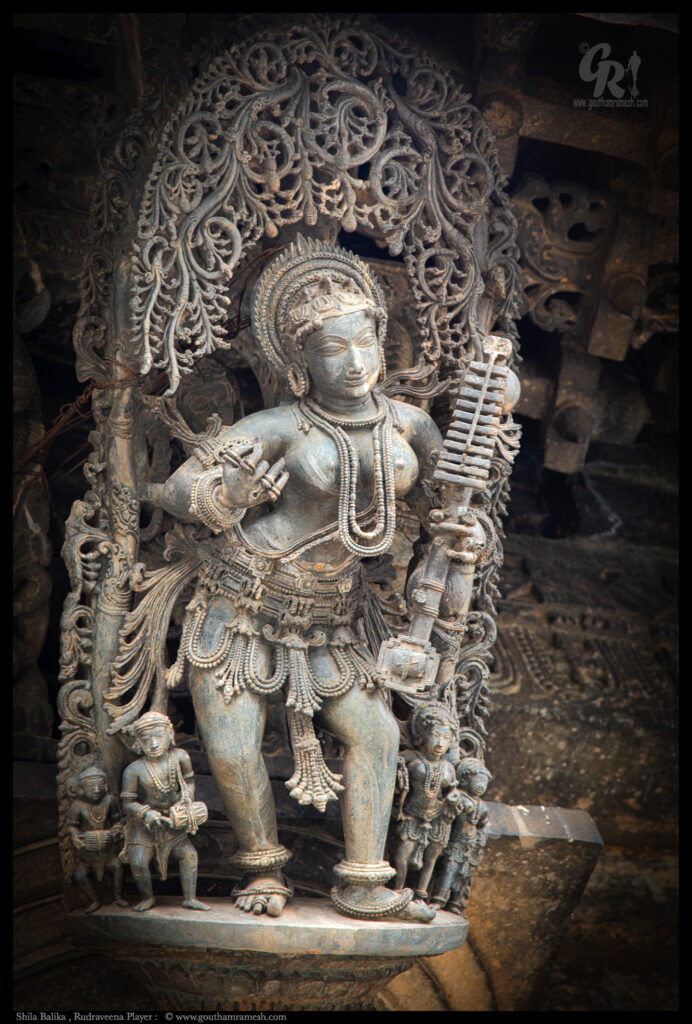
Rudraveena Player

She is a Musician . She is standing holding the instrument (Rudra veena) in her left hand. Her maids are arranging for a concert

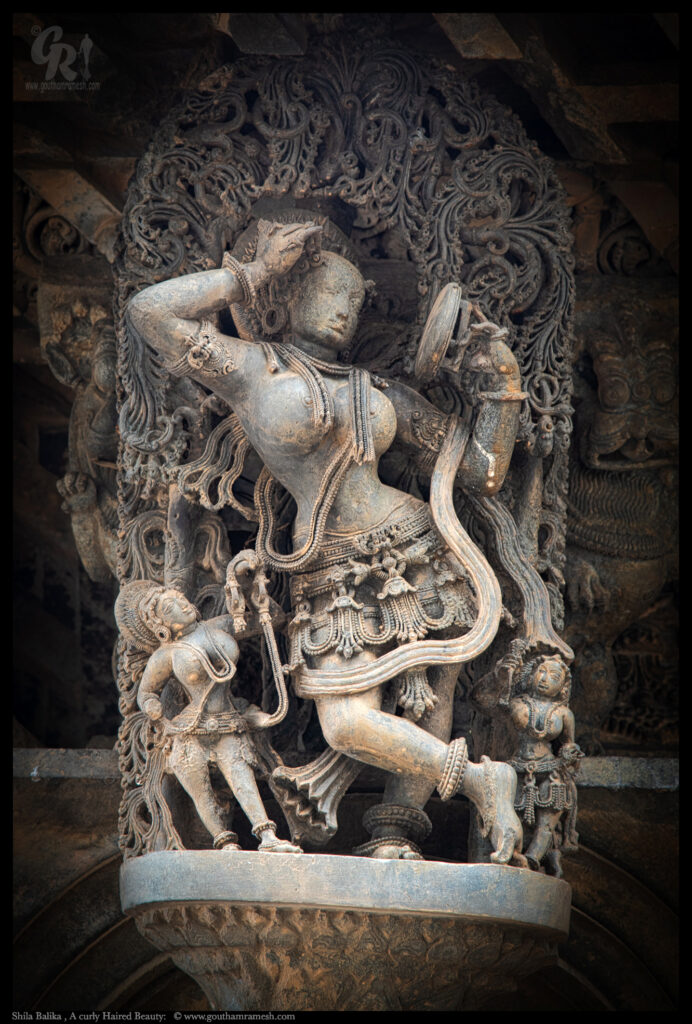
A Curly Haired Beauty

She holds a mirror having a handle. She is arranging the curls on the forehead with her right hand finger

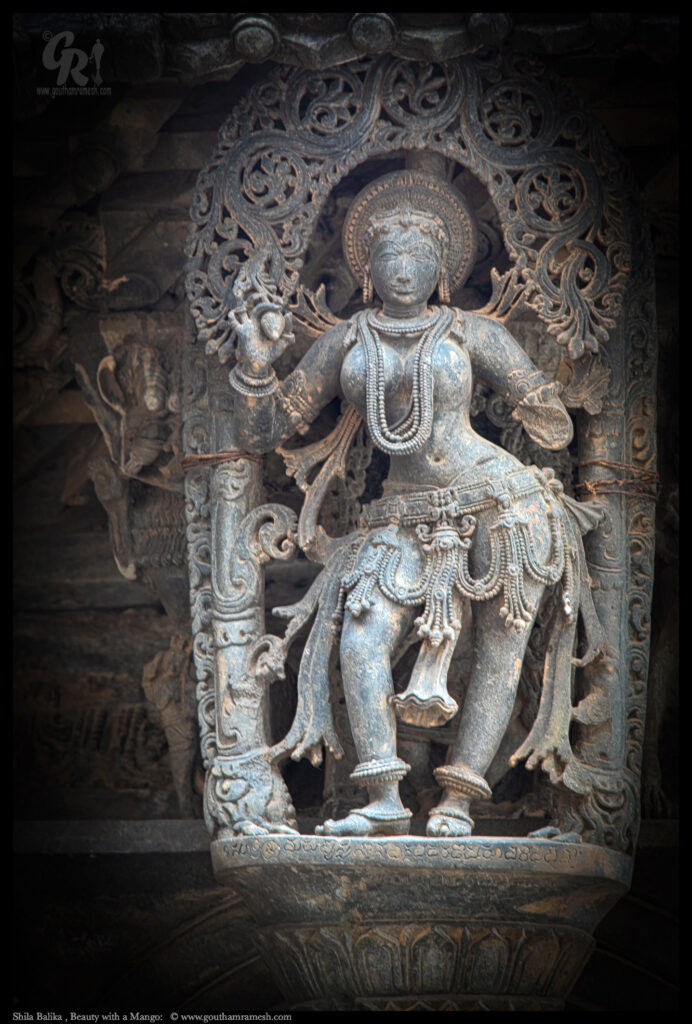
Beauty with a Mango

She is plucking a mango with her right hand, unfortunately not much is known, this one is damaged more than others with one hand missing and also her maids are missing.

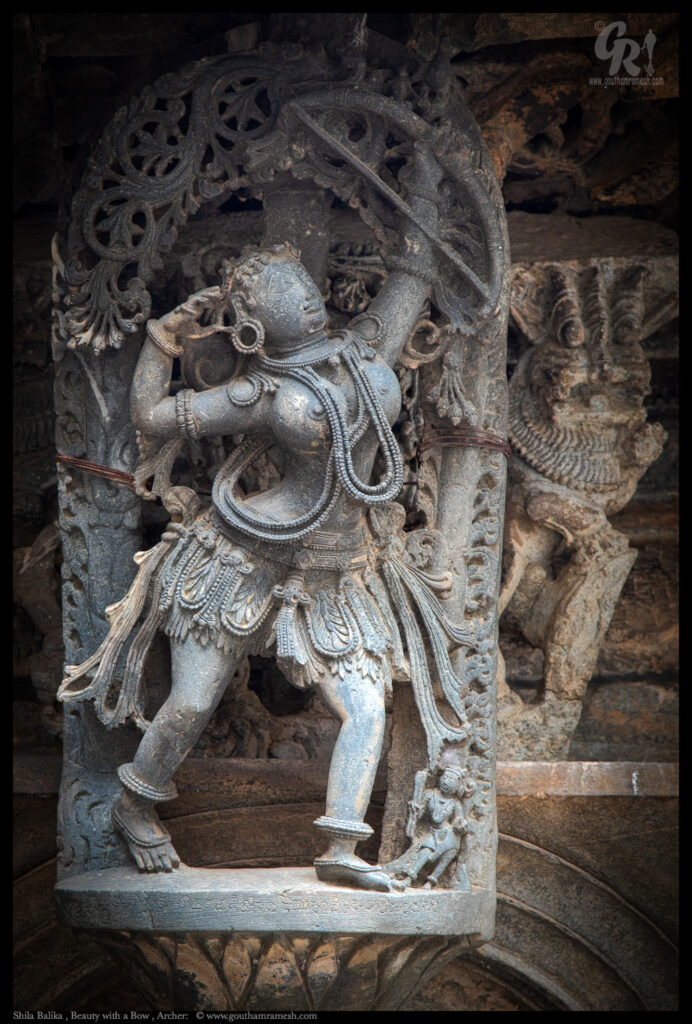
Beauty with a bow (Archer)

Women of ancient india were skilled warriors as well , this is one sculpture of a warrior beauty with her bow , she must have been a great archer.

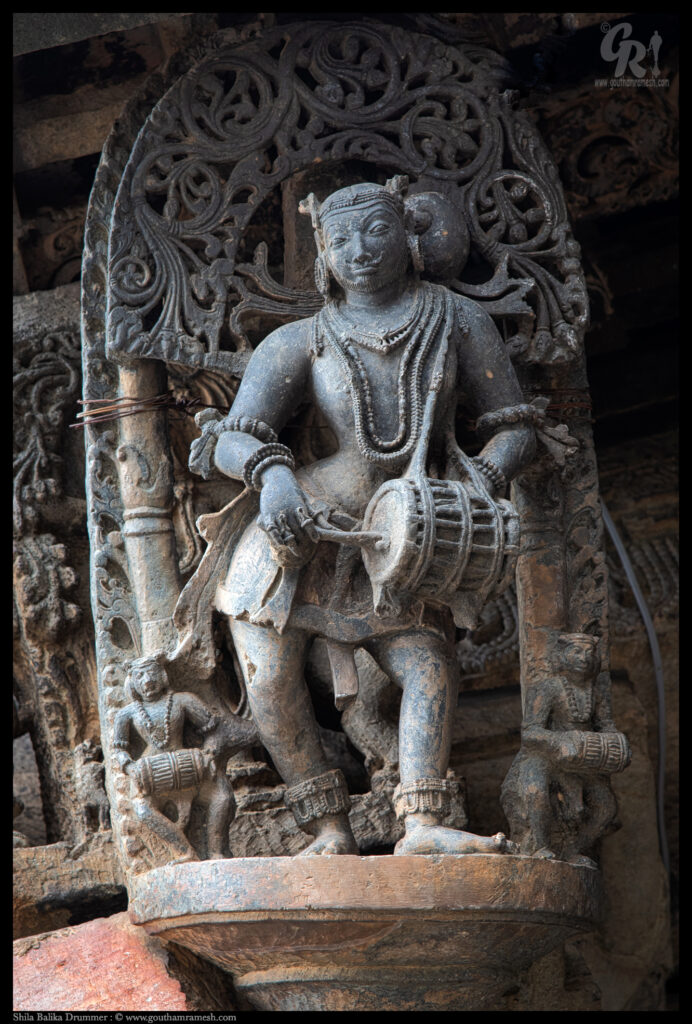
Drummer – Male form

This is a drummer looks like a female dressed as male or male drummer with feminine pose and ornaments or a young girl . its anybody’s guess . One thing is sure this is different from other shilabalika and stands out.

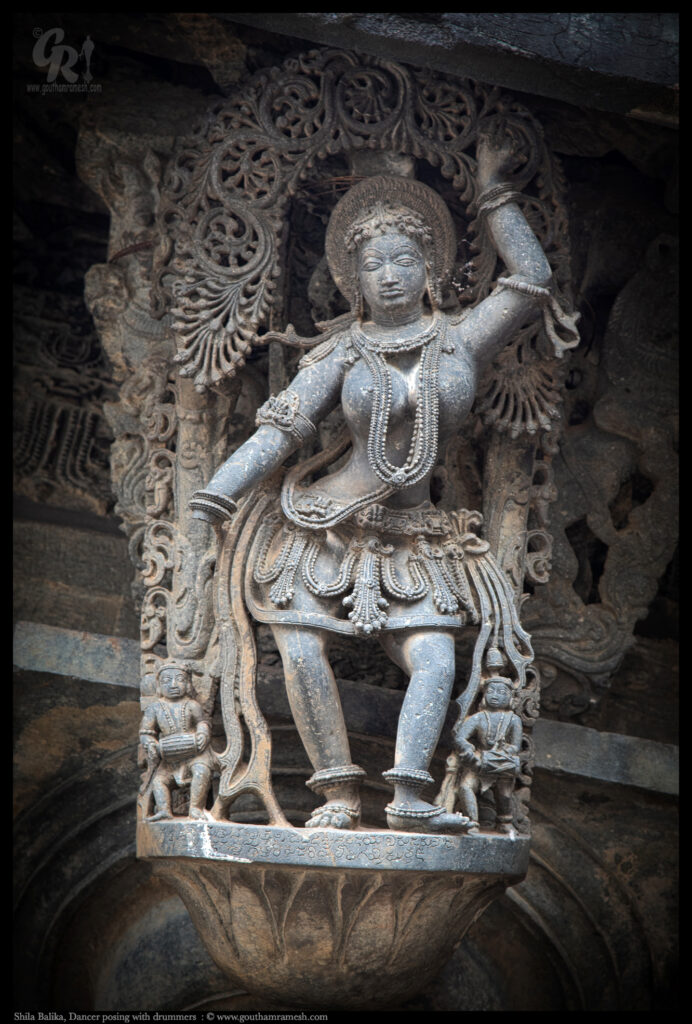
Dancer posing with drummers

This is one of many dancer shila balikes , one hand is missing and she is accompanied by drummers.

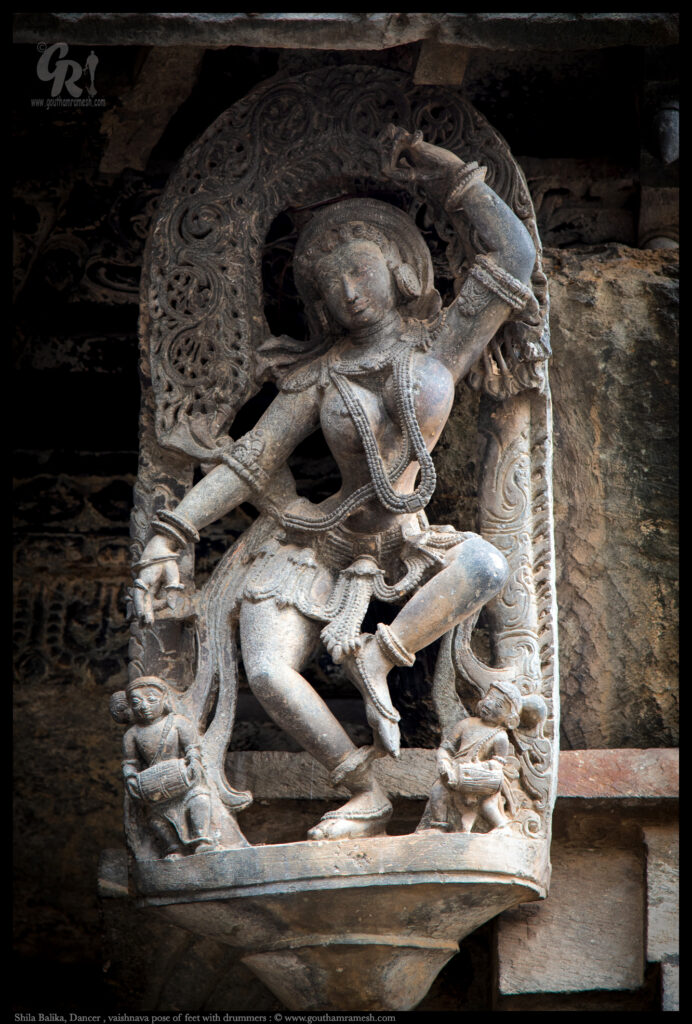
Dancer , vaishnava pose of feet with drummers

This is one of many dancer shila balikes , Beautiful feminine form with a dance pose where The feet are kept two and a half Talas apart from each other. One of them should be on the ground in the natural posture, the other is lifted and turned sideways with the toes stretched and turned towards the shin, its called vaishnava pose of feet

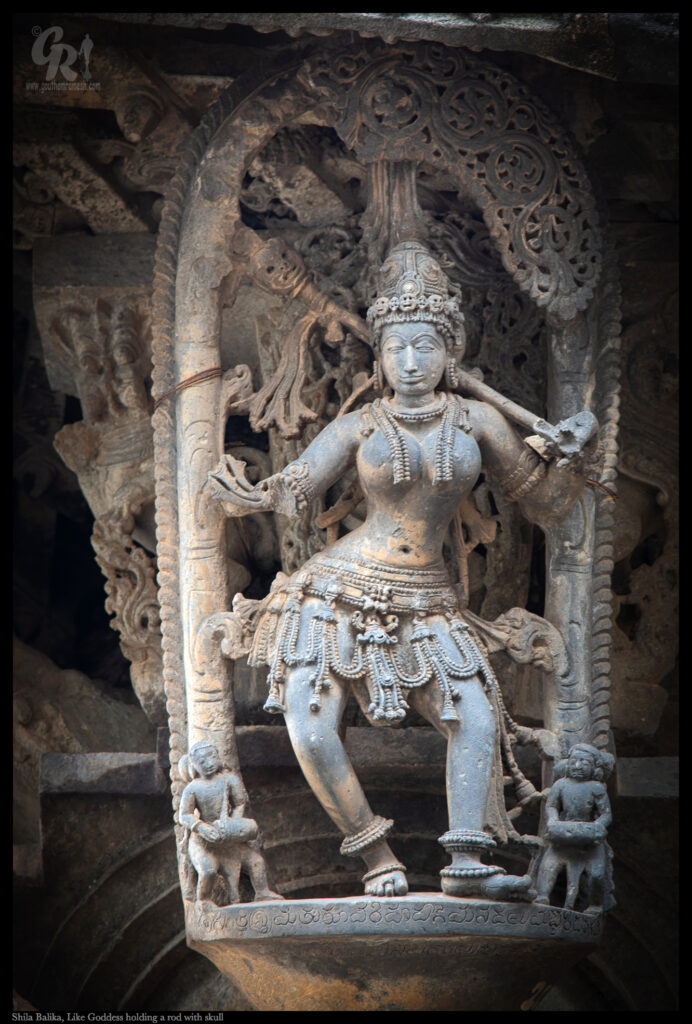
Like Goddess holding a rod with skull

She is like a Goddess . She holds a rod with skull at the top in her left hand and her head is dressed with a band of skulls.

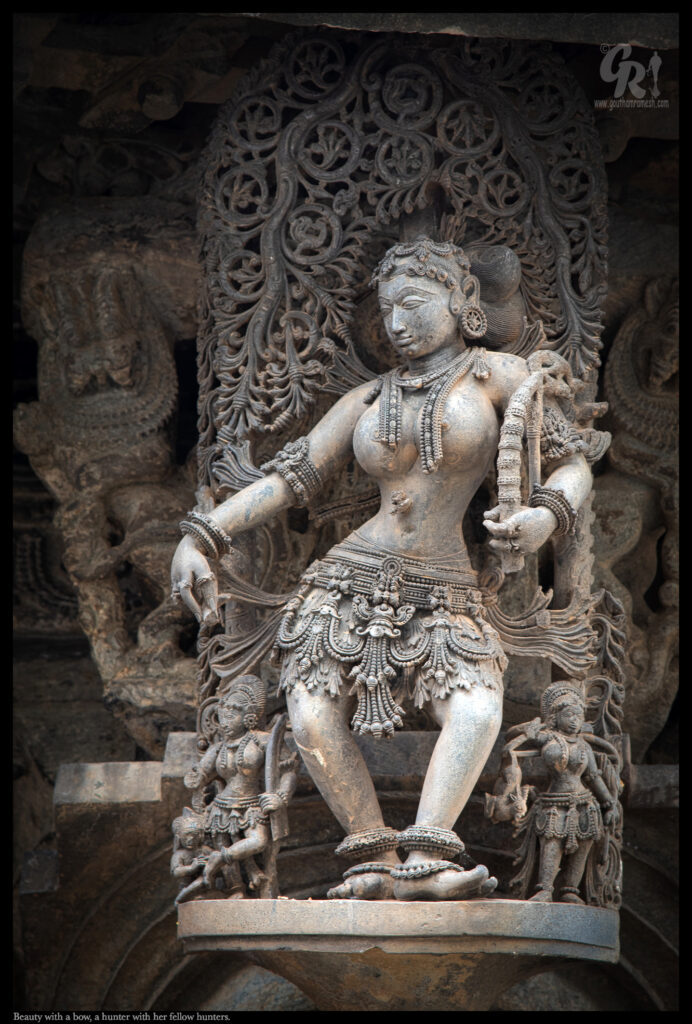
Beauty with a bow, a hunter with her fellow hunters.

This is one of few shilabalika shown with a bow , here the bow is damaged , but looks more intricate , the arrow in the other hand is also damaged , the accompanying images show a female hunter with a deer kill .. It shows in 12/13 century India women also participated in hunting and were very skilled hunters . The toe is also very delicately posed .. indicating a delicate movement required for hunting … amazing.

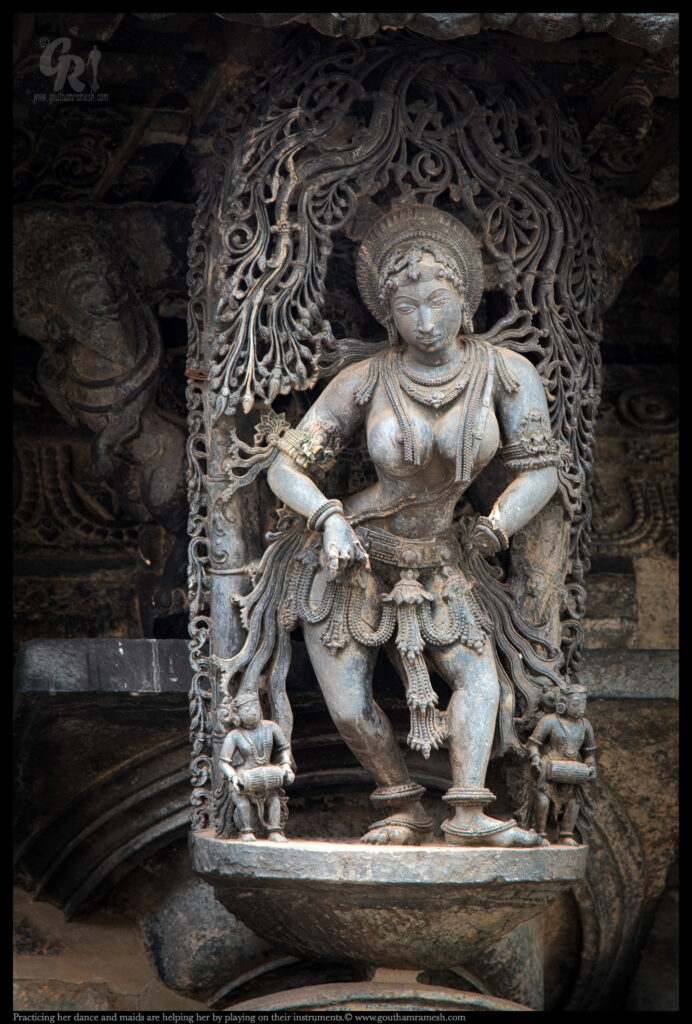
Practicing her dance

She is practicing her dance. Her maids are helping her by playing on their instruments.

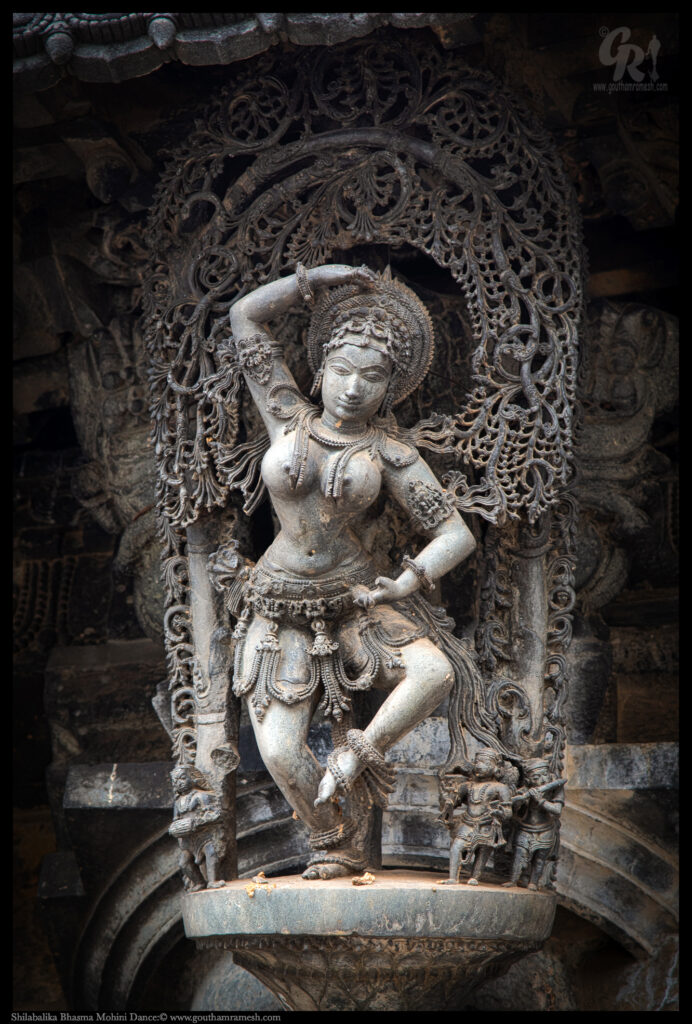
Bhasma Mohini Dance

The figure illustrates the epic story of God Vishnu who took the form of Mohini

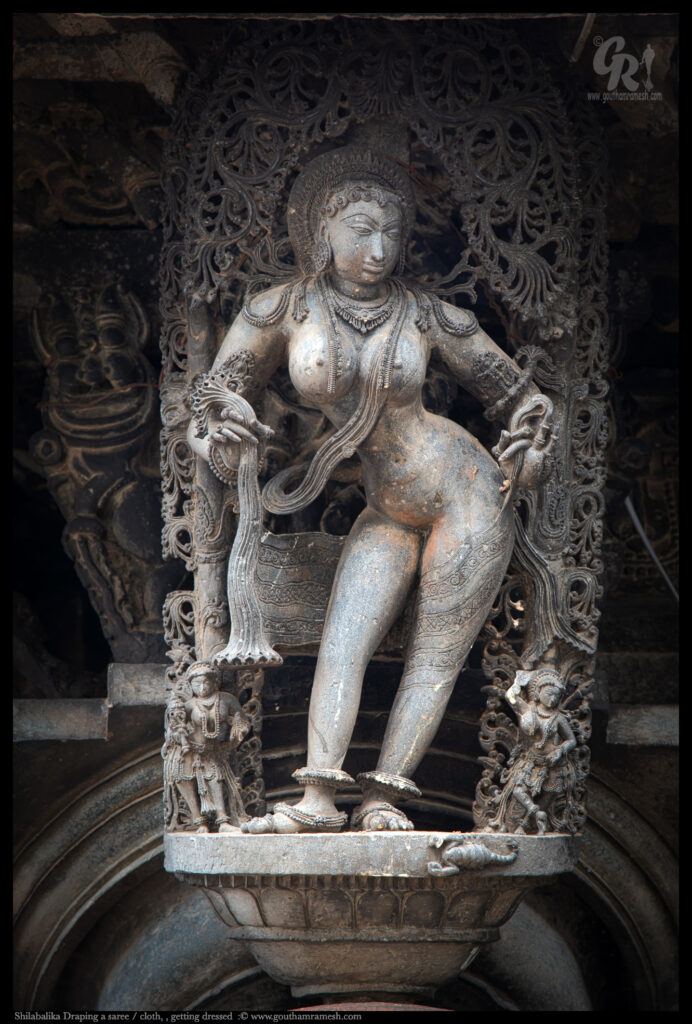
Shilabalika Draping a saree / cloth, getting dressed 

Shilabalika draping a saree or a cloth

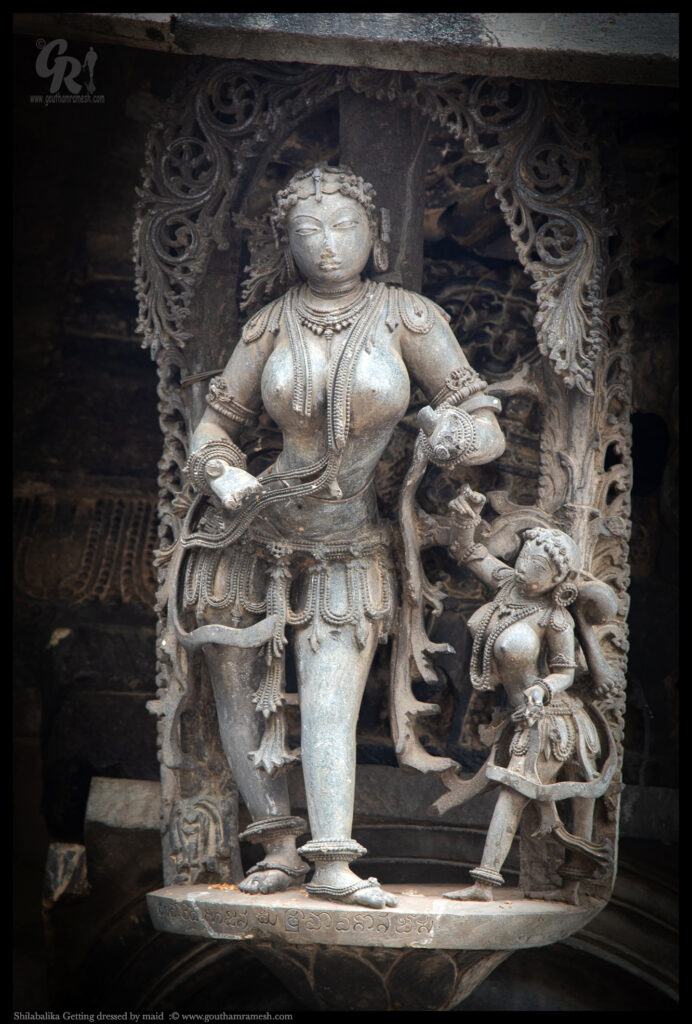
Getting dressed by a maid

This looks like she is a queen or princess , who is getting dressed up by a maid.

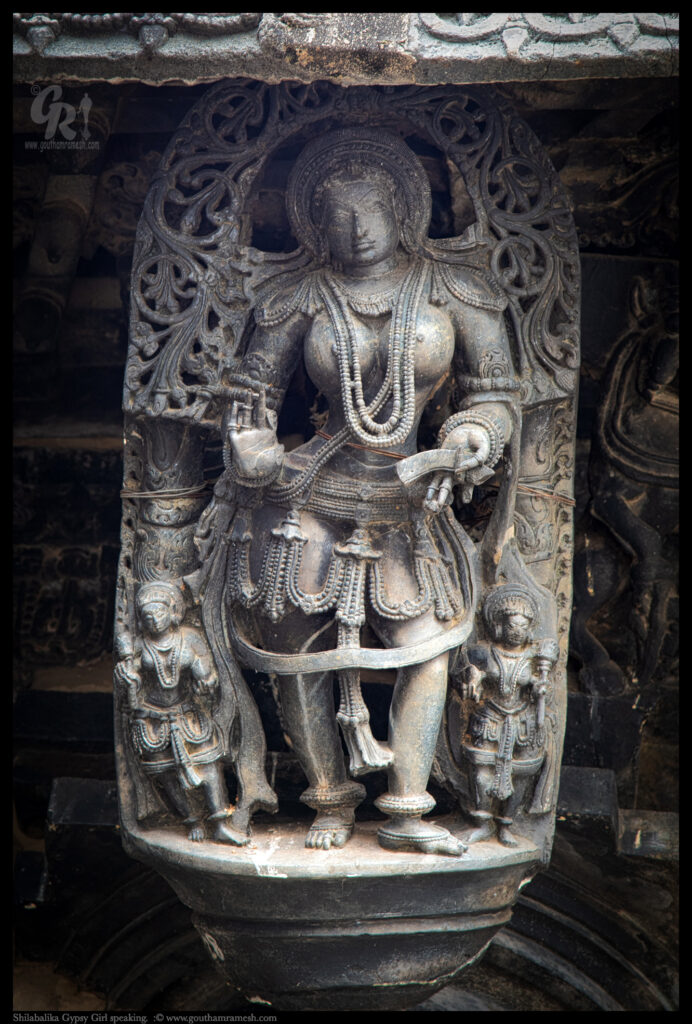
Gypsy Girl speaking.

She is holding in her left hand palm leaves and and the right hand is in speaking pose.

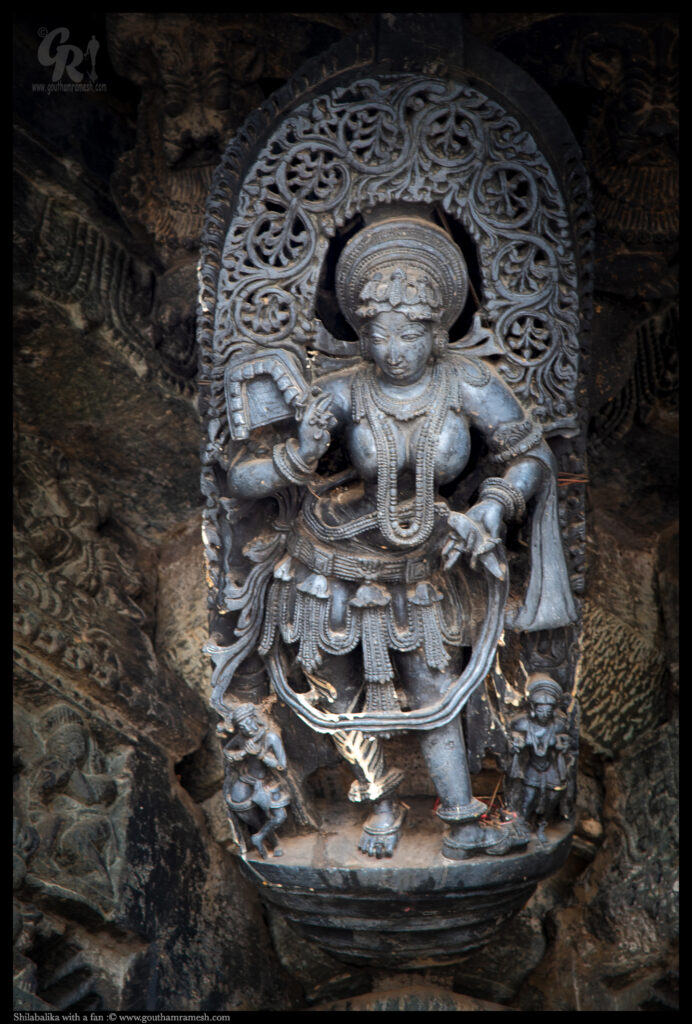
Shilabalika with a fan ( Mostly )

She is holding in her left hand something that looks like a banana and in her right hand a fan

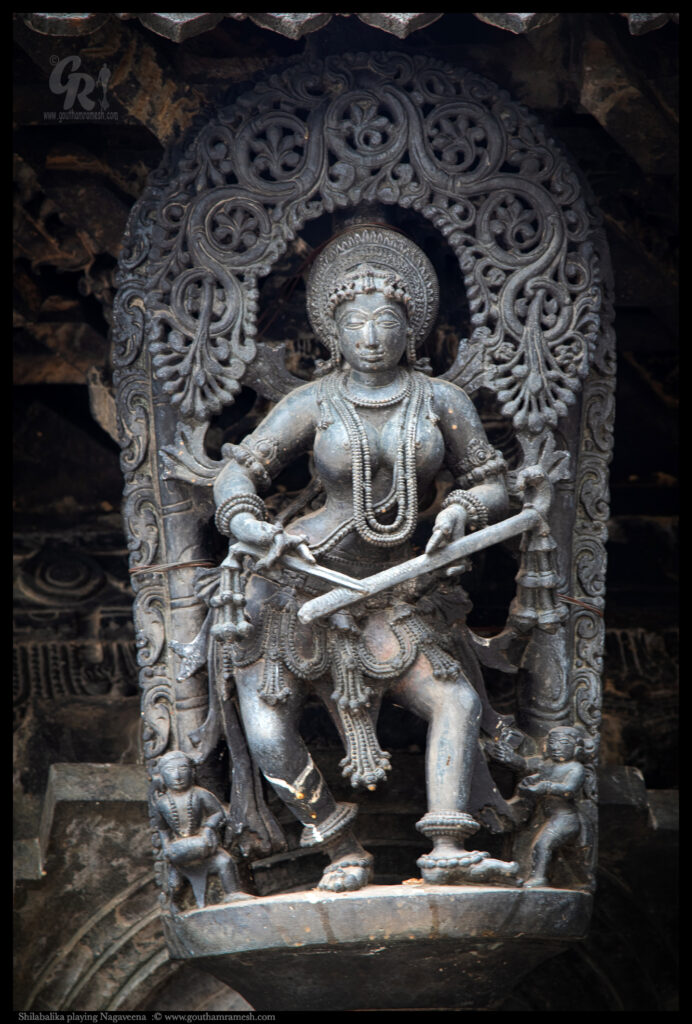
Shilabalika playing Nagaveena

This madanika is holding a ‘nagaveena’. A veena with one end shaped like a snake.

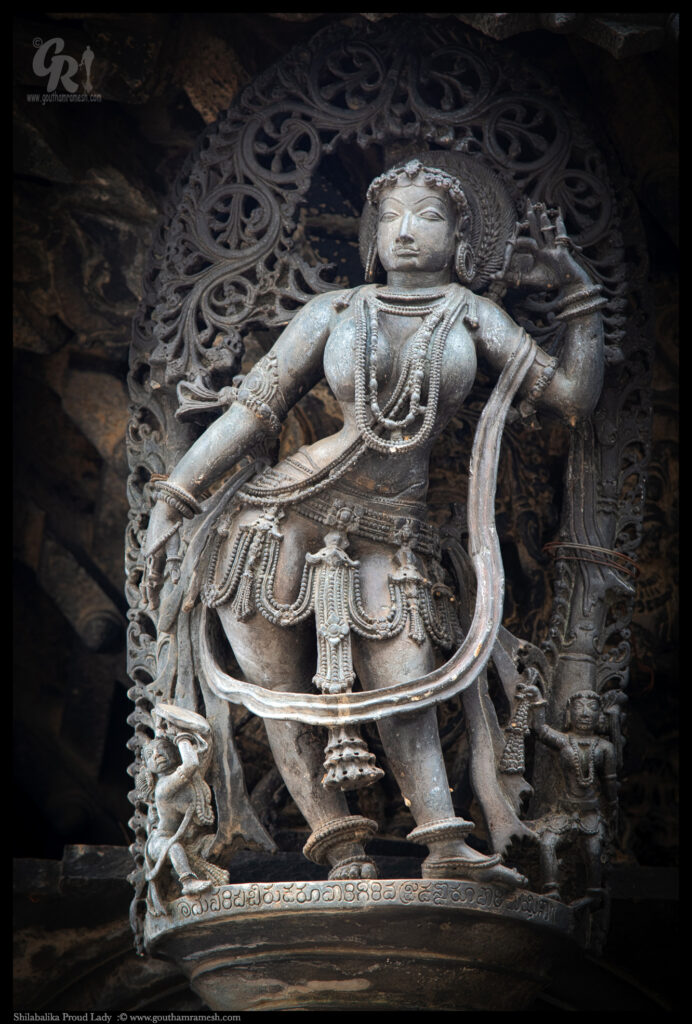
Shilabalika Proud Lady

She is fully dressed and has put on all sorts of ornaments on her body. She is looking at her beauty in proud through a mirror. This madanika is called Abhimani… the proud one. Symbolizing someone who has a lot of pride in her beauty and is also very conscious of it. The sculpture at the left (at her feet), holds up a mirror but is looking away – kind of telling her ‘woman, reality check’.

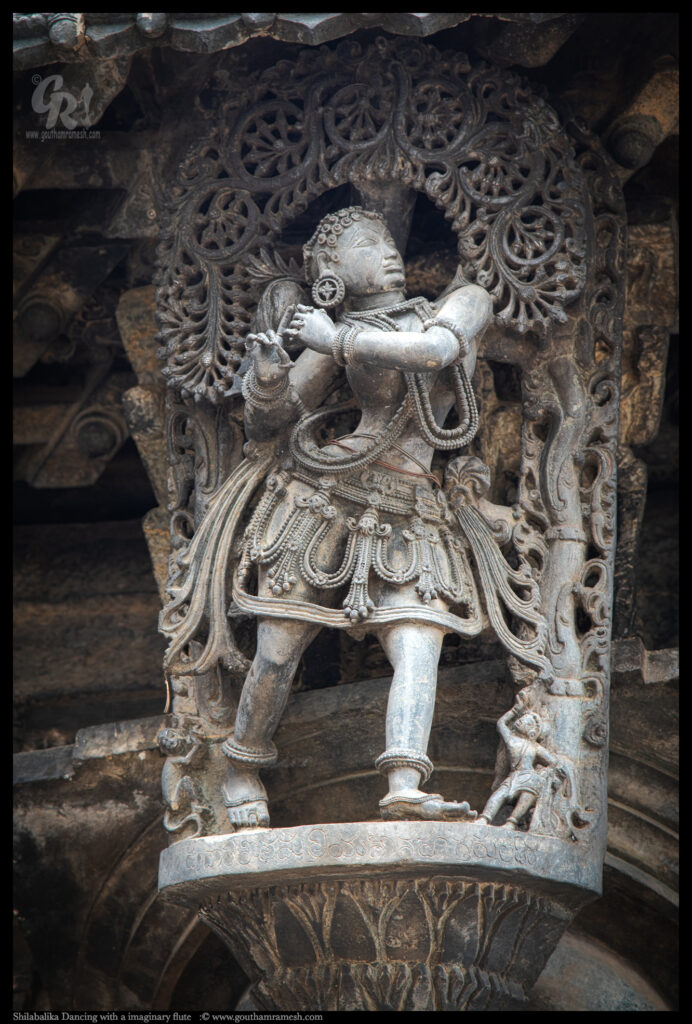
Shilabalika Dancing with a imaginary flute 

Dancing with an imaginary flute ; This one has an imaginary flute in her hand. Look at the details on the ear ring , beauty

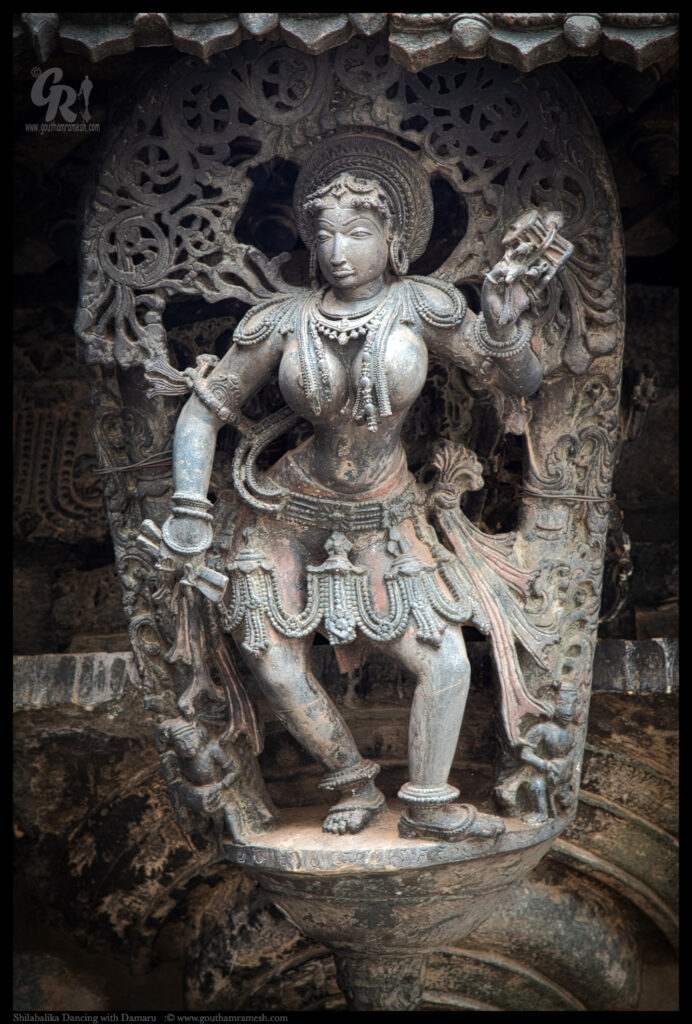
Shilabalika Dancing with Damaru

Dancing with a damaru in left hand and tala vadya in right hand

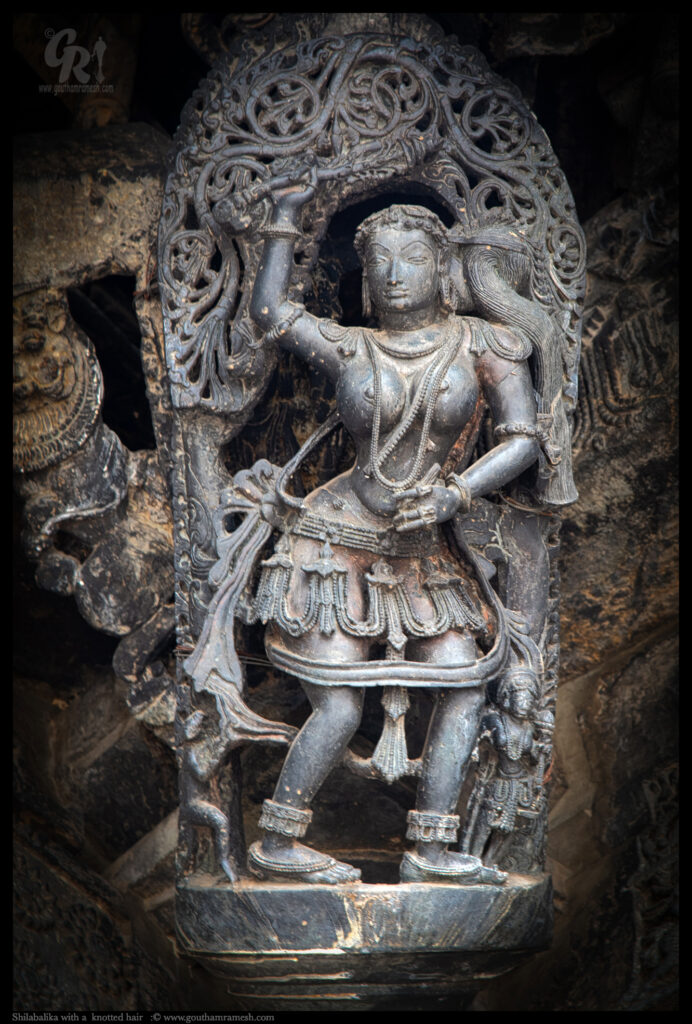
Shilabalika with hair in fine knot

She has tied her hair into a fine knot, and she is holding a mast of some kind.

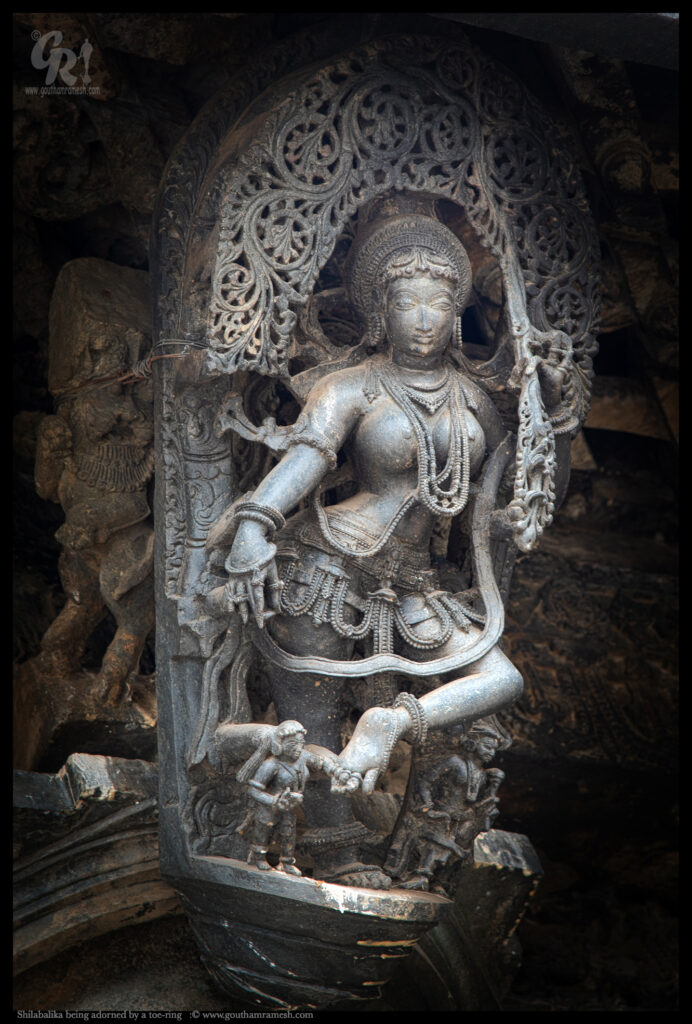
Shilabalika being adorned by a toe-ring

The lady has put on her best dress and ornaments and is ready to go for a dance.This one depicts whose is being adorned by a toe-ring. she is holding onto a vine for balance.

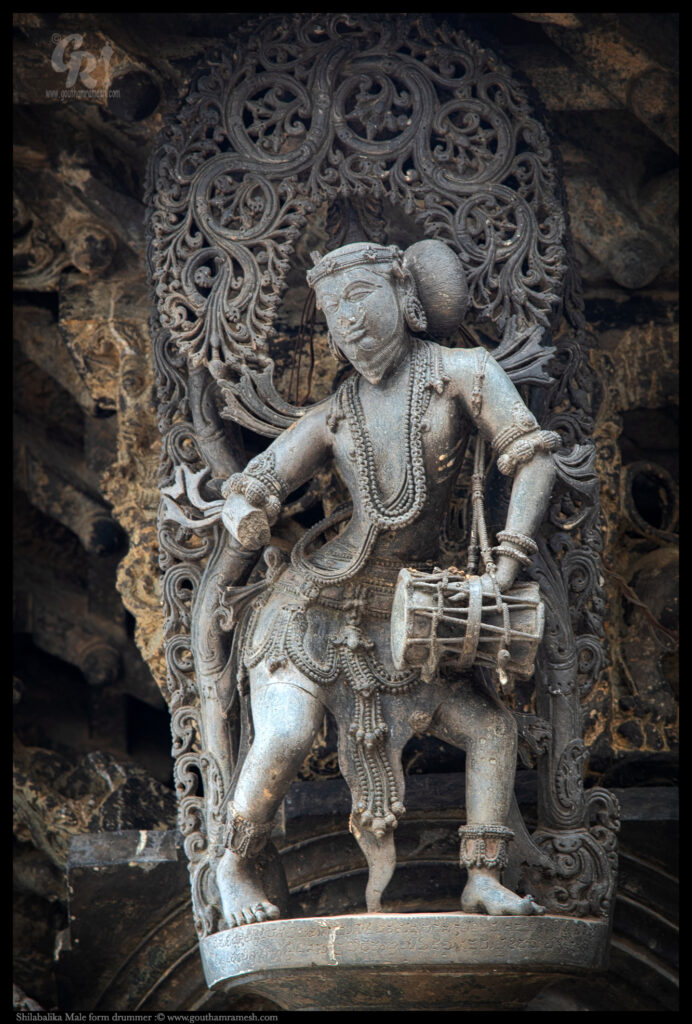
Shilabalika Male form drummer

This is one of the few odd one out with male form , with beard and moustache playing a drum , have a look at the fingers of left hand inside the strings that hold the membrane together .. master sculpture

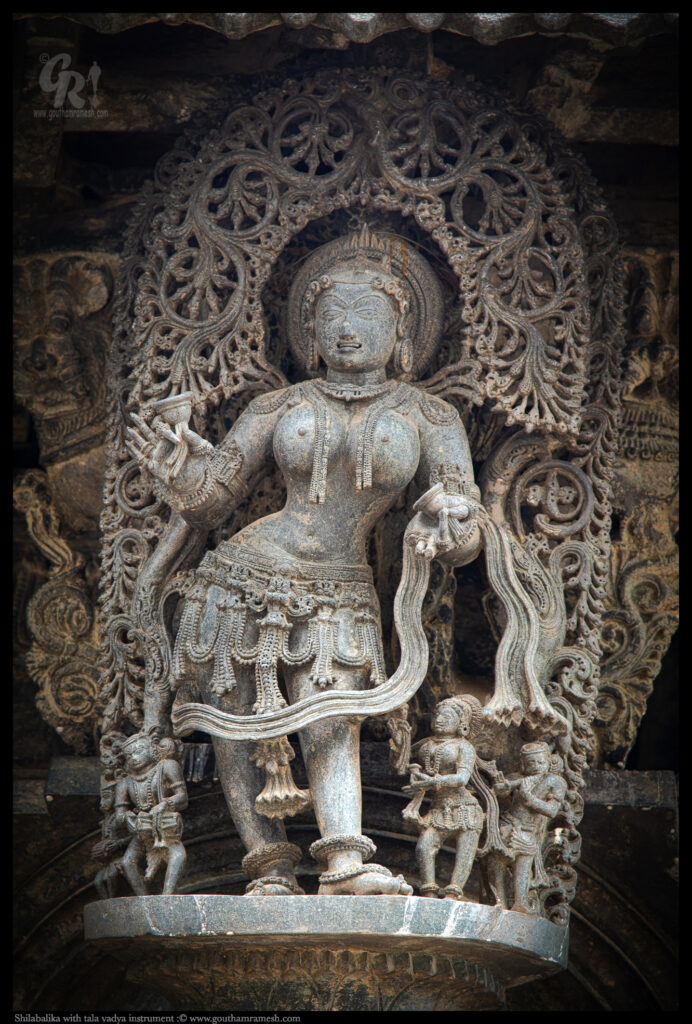
Shilabalika with taala vadya instrument

She is holding a playing a taala vadya instrument with other musicians accompanying her

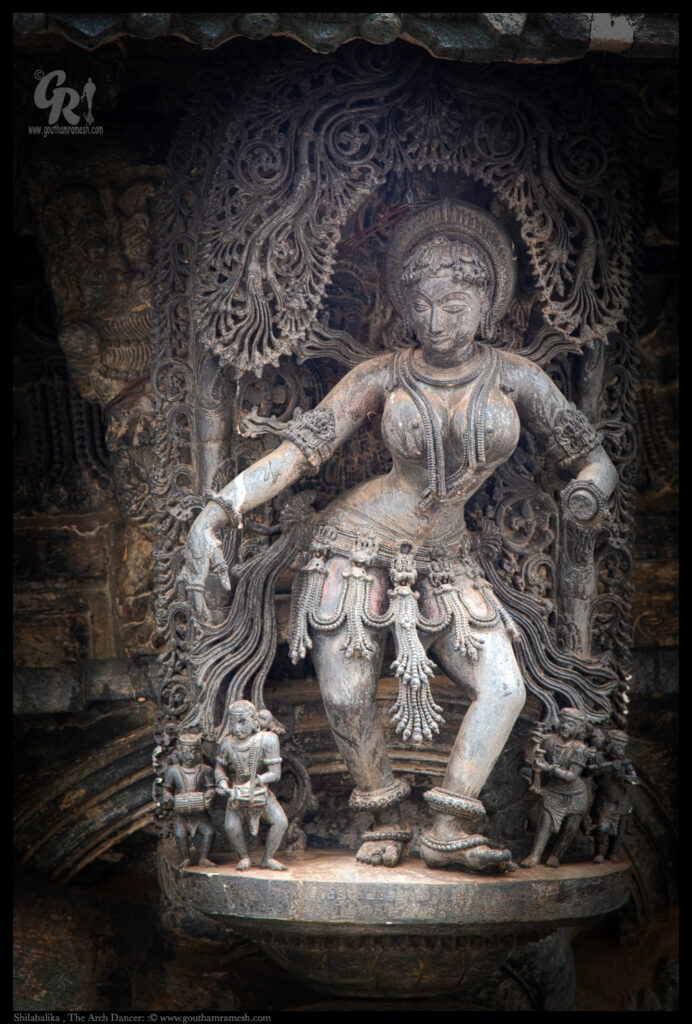
The Arch Dancer:

The Arch Dancer, She is dancing to the tune of the fun of her accomplice on both her sides

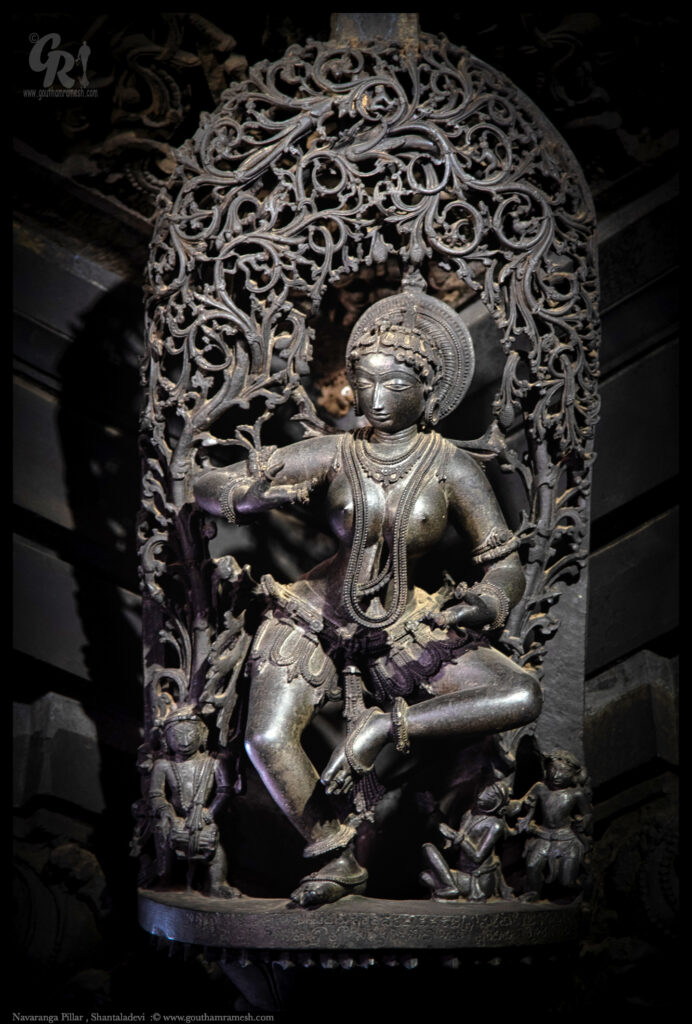
Navaranga Pillar , Shantaladevi

This is one of the most beautiful shilabalika found inside the temple and this is of Queen Shantala devi , an expert dancer and a very able administrator and an inspiration for all shilabalikas , being a dancer she used to dance in Navaranga inside the temple and she was an Queen.

She is dancing here . See the canopy behind. She is wearing a gem just above the middle of the forehead.

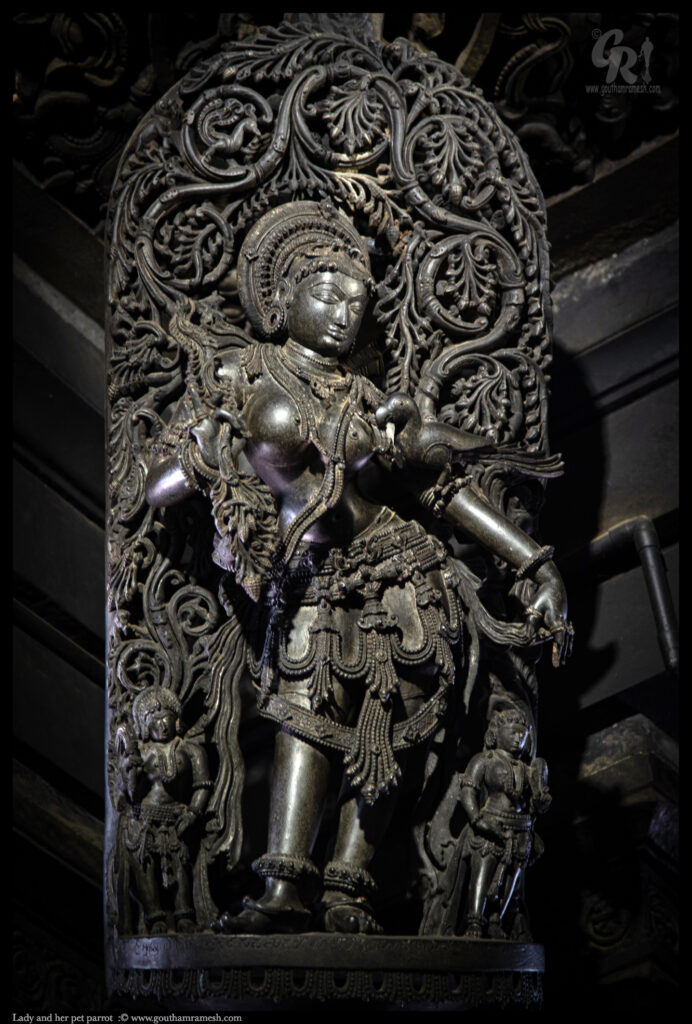
Lady and her pet parrot

This Inside the temple

A lady holds a creeper in her right hand. A parrot is sitting on the fore palm of her left hand. She looks as if she is having a conversation with the parrot. She is having a bangle on her right hand and can MOVE UP AND DOWN ( Can really move !)

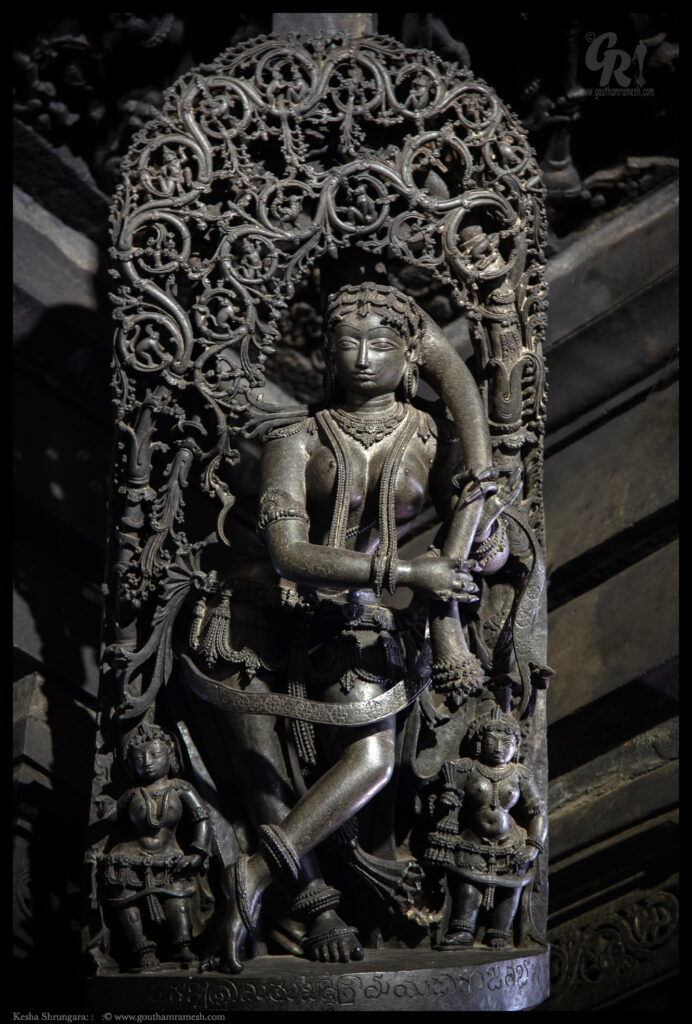
Kesha Shrungara:

This Inside the temple
She is wringing her hair to squeeze the water after her bath. You can see the drops of water collected at the tip of her hairs.

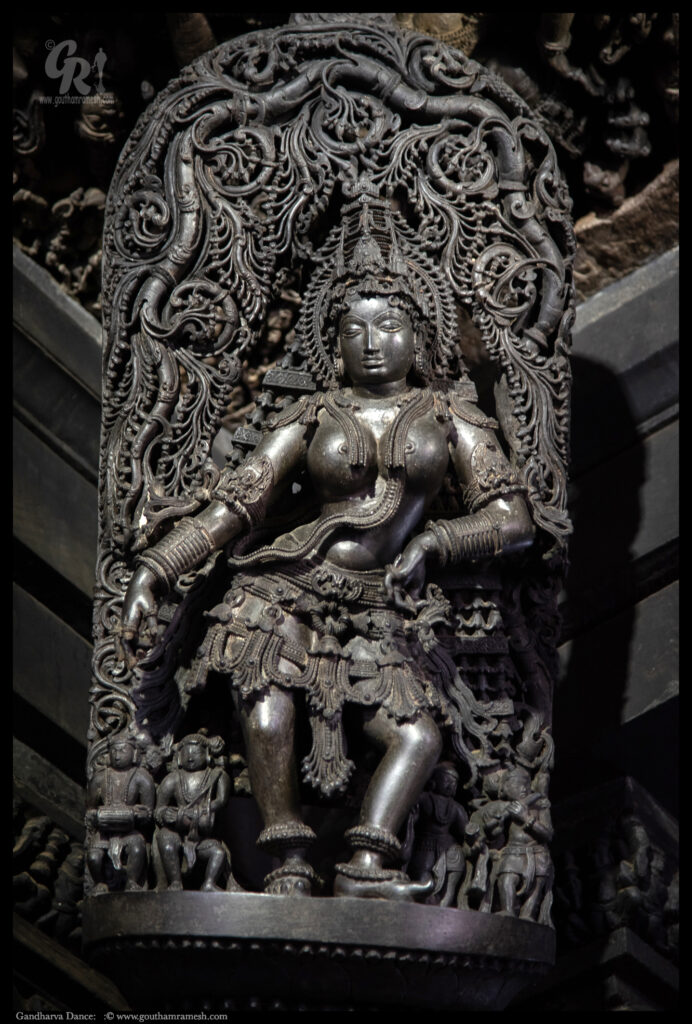
Gandarva Dance

This Inside the temple

She wears on her forearm, a good number of bangles, which give an impression of moving to and fro.

Thanks for patiently reading and seeing the images as I humbly bow with a sense of awe and admiration wondering at the architectural excellence of the Hoysala craftsmen! Incredible India and it shows what rich culture we come from.

If you like the blog, you can leave a comment at Home Page

Cheers

This image has an empty alt attribute; its file name is TransparentImage-4.png
Goutham Ramesh

Photographing Butterflies in Winter

It is a known fact   that bugs and butterflies don’t have the same far-reaching photo appeal as other natural subjects like things that are feathered or furred in savanna of safari.  They are also difficult to spot, and little challenging to shoot; However, in frame-filling close-up, insects are actually amazingly photogenic. I will talk about Butterfly photography in Indian winters*** in this blog. Butterflies are also fantastically beautiful and photogenic and you  can’t help but be seduced by their colour, intricate markings, delicacy and design and they’ve inhabited almost every type of environment and can migrate large distances – and in large numbers too .. so give it a shot!

**** When I say winter , I’m taking about India , especially south India, where you can still find lot of these small butterflies in winter!

Butterfly photography is easily accessible if you are an early riser and  you can spot them in a local garden or a grassland filled with shrubs:

In this blog I will share some of the images I shot this winter and also share some pointers on how to shoot them ( They are just my techniques and not really tips).

Most important thing you should do to shoot a butterfly is to  get up early and photograph them during sunrise especially during winters ; the winter mist makes them sluggish and that helps you to approach them. Ideally you need to photograph butterflies soon after they emerge when they are still in pristine condition and also note that the window of opportunity is brief – mistime your visit, and you may need to wait long  before you can try again.

Stalking is the best technique , This is when you follow (not chase!) butterflies around, waiting for them to rest, feed or bask. When they do, you need to efficiently move into position – just be mindful of the sun’s position; if you cast your shadow across your subject, you will likely frighten it away. 

At work
At work

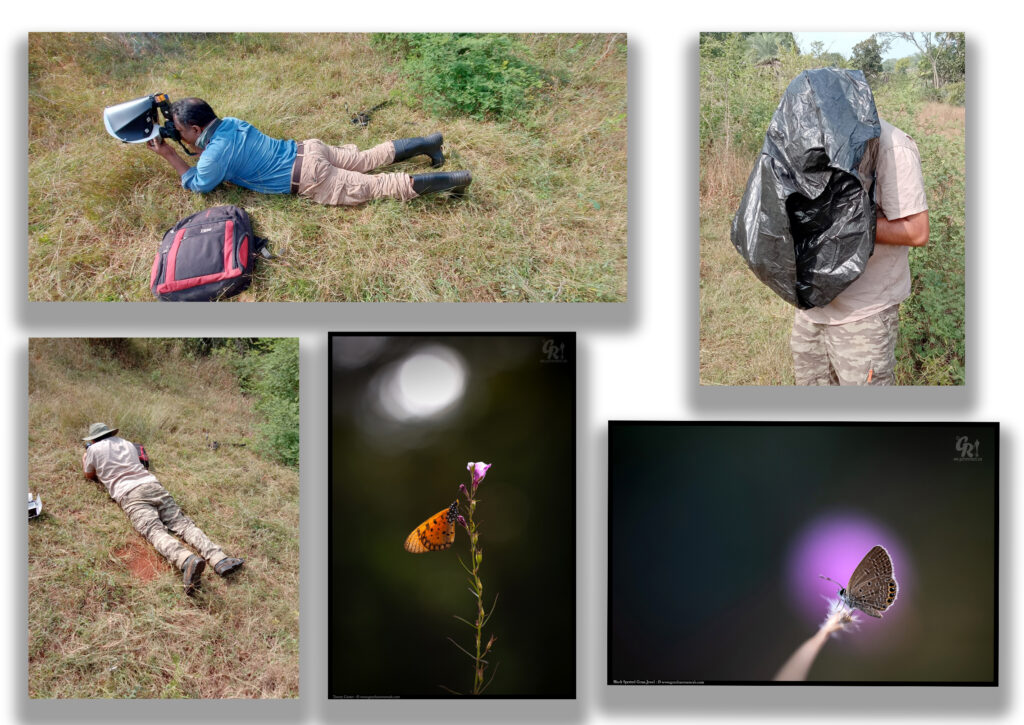
What all Circus ..we do to get a picture .. from top right in clockwise :

1. Vinod on the ground shooting (PC Vinod)
2. Myself reviewing the image with a portable dark room ( garbage bag )
3. Grass jewel
4. Tawny Coster .
5. Myself on the Ground shooting an image ( PC Vinod)

Depth of field is inherently shallow at higher magnifications when using a macro lens , so there is no leeway for error when focusing. However, if you are using a tripod you can focus via Live View – something I always prefer to do when practical, as I’m able to magnify the live image and manually focus on the butterfly’s head/eyes with good  precision. A tripod also allows you to select a smaller aperture to achieve the depth of field needed, and – if necessary – use a reflector to light up  shadow areas. Alternatively if you use latest cameras  especially mirror less you can use focus peaking as an assisting aid.

Personally, I usually want my subject to stand out boldly against a nicely diffused, out of focus backdrop , with a Bokeh  so I will typically opt for the largest aperture possible (lowest f-stop number in my case its 2.8 ) Doing so also provides a faster shutter speed.

I don’t use flash on butterflies and prefer natural light  and I do use a reflector at times or a LED light for fill in, which is not as bright as flash and still allows me to fill the shadows a bit.

Finally, be patient… very patient. When shooting butterflies, be prepared for moments of complete and utter hair-pulling frustration. You wouldn’t believe the number of times a butterfly will disappear into the distance just at the moment you are about to trigger the shutter! However, thanks to subject knowledge, good technique, perseverance and a little lady luck, you can capture great images.

Image Gallery

Thanks if you like the blog, you can leave a comment at Home Page

Cheers

This image has an empty alt attribute; its file name is TransparentImage-4.png
Goutham Ramesh

My Nikon Zfc!

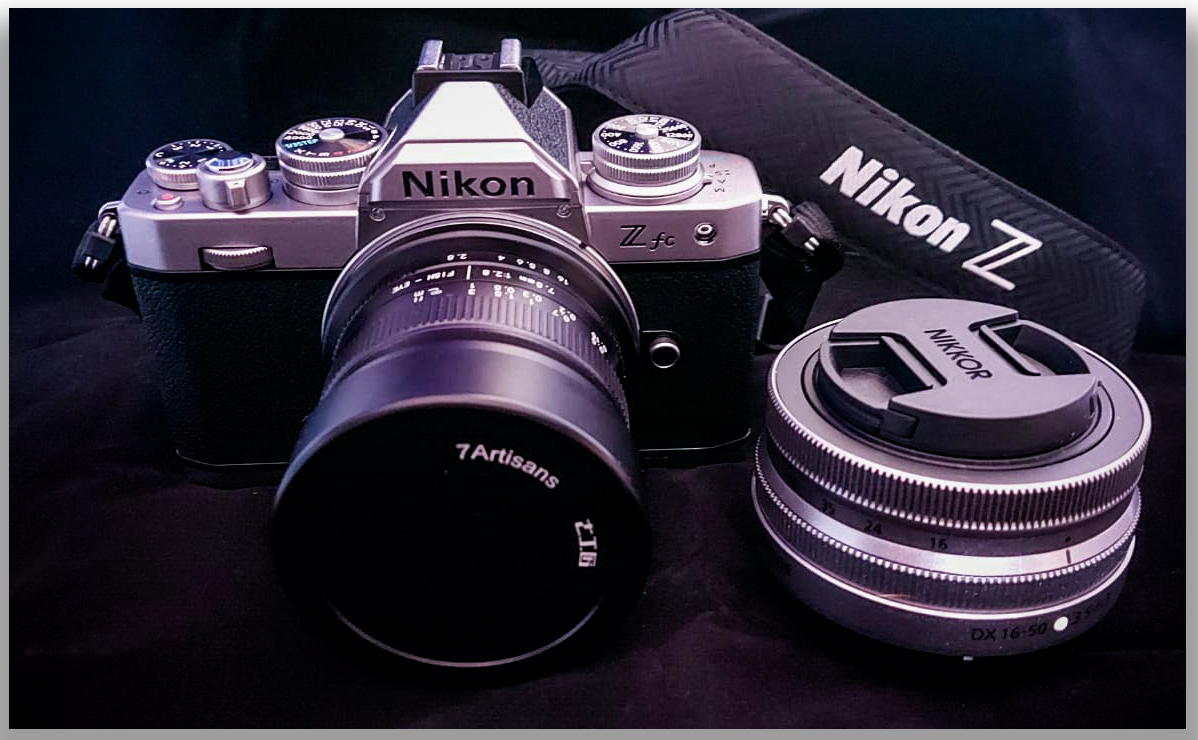
Nikon Zfc

Not all decisions in life have to be rational, my decision for buying “Nikon Zfc” was just that!

In this post, I will share my experience with this beauty and what I personally think of this beauty and share some pictures shot with this beauty.

Nikon says “Classic design meets modern engineering” when they introduce this camera on their website. I personally agree with this, it is the retro design that was the biggest factor for me to buy this camera. Having used old film cameras in the past I just fell in love with the design and all the controls on the top of the camera.

Important Specifications:

Lens mount: Nikon Z mount

Image sensor format: DX (Crop Sensor)

Image sensor type: CMOS

Total pixels: 21.51 million

Effective pixels: 20.9 million

My Take :

Some Images and what I did to shoot these images; Please note I use different kind of lenses and usually prefer lenses with no electronics and completely manual, so this is not a exhaustive review, however i will try to share my experiences with this beautiful camera and lenses I used.

Usage with Kit Lens (with Z DX 16-50mm f/3.5-6.3 VR):

The first thing I wanted to do was check the kit lens and this is what I shot with it.

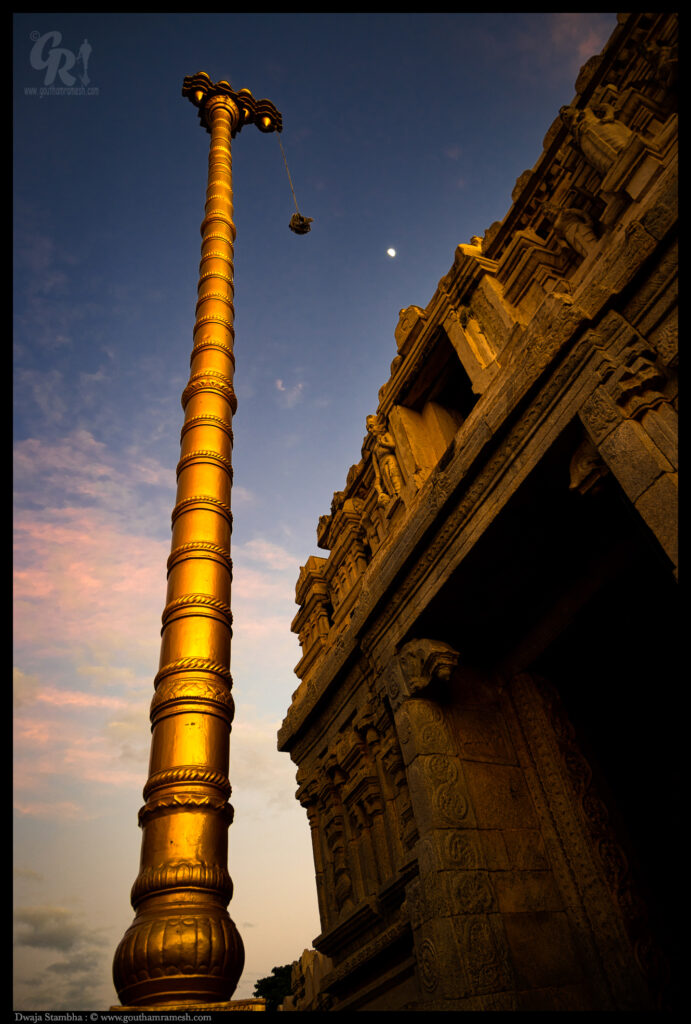
Dwaja Stambha, Lepakshi

Exposure : 1/15 sec at F3.5 ISO 200 Shot at 16mm

First thing i did was check the Kit lens and how it performs at fully open aperture and I was pleased to get a decent shot with good color tones and decent sharpness.

The NIKKOR Z DX 16-50mm f/3.5-6.3 VR is the smallest and the lightest lens available for the Nikon Z mount.Sporting an all-plastic construction and plastic mounts, these lenses are specifically designed to be as small and as lightweight as possible, while taking advantage of the short flange distance of the Z mount. At a mere 135 grams, it is impressively light ; in fact, it is the lightest DX / APS-C lens Nikon has produced to date! Optically, the lens is comprised of 9 elements in 7 groups, four of which are aspherical elements, and one of which is an extra-low dispersion element. Similar to other Nikon Z lenses, the 16-50mm VR comes with a stepping motor, which delivers quiet and fast autofocus performance. Nikon incorporated optical image stabilization into the lens, and it is supposed to compensate camera shake by up to 4.5 stops ( Yes 4.5 Stops ) .

Considering all this it produces decent results and a great lens to have with Nikon Zfc especially while shooting architecture and street.

Usage with 7Artizans 7.5mm Fisheye Manual Lens:

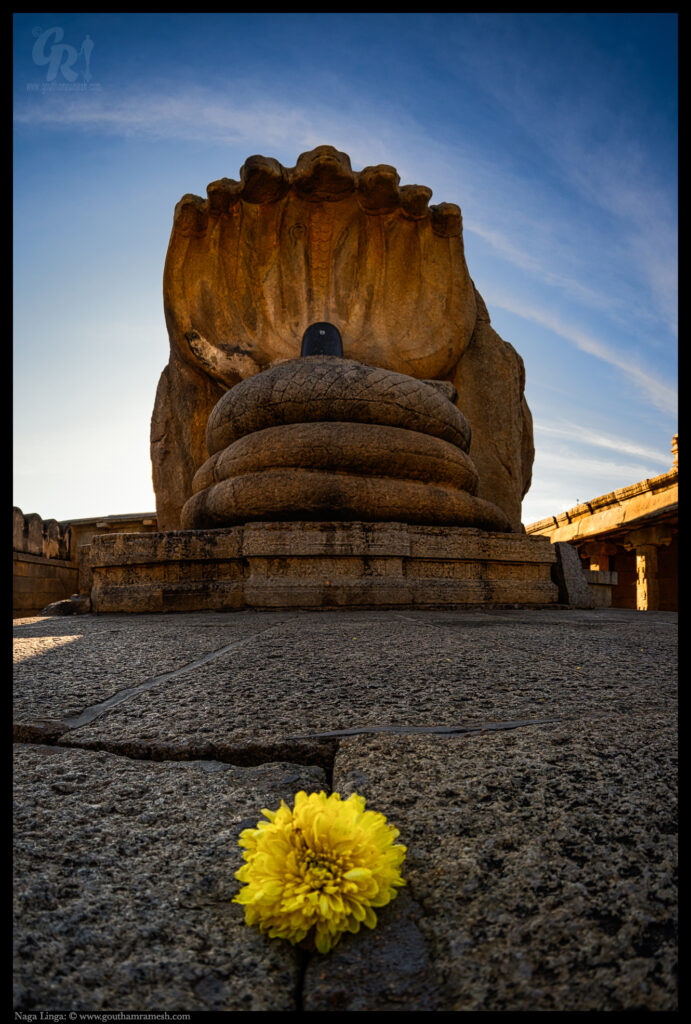
I love perspectives from fisheye and sometimes even distortions , it is not everybody’s cup of tea and some hate it. But personally for me it gives some perspectives which i like a lot and deviates from mundane.

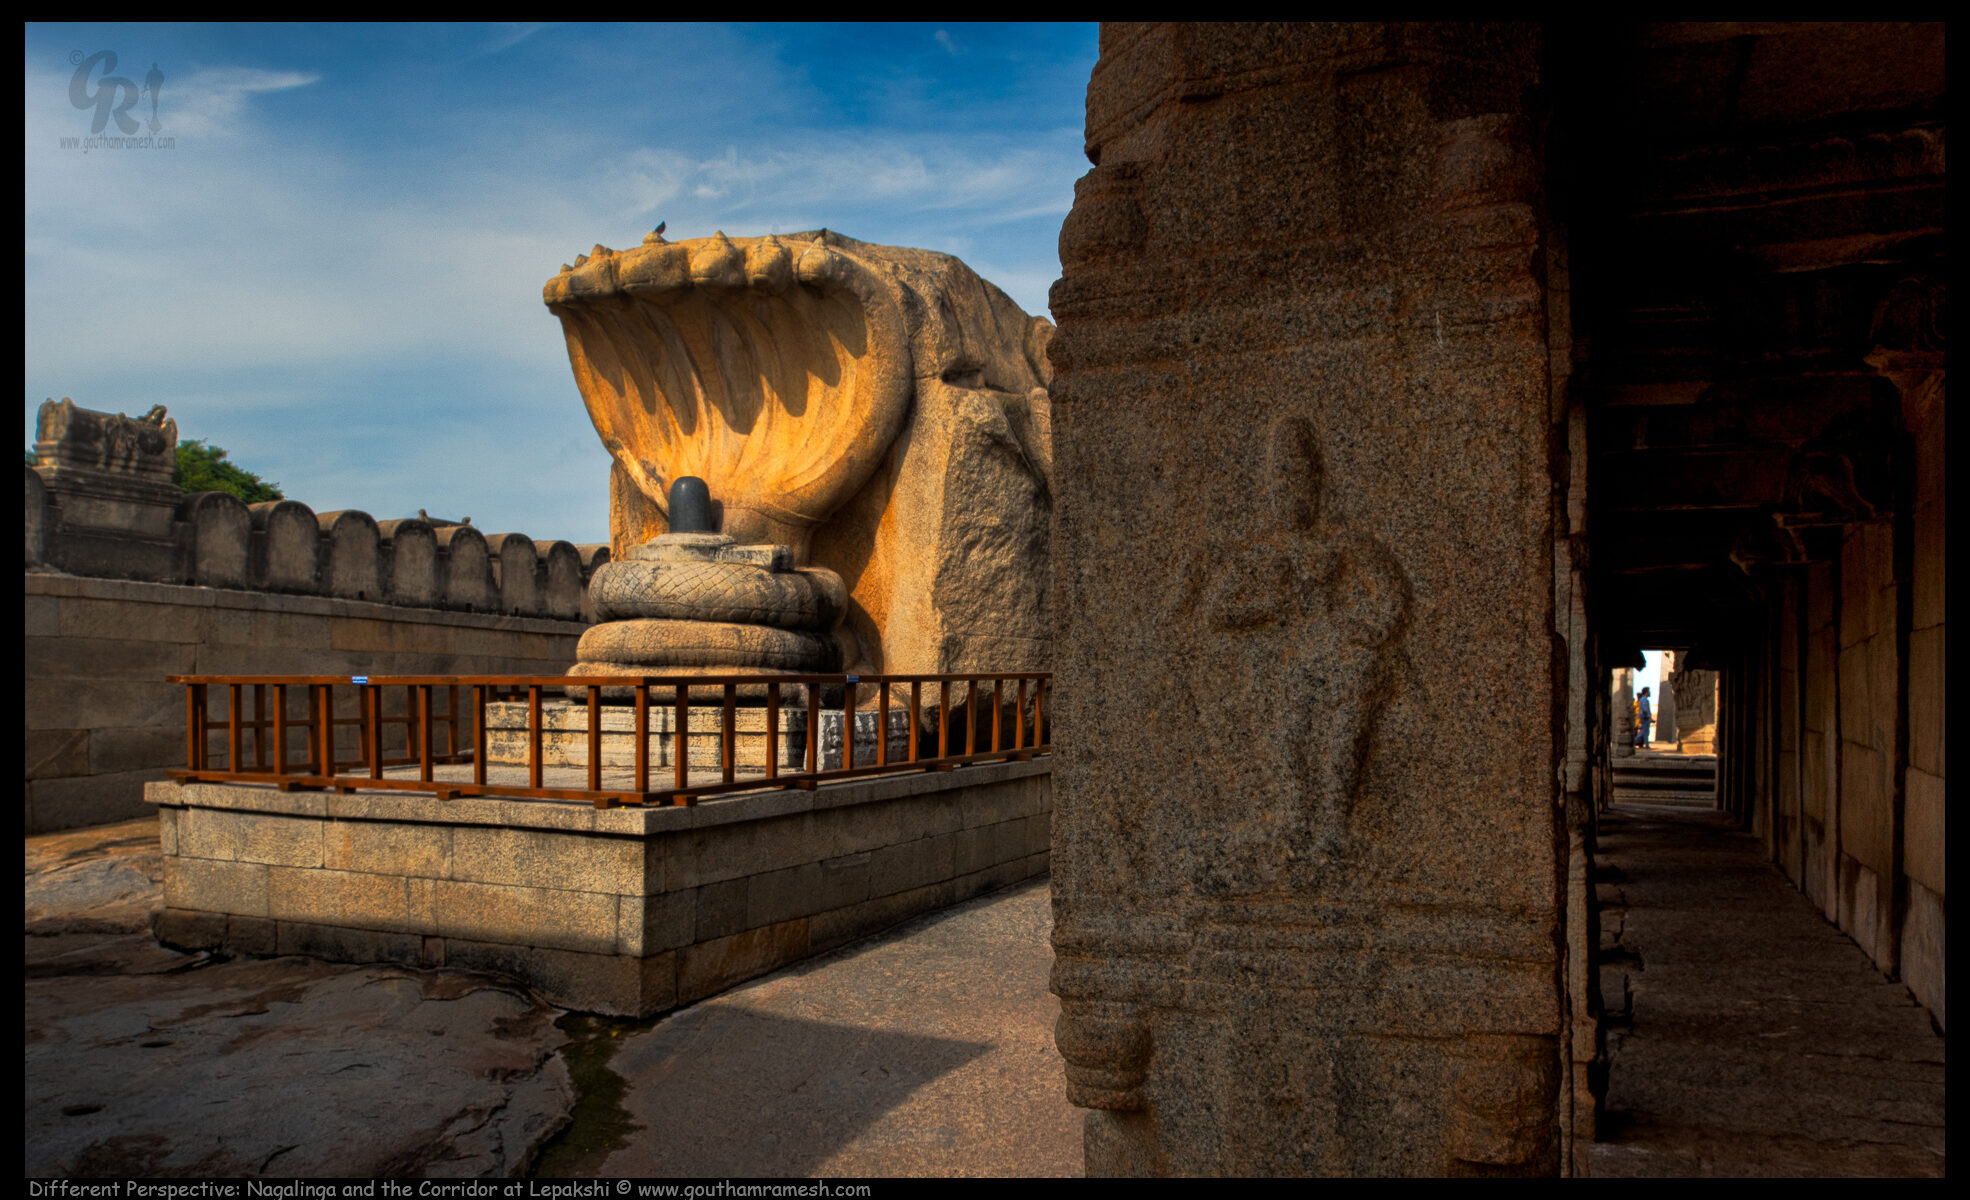
Naga Linga

Exposure : 1/250 sec at F8 ISO 100

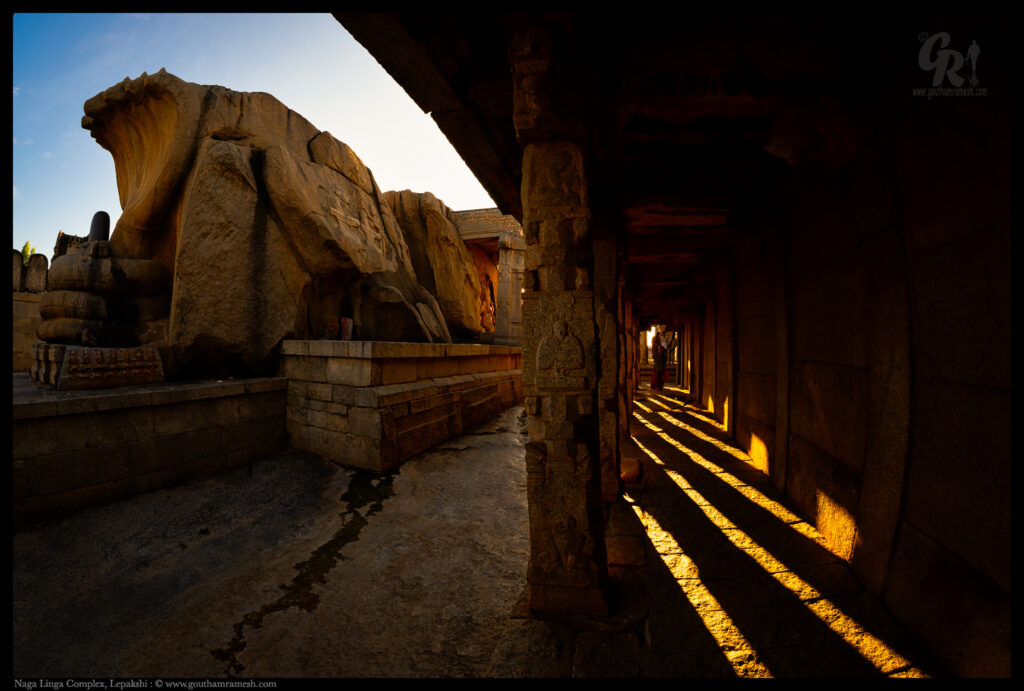
Framed

Exposure : 1/125 sec at F5.6 ISO 100

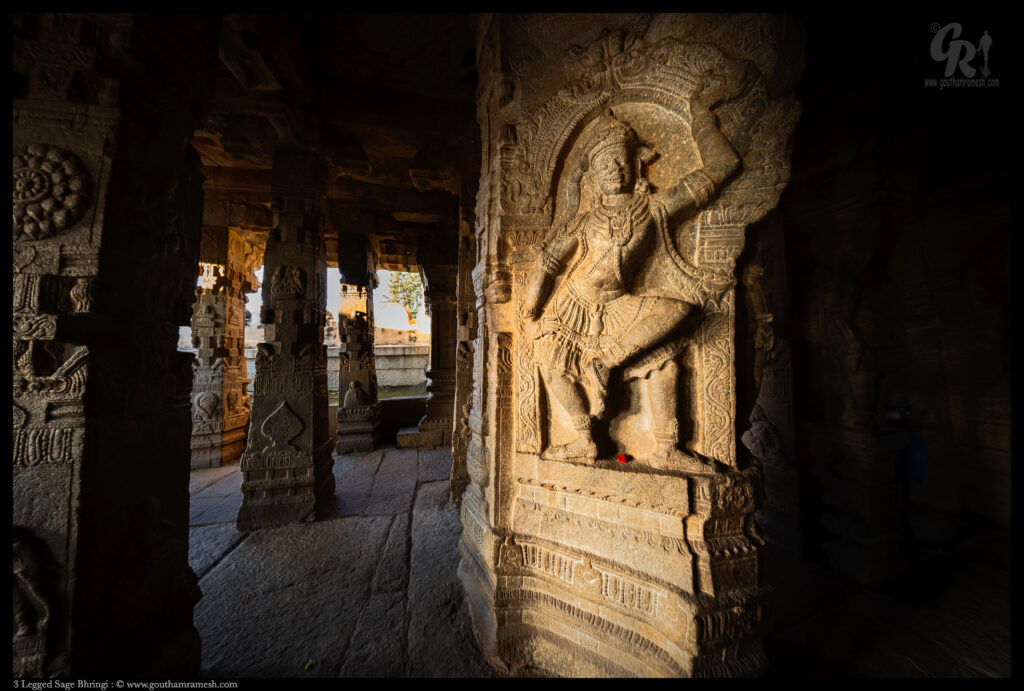
Bhringi , Lepakshi

Exposure : 1/5 sec at F2.8 ISO 100

7.5mm f/2.8 from 7Artisans produces rectangular images that cover the entire APS-C format, unlike Circular Fisheye lenses which produce round images within the rectangular field. . This Lens has a solid, high-quality feel in the hand and the focus ring completes its arc in about 1/5 of a turn and the aperture ring is click-free. Exposure is not automatic. Set the camera on Aperture Priority and select a suitable f/stop or go Manual and trust the meter. This lens is manual focus; in fact, it’s manual in everything..

The DOF so extreme that precise focusing isn’t necessary at apertures smaller than f/5.6. Minimum focus is 5.9 inches.

Using this lens on Nikon Zfc was fun and they work very well and if you swear by manual exposure and focus like me you will enjoy this; For people who shoot auto and rely on auto focus this lens is not for you.

Usage with 100mm Laowa Macro + FTZ adapter:

This was the combination that I was always interested in , because I do lot of macro and would love to shoot with Bokeh. You can see my Laowa lens review here.

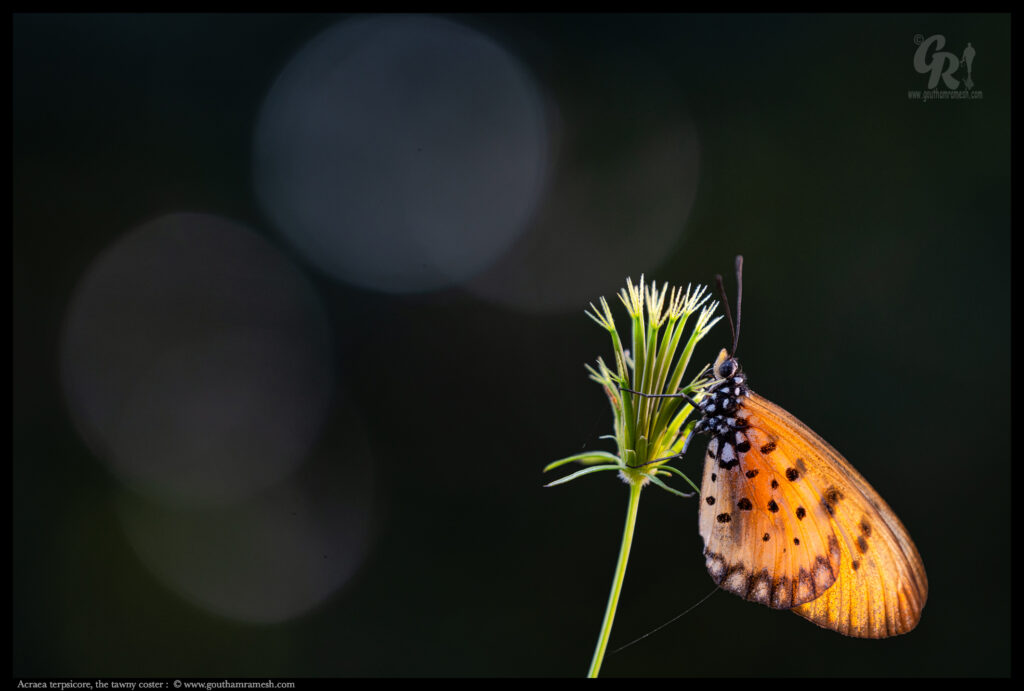
All these images are shot at 2.8 to get a round bokeh.

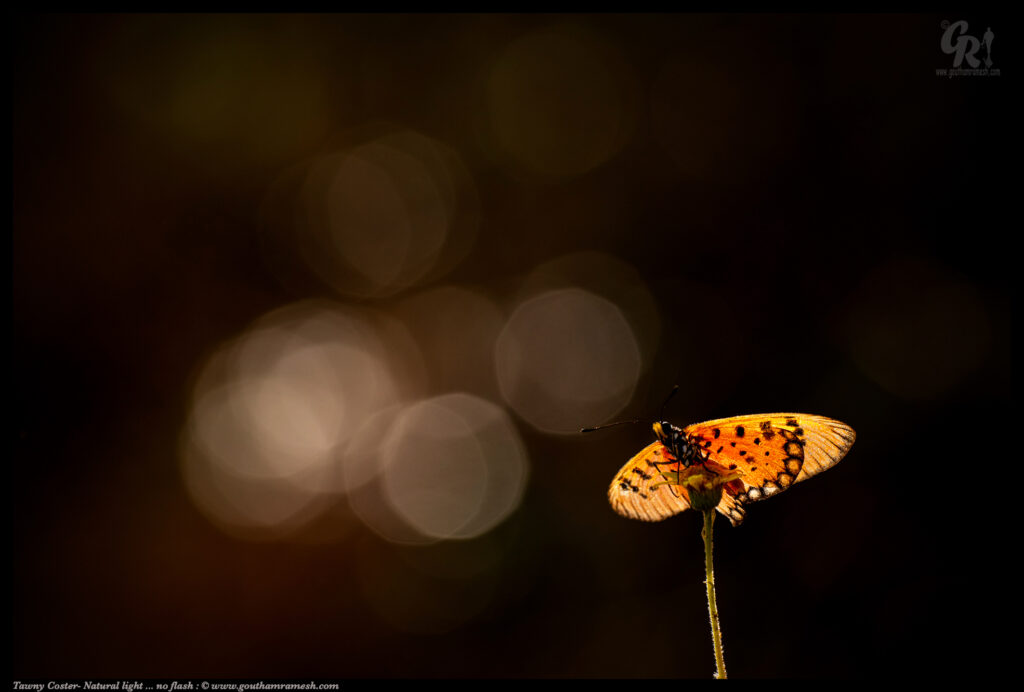
Tawny Coster
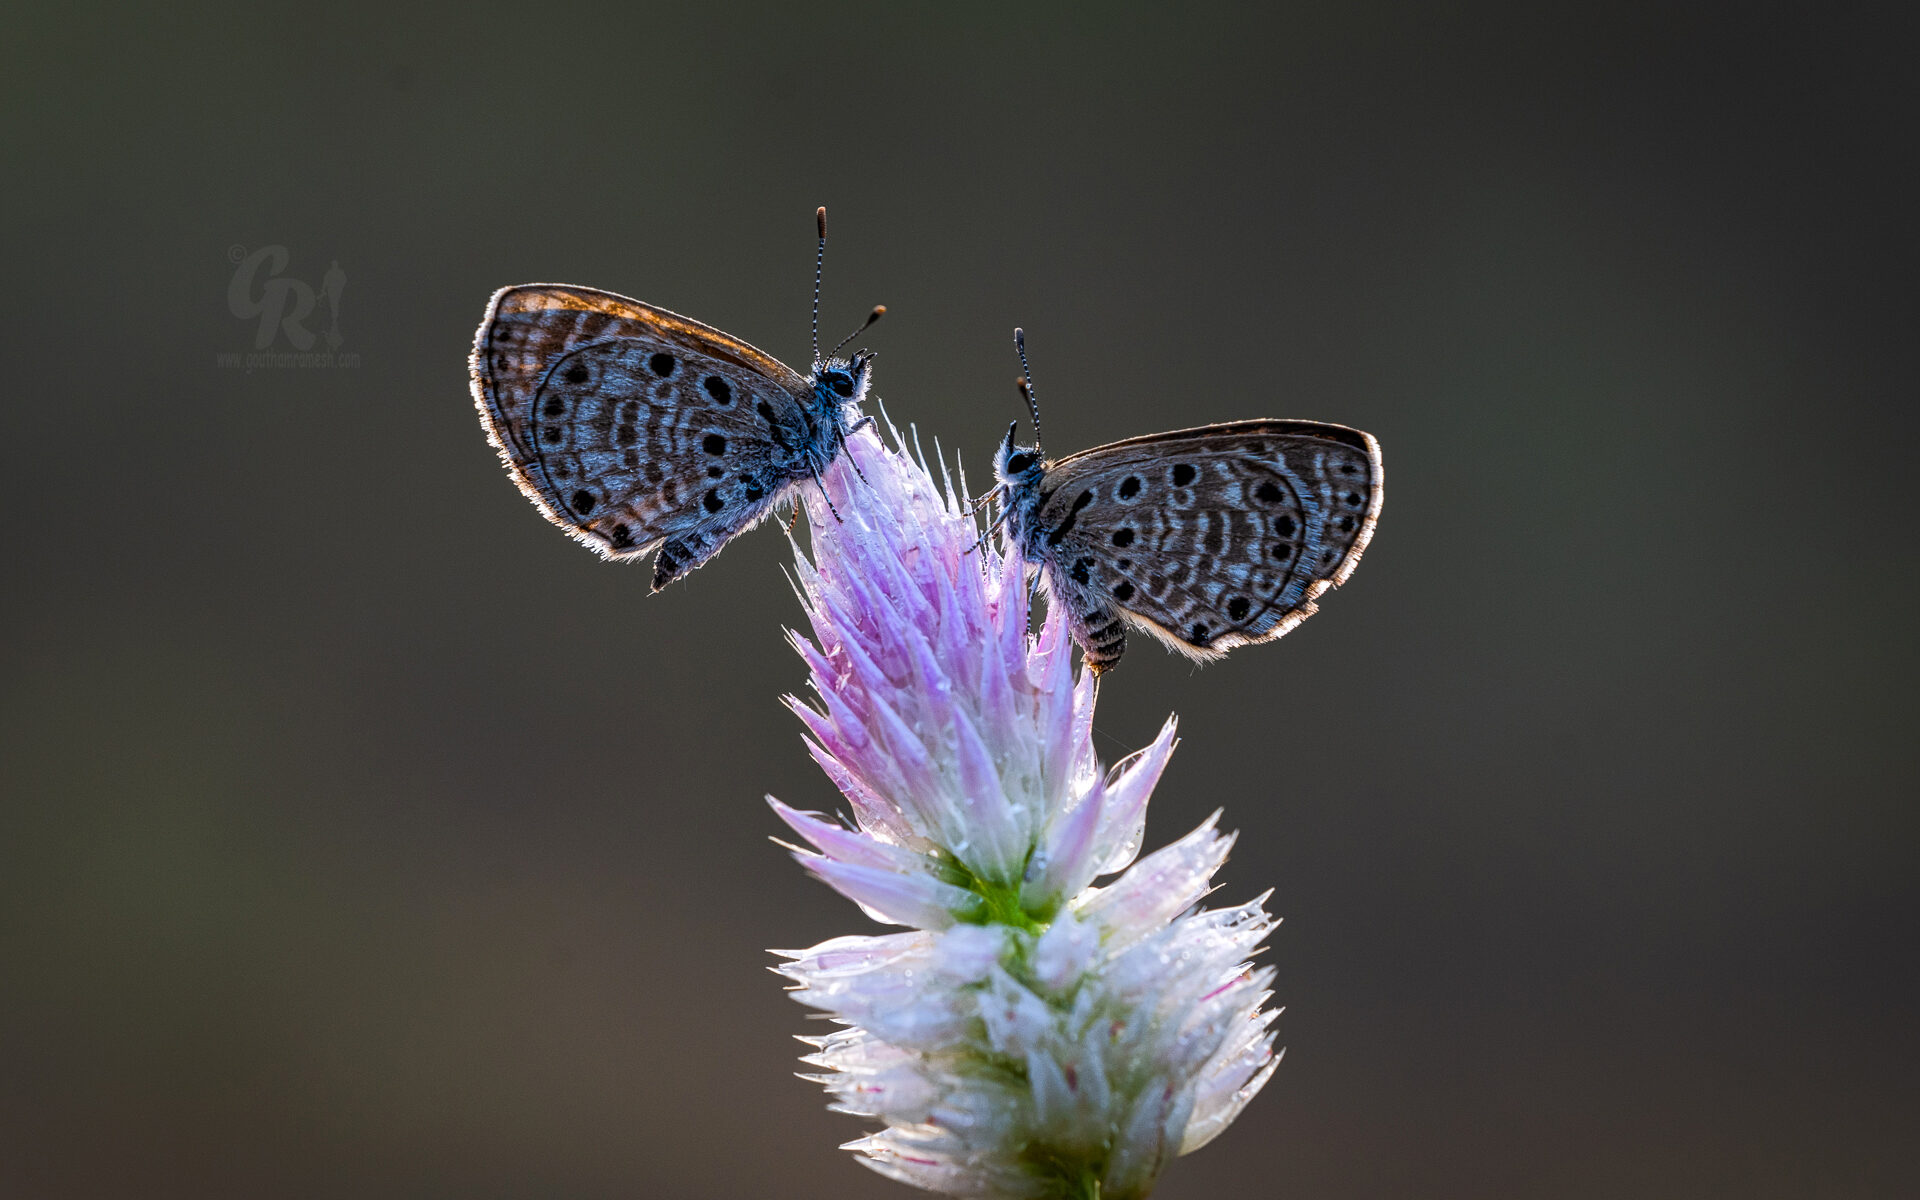
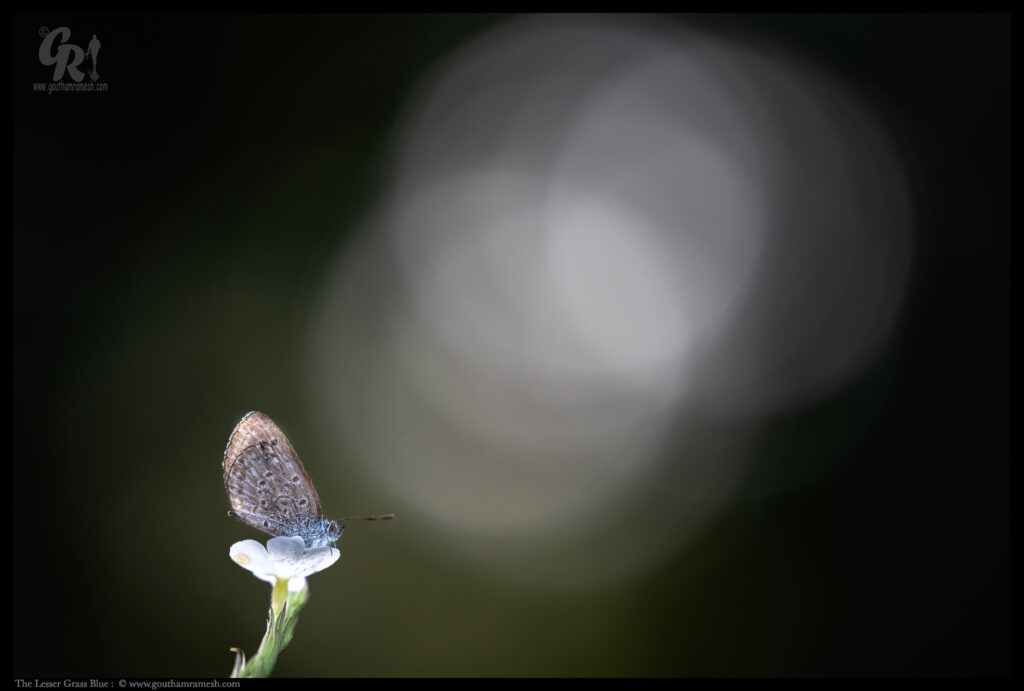
Tiny Grass Blue
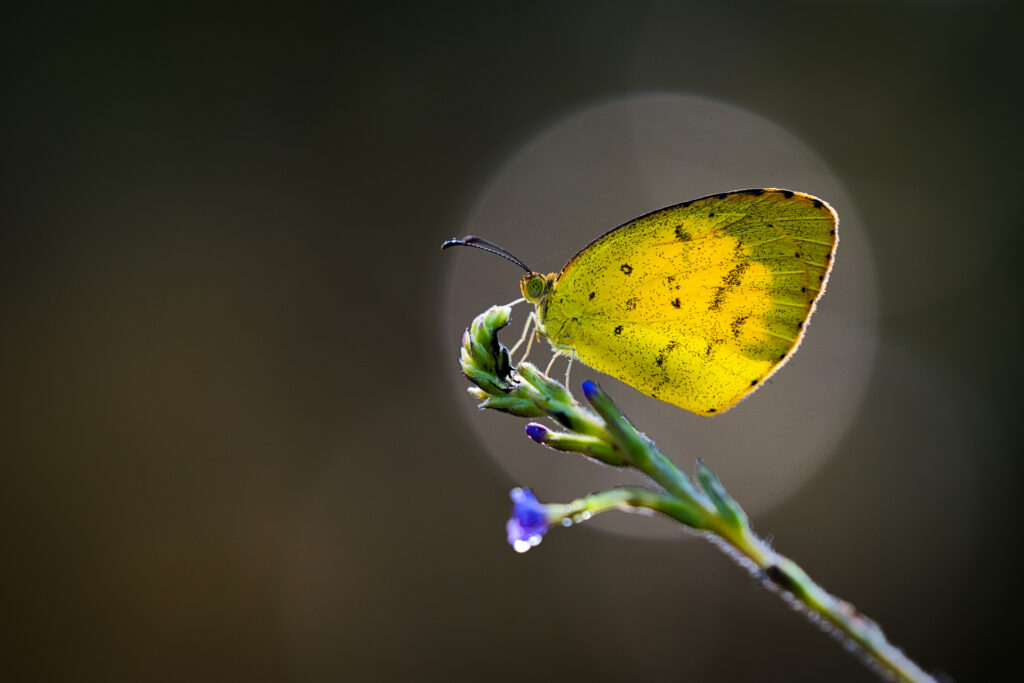
Small Grass Yellow
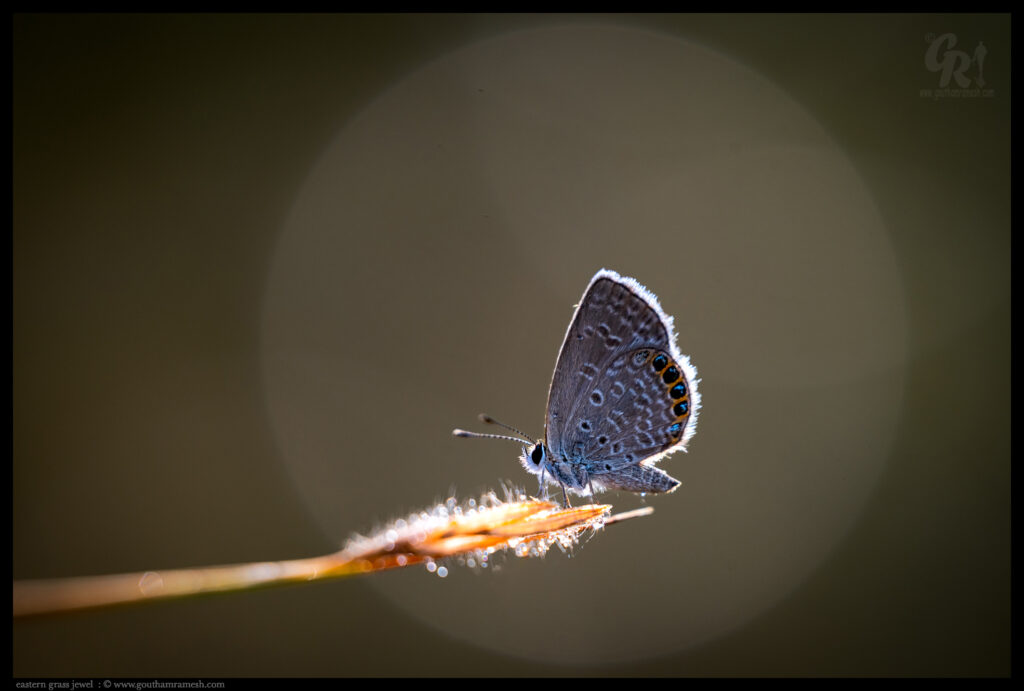
Oriental Grass Jewel
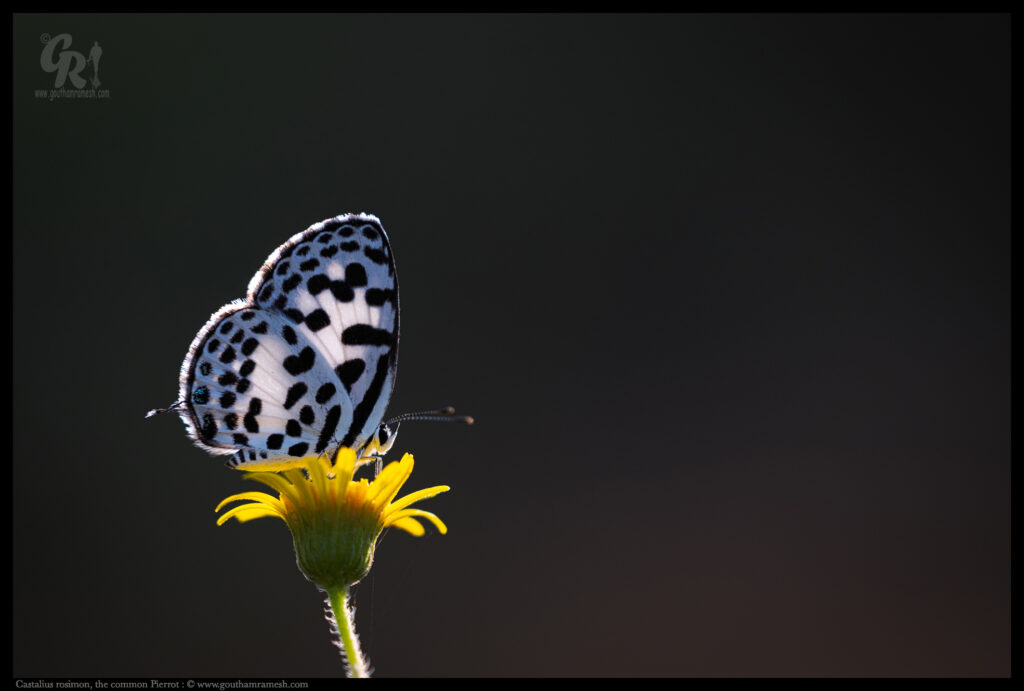
Common Pierrot
Back Lit , Common Pierrot.
Small Grass Yellow

Using Nikon Zfc with Laowa 100mm and FTZ adapter was fun , but also slightly difficult because of lack of hand grip on the camera ( A simple monopod or a small rig grip will solve this problem) .

I love round bokeh and inorder to get that I need to open the aperture , which gives me a very shallow DOF. Now order to make the picture look good with this setting my focus have to be perfect and also I need to be parallel to the subject, with laowa lens which is manual this is a herculean task , this is where focus peaking on Nikon Zfc helped! What an amazing setting this is.

Focus peaking is a focusing aid in live preview or electronic viewfinders on Nikon Zfc that places a white or coloured highlight on in-focus edges within an image using an edge detect filter.

Now, one may ask why a tool such as this is necessary, with the high-resolution LCDs and EVFs being released today. This is because as great as those screens are and as perfect as your eyesight may be, being able to see what is in focus quickly and clearly can dramatically speed up your work. Also, it is always nice to get another, perhaps more precise, opinion on the technical aspects before you get home and find out that you barely missed the shot you needed.

Peaking also shows up in real time, giving you near-instantaneous feedback as you rack focus through a scene.  Importantly it helps you see what all area is in focus!

How to set focus peaking and use , see the video here https://www.youtube.com/watch?v=auBqCn9RdLo.

Thats it friends , I just wanted to share my experience and my take for detailed review there are many sources on the net.

I bought this camera from https://www.videolinks.com/ , Great service from Anish George and his team, They really went out of their way to get me this camera, especially during these days when most of the equipments are out of stock.

Thanks if you like the blog, you can leave a comment at Home Page

Cheers

This image has an empty alt attribute; its file name is TransparentImage-4.png
Goutham Ramesh

Laowa 100mm f/2.8 2x Ultra Macro APO -My Take

Background :

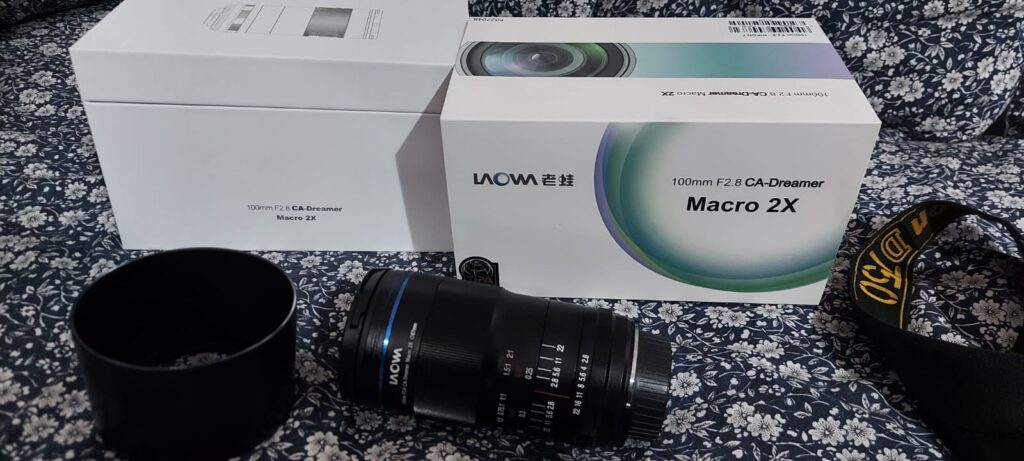
Recently I bought Laowa 100mm f/2.8 Ultra Macro for Nikon Mount  to compliment my aging Sigma 180mm F3.5 which is a brilliant lens by itself but its has started giving me problems with auto focus and since it is a discontinued lens I was forced to look at other alternatives.

This blog is all about my first take on the lens and not really a technical review ; For technical review pls visit

https://www.digitalcameraworld.com/reviews/laowa-100mm-f28-2x-ultra-macro-apo-review 

or look at many youtube videos like

https://www.youtube.com/watch?v=lkNOmMxOwIY

Please Note

  • I have not really tested this lens at 2X yet and may not really use it at 2x as I like lot of space in my images.
  • I have tested it on only Nikon Mount Nikon D750 Fx full frame body ; Only Canon EF version is equipped with a CPU chip and motor for aperture control via the camera. All other mounts are manual and aperture is controlled by the aperture ring on the lens.
  • The aperture gets deployed when shutter clicks, so while focussing you will have full brightness across F stops ( This is an issue only when an adapter is used )
  • Also I’m a hobby photographer and really do not have any association with Laowa ( would love to have one if I get to test their latest lenses  )  or any manufacturer and this is a not a paid review.

Specification

  • H/AI-Mount Lens/Full-Frame Format
  • Aperture Range: f/2.8 to f/22
  • Two Low Dispersion Elements
  • Maximum Magnification: 2:1
  • Minimum Focusing Distance: 9.7″
  • Manual Focus Design
  • Aperture Blades 9 (Canon); 7 (Nikon); 13 (Sony)
  • APS Equivalent 1.5x: 150mm; 1.6x: 160mm
  • No Front element rotation
  • Filter Size 67mm
  • Available Mounts: Canon EF, Canon RF, Nikon F, Nikon Z, Sony FE

Note : The lens comes with a UV filter and keep this on , removing this will expose the moving parts of the lens to weather.

Test Images and my take:

Testing Bokeh

First thing I do for with any lens is test Bokeh. The above shot was shot at 2.8 with a square LED at the back , as you can see the bokeh is smooth and round.

Bokeh at f8
Bokeh at F2.8

As you can see in the in above images the bokeh is perfectly round at 2.8 ! At F8 it is septagonal ( 7 blades ) , which is good with more blades it would have been more round , canon and sony mounts might give you near round bokeh.

Color Contrast

Color contrast is one thing I always suspected in this lens because my sigma gives an excellent color contrast and this lens did surprise me with color contrast and the contrast is very good.

Sharpness

The above image was for testing sharpness , here also the lens performed exceptionally well as you can see in the result.

Some More sample shots ( Let the images speak for themselves )

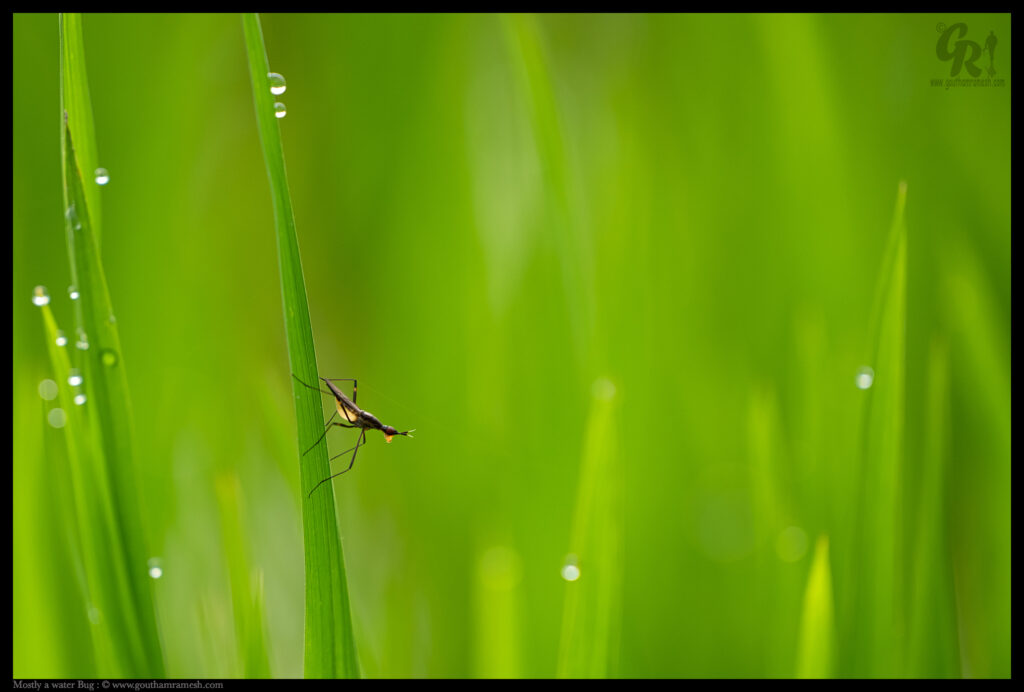
Neriidae this was on paddy grass
Exposure:
F2.8 , 1/600 , ISO 100, Natural light
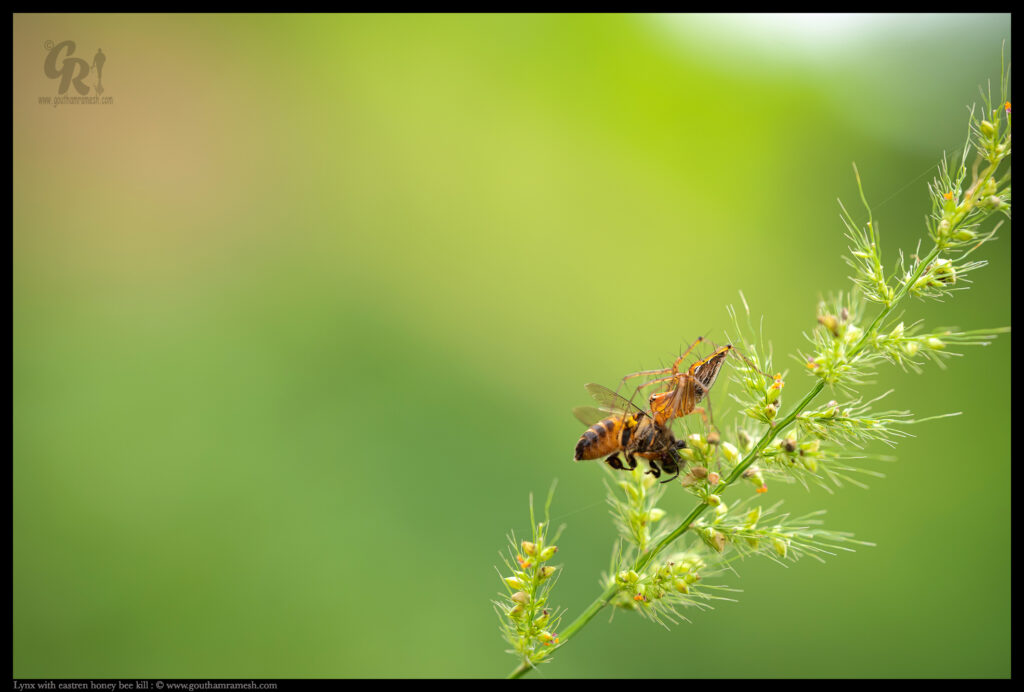
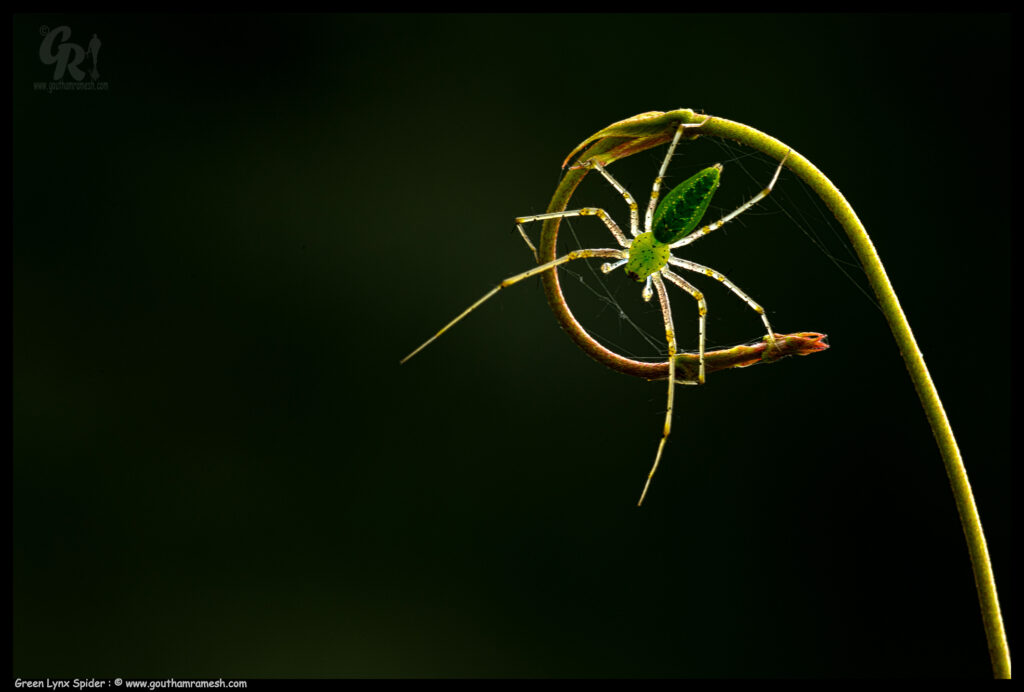
Lynx spider with eastern honey bee kill.
Exposure:
F8 , 1/128 , ISO 100, Natural light
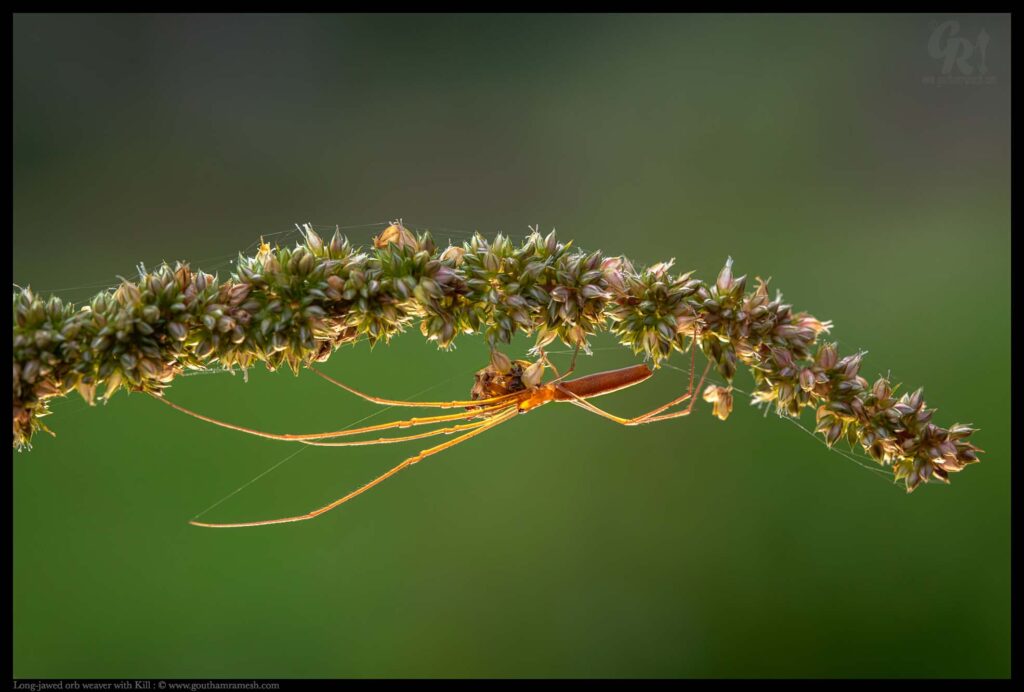
Long-jawed orb weavers
Exposure:
F8, 1/100 , ISO 400, Natural light
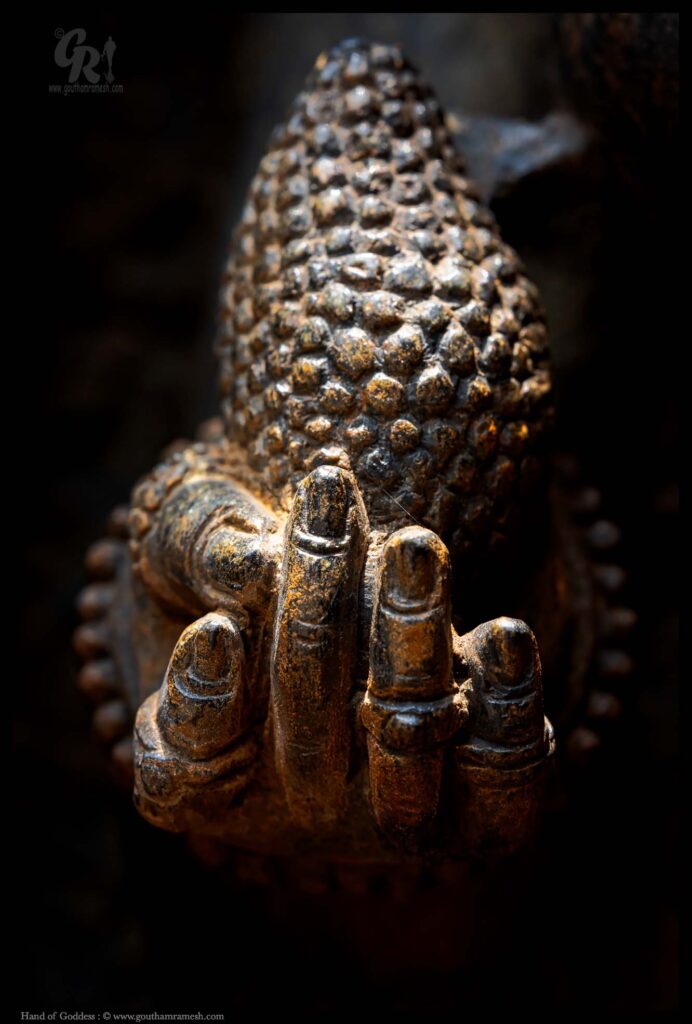
Hand of goddess
Exposure:
F8
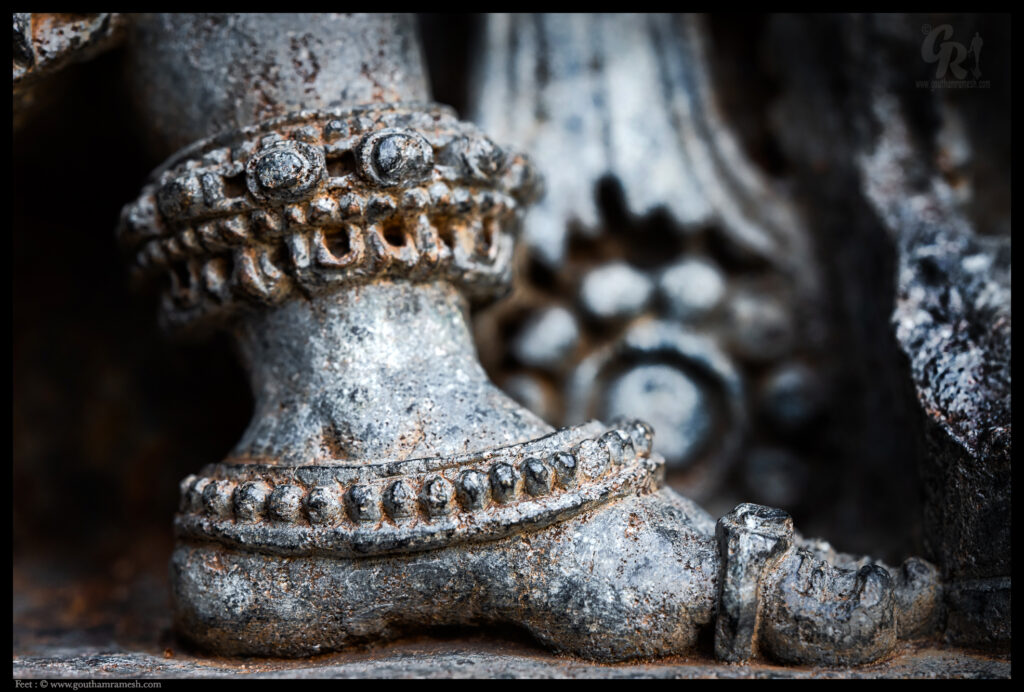
Feet of Goddess Exposure:
F5.6
Exposure:
F5.6, 1/160 , ISO 400, Natural light

Some Points:

  • Focus : It is a Manual focus lens; Since manual focus lens are by design “not  designed” for faster focus the focus rotation is smooth and gives you longer rotation but  not much as I would have liked ( throw is about 60 degrees )!  However focussing is smooth and pictures are super sharp. If you are a photographer who uses manual focus like me, you will love this and for photographers who swear by AF and vibration reduction/image stabilization .. my advice is stay away from this lens and this is not for you guys
  • Build Quality: The lens has a solid, metal body with engraved markings. It measures 2.8 x 4.9 inches (72 x 125 mm) and uses the common 67mm filters. At 1.4 pounds (650g), it is fairly heavy. The lens is officially “internal focusing”, but that’s not strictly true. The outer barrel doesn’t extend, but the whole lens assembly moves inside the barrel, just like it did on older lenses. However to prevent damage to the inner components of the lens, Laowa ships it with a UV filter which should remain permanently attached to the front.
  • Aperture control : The aperture ring is located close to the mount. On most versions, the aperture can only be controlled on the lens, with no communication with the camera, but Canon’s EF version comes with a chip for aperture control and Pentax’s version uses a mechanical coupling for aperture control (thanks to the K-mount’s backward compatibility) However for a guy like me who started with Nikon FE, Pentax K1000 and Kiev-19 this is nothing new and It’s not a great disadvantage.
  • Sharpness and resolution:  Macro lenses come with high expectations regarding sharpness. In this regard, the lens  does not disappoint and the lens is sharp from f2.8 onwards till f22; However it performs best between f8 and f16 after which diffractions can be seen.

Thats it friends , I just wanted to share my experience and my take for detailed review there are many sources on the net.

Thanks if you like the blog, you can leave a comment at Home Page

Cheers

This image has an empty alt attribute; its file name is TransparentImage-4.png
Goutham Ramesh

Natural Light Macro with my 180mm.

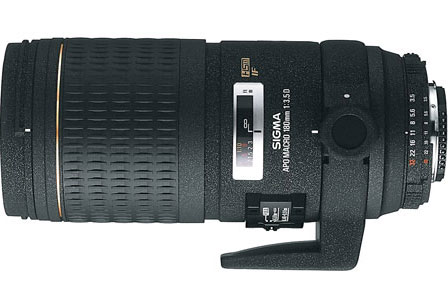
I usually do not give too much importance to the equipment, however if there is one lens that’s been close to my heart it’s been my beloved Sigma 180mm Macro EX HSM ; This lens has been with me for close to 2 decades and has given me great images. In this blog I will share some images shot with this lens in natural light.


Sigma 180mm Macro EX HSM 3.5, a brief overview:

The Sigma APO 180mm F3.5 EX DG lens was (yes, it is no longer manufactured) a telephoto/macro lens produced by Sigma Corporation.

  • Lens style:       Telephoto , Macro
  • Focal length:   180 mm
  • Maximum aperture:    f/3.5
  • Closest focusing distance :     0.46 m
  • Maximum magnification:       1:1
  • Minimum aperture:     32
  • Number of diaphragm blades :9
  • Auto focus type:         AF HSM
  • Lens Construction:     13 elements / 10 groups
  • Filter diameter :72 mm

What I liked about this lens!

  1. Shots  taken with this  lens were quite impressive.
  2. The shallow DOF.
  3. The  working distance has always been excellent.
  4. This lens performs extremely well even when the aperture is fully opened at 3.5.
  5. Excellent build , even though the powder coating matte finish peels off.
  6. Lovely Circular Bokeh at 3.5

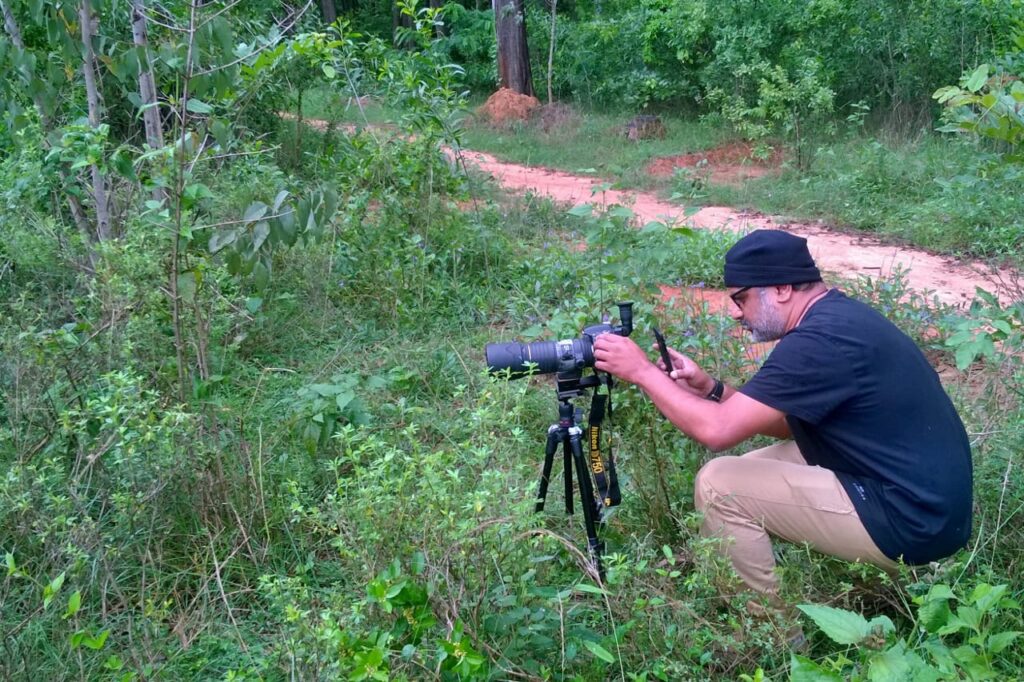
Me , with my Sigma 180mm on field

Some techniques that I follow with this lens:

  1. Always stay parallel to the subject , this allows me to get the subject of interest in the shallow DOF that this lens provides
  2. Always use a tripod stand! This lens is heavy and is not for people who like to do handheld photography
  3. Use a Macro rail
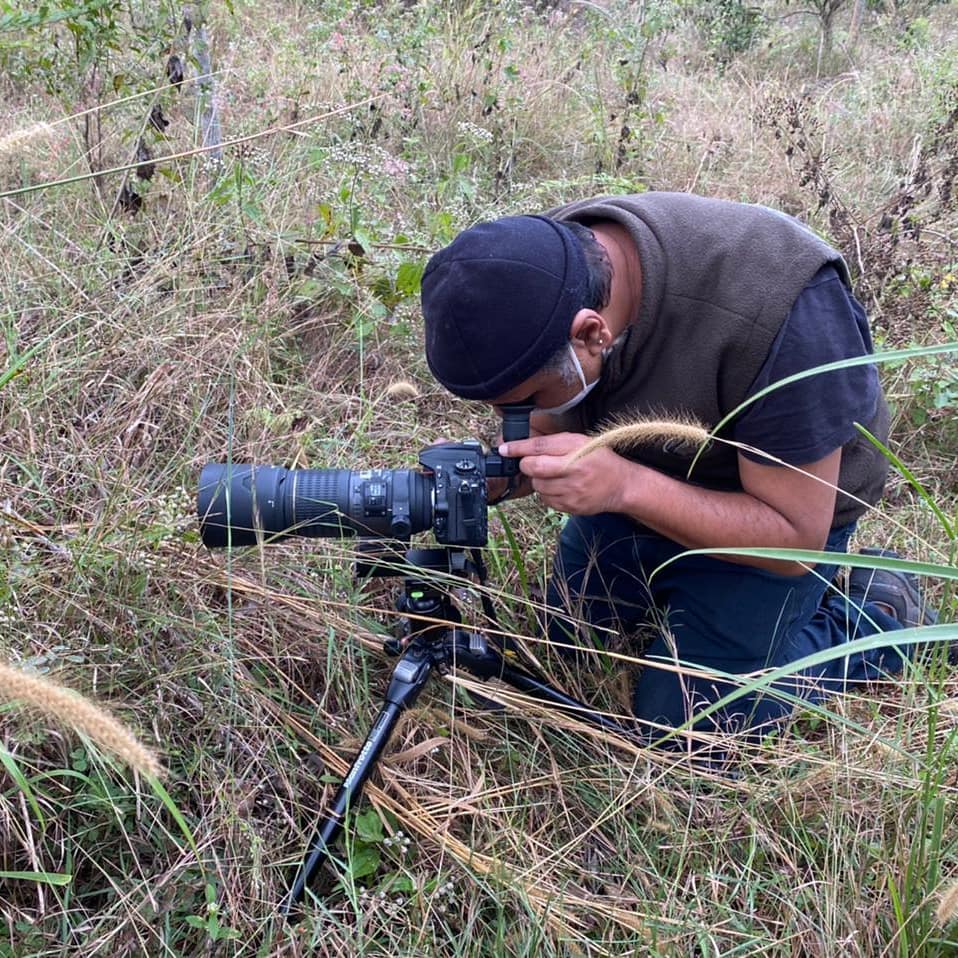
  4. Use a right angle viewfinder , since most of the subjects are at ground level or very close to the ground, this helps a lot and saves my back as well.
  5. Start shooting with a fully open aperture and keep closing the aperture till i get right DOF
  6. Carry a white sheet of paper as a reflector to bounce natural light and use it to fill shadows.

Some Images:

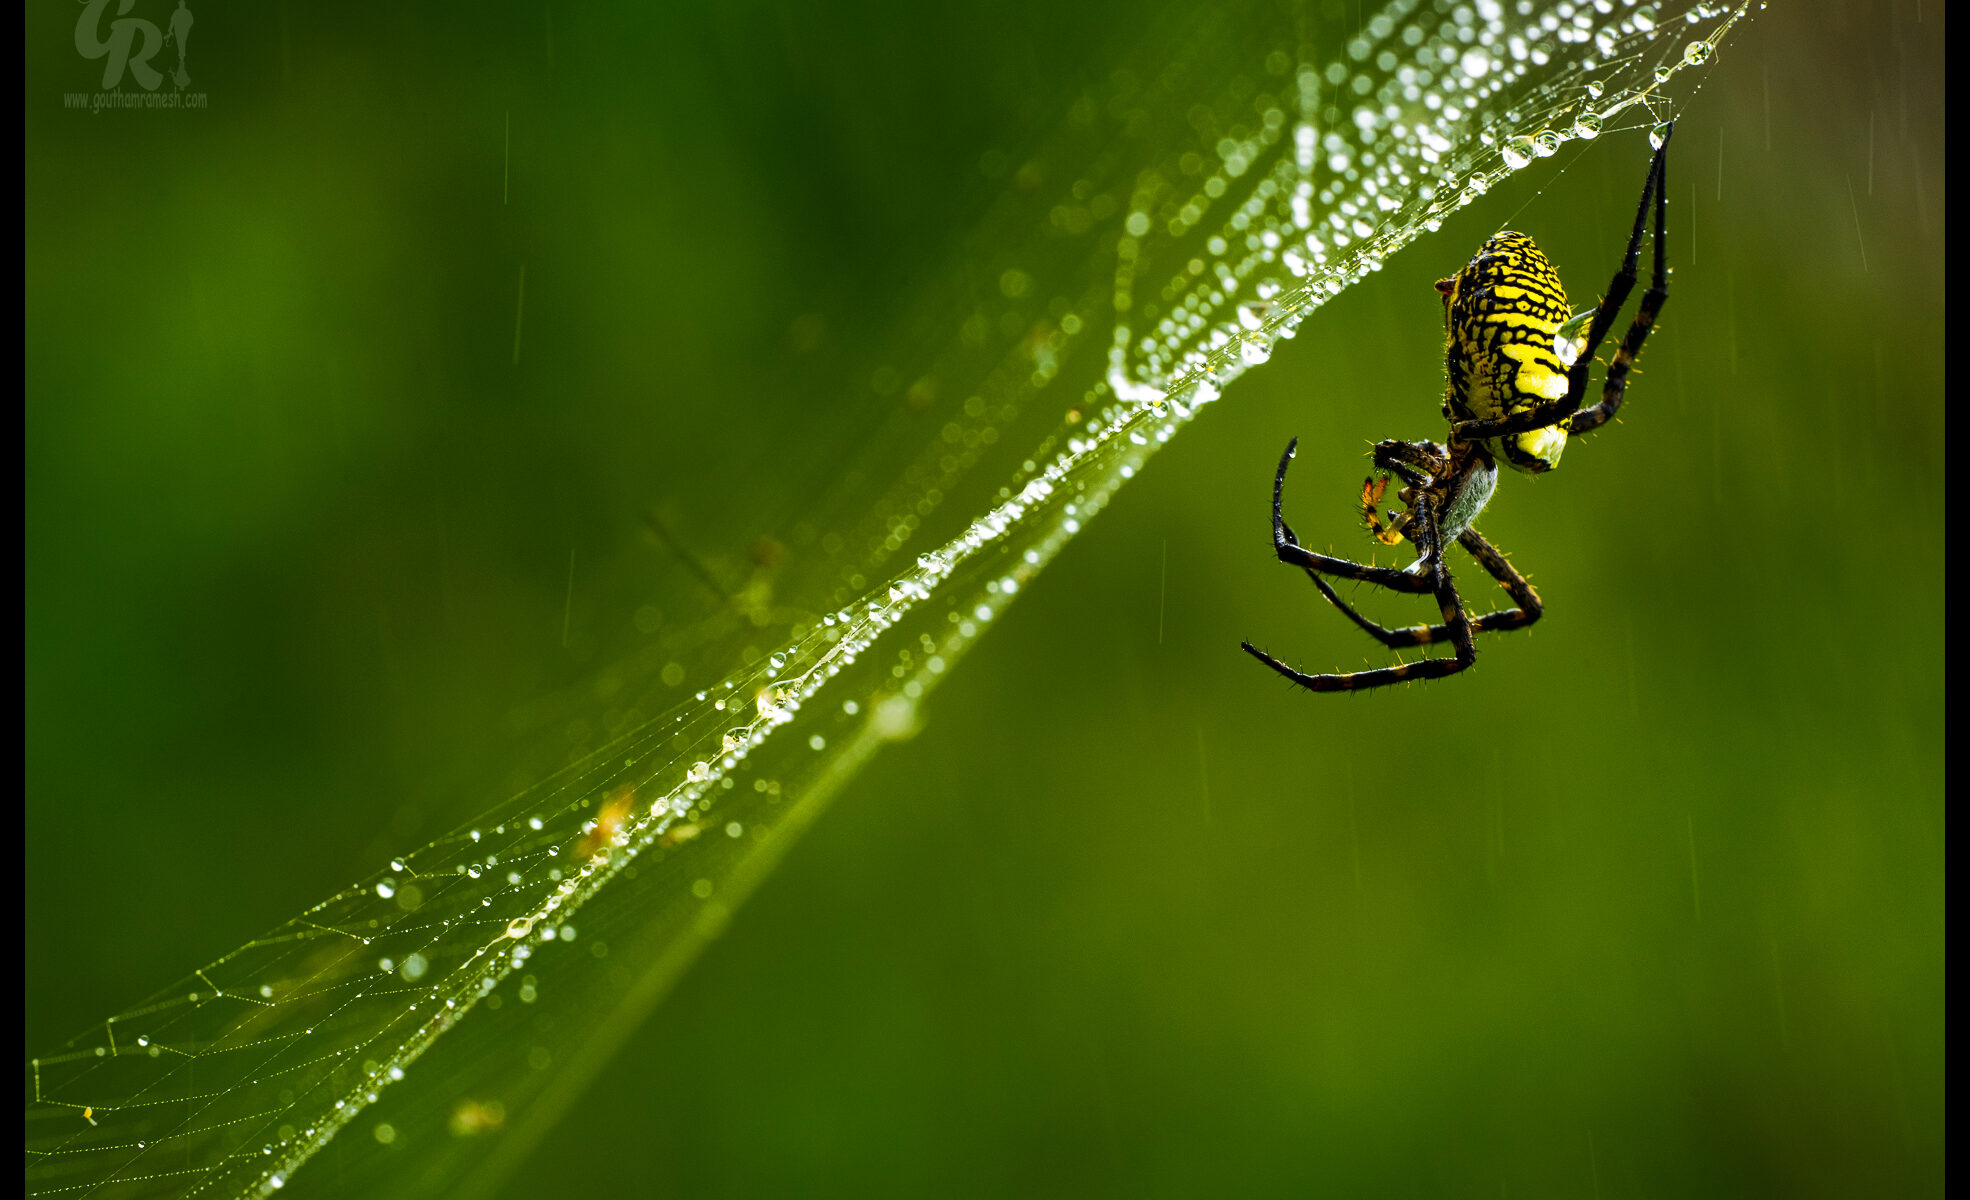
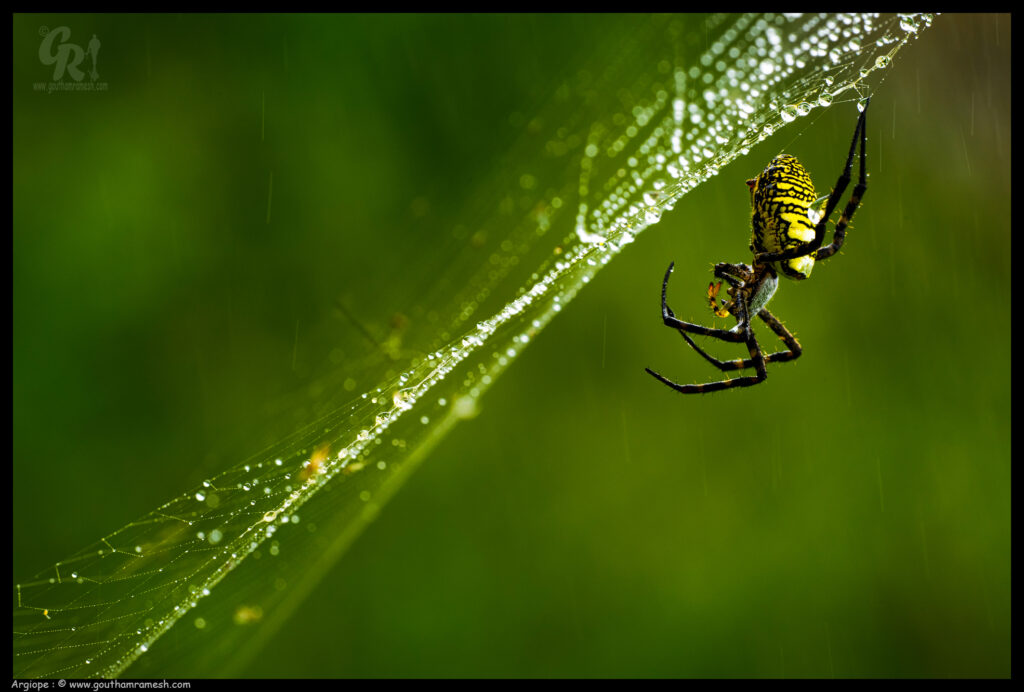
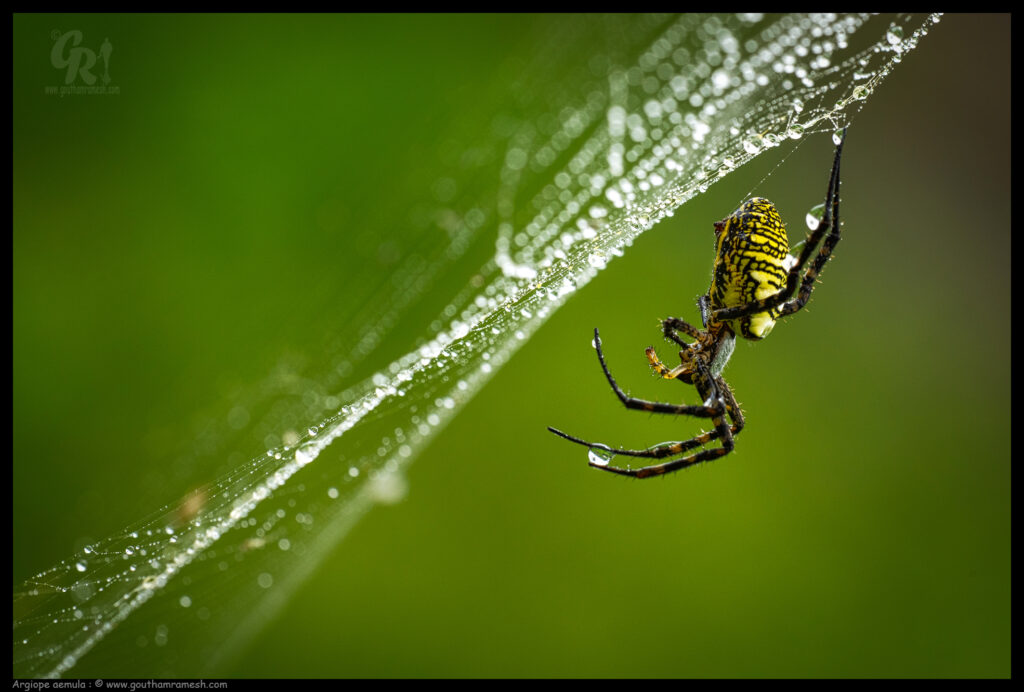
Argiope in light drizzle. This was a challenging shot due to wind and I also wanted to show the raindrops ( Exposure : F14 , 1/125 second , ISO 400, Natural light )

Argiope after the drizzle . ( Exposure : F10 , 1/320 second , ISO 400, Natural light )

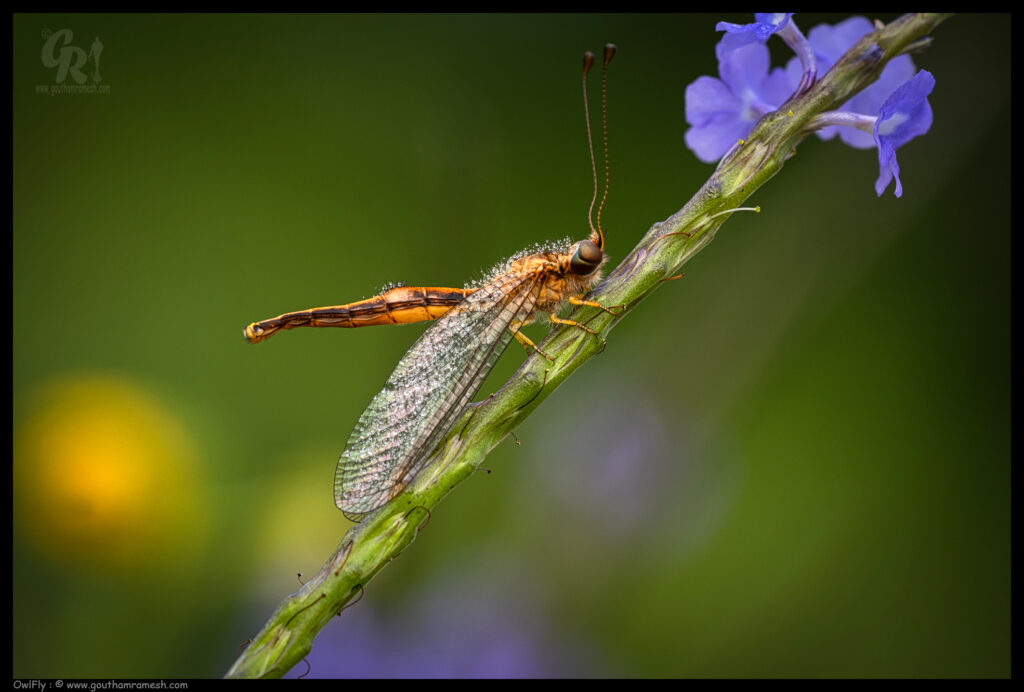
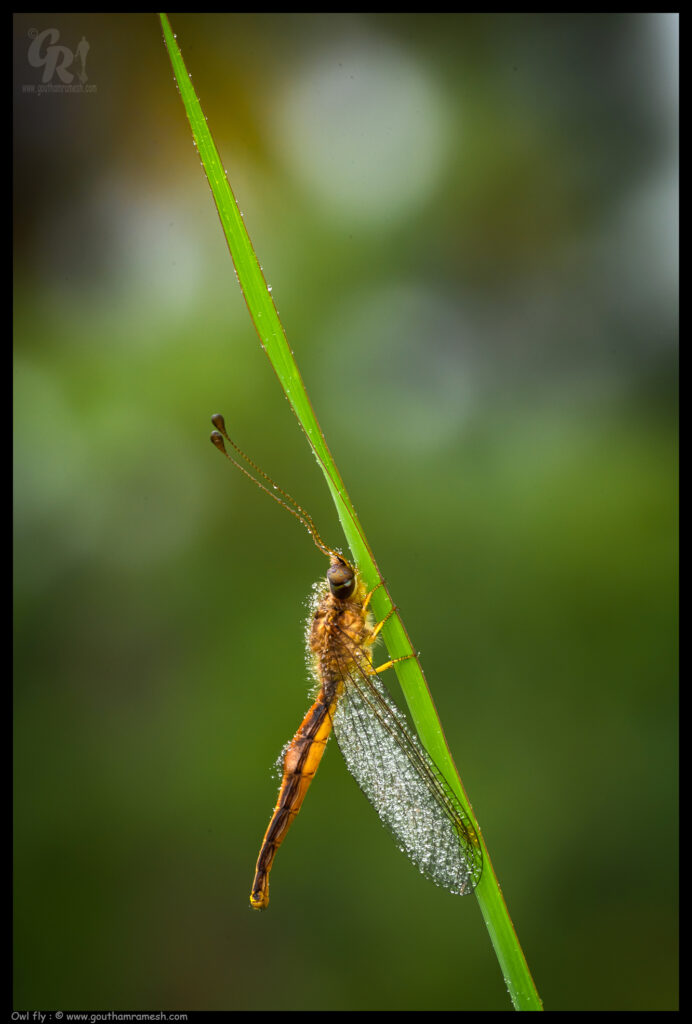
Owl Fly ( Exposure : F10 , 1/320 second , ISO 400, Natural light )

Owl Fly with Bokeh ( Exposure : F16 , 1/50 second , ISO 400, Natural light )

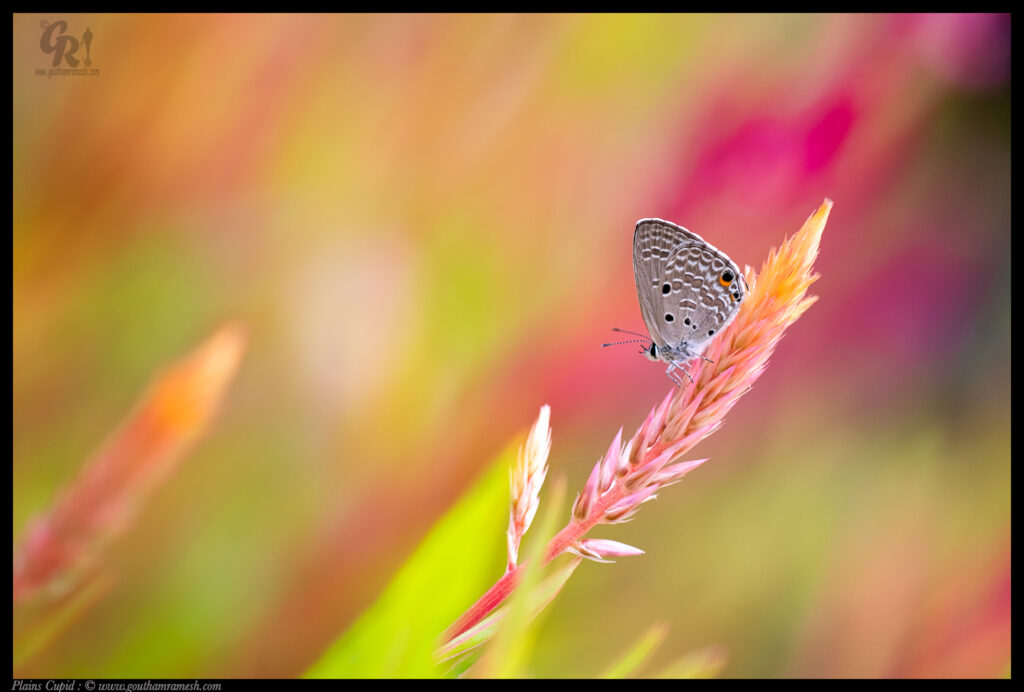
Plains Cupid , Here i have opened the aperture almost full to get a very shallow DOF and have gone almost parallel to the subject ( Exposure : F4 , 1/1250 second , ISO 800, Natural light )

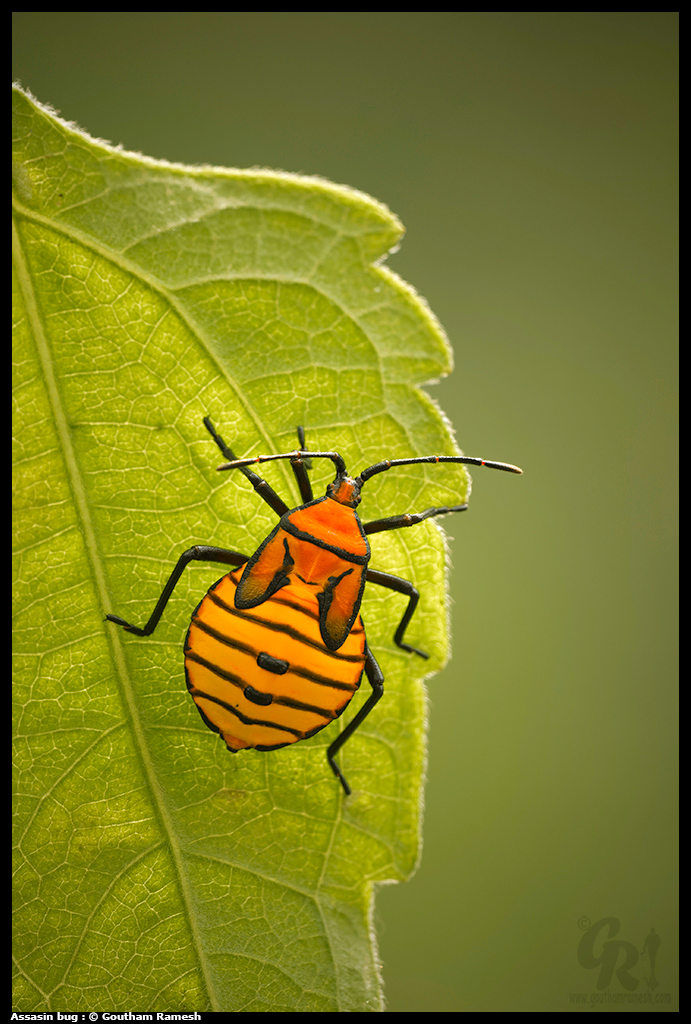
Assassin Bug back lit with a paper reflector in the front ( Exposure : F8 , 1/125 second , ISO 400, Natural light )

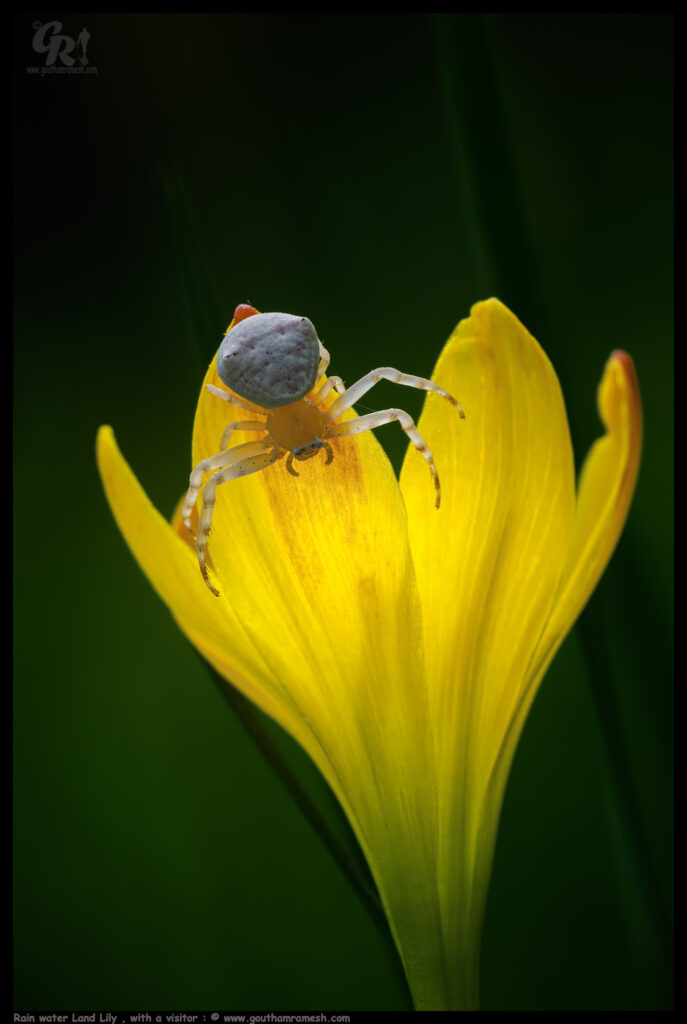
Crab Spider back lit with a paper reflector in the front ( Exposure : F13 , 1/60 second , ISO 100, Natural light )

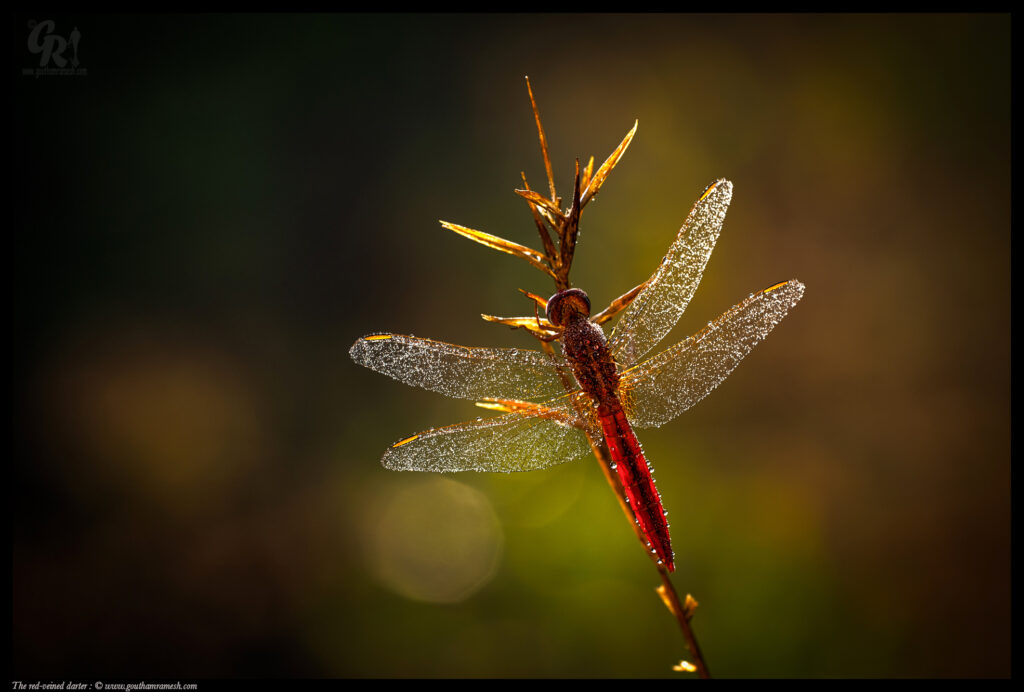
Red Veined darter back lit with a paper reflector in the front ( Exposure : F8 , 1/125 second , ISO 400, Natural light )

Assassin Bug back lit with a paper reflector in the front ( Exposure : F16 , 1/40 second , ISO 400, Natural light )

Back lit Tawny Coaster ( Exposure : F6.3, 1/1000 second , ISO 400, Natural light )


Rant!

These days , Macro photography has changed! ; The way we shoot pictures have also changed with good close up lenses , attachments , great diffusers and lighting support and there is a decline in people using natural light ( Even I don’t use this lens and natural light quite often these days ) . Today we can  get much more greater details in the images which is amazing. However personally for me charm of natural light macro is still very close to my heart even though I do shoot  a lot of my recent macro’s with close up attachments and diffusers  and I do love my Raynox and Radiant diffuser.

Having said that these days manufacturers have stopped making lenses like 180mm due to lack of demand and it’s very sad, one day I hope the demand for macro lenses and this focal length is back on track and we get to see some great macro images in natural light .


Thanks if you like the blog, you can leave a comment at Home Page

Cheers

This image has an empty alt attribute; its file name is TransparentImage-4.png
Goutham Ramesh

Long Exposure Photography

Long exposure photography is  recently very popular , due to the dramatic effects produced with the technique. The advent of more advanced digital cameras have made it much easier to produce these images, since the calculations, guesswork and luck have mostly been eliminated from the process.

Long-exposure, time-exposure, or slow-shutter photography involves using a long-duration shutter speed ( from 1/15 of second to minutes ) to sharply capture the stationary elements of images while blurring, smearing, or obscuring the moving elements. Long-exposure photography captures one element that conventional photography does not: an extended period of time.


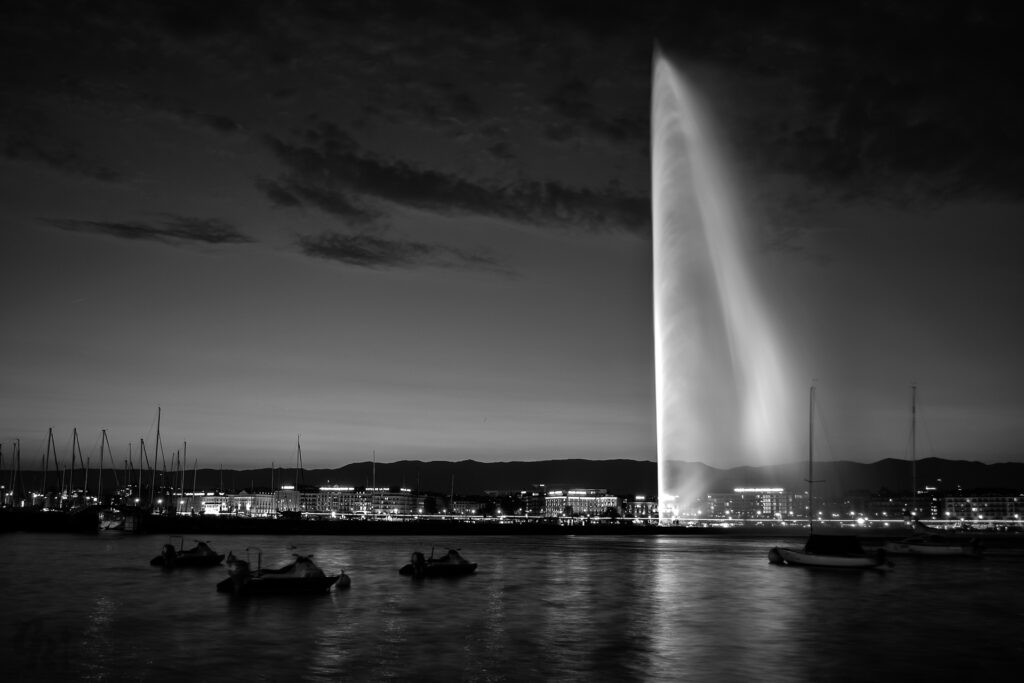
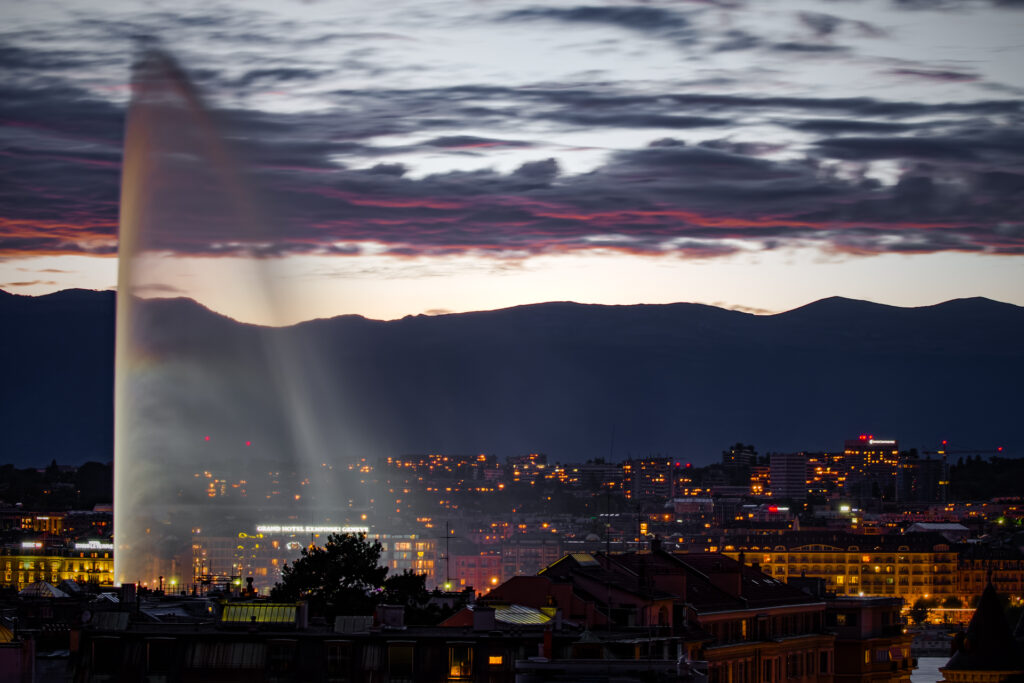
4 Second exposure to get the blur effect of this fountain on lake Geneva


As mentioned Long exposure is achieved by using slower shutter speed and this longer exposure times allow you to capture clouds, water, or other moving objects in a smooth, flowing manner, while maintaining sharpness and clarity on still objects.

One of the post important aspect to get longer exposure is  to shoot during early morning or late evening when light is little low; However we can also use an ND filter (Neutral density filter ) , which actually cuts down the exposure.

A neutral density filter essentially allows for this extended amount of exposure time, without altering the hue or colour of the image. Adding the filter is equivalent to stopping down one or more f-stops, and allows you to avoid making the photo too hot/bright due to the amount of time the shutter will be open.

Again as I said If you don’t have a ND or polarizing filter available, you’ll need to attempt these captures in lower light, such as in the early morning or late evening . Many photographers use long exposures to capture shots at night also!

Here the main objective is to increase your exposure time for the shot without overexposing the image!

Whether you use ND or get up early in the morning  using a “Tripod” is a must as these shots involve too much open shutter time to attempt holding by hand.


1/5 Second exposure , this was shot around 3 PM , so had to use ND Filter


How to start ( Some Tips )

Begin experimenting with very small apertures during the golden hour (the hour before sunset or after sunrise) such as f/22 or higher, and bump the aperture up to f/8 or larger after night falls.  Please note You’ll end up with several attempts, since nailing a great exposure is largely trial and error. You’ll also need to play around with exposure times, and this depends on what moving object you are capturing.


30 Second exposure to capture moving vehicle tail lamps at KR Circle Mysore


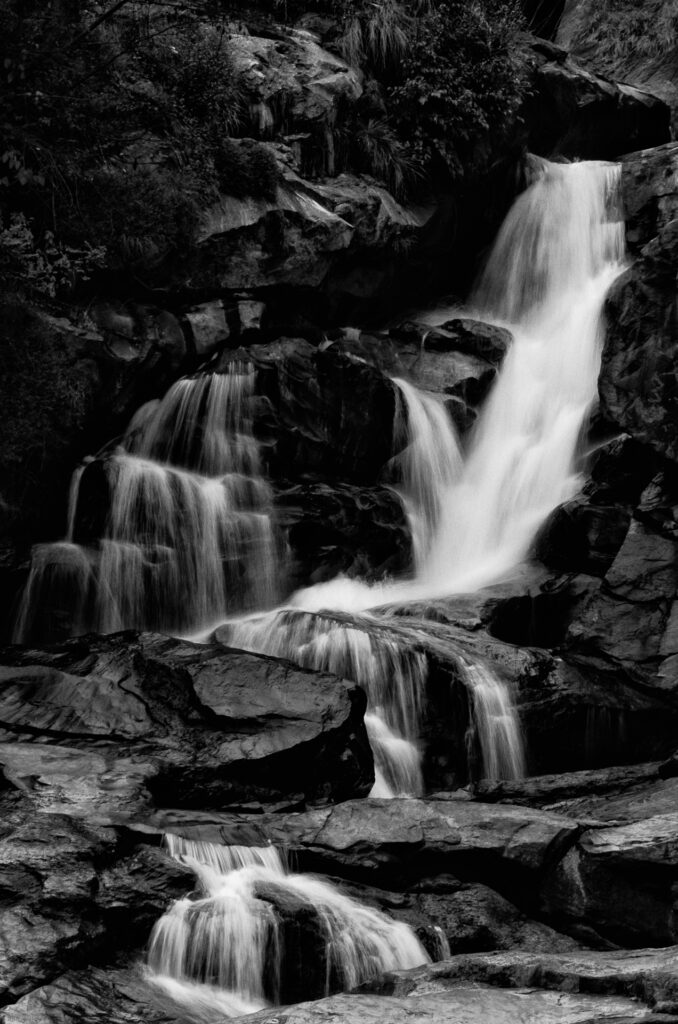
2.5 Second exposure to capture the flowing water


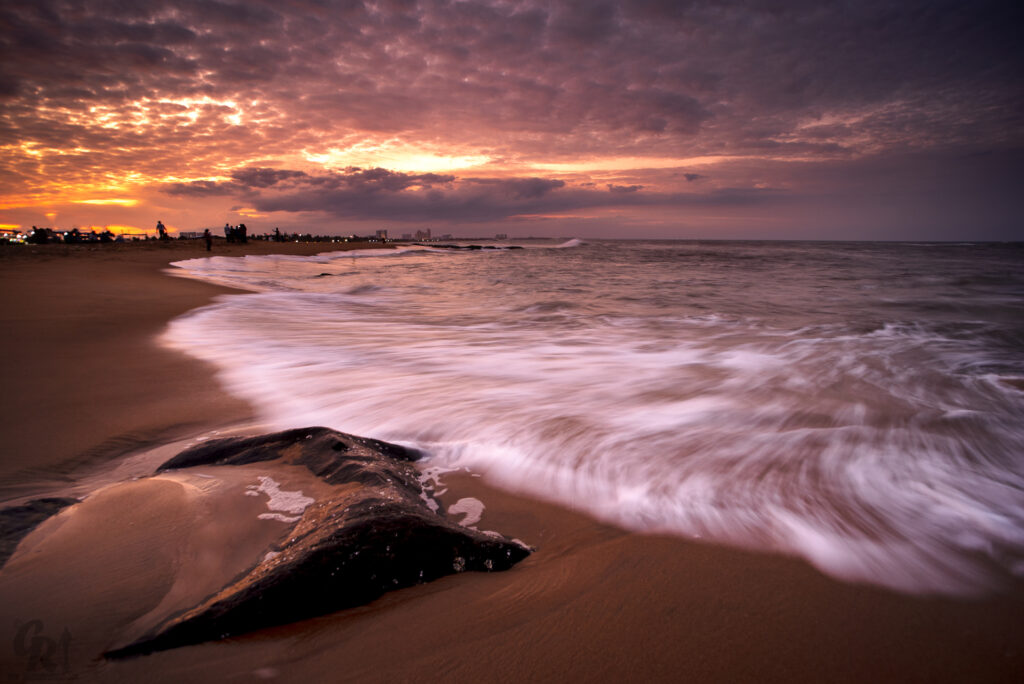
Waves at 1/6 second exposure


1.6 second exposure to capture the BG water stream


Clouds need much longer times to properly capture their trek across the frame of the shot; 5 minutes is a good place to start. Rolling or crashing waves at a beach require much less, sometimes 15 to 30 seconds is enough to create the necessary motion in the image.


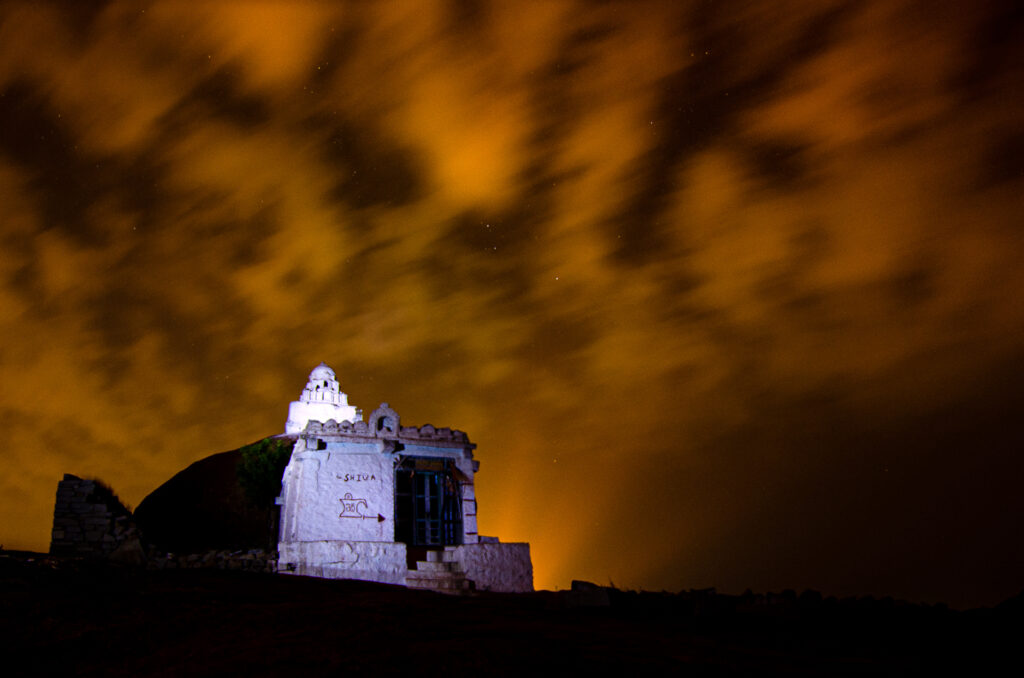
20 second exposure at shiva temple Hampi , lit by a flash ( Light Painting )


Due to the sensitivity of the camera during exposure times of this length, a remote shutter release would come in handy. Anything you can do to minimize shake will help preserve the sharpness of the non-moving elements in the photo.


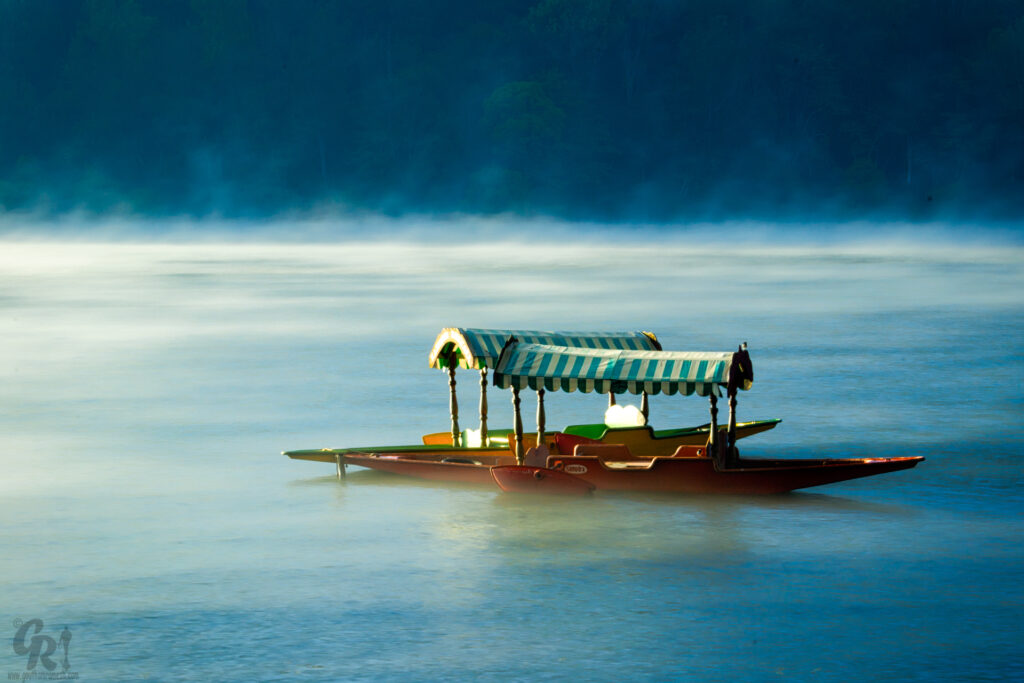
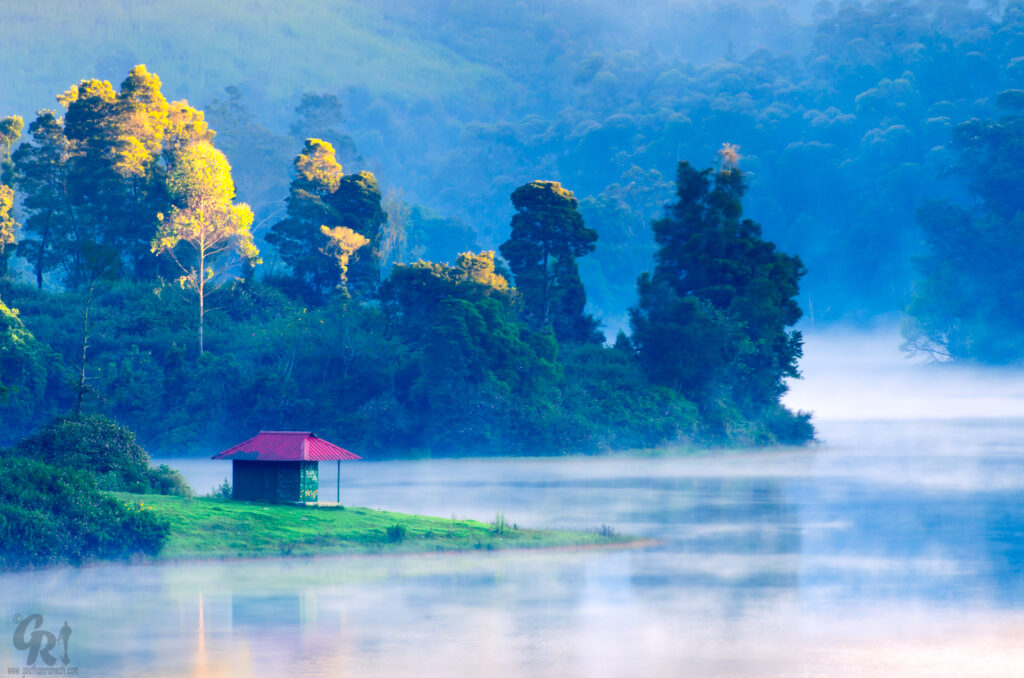
1/2 second exposure to create a blur effect of the moving mist on a lake


1 second exposure to capture the moving mist on a lake


Finally, be sure to do some pre-planning before actually clicking the shutter; try to visualize what the motion of all elements will be in your composition, including flowing elements (clouds, water, car lights), and still elements (rocks, buildings). This can help you better determine what settings you’ll need to capture the image you see in your mind


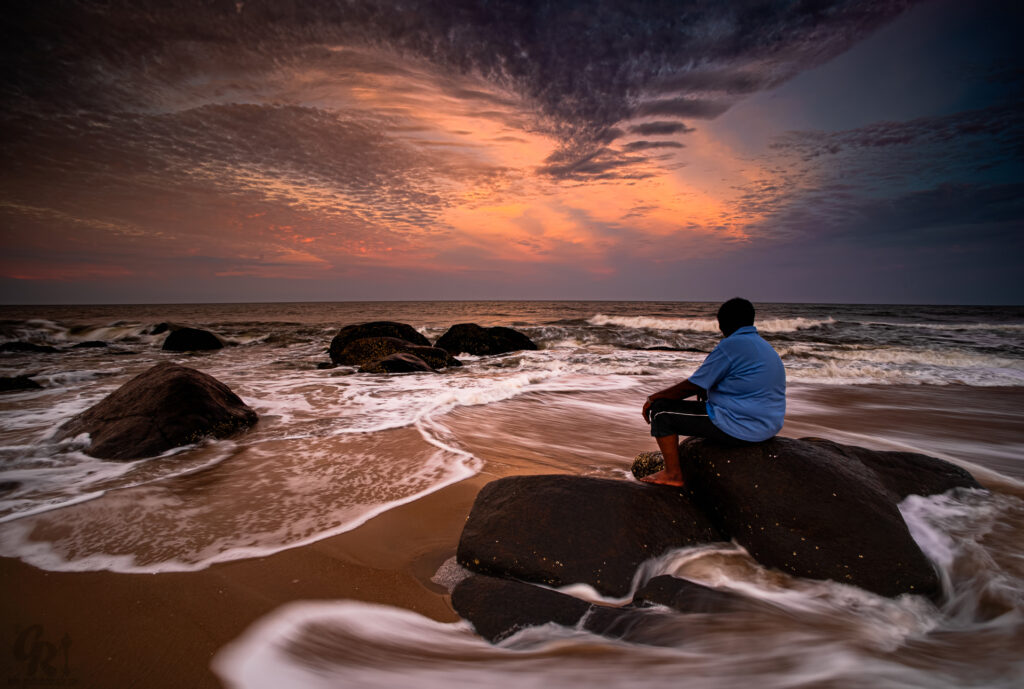
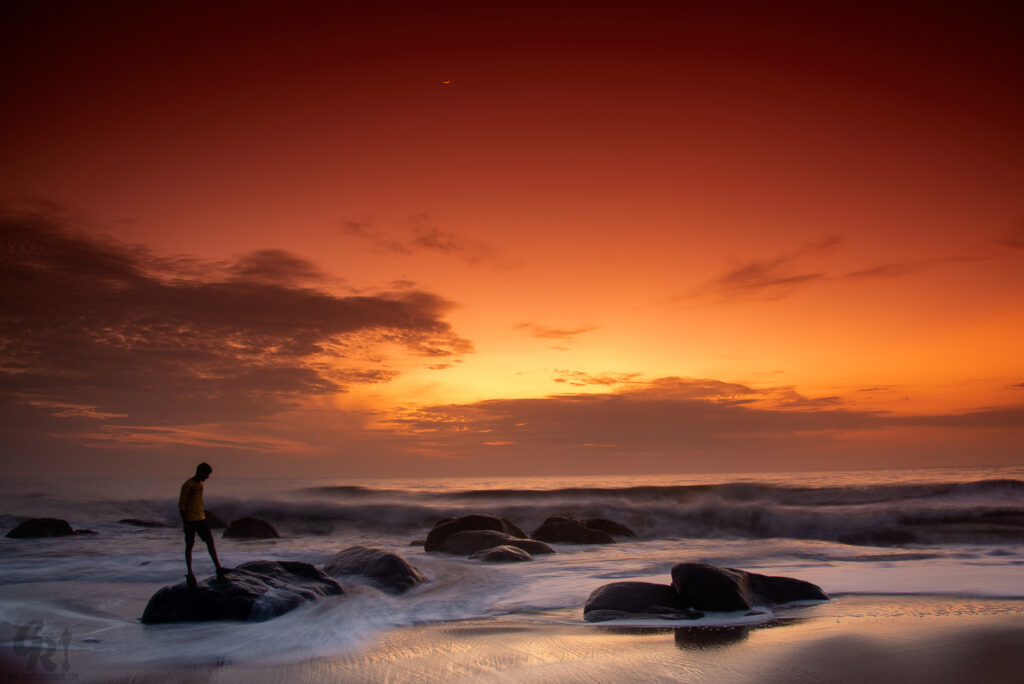
1/6 second exposure to capture movement of waves


0.4 second exposure to capture moving waves


0.6 second exposure to capture moving waves


Thanks if you like the blog, you can leave a comment at Home Page

Cheers

Goutham Ramesh

Hyperfocal Distance – A required technique in Landscape Photography

Hyperfocal distance can be a confusing topic, both for beginning and expert photographers. However, if you want to take the sharpest possible images, particularly landscape photographs, it is simply invaluable. In this blog I will try to demystify this topic.  

Please Note : Please note: Although the methods I present in this Blog are quite easy to understand, hyperfocal distance itself can be a complex topic. If you are a beginner, I highly recommend reading about aperture and depth of field before you delve into this Blog. Please read about exposure , aperture , shutter speed and ISO  here!

What is Hyperfocal Distance?

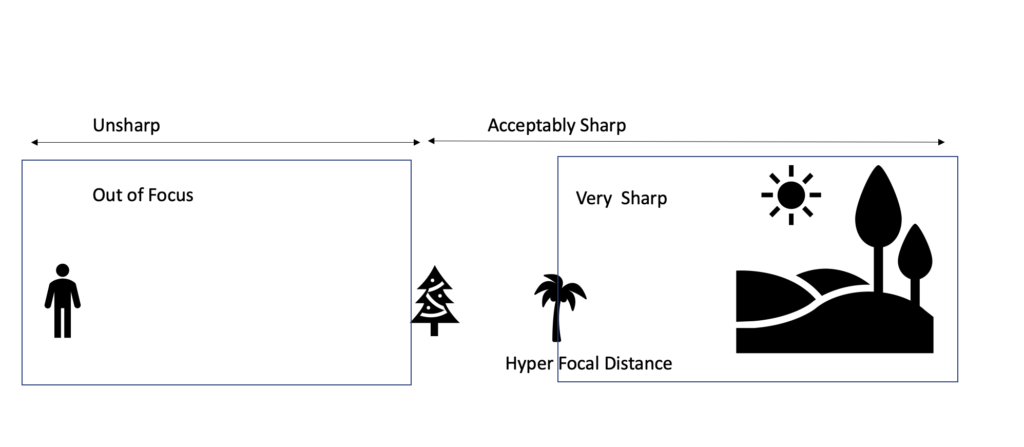
  • Hyperfocal distance, at its simplest, is the focusing distance that gives your photos the greatest depth of field. 
  • Hyperfocal distance is a distance beyond which all objects can be brought into an “acceptable” focus.
  • Hyperfocal distance is the focusing distance that provides equal sharpness between the foreground and background.

Role of Aperture

  • Hyperfocal distance of your lens will vary with aperture. Why? Think about it like this – if your aperture is wide, such as f/2, you will need to focus quite far away for objects at infinity to appear in focus. However, at a small aperture of f/11 or f/16, distant objects will continue to be sharp even if your lens is focused more closely. So, in this case, hyperfocal distance moves closer to your lens as you use smaller apertures.

Role of Focal Length

  • Hyperfocal distance of your lens will vary  with your focal length ,Your focal length also has a huge impact on hyperfocal distance. As you zoom in, your hyperfocal distance moves farther and farther away. For a 20mm lens, you may need to focus just a few feet from your lens to get the horizon (distant background at infinity) acceptably sharp. On the other hand, for a 200mm lens, your hyperfocal distance may be hundreds of feet away.

When to Use Hyperfocal Distance?

Not all photographs require that you focus your lens at its hyperfocal distance. Consider, for example, an overlook of a distant mountain. If you are standing on the top of the overlook and there are no objects in your foreground, it would be silly to try and calculate the hyperfocal distance, since your nearest object is effectively at infinity. Just focus on the distant mountains! And your aperture does not really matter either – since the closest object is so far away, you could shoot wide open if you wanted to (probably not a very good idea, since most lenses aren’t as sharp at wide apertures, but this is just in theory). Hyperfocal distance is only important to calculate when you have objects both close and far away from your lens that need to be sharp. Since you are actually focusing between these objects, neither is “perfectly” sharp; they are both simply close enough, or “acceptably sharp.”

Using a Hyperfocal Distance Chart.

One way to calculate Hyper focal distance is to use a chart , here is the chart for calculating hyperfocal distance

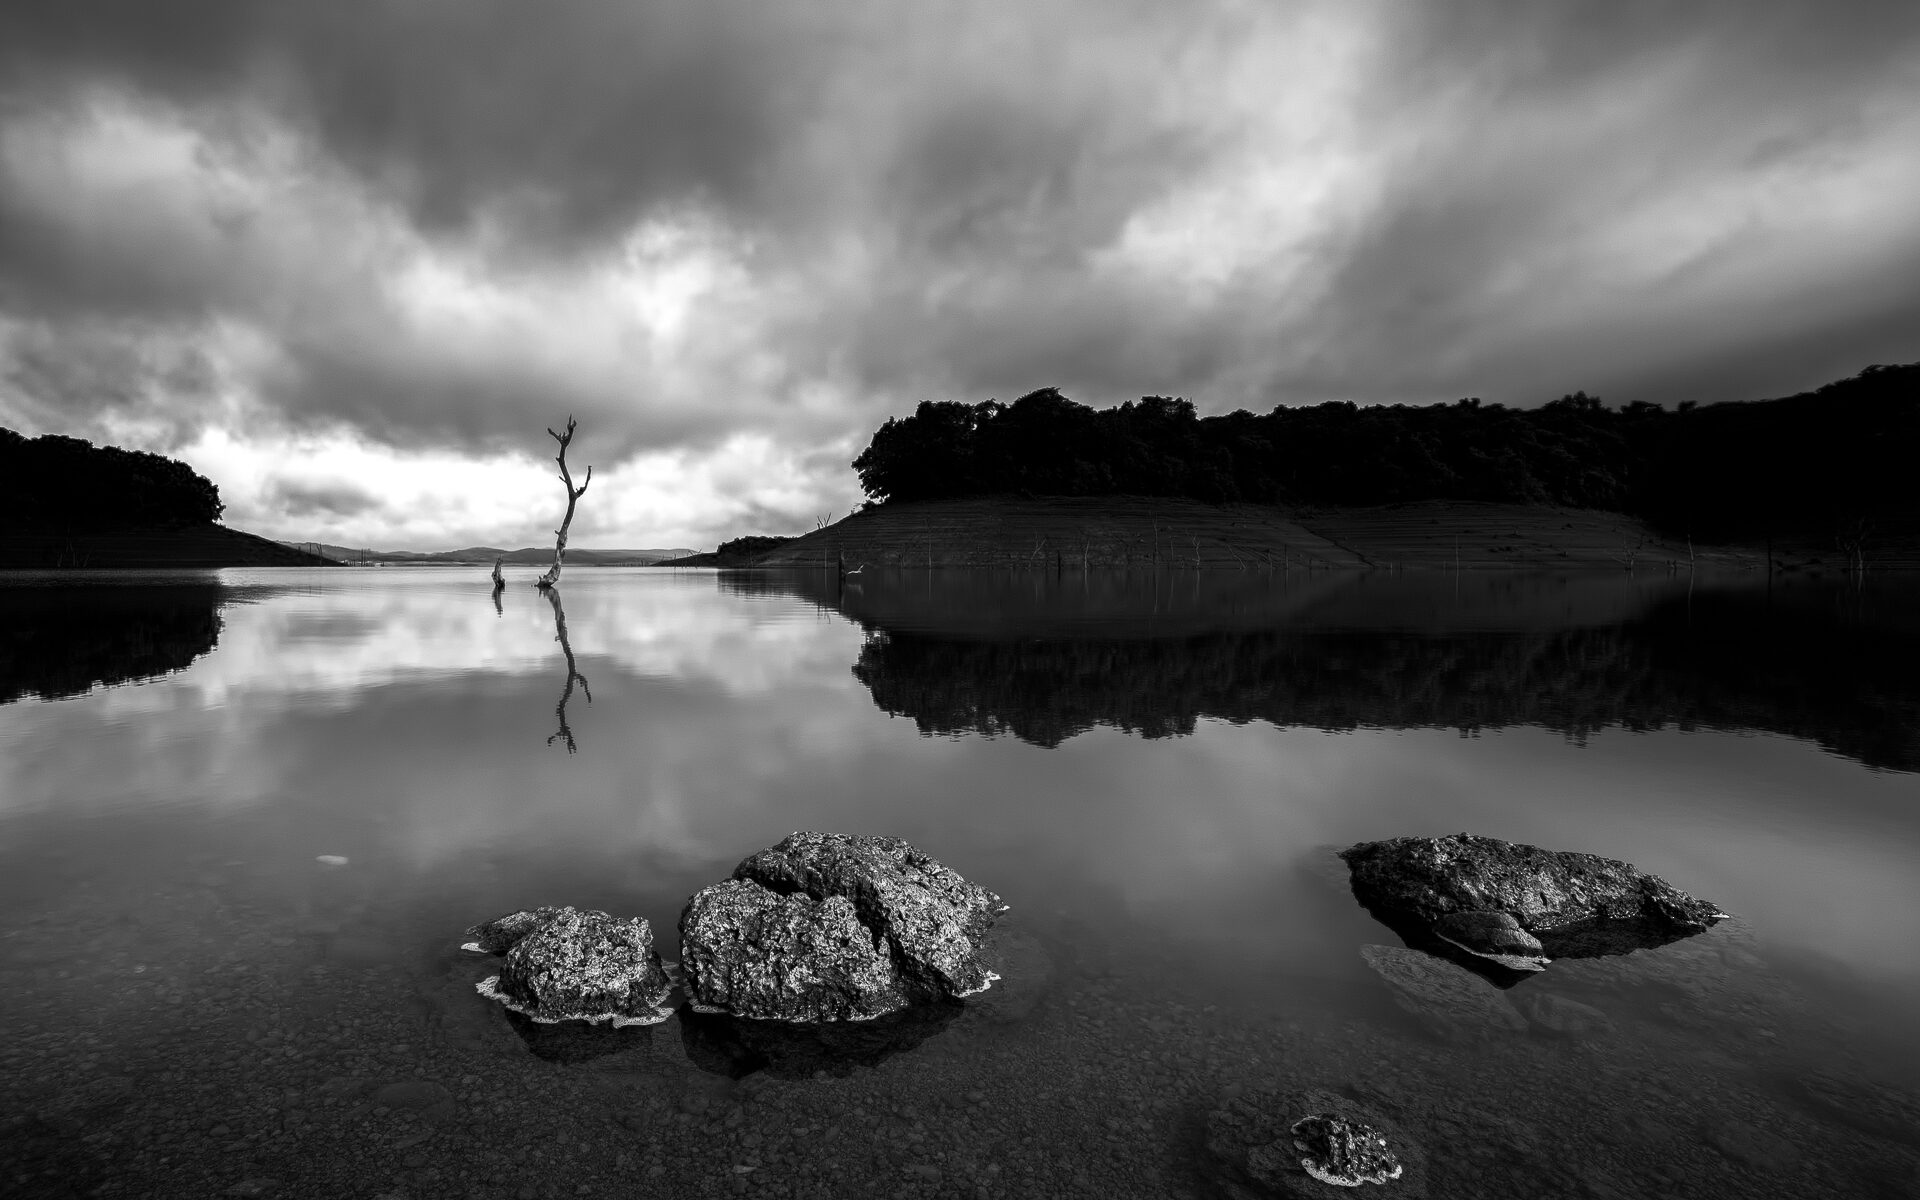
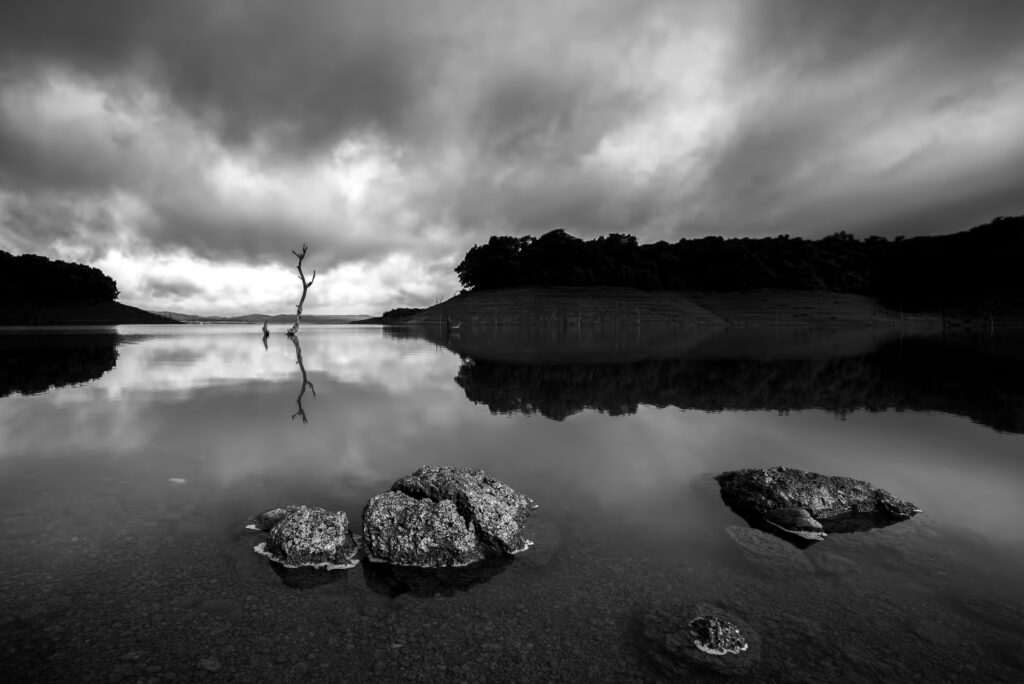
15mm at F16, HyperFocal distance of 2.5 FT

Here the Idea was to use stones in the water to be in sharp focus along with subjects in infinity . Shot at 15mm at F-16 made sure the stone was beyond 2.5 ft ( Refer the cart above )

Using Apps.

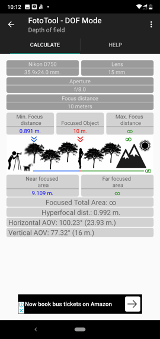
FotoTool ( Android ) :

FotoTool is a free application that contains several useful tools for both amateurs and professional photographers, This includes a tool to calculated HyperFocal distance.

https://play.google.com/store/apps/details?id=com.alfbishop.software.fototool&hl=en_US&gl=US

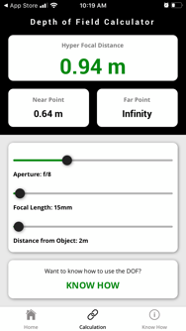
Simple DoF Calculator (iOS)

Simple DoF Calculator allows photographers to calculate the depth of field and hyperfocal distance for any given settings.

https://apps.apple.com/us/app/simple-dof-calculator/id301222730

How to use Hyperfocal Distance

  1. Choose a lens, and be sure to note the focal length that you are using.
  2. Pick an aperture value.
  3. Find the hyperfocal distance that corresponds to your chosen focal length and aperture.
  4. Focus your lens at the hyperfocal distance. This can be done by estimation, or by the focusing scale on your lens (if you have one).
  5. Now, everything from half that distance until infinity will be sharp.

Some Pictures using Hyperfocal distance

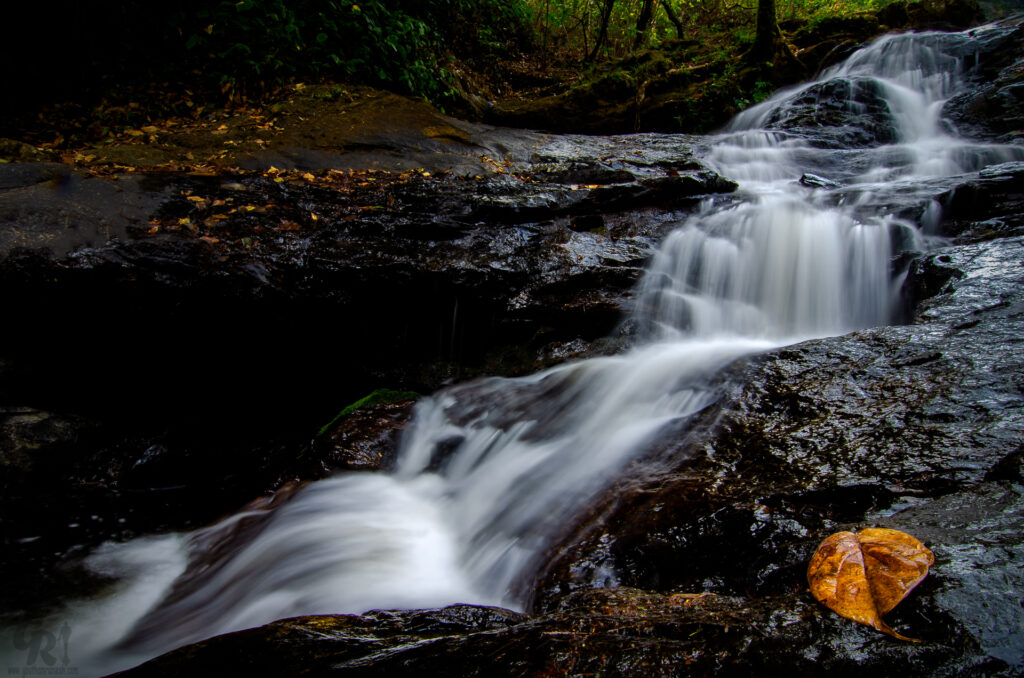
11mm at F22 , Hyperfocal distance of 1 ft

This is 11mm at F22 , Hyperfocal distance of 1 Ft .. So made sure the leaf is one feet away from the camera

15mm at F8, HyperFocal distance of 5 FT

This is 5mm at F8 , Hyperfocal distance of 5 Ft , so made sure the rock is on5 feet away from the camera


Credits

https://photographylife.com/landscapes/hyperfocal-distance-explained

https://en.wikipedia.org/wiki/Hyperfocal_distance

Thanks if you like the blog, you can leave a comment at Home Page

Cheers

Goutham Ramesh

Basics of Exposure in Photography

One thing you will hear a lot about as you start your journey into the world of photography is Exposure.  So, what exactly is exposure? 

Exposure is the amount of light captured by the image sensor of a camera.  If too much light gets to the sensor, the picture is washed out or too bright.  Conversely, if not enough light gets to the sensor, the image will be underexposed or too dark.

Most cameras have a light meter built in that will automatically determine the correct exposure, but when you know the three basics of exposure and how to use them, you can set your camera on manual, go rogue, and get some very AMAZING results.


Let’s take a look these 3 aspects of Exposure:

Aperture

The size of the lens opening, measured in f/stops.  Aperture controls the depth-of-field which is the area that is in focus in the picture FOR A GIVEN MAGNIFICATION! ( SAME F-STOP WILL NOT LOOK SAME IN DIFFERENT FOCAL LENGTH ! PEOPLE USUALLY GO WRONG HERE ) .  Aperture can be used to draw attention to one part of the picture (like the BUTTERFLY BELOW) by blurring the foreground and background with a large aperture opening.  One thing to remember is that the f/stop numbers are smaller for larger openings and the numbers are larger for smaller aperture openings i.e. f/1.4 is a large opening and f/22 is tiny. 

Look at the images below to see the difference of aperture at same magnification and focal length of 180mm.

Shot at F16
Shot at F11
Shot at F3.5

As you can see , the opening of aperture reduces the DOF ( Depth of field ) , Sometimes a fully open aperture works wonder but you should be aware of shallow DOF and keep parallel to the DOF plane to make sure the subject of interest is within the DOF.


Shutter Speed

The amount of time the sensor is exposed to the light measured in fractions of a second.  Shutter speed can be used to freeze a subject with a fast speed of 1/250 or faster or it can be used to blur motion with a slow speed like 1/4.  You can also adjust shutter speed to capture images in low light scenarios IE: increasing the amount of time the camera sensor is exposed to the image/light.  In this situation, you usually need a tripod so that you don’t blur your photograph ( TRIPOD IS AN IMPORTANT GADGET, IF YOU CAN USE IT , PLEASE USE IT)

Shot at 1/2000 of a second

In the below picture the bird was too fast and i wanted to freeze it skimming through water so used a very high shutter speed!

Shot at 1 Second

I wanted to create a blur effect of water flowing , so used a I ( One ) second exposure.


ISO

The light sensitivity of the image sensor.  The smaller number (like 100) is considered low and is not very sensitive, and a number like 1600 is high and is very sensitive to light.  The higher the ISO speed, the faster the camera gathers light, but it also adds noise to the photograph.  Most of the time you should keep the ISO at the lowest setting if there is enough light around you to get the shot you want.  Sometimes though, the only way to get a shot is to crank up the ISO.  A noisy shot is better than no shot at all.

ISO 2500

Since this was shot before sunrise and I wanted to capture the night sky with stars , I had to increase the ISO to 2500 so that camera gathers light faster


Conclusion

So with these three components of exposure ( APERTURE, SHUTTERSPEED AND ISO ), you can combine them in all sorts of ways to bring out your inner Artist! And in the process,  If you like the results of the combination, then who can say it is  not the correct exposure?  That’s what I love about photography.  It’s up to you!


Thanks if you like the blog, you can leave a comment at Home Page

Cheers

Goutham Ramesh

Switzerland by train

My travels to Switzerland has always been on business , however when you plan your business trip carefully you can enjoy the most breath-taking landscapes by train.

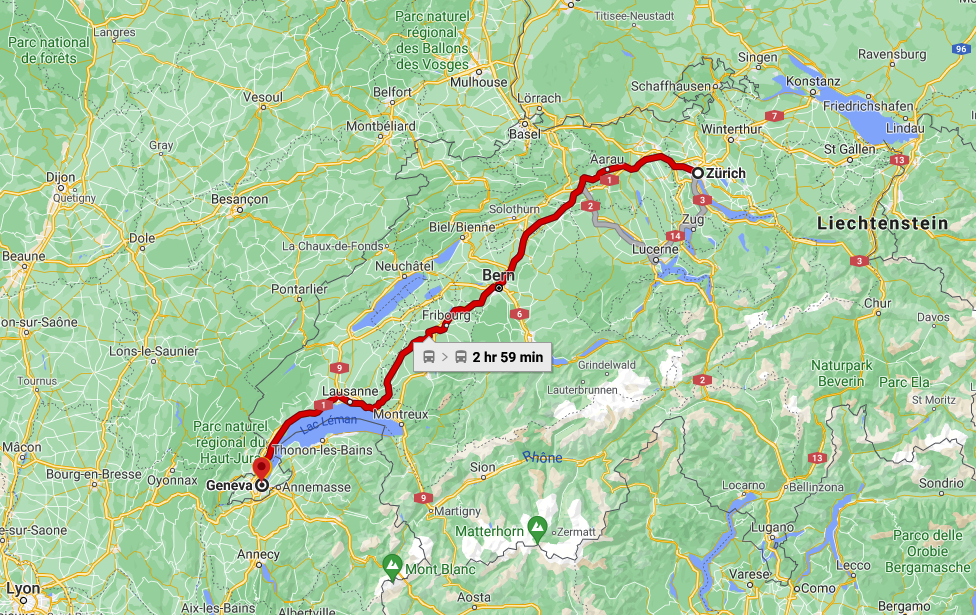
The clients that I used to consult for were either in Lausanne or Geneva , which is south west part of Switzerland and in order to enjoy my Journey , I used to land at Zurich ( North East) and take a train from there! I believe this is one the best ways to see Switzerland.

Trains from Zurich to Geneva are operated by SBB – the main rail operator in Switzerland – who offer plenty of different options to make your journey as comfortable as possible, including one-way, multi-journey and day pass tickets that let you extend your adventure even beyond these two enchanting cities.

Zurich to Geneva

Train details

Journey timeFrom 2h 43m
PriceFrom €23.15
Distance139 miles (224 km)
Frequency37 trains per day
First train03:32
Last train02:34
Departure stationZurich Hb
Arrival stationGeneva
ChangesDirect trains available
Train and bus operatorsSBB CFF FFS

There are lots of places to see and do in this Beautiful Country , However I can only speak about my Journey


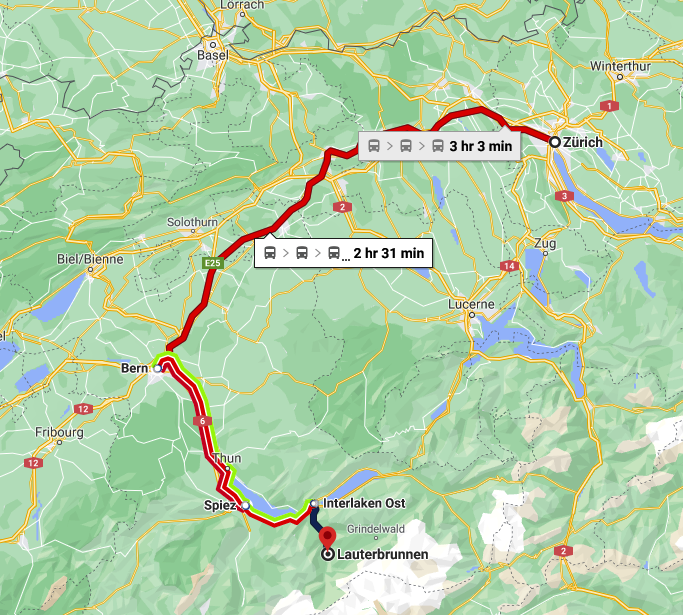
Zurich to Lauterbrunnen and Murren:

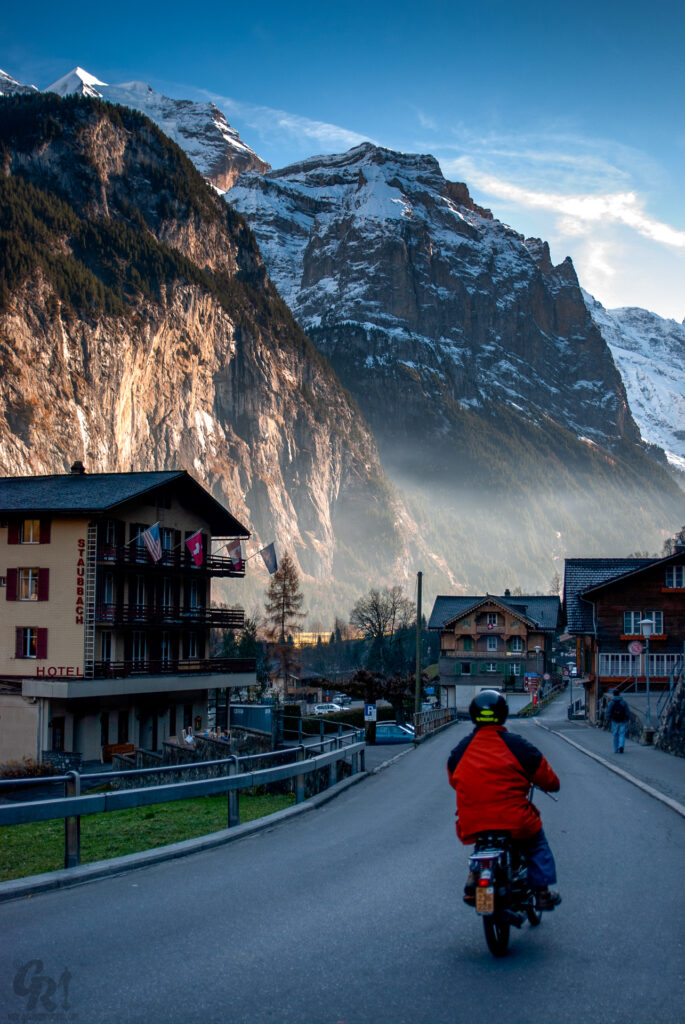
Lauterbrunnen is a municipality in the Swiss Alps. It encompasses the village of Lauterbrunnen, set in a valley featuring rocky cliffs and the roaring, 300m-­high Staubbach Falls. Nearby, the glacial waters of Trümmelbach Falls gush through mountain crevices past viewing platforms. A cable car runs from Stechelberg village to Schilthorn mountain, for views over the Bernese Alps.

Mürren is a Swiss mountain village at the foot of the Schilthorn peak, which is accessible by cable car. Featured in a James Bond film, the Piz Gloria revolving restaurant contains the Bond World 007 exhibit and has views of Mont Blanc. Near Mürren is the Lauterbrunnen Valley, with its subterranean, glacial Trümmelbach Falls. Themed trails on the Allmendhubel peak include the Flower Panorama and North Face paths.

Start at Zürich : Take a Long distance Intercity train to Geneva or Bern   (56 min non-stop) ->  Bern   

: Take another train to Interlaken OST ( 54 Mins ) -> Interlaken OST : Take a train to Lauterbrunnen (20 Mins ) -> Lauterbrunnen : Take a cable car to Murren (10-15 Mins )

Lauterbrunnen Road
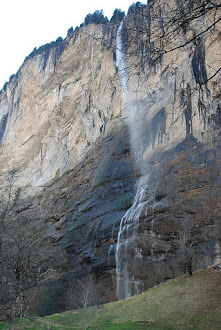
Lauterbrunnen Falls
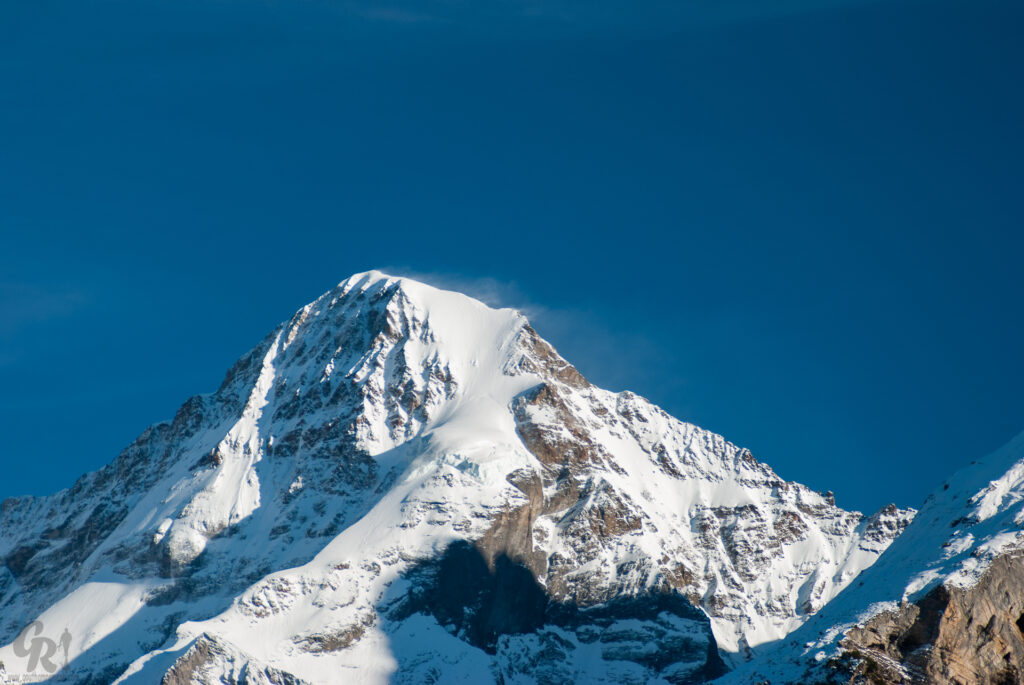
Eiger and Monch from Murren
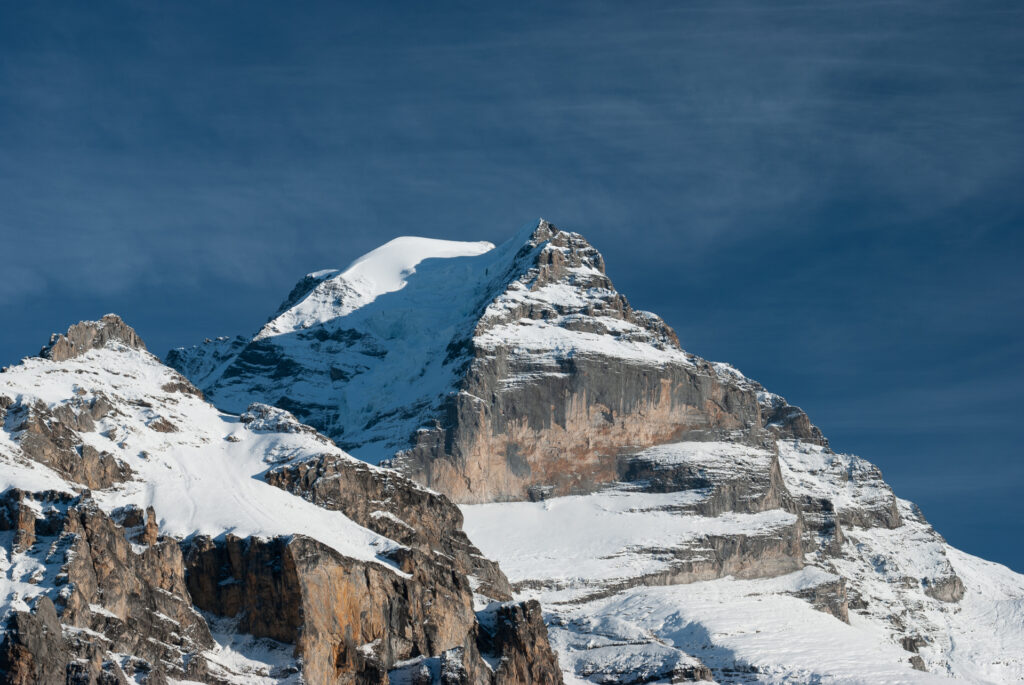
Eiger
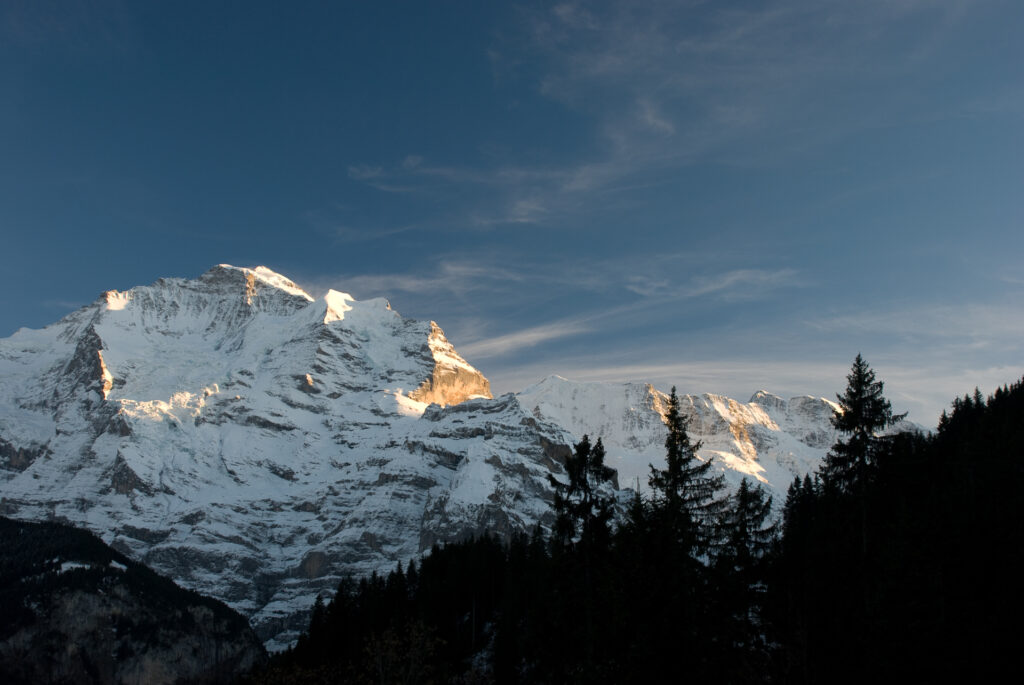
Jungfrau from Murren
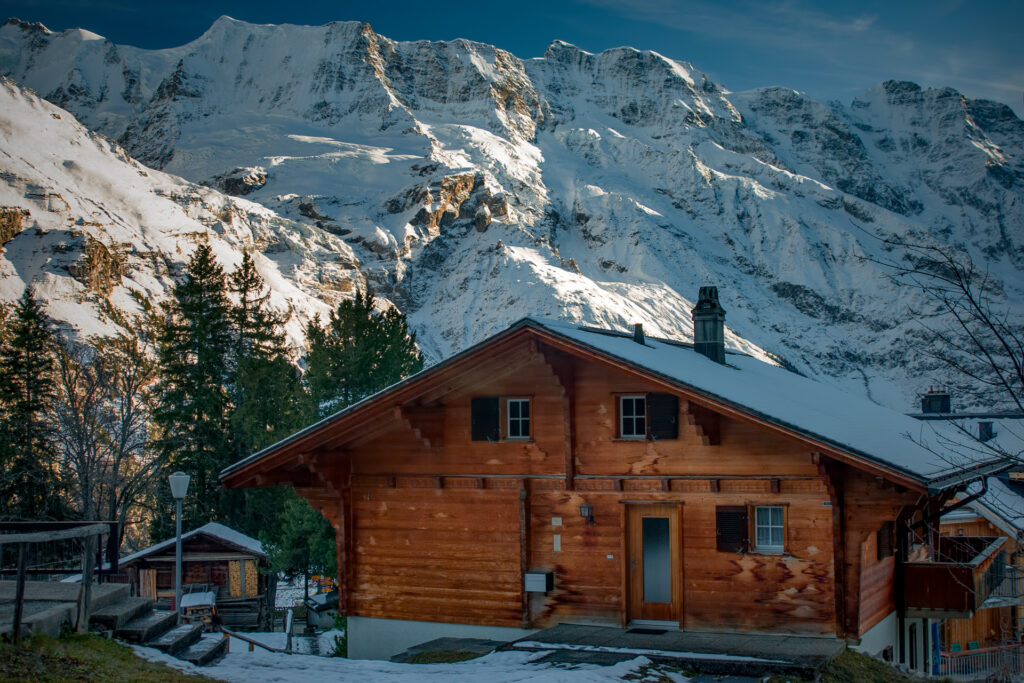
Swiss House Murren
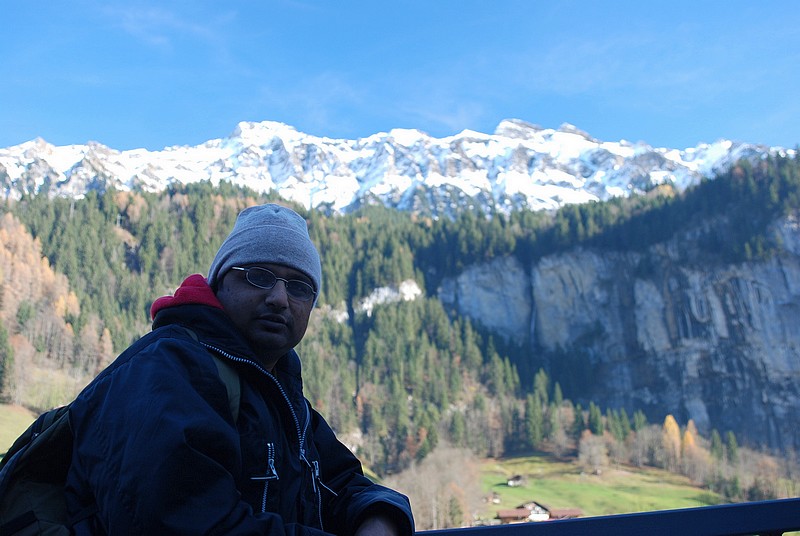
Myself at Murren

Bern to Geneva:

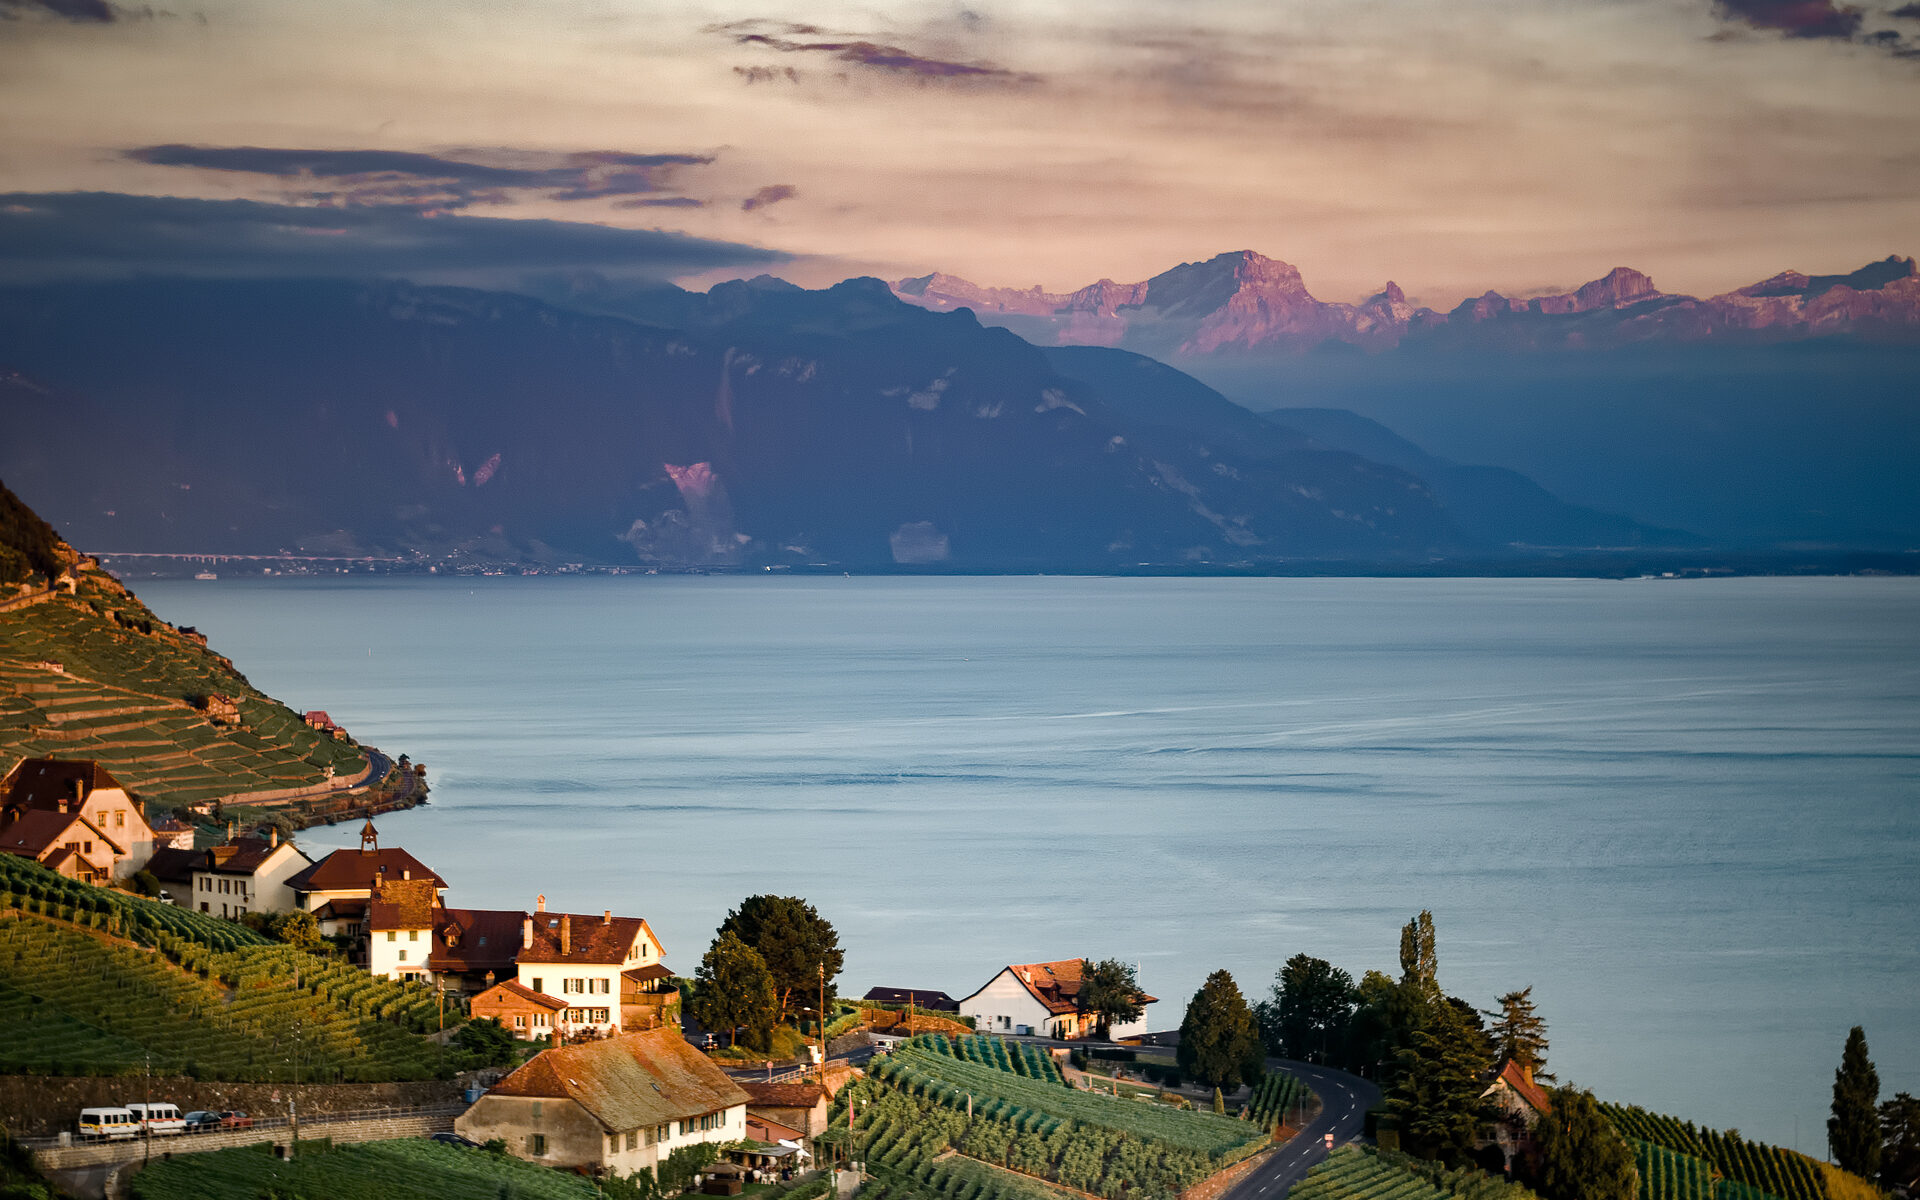
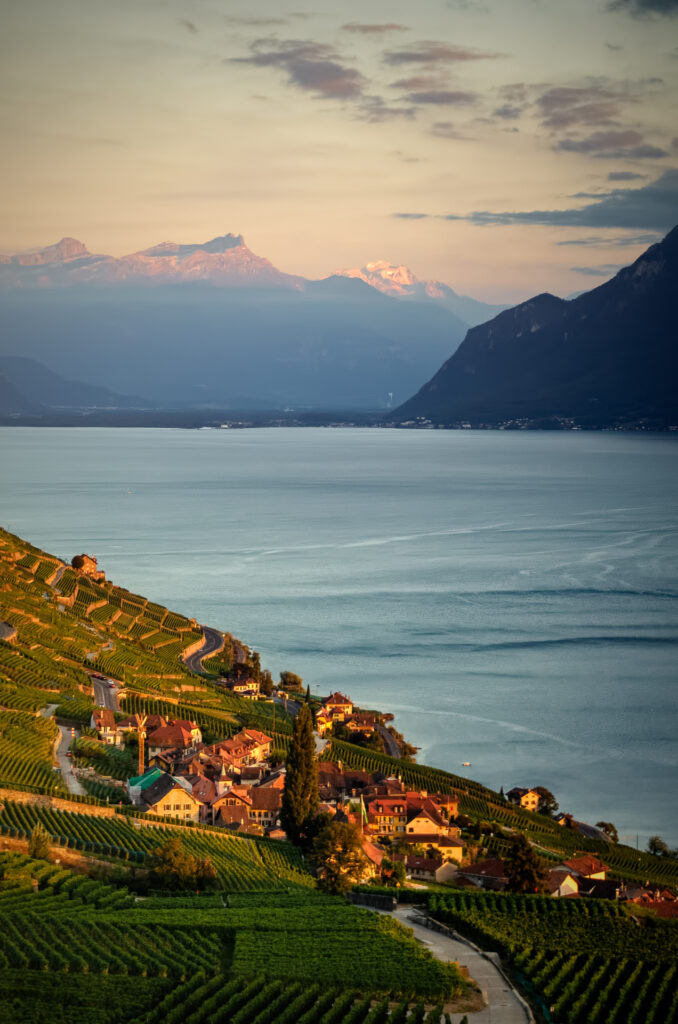
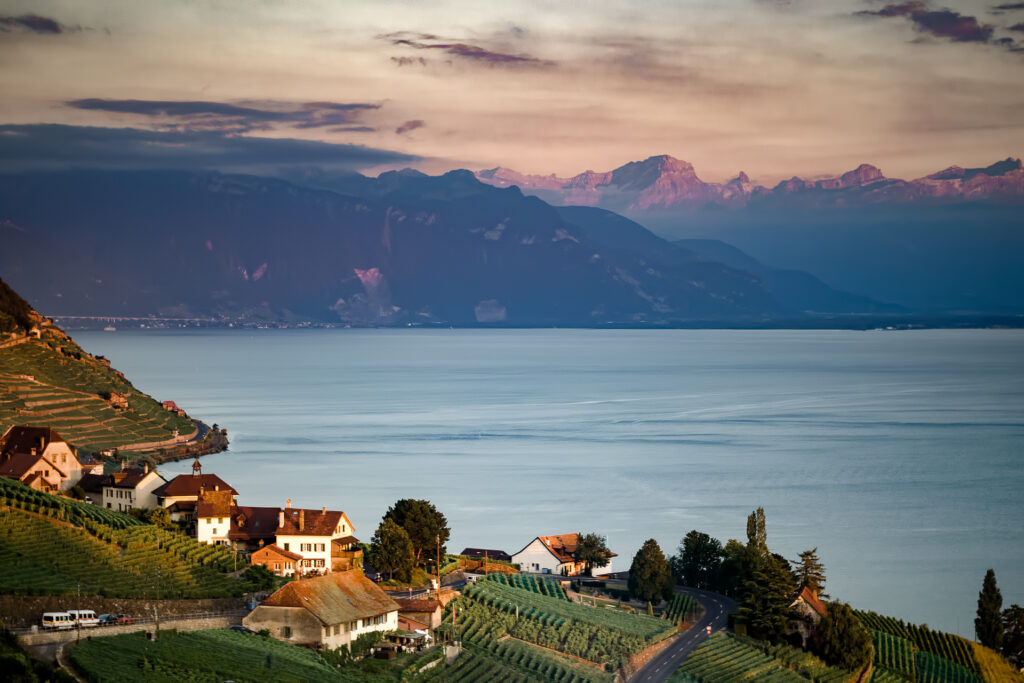
This is one of the most scenic train journeys that take you through amazing countryside and as you get close to the destination, you will see Lake Geneva; some of the pics below were taken from train.

Swiss Scape from Train
Swiss Scape from train
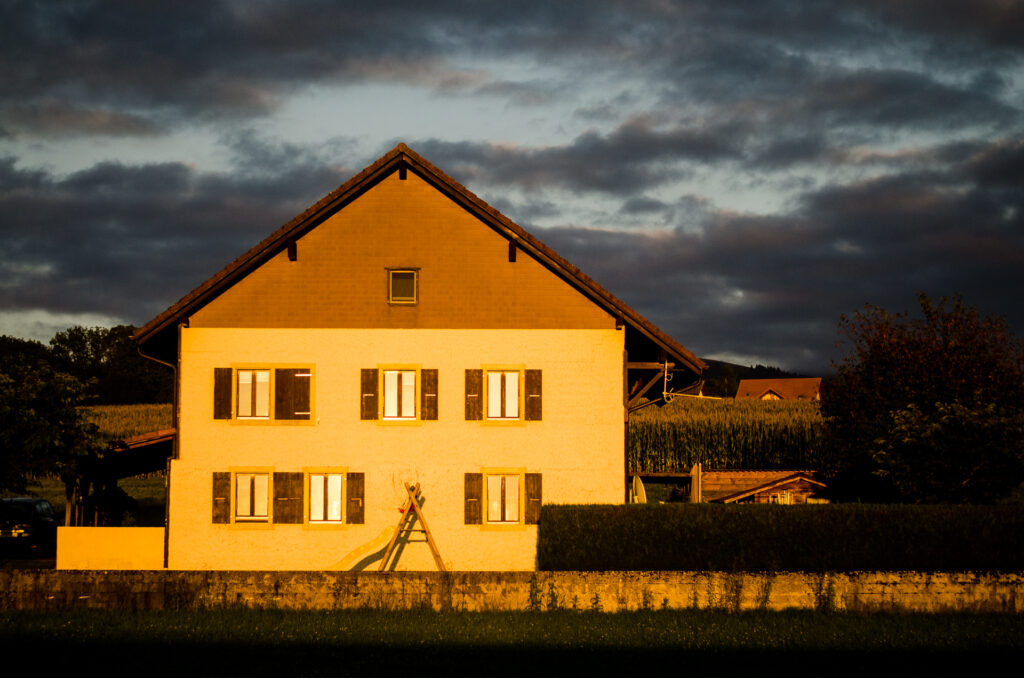
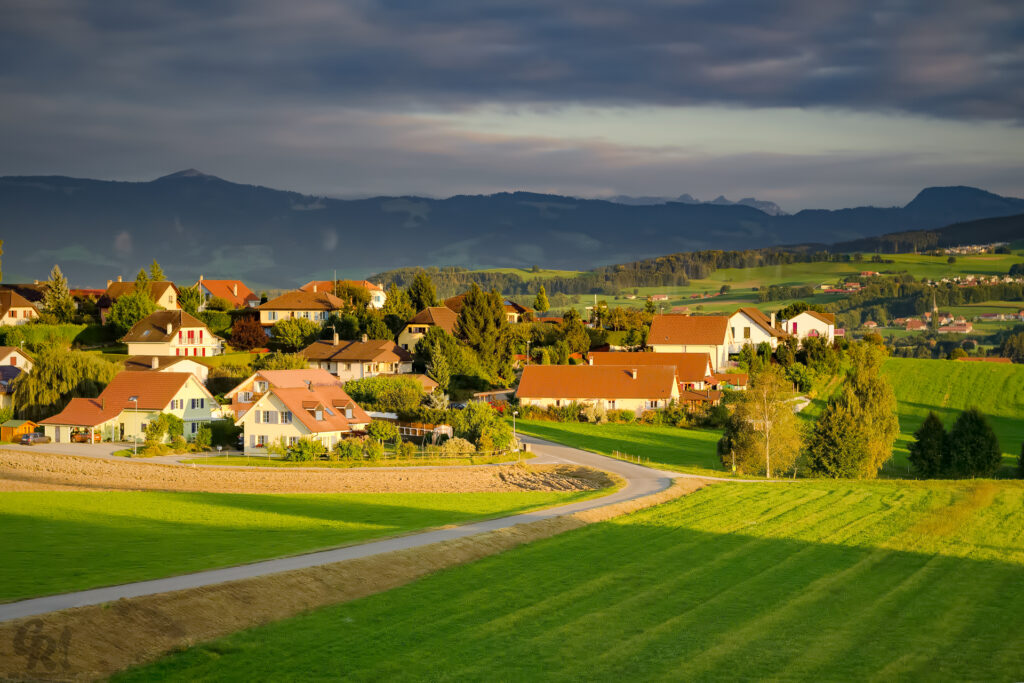
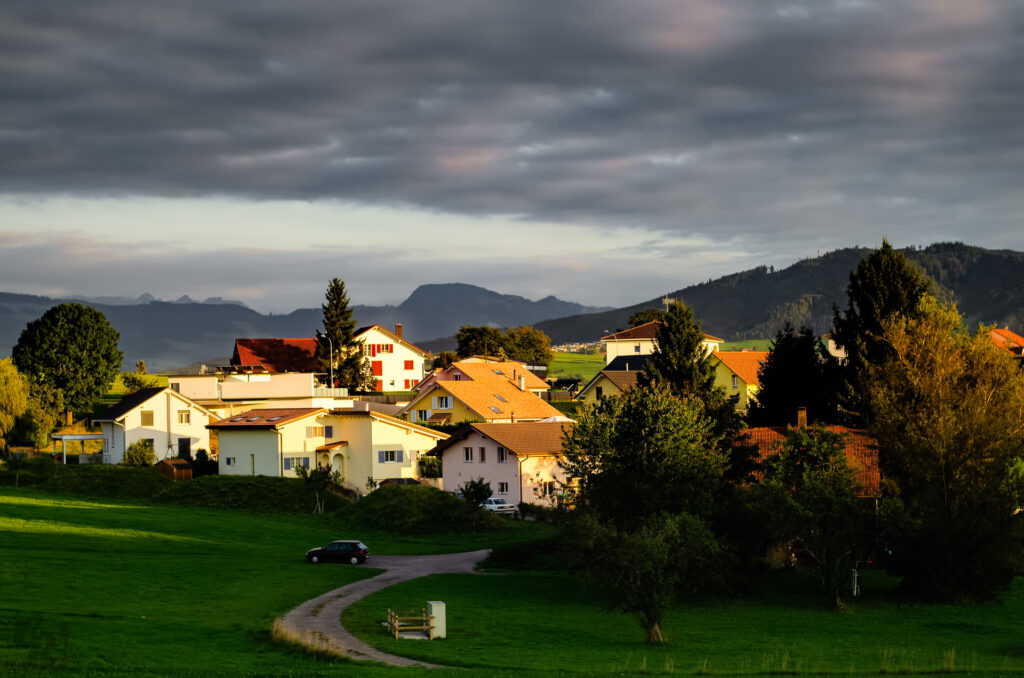
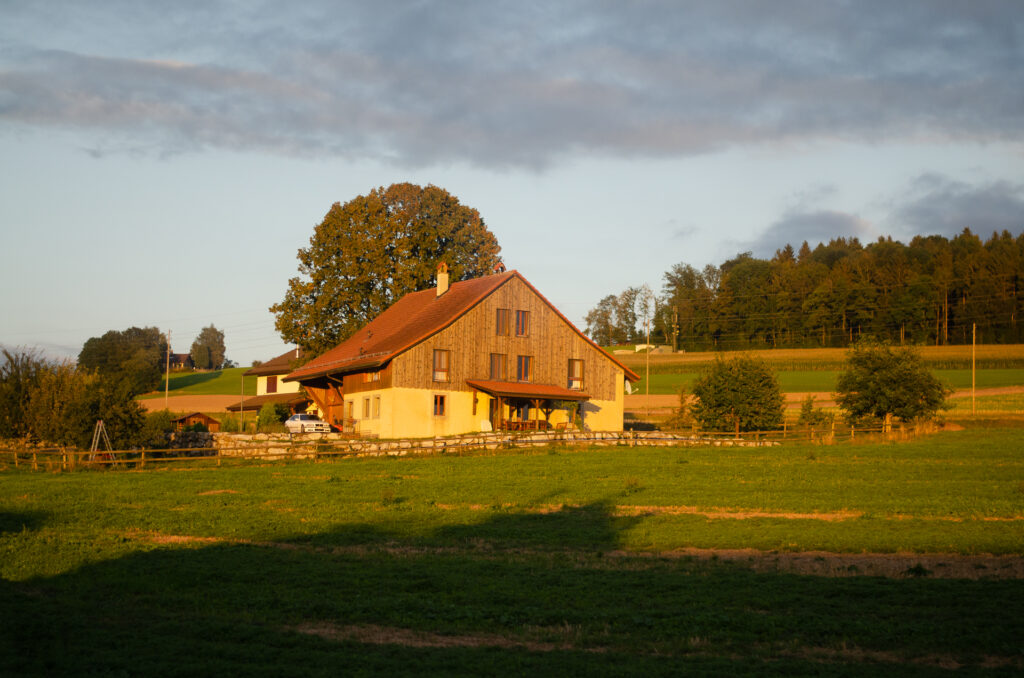
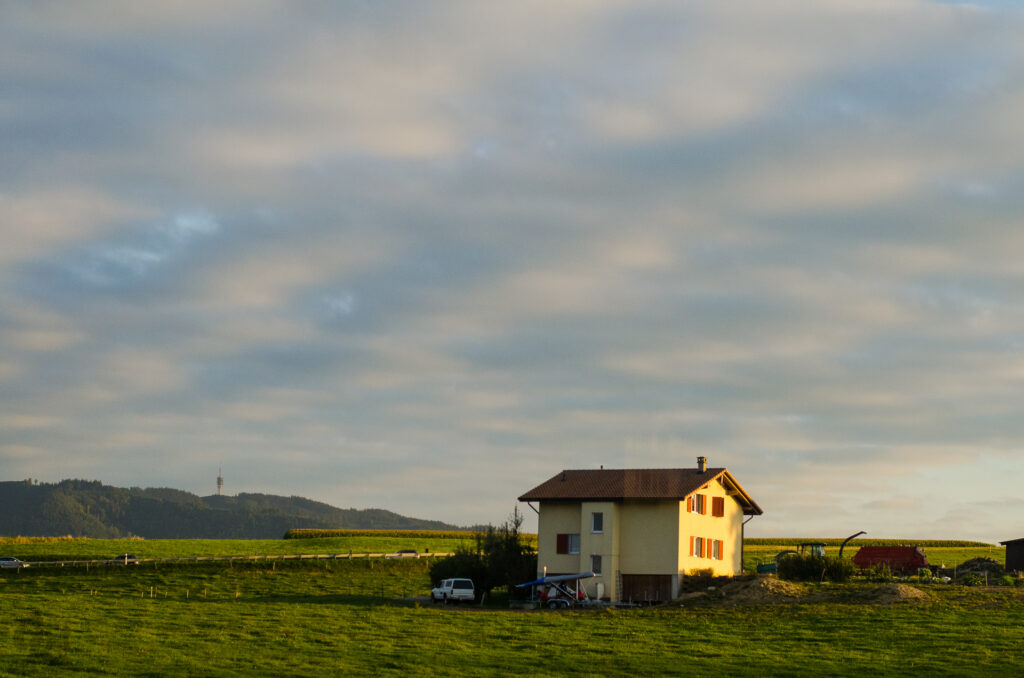
Swiss Home from Train
Swiss Village from train
Swiss village from train
Swiss village home from train
Scape from train

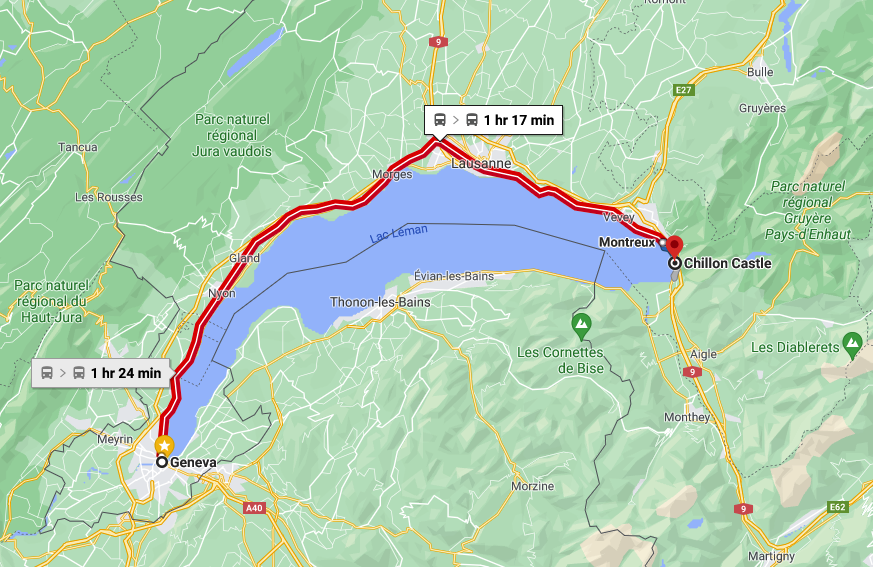
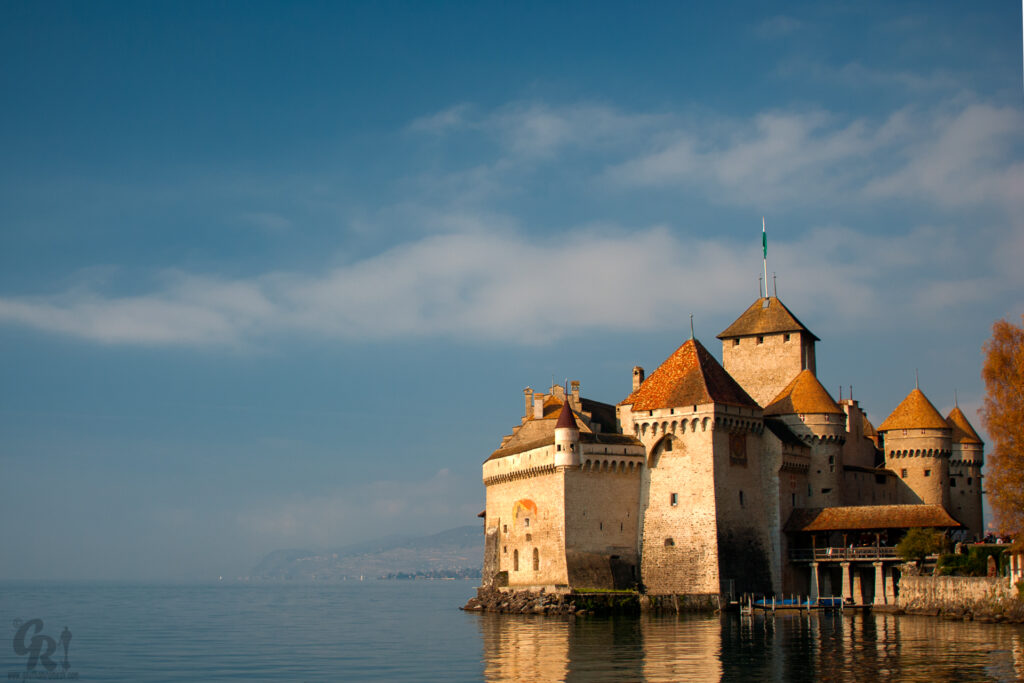
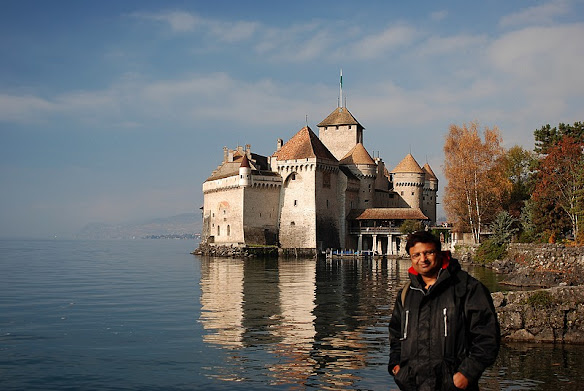
Chillon, Montreux  and Glion:

Chillon Castle is an island castle located on Lake Geneva, south of Veytaux in the canton of Vaud. It is situated at the eastern end of the lake, on the narrow shore between Montreux and Villeneuve, which gives access to the Alpine valley of the Rhône.

Glion is a village in the municipality of Montreux in the canton of Vaud, Switzerland. The village is located 700 m.a.s.l., overlooking Lake Geneva. The position of this village above Montreux and the Chauderon Gorge made it a touristic destination in the 19th century.

Start at Geneva : Take a Long distance Intercity train to Lausanne  (37 min non-stop) ->  Lausanne  

: Take another train to Villeneuve VD ( 30 Mins ) -> Villeneuve VD: Take a train to Veytaux, Château de Chillon (4 Mins ) -> Walk to Chillon Castle

Chillon Castle
Myself at Chillon
Court room , Inside Chillon Castle
Dungeon Inside Chillon Castle
Lake Geneva from Chillon Castle

Chillon to Glion

Start at Chillon: Walk to Veytaux, Château de Chillon (4 Mins ) -> Veytaux, Château de Chillon :  Take a train to Territet, Gare ->  Territet, Gare: Take a Funicular to Gliion

On the way to Glion
Funicular to Gilion
Gilon
Chillon from Glion
Glion
Myself at Glion

Lausanne :

Lausanne is a city on Lake Geneva, in the French-speaking region of Vaud, Switzerland. It’s home to the International Olympic Committee headquarters, as well as the Olympic Museum and lakeshore Olympic Park. Away from the lake, the hilly old city has medieval, shop-lined streets and a 12th-century Gothic cathedral with an ornate facade. The 19th-century Palais de Rumine houses fine art and science museums

Start at Geneva : Take a Long distance Intercity train to Lausanne  (37 min non-stop)

Lausanne from Ouchy
Myself at Olympic headquarters
Lausanne

Geneva :

Geneva is a city in Switzerland that lies at the southern tip of expansive Lac Léman (Lake Geneva). Surrounded by the Alps and Jura mountains, the city has views of dramatic Mont Blanc. Headquarters of Europe’s United Nations and the Red Cross, it’s a global hub for diplomacy and banking. French influence is widespread, from the language to gastronomy and bohemian districts like Carouge

St Peter Cathedral , Geneva
Ferry on Lake Geneva and Jet d Eau
River Rhone , Geneva
Jet d eau
Jet D Eau
St Peter Cathedral

Thanks if you like the blog, you can leave a comment at Home Page

Cheers

Goutham Ramesh

Magical Munnar with Vismaya group

I have been part of team Vismaya, which propagates the thought of helping the needy using our photography skills.  We do conduct photography exhibitions of our pictures and entire income from sales is donated for a cause.

As part of process of making pictures we do go on trips to make pictures; One of our annual trips is a to a beautiful place called Munnar ( We started visiting this place in 2012 ) and this blog is about Munnar and some of the pictures that I have taken at this beautiful place.

Team Vismaya in 2012 AD: ( L-R) Amar, Vinod Balan, Myself, Murali, Venu
Team Vismaya in 2020 : (L-R) Harish, Myself, Amar, Venu, Vinod, Murali ( Sridhar is missing )
Team Vismaya in 2020 Munnar trip : (L-R) Amar, Murali, Harish, Myself, Venu, Sisir)

Munnar

Munnar rises as three mountain streams merge – Mudrapuzha, Nallathanni and Kundala. 1,600 m above sea level, this hill station was once the summer resort of the erstwhile British Government in South India. Sprawling tea plantations, picturesque towns, winding lanes and holiday facilities make this a popular resort town. Among the exotic flora found in the forests and grasslands here is the Neelakurinji. This flower which bathes the hills in blue once in every twelve years, will bloom next in 2030. Munnar also has the highest peak in South India, Anamudi, which towers over 2,695 m.

Trip Route:

Our trip usually starts with a date and checklist by Amar which gives a fair indication of what to carry and what to do. We start from Bangalore and reach Munnar on the same day. The route we usually take is shown below

  • Take Hosur Rd, Bengaluru – Chennai Hwy/Electronic City Flyover/Hosur Rd in Bommanahalli.
  • Follow NH 44 and NH544 to Mangalam Rd/Tiruppur – Vanjipalayam – Avinashi Rd in Avinashi. Exit from NH544.
  • Follow Mangalam Rd and Udumalpet – Palladam Rd to Munnar – Udumalpet Rd in Nullatanni, Kannan Devan Hills.

Team’s Kit:

Apart from our equipment considering that we shoot pretty much whole day starting  as early as 3.00 AM we do carry portable kitchen with stove , table, chair water and lot of ready to cook stuff ( These not only help us survive very cold temperatures , it also fills our stomach and is fun )

Maggie on the road
Chef Sisir and Harish, Munnar
Refreshments on the way

Our Typical Day in Munnar

3.00 AM – 6.30 AM, Top Station: Subjects include Milky way, Sun Kissed peaks , Mist and dawn.

Milkyway , Tops tation
Milky Way Top Station ( There is also a head light lit mist which looks like fire in the distance )
Sun lit peak, Top Station
Above the clouds , Top Station
Top Station after sun rise, we are still above the clouds

6.30 AM – 11.00 AM, Kundala Dam: Subjects include curvy roads, Misty Lake, Misty Canopy and Mountains.

Mist Covered Kundala Lake
Vinod Balan , contemplating a composition
Boats at Kundala
Mist Covered Canopy
Early Morning Mist and Mountains
Sisir thinking about composition
Venu Shooting Lone Tree
Myself at Lone Tree
The result!

11.00 AM – 2.00 PM, Hotel: This is where we cook our own food and discuss the day’s shoot mistakes and what we can do better next day and plan for next day and catchup with sleep

Harish and Murali reviewing images and discussing next shoot

3.00 PM – 7.00 PM:

  • Travel to Devikulam tea gardens, scout for places with sun rays and also shoot sun set.

OR

  • Shoot The sunset at Kundala Dam or Echo point
Tea gardens of Devikulam
Rays and Tea Garden
Rays
Trees and Garden
Sunset on the way to Munnar from Devikulam
Sunset and Kundala
Boats during Sunset at Kundala

7.00PM – 12.00 AM, Top Station: Shoot Star Trails.

Star Trail Munnar
Star Trail Munnar

Link to Star Trail Photography Blog

https://gouthamramesh.com/2021/08/star-trails-photography-method/

12.00 AM – 3.00 AM, Hotel: Much needed rest.

Usually we repeat this every day and plan to shoot differently every day and being in mountains the weather is unpredictable, so we do spend good 3 days doing the same thing.

Heading Back

Our drive back is also fun filled with a customary Masala dosa at Asai Dosa at Saravana Bhavan , Salem.

Harish with his Topi Dosa ( A type of South Indian pancake from a fermented batter of rice and lentils )

If you want a personalised photo tour and workshop at munnar in December/January you can contact me from home page!

Cheers,

Goutham Ramesh
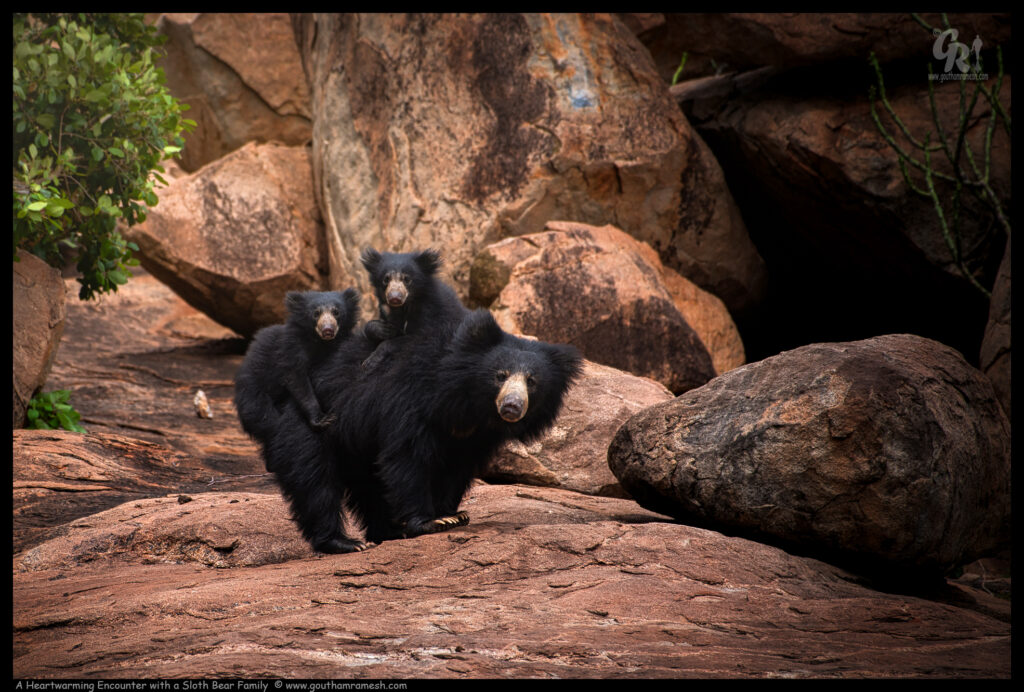
Bokeh

A good photograph is all about the subject  is what people say — but what about the background? My friend Murali Santhanam ( http://framesofmind.co.in/ ) always says it’s the background that makes a picture.

In this blog , I will talk about a background effect called Bokeh!

What is It ?

Bokeh comes from the Japanese word boke,  which means “blur” or “haze”, or boke-aji, the “blur quality.” Bokeh is pronounced BOH-Kə or BOH-kay.

Visit any photography website or forum and you’ll find plenty of folks debating the pleasing bokeh that their favourite fast lenses allow. Adjectives that describe bokeh include: smooth, incredible, superb, good, beautiful, sweet, silky, and excellent… but what exactly is it?

Bokeh is created by using aperture effectively ( Usually wide ) to render a busy background into a soft expanse of colour, turning small points of light into soft circles.

The red-veined darter at F8

Some Points :

Aperture: To achieve bokeh in an image, you typically need to use a fast lens—the faster the better ( But i use all kinds of lens including lensbaby ). Ideally you’ll want to use a lens with at least an f/2.8 aperture, with faster apertures of f/2, f/1.8 or f/1.4 being ideal, Many photographers like to use fast prime lenses when shooting photographs that they want visible bokeh in.

Lens: Although bokeh is actually a characteristic of a photograph, the lens used determines the shape and size of the visible bokeh. Usually seen more in highlights, bokeh is affected by the shape of the diaphragm blades (the aperture) of the lens. A lens with more circular shaped blades will have rounder, softer orbs of out-of-focus highlights, whereas a lens with an aperture that is more hexagonal in shape will reflect that shape in the highlights.

Don’t worry if you don’t own a very fast lens. By increasing the distance between the background and your subject, you can see bokeh in images that are shot at smaller apertures like f/8, You will see many images here shot at different apertures.

Grass Blue

How ?

To increase the likelihood of creating visible bokeh in your photographs do the following

  1. Increase the distance between your subject and the background. You can do this by decreasing the distance between the camera and subject. The more shallow the depth-of-field, or further the background is, the more out-of-focus it will be. Highlights hitting the background will show more visible bokeh too, so if you’re using a backlight, side light or a hair light, the bokeh may be more pleasing to the eye.
  2. Choose a background with visible highlights ( Sun through foliage is what I use most of the times )
  3. You’ll want to shoot with the lens wide open, so you’ll want to use a shooting mode of Aperture Priority or Manual. Manual gives you the ability to choose both your aperture and shutter speed, whereas Aperture Priority allows you to choose the f/stop while the camera chooses the appropriate shutter speed for the exposure. I usually shoot in Aperture Priority mode and start with fully open aperture
Small Grass Yellow at F6.3

Some Quick Tips:

  • Use fast prime lenses
  • Long focal length creates more extreme bokeh
  • Shoot lenses wide open
  • Increase distance between subject and background
  • Move closer to your subject
  • Take close-up portraits and macro images in nature
  • Use a backlight, side light, or hair light

Some Images :

Tawny Coaster
Tawny Coaster at F6.3
Lynx Spider at F16
Tawny Coaster at F6.3
Grass Yellow at F13
Blue Ground Skimmer at F10
Snails at F16
Hump Nosed Viper at F8

Credits :

https://www.nikonusa.com/en/learn-and-explore/a/tips-and-techniques/bokeh-for-beginners.html

https://en.wikipedia.org/wiki/Bokeh

Cheers,

Goutham Ramesh
Star Trails Photography -Method

Star Trail Munnar

What is it?

A star trail is a type of photograph that uses long exposure times to capture the apparent motion of stars in the night sky due to Earth’s rotation. A star-trail photograph shows individual stars as streaks across the image, with longer exposures yielding longer arcs.

Points to ponder:

Some important points to ponder for making a good star trail image are:

  • Camera settings
  • Equipment
  • Shooting locations
  • And more

Camera Equipment for Star Trails Photography.

  • Any camera with manual mode is great for star trails photography. The nice part of this mode is you can use the exact same camera for star & Milky Way photography too; By using manual mode, you can independently control shutter speed, f-stop, and ISO by hand.
  • I recommend a full-frame camera, a full-frame sensor in the camera can “collect” more light over the exposure time, increasing image quality, and reducing noise.

Best Lens for Star Trails Photography.

A wide-angle lens with f-stop values ranging from f/2.8 to f/5.6 will work best for star trails photography.

  • Focal Lengths – Full Frame: 14mm – 20mm are recommended.
  • Focal Lengths – Crop Sensor: 10mm – 18mm are recommended.

Aperture.

The larger the aperture diameter, the more light the camera can collect over a standard exposure. Opening the aperture increases image quality because you can reduce the ISO, thus inducing less noise in the image.

I shoot with the Laowa 15mm, Tokina 11-16 or Samyang 8mm for all my night sky images.

Tripod.

A carbon fiber tripod, with a sturdy, stable adjustable ball-head is the best for star trails photography. Carbon fiber reduces tripod vibration providing sharper images.You can try cheaper tripods the most important thing is a sturdy tripod.

Intervalometer.

An intervalometer connects to your camera allowing you to take exposures longer than 30 seconds. It also allows you to take multiple images, one after another, all at the same settings, for an extended amount of time.

Any intervalometer will work, so long as you can control:

  • Shutter speed
  • Time between shots
  • Number of shots total

Some camera’s come with an inbuilt intervalometer ( This is what I use )

Nikonians refer this link

https://onlinemanual.nikonimglib.com/d7500/en/24_menu_guide_03_24.html

Planning

Doing some basic planning before the shoot will greatly improve the chances of coming home with a good shot.

  1. Determine the moon phase : You can shoot star trails under any moon phase, but the results will drastically differ. During the full moon, it’s almost too bright to shoot star trails at all, and you can barely see them in the sky. When the moon is at half or less is a great time to shoot star trails photography, Ideally new moon day is best.; however half-moon can also provide some nice lighting to the landscape at the same time it does does not dominate the brightness of the scene.
  2. Find a Location without Light Pollution : Choose darker areas, you can use this map ( https://blue-marble.de/nightlights/2019 )
  3. Find the Best Weather : This all depends on the shot you want. You can get great results when there are perfectly clear skies, where the star trails scene dominates the sky. However sometimes It’s also great to shoot on nights with 20-50% cloud cover in the sky, which means fewer trails, but move cloud movement.
  4. Determine Moonrise & Moonset Times : It does not matter if you shoot under moonlight or not, It’s best to shoot during a time when the moon will not be rising or setting during this time the light stays fairly constant on the landscape during your exposure and leads to better results. Tip : Start your shoot at least 2 hours before a moon or sun, rise or set event.

Focusing Your Lens at Night

Always focus your lens before changing any other settings, this makes all the rest of the steps easier. Since the distance between us and the stars is very large, focusing at or near infinity works well for star trails photography . However lens may have an “∞” symbol on it, this is not always the ideal place to focus , so understand your lens and do some infinity shooting (Focus on object > 50mts ) in day light with manual focus to understand the point of focus on your lens

Star trail Himalayas

Method to madness

  1. Mode : Manual
  2. Image Format : RAW
  3. Metering Mode : Not applicable as settings are manual
  4. Colour Balance : Kelvin Values between 4000K-5500K work best for night photography settings, If confusing use auto white balance and correct it during post processing.
  5. Focal Length : Widest ( 11- 50mm is the best range )
  6. F-Stop : f/2.8 to f/5.6
  7. Shutter Speed : Shutter speeds ranging from 20-90 seconds are the best for star trails ; Full Frame (30-60 seconds ) ;Crop Sensor (30-120 seconds ). I use a technique that takes a few hundred-star images, without trails, and overlays them on top of each other, creating a star trails image.
  8. ISO Settings: between 500-1200
  9. Noise reduction and long exposure settings: OFF
  10. Number of exposures : The more exposures you take, the longer your star trails will be; This is where intervalometer help; you can also use a single exposure only thing is you might have to keep the exposure open for minutes (30-60 minutes)
  11. Camera pointing : Always point towards North star or in exact opposite direction ( Use Skyview app to track North star )
Champaka Sarasi
Champaka Sarasi

Merging many images to get star trails :

Once you take multiple images you can use Photoshop to merge multiple images to create a star trail :

Steps :

1. First, load all your base images into Photoshop into a single stack (File -> Script >- Load Images into Stack from Photoshop, load from Bridge, or Lightroom, etc).

2. Second, scroll to the bottom of your stack and select the second to the bottom layer – the first layer you want to set to Lighten, and set the blend mode.

3.Next, Right-Click on your newly set ‘Lighten’ layer, a context menu will open up and scroll up and find ‘Copy Layer Style’

4.Select all the remaining Layers above your current lighten layer – all those annoying many images + layers you want to quickly blend together.

4 .Now for the magic, right click again on your selected layers and find that menu item that says ‘Paste Layer Style’ – try not to fall out of your chair at this point

Conclusion.

This was a long read and hope this blog helps fellow photo artists who want to shoot star trails

Credits

https://www.davemorrowphotography.com/2012/03/StarTrailsPhotographyTutorial.html

https://blue-marble.de/nightlights/2019

https://onlinemanual.nikonimglib.com/d7500/en/24_menu_guide_03_24.html

https://en.wikipedia.org/wiki/Star_trail

Cheers,

Goutham Ramesh
Hoysalas skilled artists of India

Hoysalas (1026 CE – 1343 CE) were a dynasty that ruled present day Karnataka, parts of Tamil Nadu and south-western Telangana; Their contribution to art especially sculpture and temple architecture is unparalleled! Their era was marked by illustrious achievements in art, architecture, and culture. The nucleus of this activity lay in the present-day Hassan district of Karnataka, India. Their  intention of surpassing the Western Chalukyan Empire (973 CE – 1189 CE) in its own sphere provided further impetus for excelling in the field of architecture.

History of the Hoysala Empire

The Hoysala rulers began as local chieftains in the hills of Western Ghats. With time, their fortune began to prosper and within a few decades they achieved the status of a powerful feudatory under Western Chalukyan Emperors. Early in the history of Hoysala dynasty, the capital of their nascent dominion was shifted from the hills of Western Ghats to Belur. The military conquests of Vishnuvardhan (1108 CE – 1152 CE) against the neighboring Chola Empire (c. 300 BCE – 1279 CE) in 1116 CE marks the first major development in the history of these dynasts. A new age ushered with Vishnuvardhan as he built the Chennakesava temple (1117 CE) in Belur to celebrate this victory; furthermore, he decided to shift the capital almost 20 km to the east to Halebidu or Halebid.
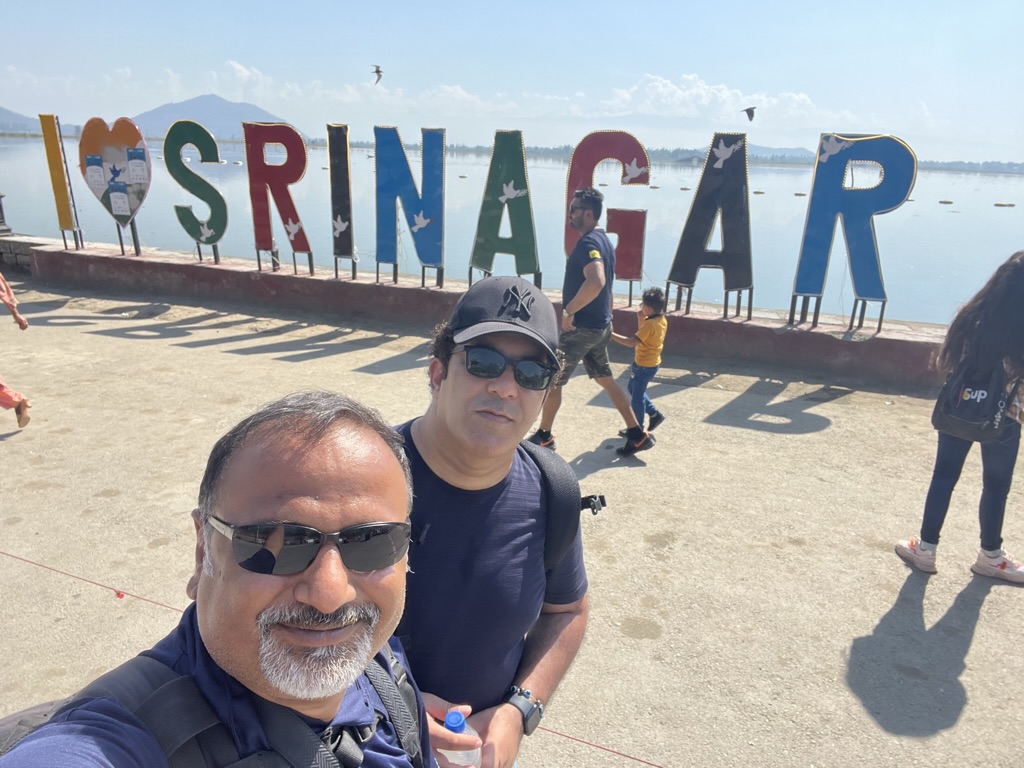
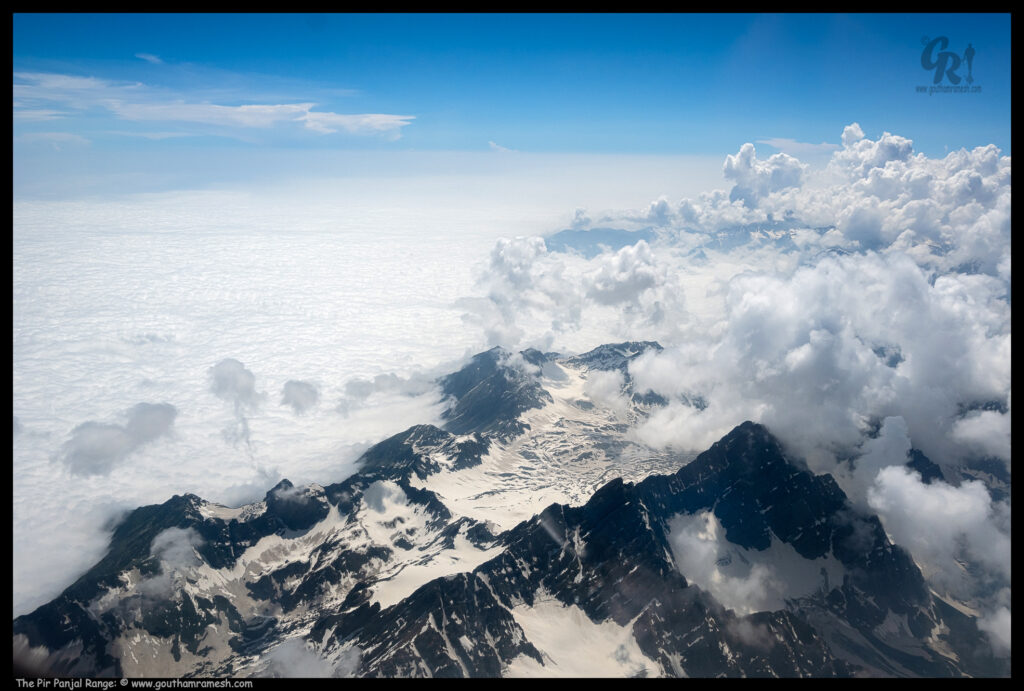
The Hoysalas gained their political freedom in 1192 during the reign of Veera Ballala II (1173 CE – 1220 CE). They soon became a leading power in Southern India and enjoyed territorial supremacy and economic well-being over the next century or so. At its height, the empire consisted of present-day Karnataka, parts of Tamil Nadu and south-western Telangana. However, invasions of sultanates from Delhi and Madurai, from 1311 CE onwards, proved fatal to the then reigning monarch, Veera Ballala III (1292 CE – 1343 CE). He eventually succumbed to these repeated onslaughts in 1343 CE.

I have tried to capture some of their architectural marvels in the following images, I would like to call this as poetry in stone.

Poetry in stone

Credits :

https://www.worldhistory.org/article/898/hoysala-architecture/

https://en.wikipedia.org/wiki/Hoysala_architecture

Cheers,

Goutham Ramesh