
“Lepakshi Temple, a gem of the Vijayanagara Empire, stands as a masterpiece of ancient Indian architecture and artistry. I had the chance to visit this place a couple of times recently, accompanied by young minds and later with senior photographer GR Pandith. Every pillar, sculpture, and carving within its sacred walls holds centuries of history and devotion. Through my lens, I’ve sought to capture the timeless beauty of this temple—its intricate stonework, the grandeur of the Nagalinga, and the spiritual essence that resonates in every corner. Join me as I share the visual stories etched into the heart of Lepakshi’s architectural marvel.”
Stone Stories
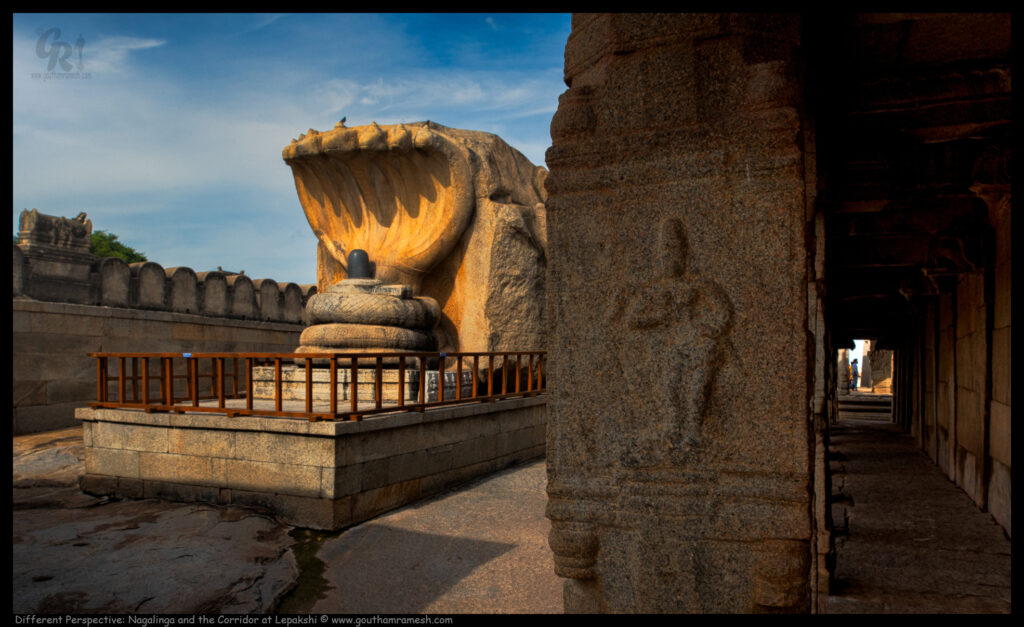
Camera: Nikon D750
Lens: Nikon 24mm PCE Tilt-Shift
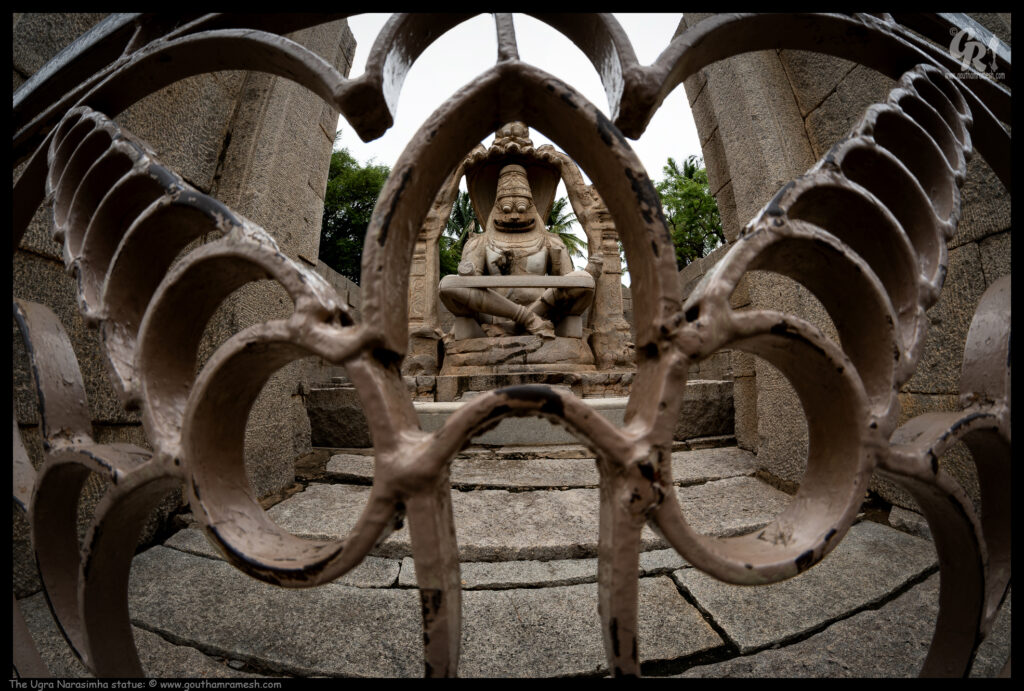
Shooting the Nagalinga at Lepakshi presents a unique opportunity to break away from traditional compositions, and incorporating the corridor into the frame is a refreshing way to do just that. In this particular composition, captured with the precision of the Nikon 24mm PCE tilt-shift lens, the grandeur of the Nagalinga is beautifully complemented by the linear perspective of the corridor. The lens’s ability to maintain perfect alignment and eliminate distortion adds to the clarity and impact of the scene, creating a dynamic interplay between the sacred sculpture and the surrounding architecture.
The corridor, with its rhythmic sequence of pillars and shadows, adds depth and context, guiding the viewer’s eye towards the Nagalinga while also offering a sense of continuity within the temple complex. This approach not only highlights the Nagalinga as a focal point but also integrates it into the broader narrative of the temple’s architecture, making the composition visually striking and richly layered with meaning.
This is one of those compositions where breaking the monotony of traditional views brings a fresh and engaging perspective to a revered subject, offering a new way to appreciate the timeless beauty of Lepakshi.
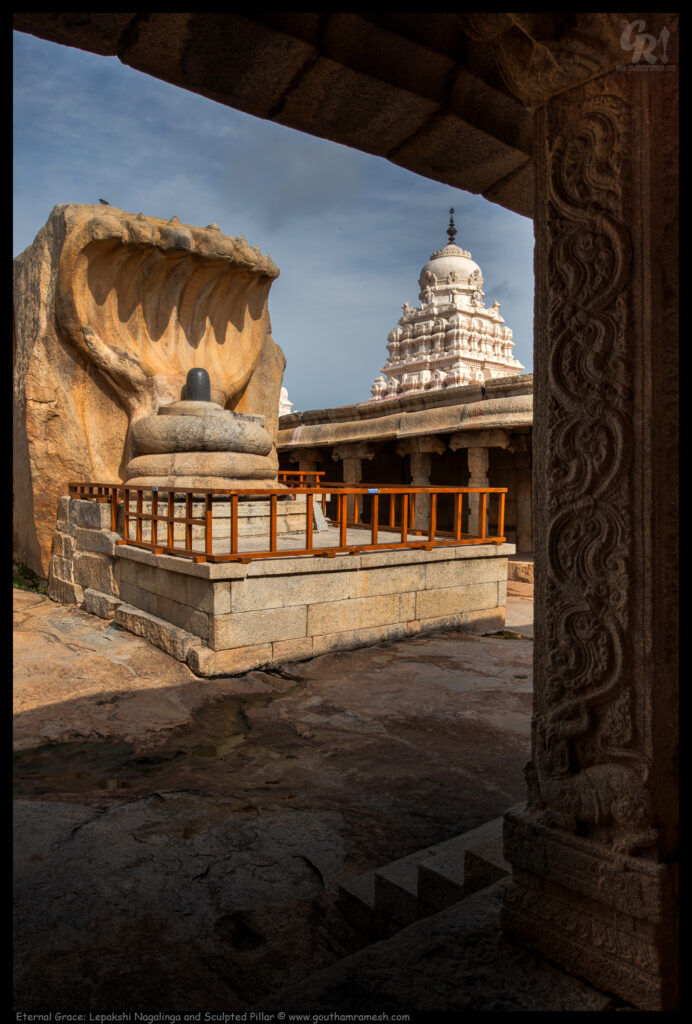
Camera: Nikon D750
Lens: Nikon 24mm PCE
In this composition, the beautifully sculpted pillar takes the foreground, framing the majestic Lepakshi Nagalinga that stands behind it. The Nikon 24mm PCE lens, renowned for its zero distortion, captures the scene with exceptional clarity, allowing the intricate carvings of the pillar to stand out while still maintaining the grandeur of the Nagalinga in the background. The alignment of the pillar and the Nagalinga creates a harmonious balance, showcasing the timeless craftsmanship of ancient India. The lens’s precision highlights every detail, making the scene a testament to the enduring beauty of these architectural wonders.
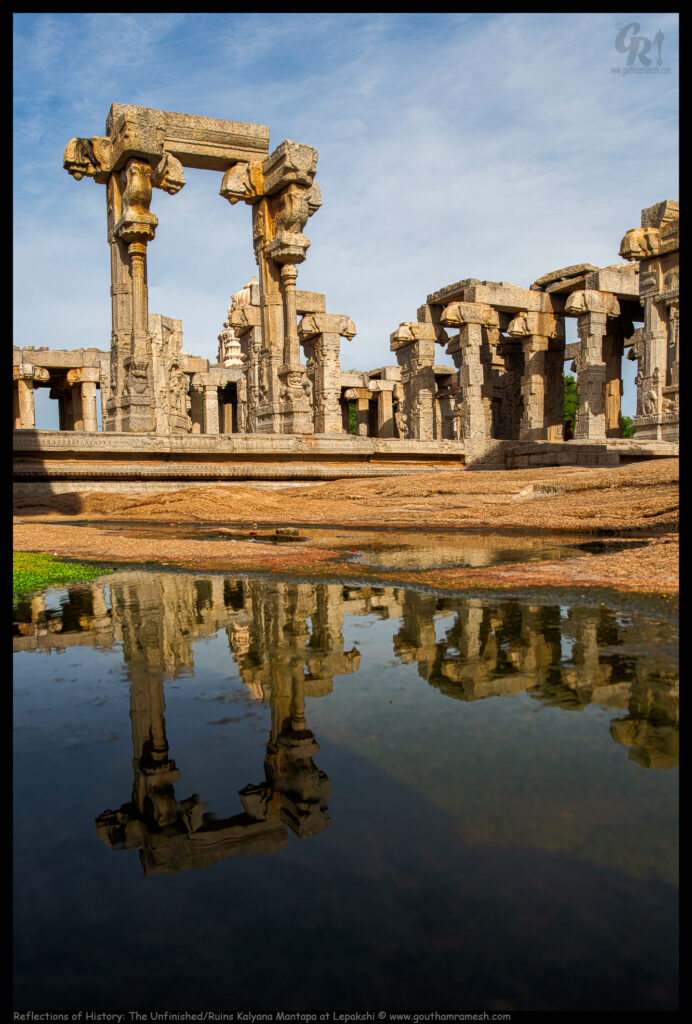
Camera: Nikon D750
Lens: Nikon 24mm PCE
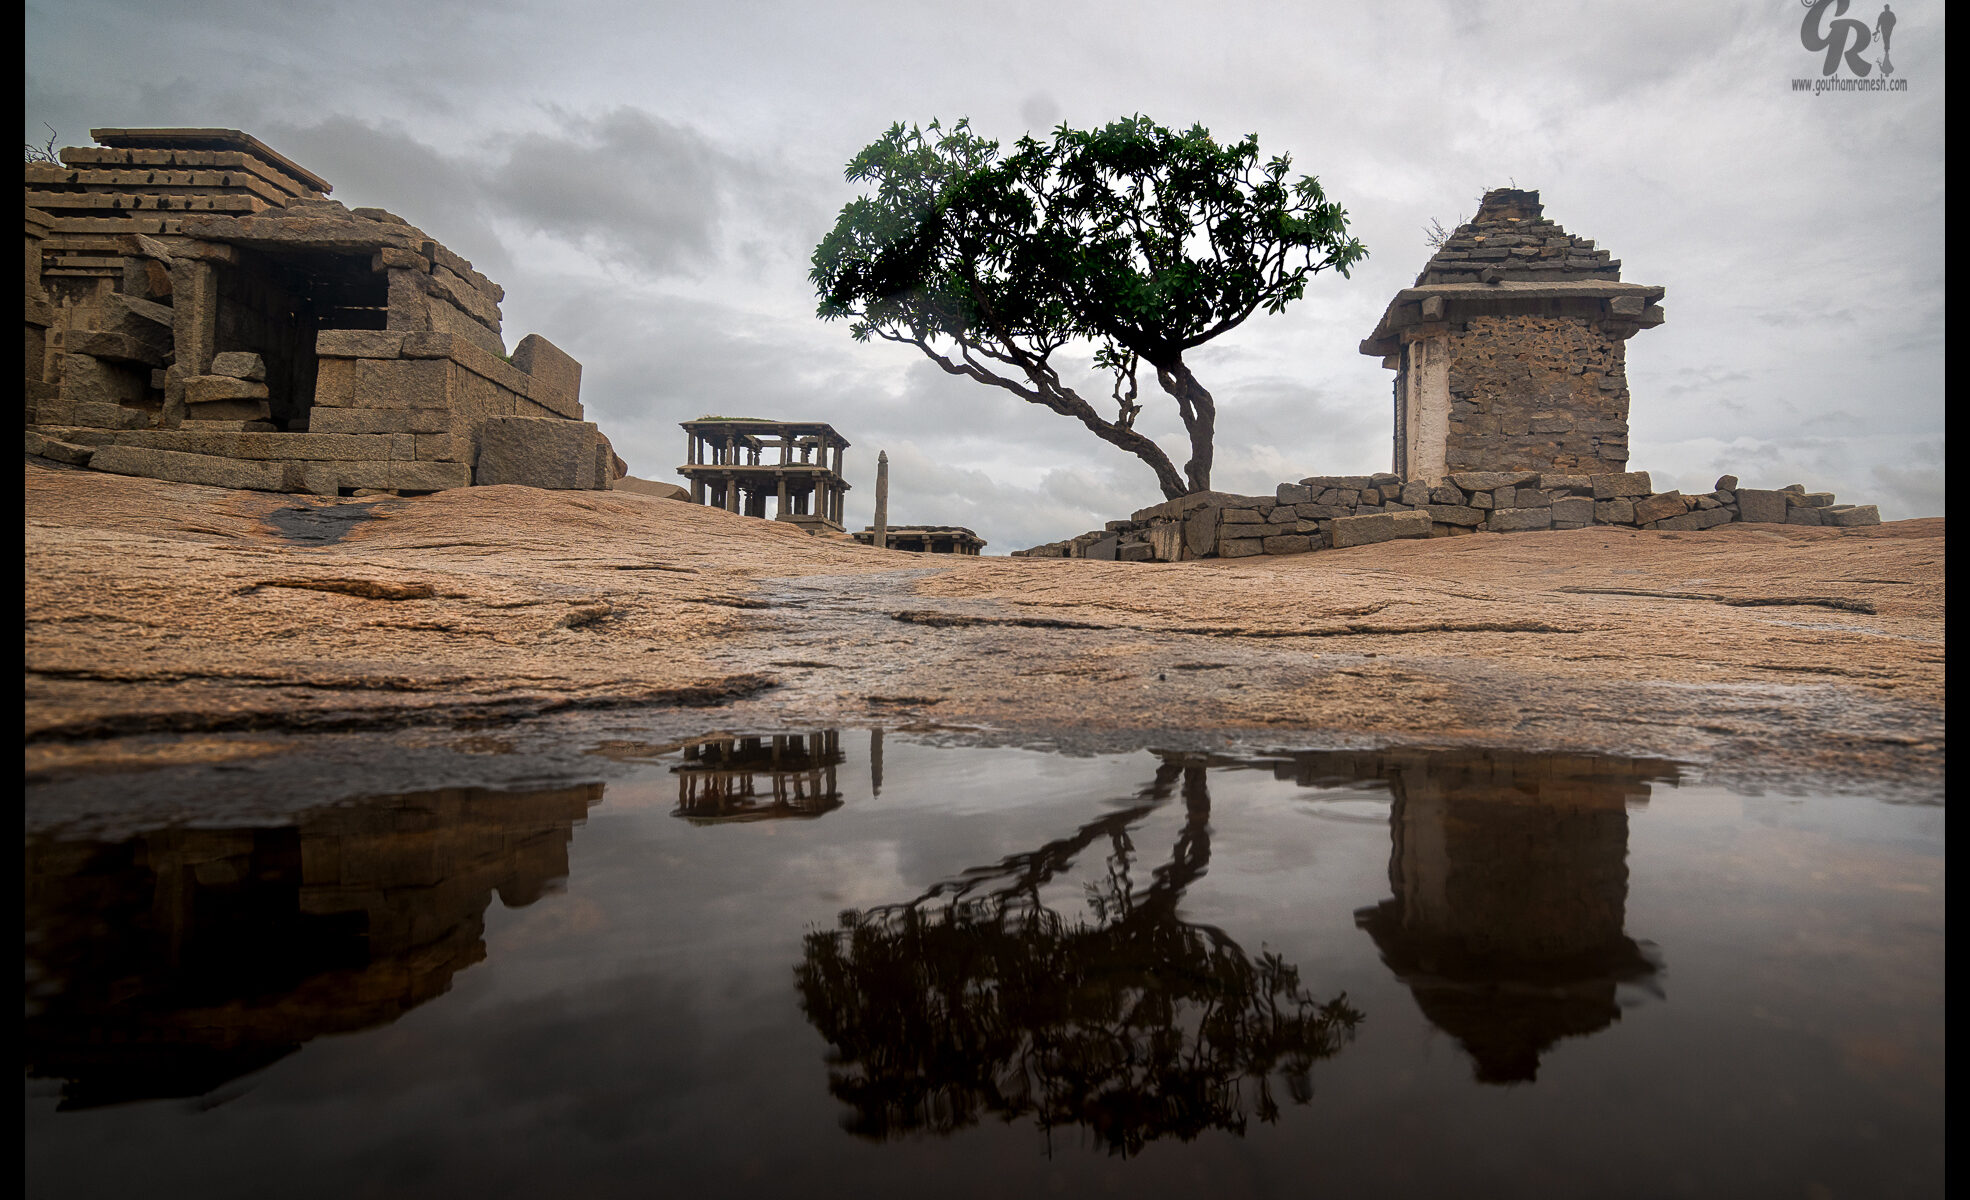
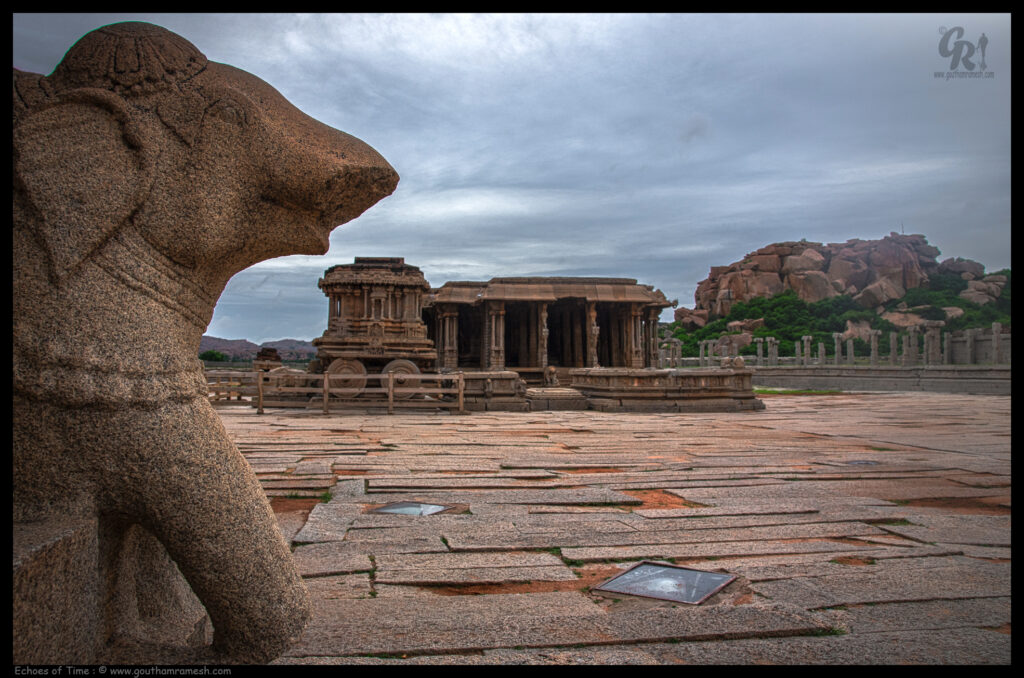
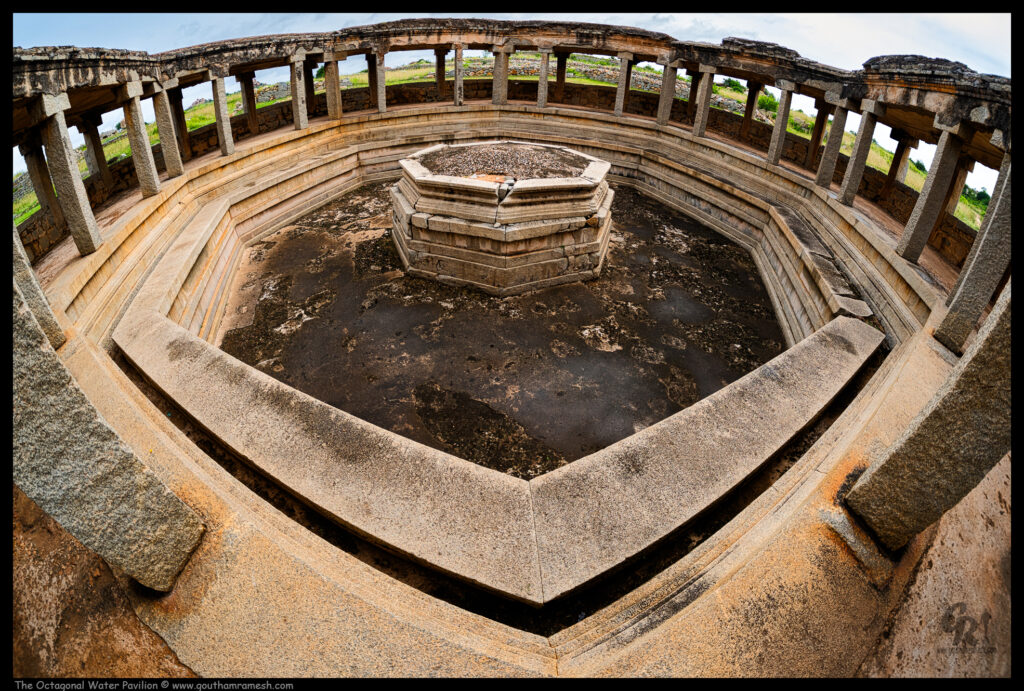
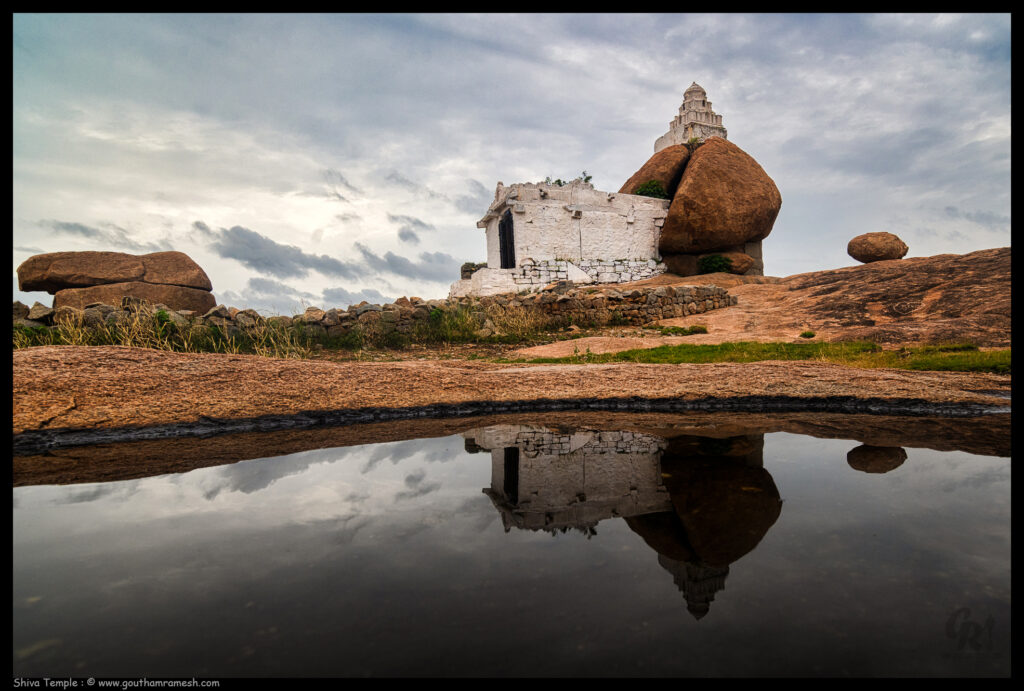
The entrance of the unfinished or runis Kalyana Mantapa at Lepakshi, captured in the reflection of a puddle of water, offers a hauntingly beautiful glimpse into the past. The partially completed structure, with its towering pillars and intricate carvings, appears almost ghostly in the still water, creating a mirror image that blurs the lines between reality and reflection. The delicate details of the entrance, carved with scenes from mythology and adorned with floral patterns, are perfectly echoed in the water, adding a sense of symmetry and balance to the scene. The unfinished nature of the Mantapa, juxtaposed with its reflection, symbolizes the timelessness of the temple’s architecture, where even incomplete structures evoke a sense of grandeur and mystery. This fleeting reflection, captured after a rain shower, serves as a poignant reminder of the impermanence of life and the enduring beauty of art.
Camera: Nikon D750
Lens: Nikon 24mm PCE Tilt-Shift
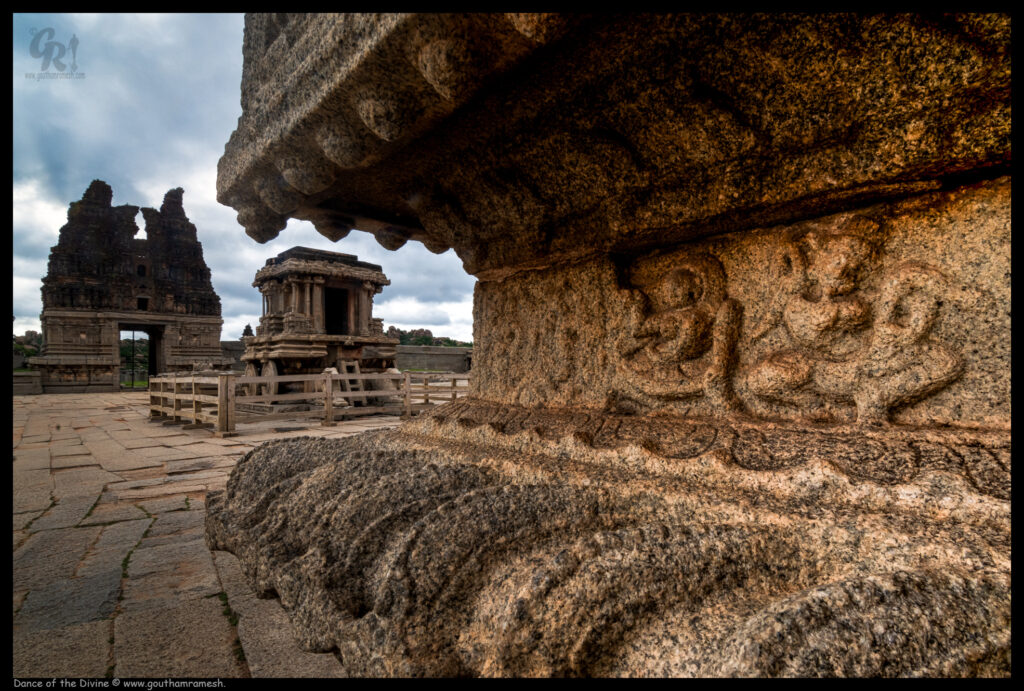
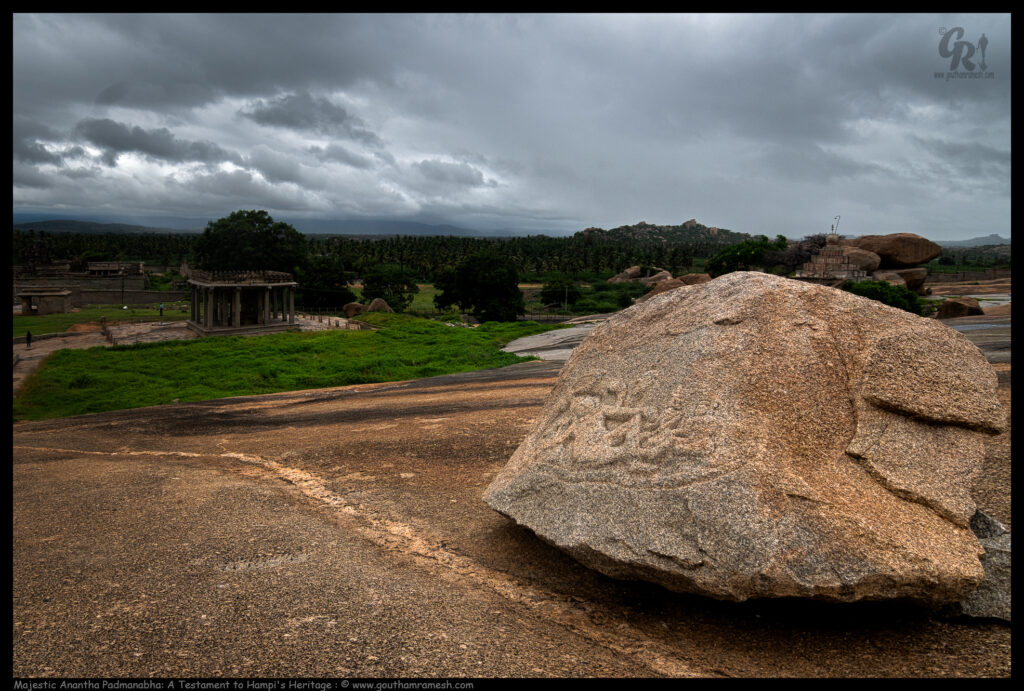
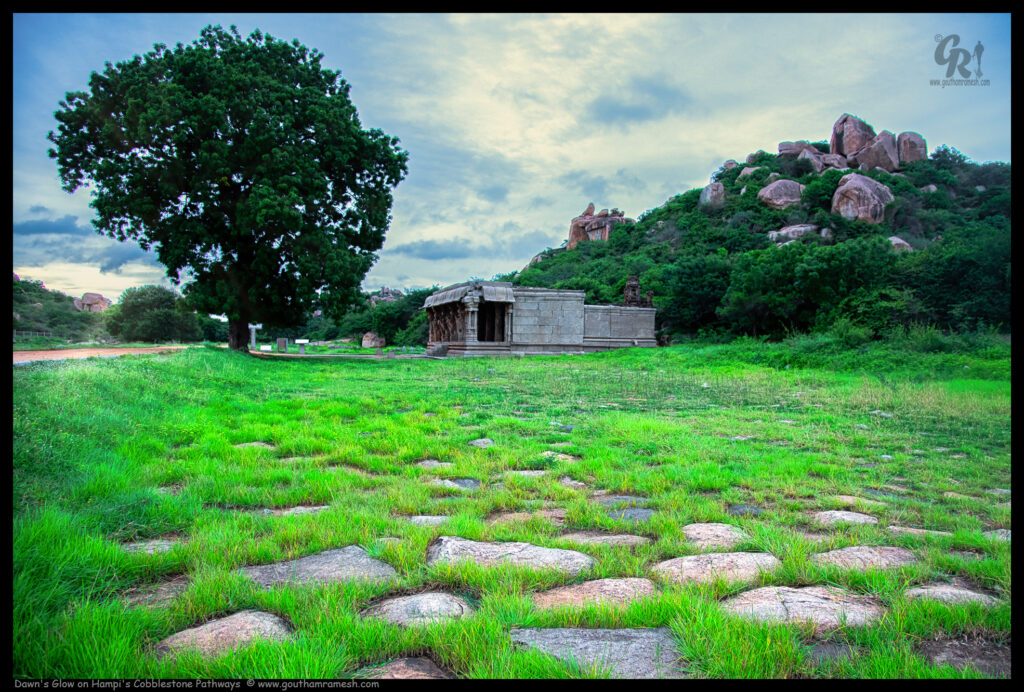
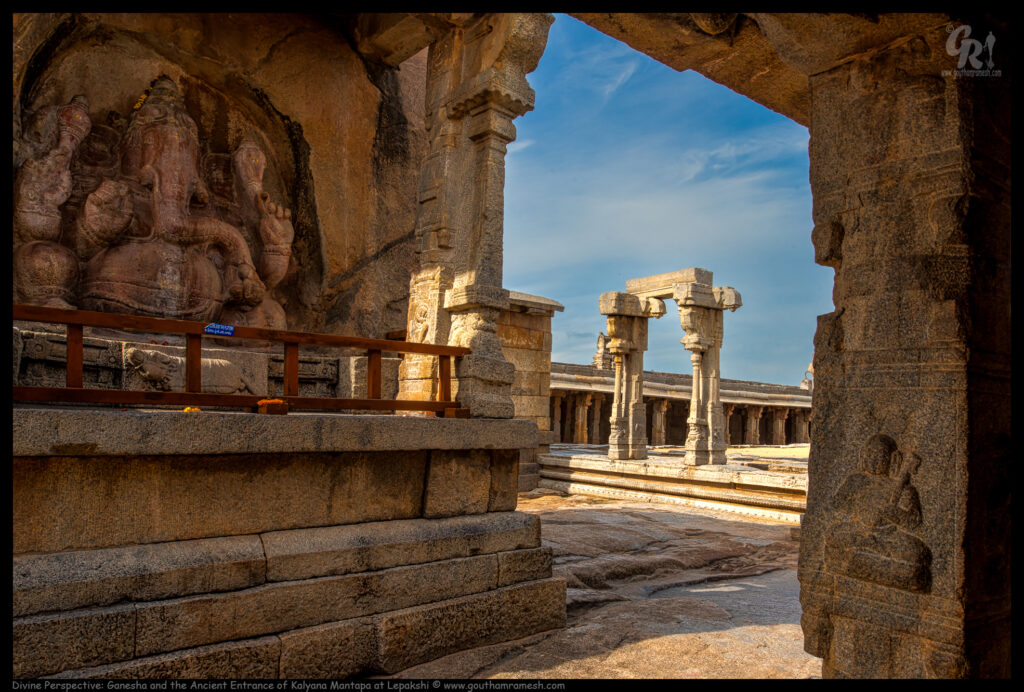
In the sacred space of theTemple, the Ganesha idol, sculpted directly into the rock, commands a serene presence. This view captures not only the deity but also the historical remnants of a grand entrance to the Kalyana Mantapa, now framed by the enduring beauty of the temple’s architecture.
The stone frame, which once served as the entrance to the Kalyana Mantapa, stands in silent testimony to the temple’s bygone splendor. Positioned behind the rock-carved Ganesha, the frame adds depth and context to the scene, drawing the viewer’s eye through the layers of architectural history. The interplay between the Ganesha sculpture and the ancient entrance highlights the artistic and spiritual legacy of Lepakshi.
This perspective emphasizes the intricate relationship between the natural rock formations and the crafted architectural elements, creating a harmonious blend of the sacred and the historical. The image serves as a poignant reminder of the temple’s timeless significance, where each element, from the Ganesha sculpture to the weathered entrance frame, contributes to the narrative of this revered site.
Camera: Nikon D750
Lens: Nikon 24mm PCE Tilt-Shift
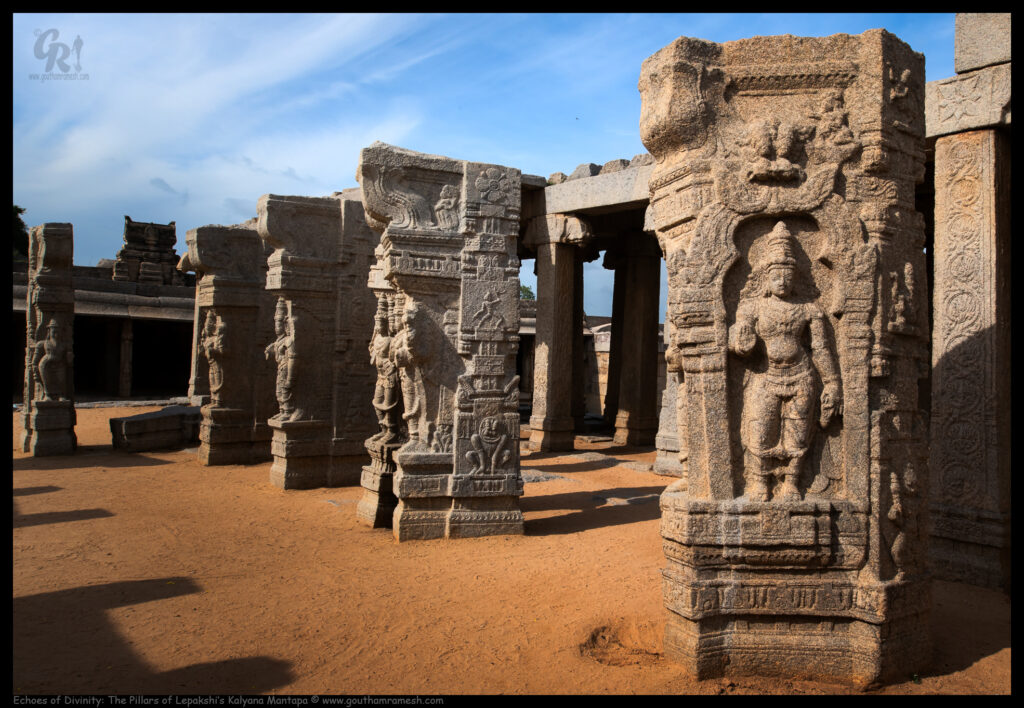
The pillars of Kalyana Mantapa stand as resilient testaments to the artistry and devotion of a bygone era, even as the roof lies in ruins. Each pillar is adorned with intricate sculptures of gods, capturing moments of divine mythology frozen in stone. The figures are carved with exquisite detail, from the expressions on the faces of the deities to the ornate adornments they wear. Though the roof has fallen, these pillars continue to exude a sense of sacredness and grandeur, their carvings offering glimpses into the spiritual and cultural richness of the time. The ruins, with their mix of decay and divine imagery, create a powerful contrast, reminding us of the impermanence of structures yet the enduring legacy of the art and faith they embody.
Camera: Nikon D750
Lens: Nikon 24mm PCE Tilt-Shift
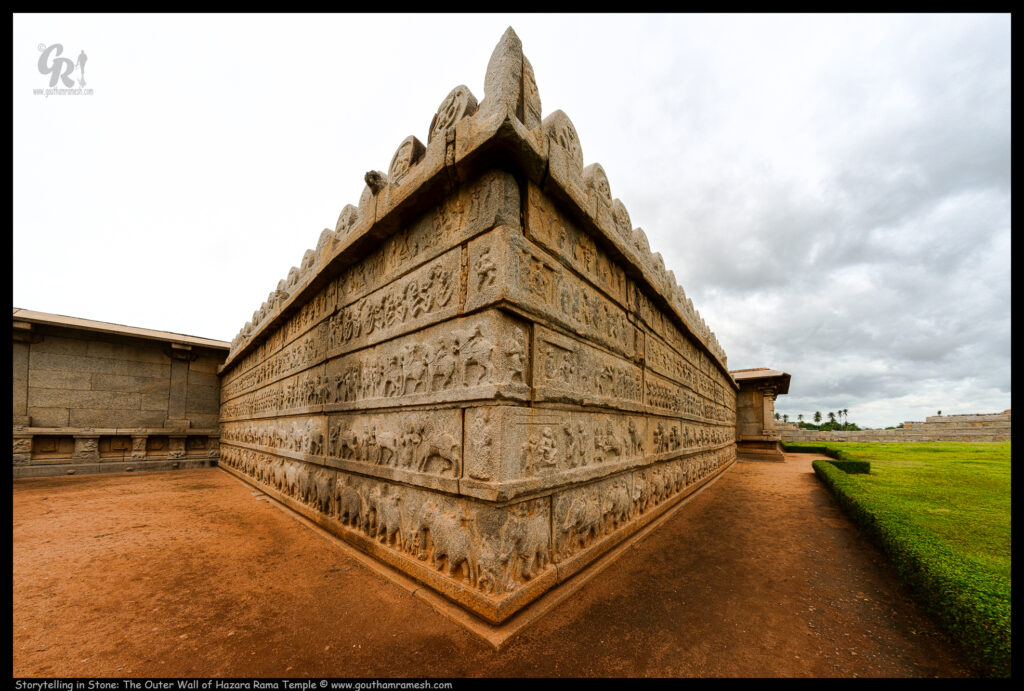
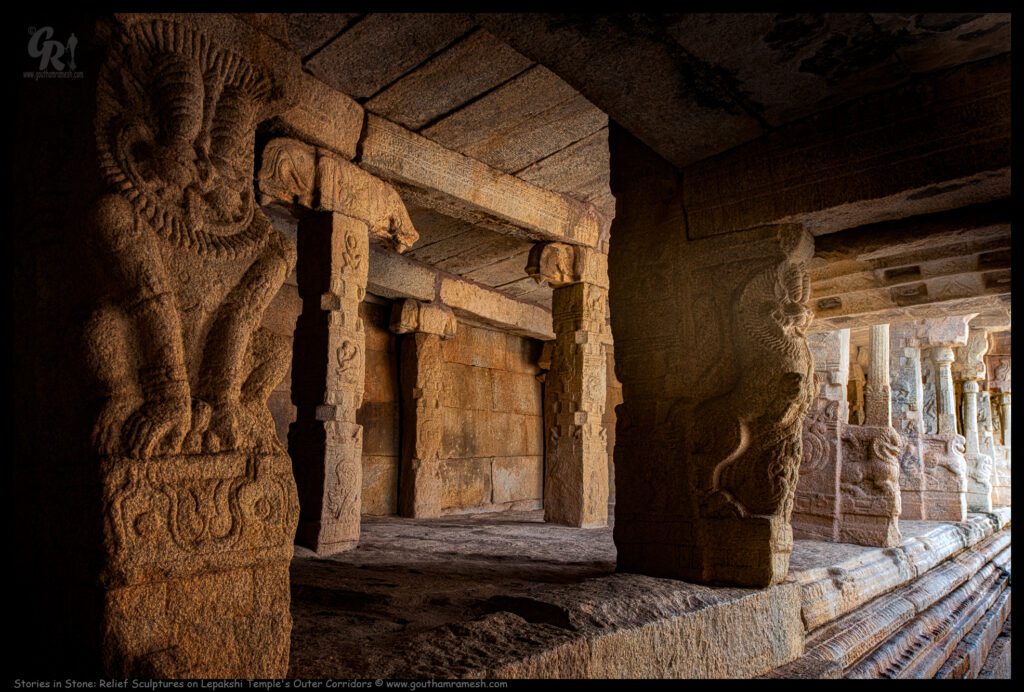
The relief sculptures on the pillars in the corridors around the outer wall of the Temple are a marvel of ancient artistry, each one telling a unique story from the rich tapestry of Hindu mythology. Carved with meticulous precision, these sculptures depict gods, goddesses, celestial beings, animals, and mythical creatures, all intricately intertwined in scenes of devotion, battle, and celebration. The figures, though rendered in stone, convey a sense of movement and life, with their detailed expressions and dynamic poses. The craftsmanship of these reliefs showcases the skill and imagination of the Vijayanagara artisans, who transformed the stone pillars into narrative canvases. As you walk through these corridors, the relief sculptures invite you to immerse yourself in the spiritual and cultural heritage they represent, offering a timeless connection to the stories and beliefs that shaped this sacred space.
Camera: Nikon D750
Lens: Nikon 24mm PCE Tilt-Shift
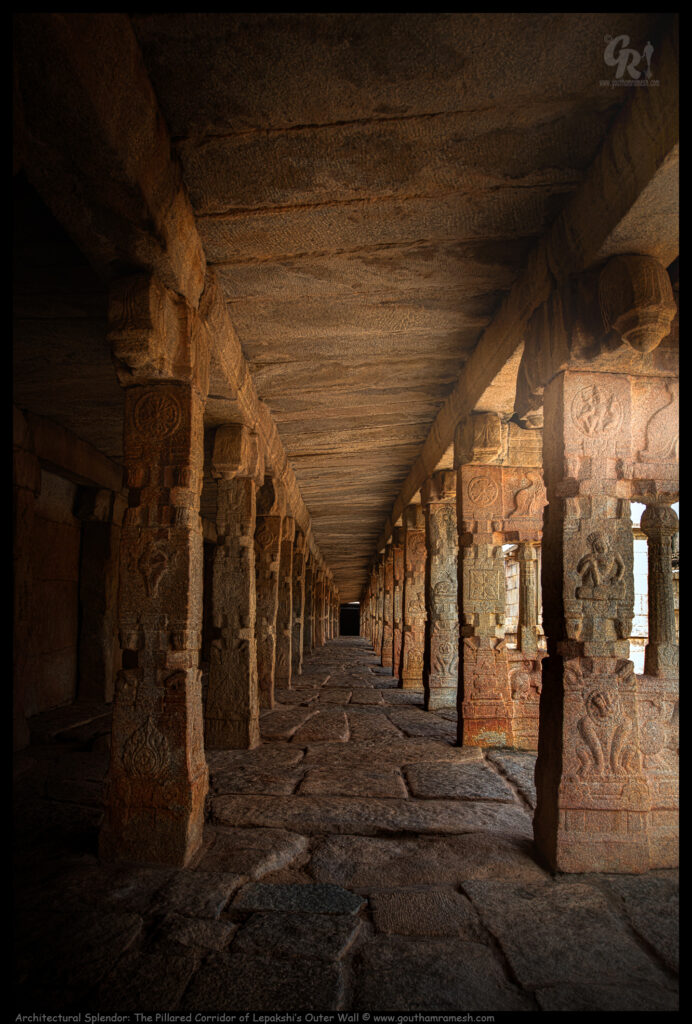
The pillared corridor of the outer wall enclosure at Temple is a testament to the architectural brilliance of the Vijayanagara period. These corridors, lined with intricately carved pillars, stretch endlessly, creating a rhythmic pattern of light and shadow that enhances the temple’s serene ambiance. Each pillar is adorned with detailed reliefs depicting deities, mythical creatures, and floral motifs, showcasing the artisans’ dedication to their craft.
Photographing this corridor with the Nikon 24mm PCE tilt-shift lens is a transformative experience. The lens’s ability to eliminate distortion ensures that the pillars remain perfectly vertical, preserving the symmetry and balance of the scene. In architectural photography, where precision is paramount, the 24mm PCE lens is a boon, capturing the true essence of the structure without compromising on the integrity of the lines or the intricate details. The result is an image that faithfully represents the grandeur of the corridor, allowing the viewer to appreciate the full scale and beauty of this historic space.

Camera: Nikon D750
Lens: Nikon 24mm PCE Tilt-Shift
The outer pillars of the unfinished Kalyana Mantapa are adorned with intricate sculptures of sages and demigods, each figure meticulously carved with expressions of devotion, wisdom, and spiritual power. These pillars, though part of an incomplete structure, stand as magnificent examples of the artistry and religious fervor that define the temple complex.
These sculptures not only enhance the architectural beauty of the Kalyana Mantapa but also serve as a testament to the rich spiritual and cultural heritage of Lepakshi, making it a must-visit site for anyone interested in India’s ancient traditions.
Camera: Nikon D750
Lens: Nikon 24mm PCE Tilt-Shift
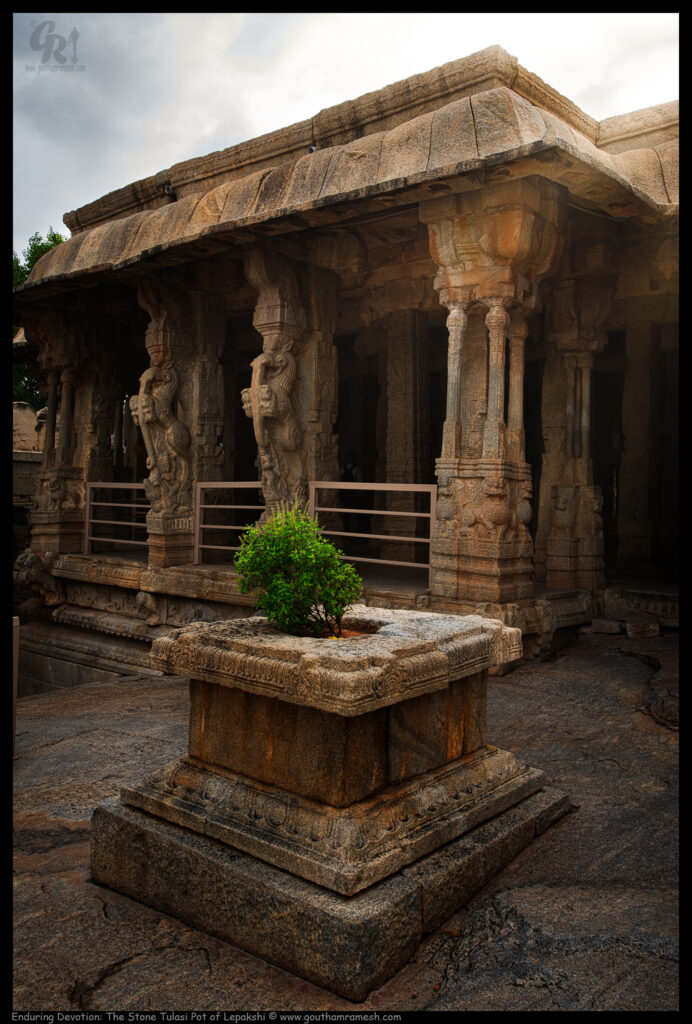
In the hallowed grounds of the temple amidst the temple’s grand architecture and intricate sculptures, stands a centuries-old Tulasi pot, sculpted entirely out of stone. This ancient artifact, though simple in its form, embodies the timeless devotion and spiritual practices that have been an integral part of this sacred site for generations.
The Tulasi pot, traditionally used to house the holy basil plant revered in Hinduism, is carved with a delicate precision that highlights the artisans’ respect for both nature and spirituality. Its stone surface has weathered the passage of time, yet it retains a sense of grace and purity. The pot’s design features subtle floral motifs and geometric patterns that are characteristic of the Vijayanagara style, blending seamlessly with the temple’s overall aesthetic.
This stone Tulasi pot is not merely a vessel; it is a symbol of the enduring faith and the cultural heritage that continues to thrive at Lepakshi. As it stands resilient through the centuries, it serves as a poignant reminder of the connection between the divine and the natural world, cherished in this historic temple complex.
Camera: Nikon D750
Lens: Nikon 24mm PCE Tilt-Shift
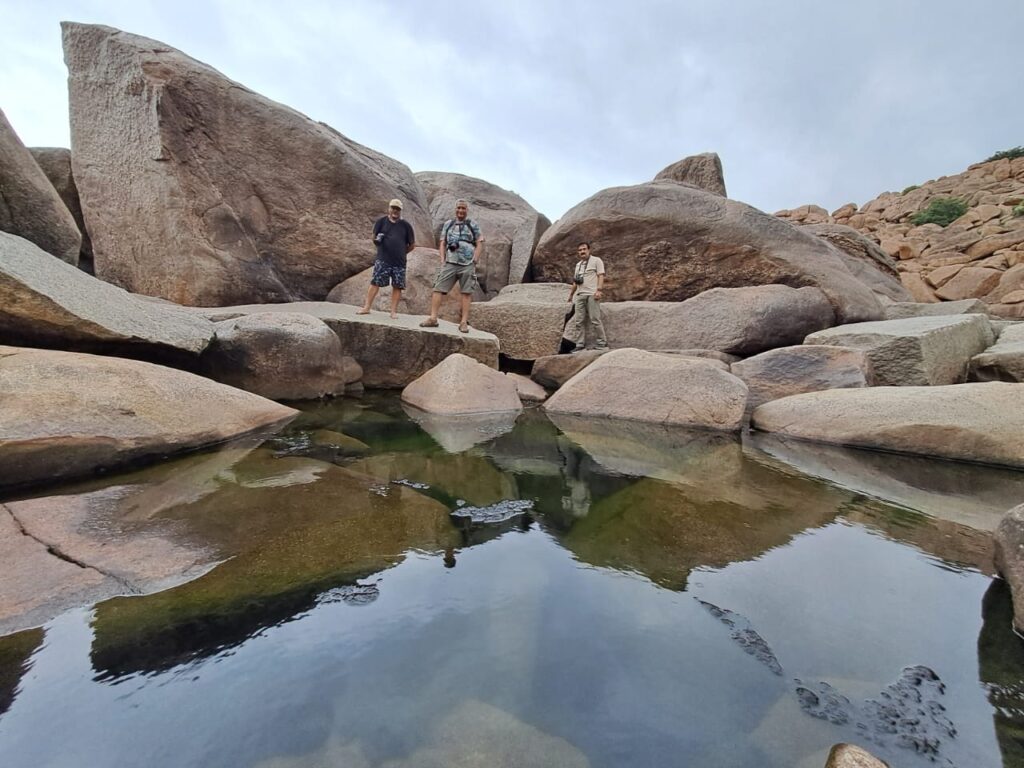
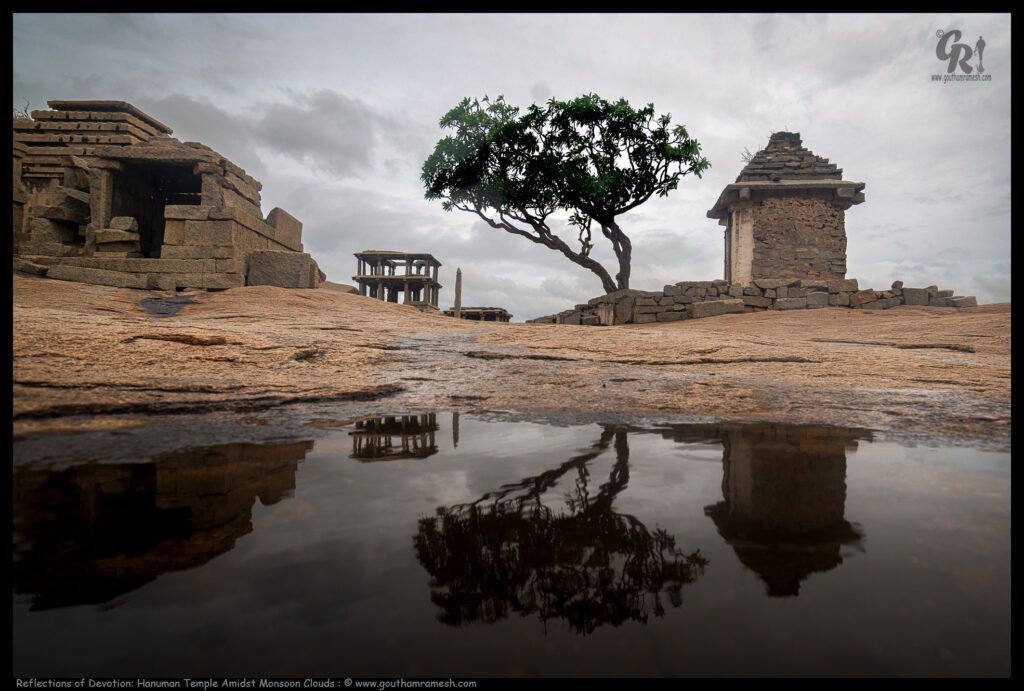
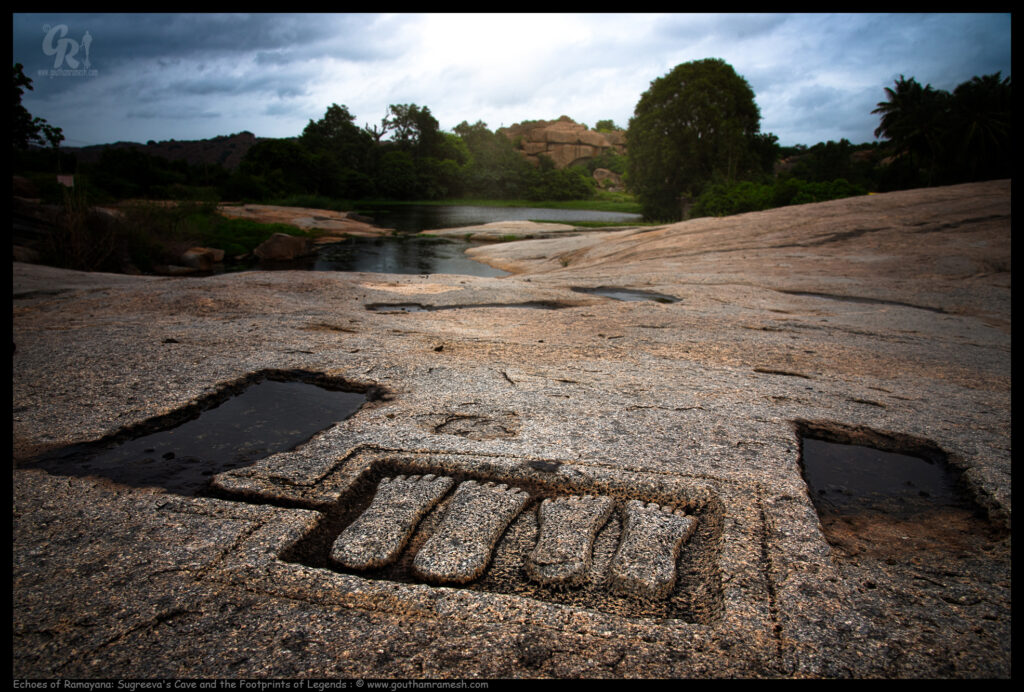
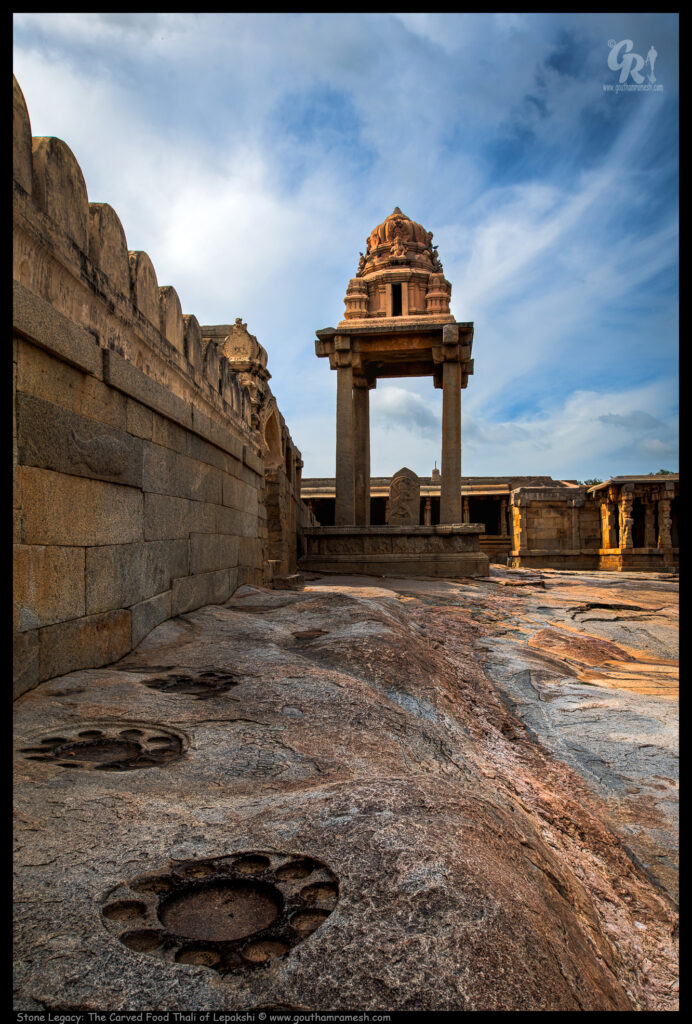
In the ancient temple complex ,nestled among the rocks adjacent to the main temple wall and near the Hanuman Mantapa, lies a unique and fascinating artifact—a food thali carved directly into the stone. This thali, meticulously chiseled out of the natural rock surface, is an extraordinary example of the practical artistry that characterizes the site.
The thali features distinct sections, each carefully shaped to resemble the compartments of a traditional Indian meal plate, where different food items would be served. The craftsmanship is remarkable, with smooth, rounded edges and a perfectly proportioned layout, reflecting the skill and attention to detail of the artisans who created it. This stone-carved thali, seemingly simple yet deeply symbolic, offers a glimpse into the daily life and rituals of the past, where even the act of eating was elevated to an art form.
Located in a serene and somewhat hidden spot, this carving invites reflection on the blending of the sacred and the everyday in the cultural heritage of Lepakshi. It stands as a testament to the ingenuity and creativity of the people who once inhabited and worshiped in this historic site.
Camera: Nikon D750
Lens: Nikon 24mm PCE
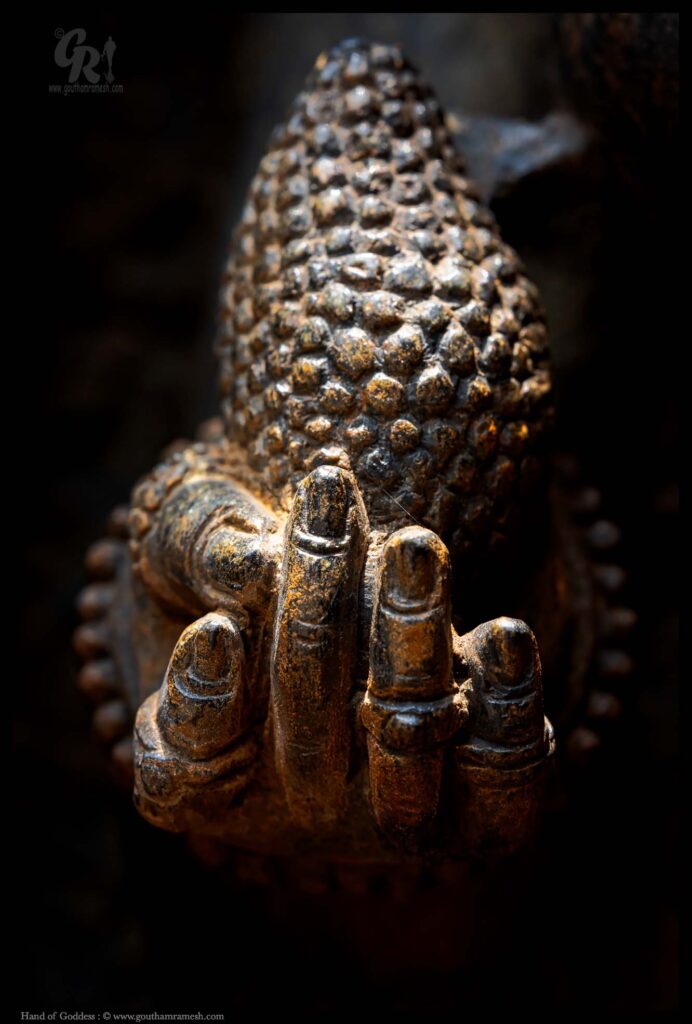
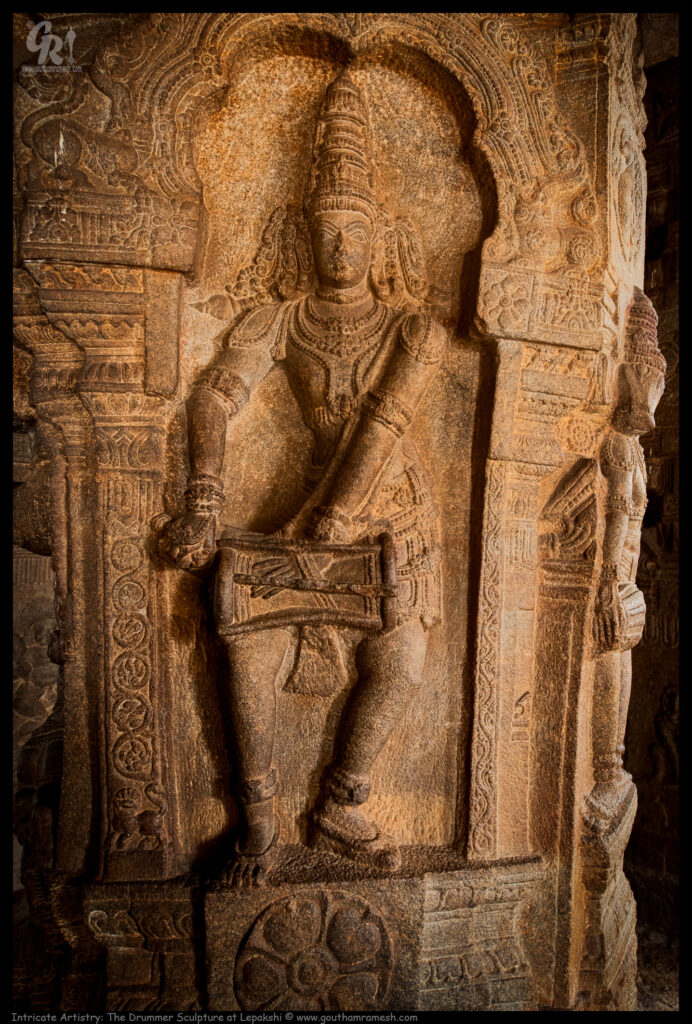
The sculpture of a drummer is a masterpiece of delicate craftsmanship. Carved from stone, the drummer’s hand is intricately positioned inside the strings of the drum, a detail so fine that it appears almost lifelike. The precision with which the strings and the hand are rendered is a testament to the extraordinary skill of the artisans who brought this sculpture to life. The Nikon 24mm PCE lens captures this intricate detail with perfect clarity, highlighting the depth and dimension of the carving without any distortion.
This sculpture not only showcases the artistic brilliance of the Vijayanagara period but also evokes the rhythm and music that would have once filled the temple complex. The delicate carving of the hand within the drum strings adds a dynamic element to the piece, making it seem as though the drummer might start playing at any moment, bringing the stone to life.
Camera: Nikon Zfc ; Lens : 7 Artisans 7.5 mm Fisheye
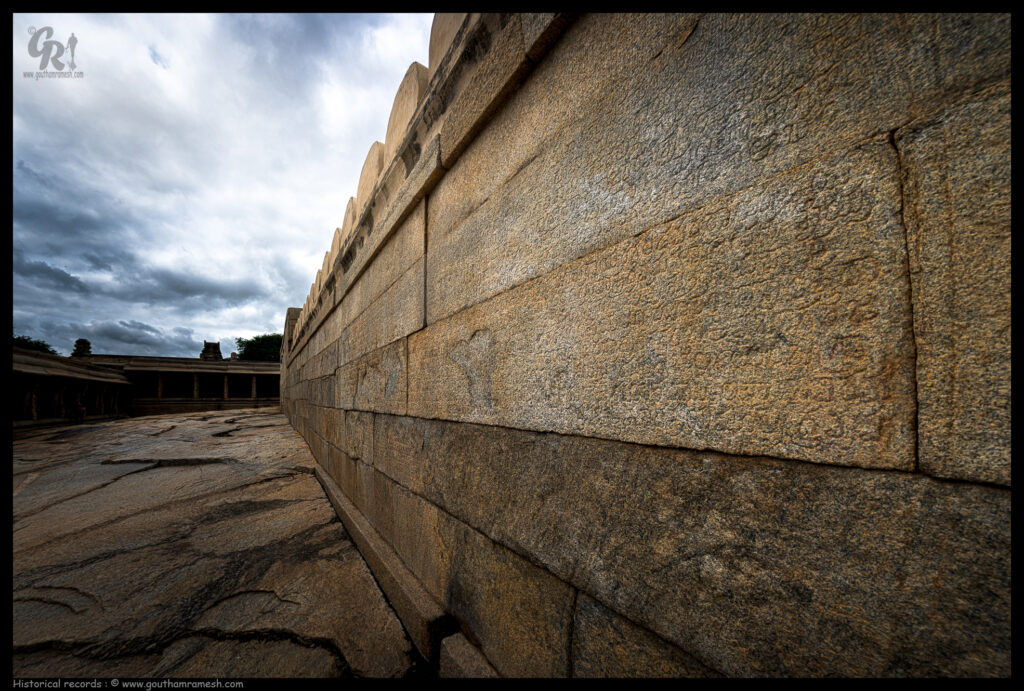
The inscriptions on the walls are a stunning blend of artistry and history, featuring elegant Kannada and Telugu scripts. These beautifully carved texts detail the temple’s rich heritage, from royal donations to religious hymns, surrounded by intricate floral and geometric designs. They offer a glimpse into the cultural and historical legacy of the Vijayanagara Empire, preserved with remarkable precision and detail.
“As I wandered through the corridors and stood before the magnificent sculptures of Lepakshi Temple, I realized that this place is more than just a historical monument—it is a canvas of devotion and artistry, frozen in time. Each photograph I’ve shared is a small glimpse into the temple’s grandeur, a tribute to the incredible craftsmanship of the Vijayanagara era. I hope these images inspire you to explore the rich cultural heritage that lives on in the stones of Lepakshi, where history and art are woven together in an eternal dance.”
if you like the blog, you can leave a comment on Home page.

Cheers ,
Goutham Ramesh