The Hoysala temples, located in the centre of Karnataka, are silent storytellers. The elaborate sculptures that adorn their exterior walls tell timeless and beautiful tales. These walls are more than just stone constructions; they are canvases where art and devotion coexist and where mythology, gods, and the human soul all dance through the ages.
Walls as Canvases of Devotion
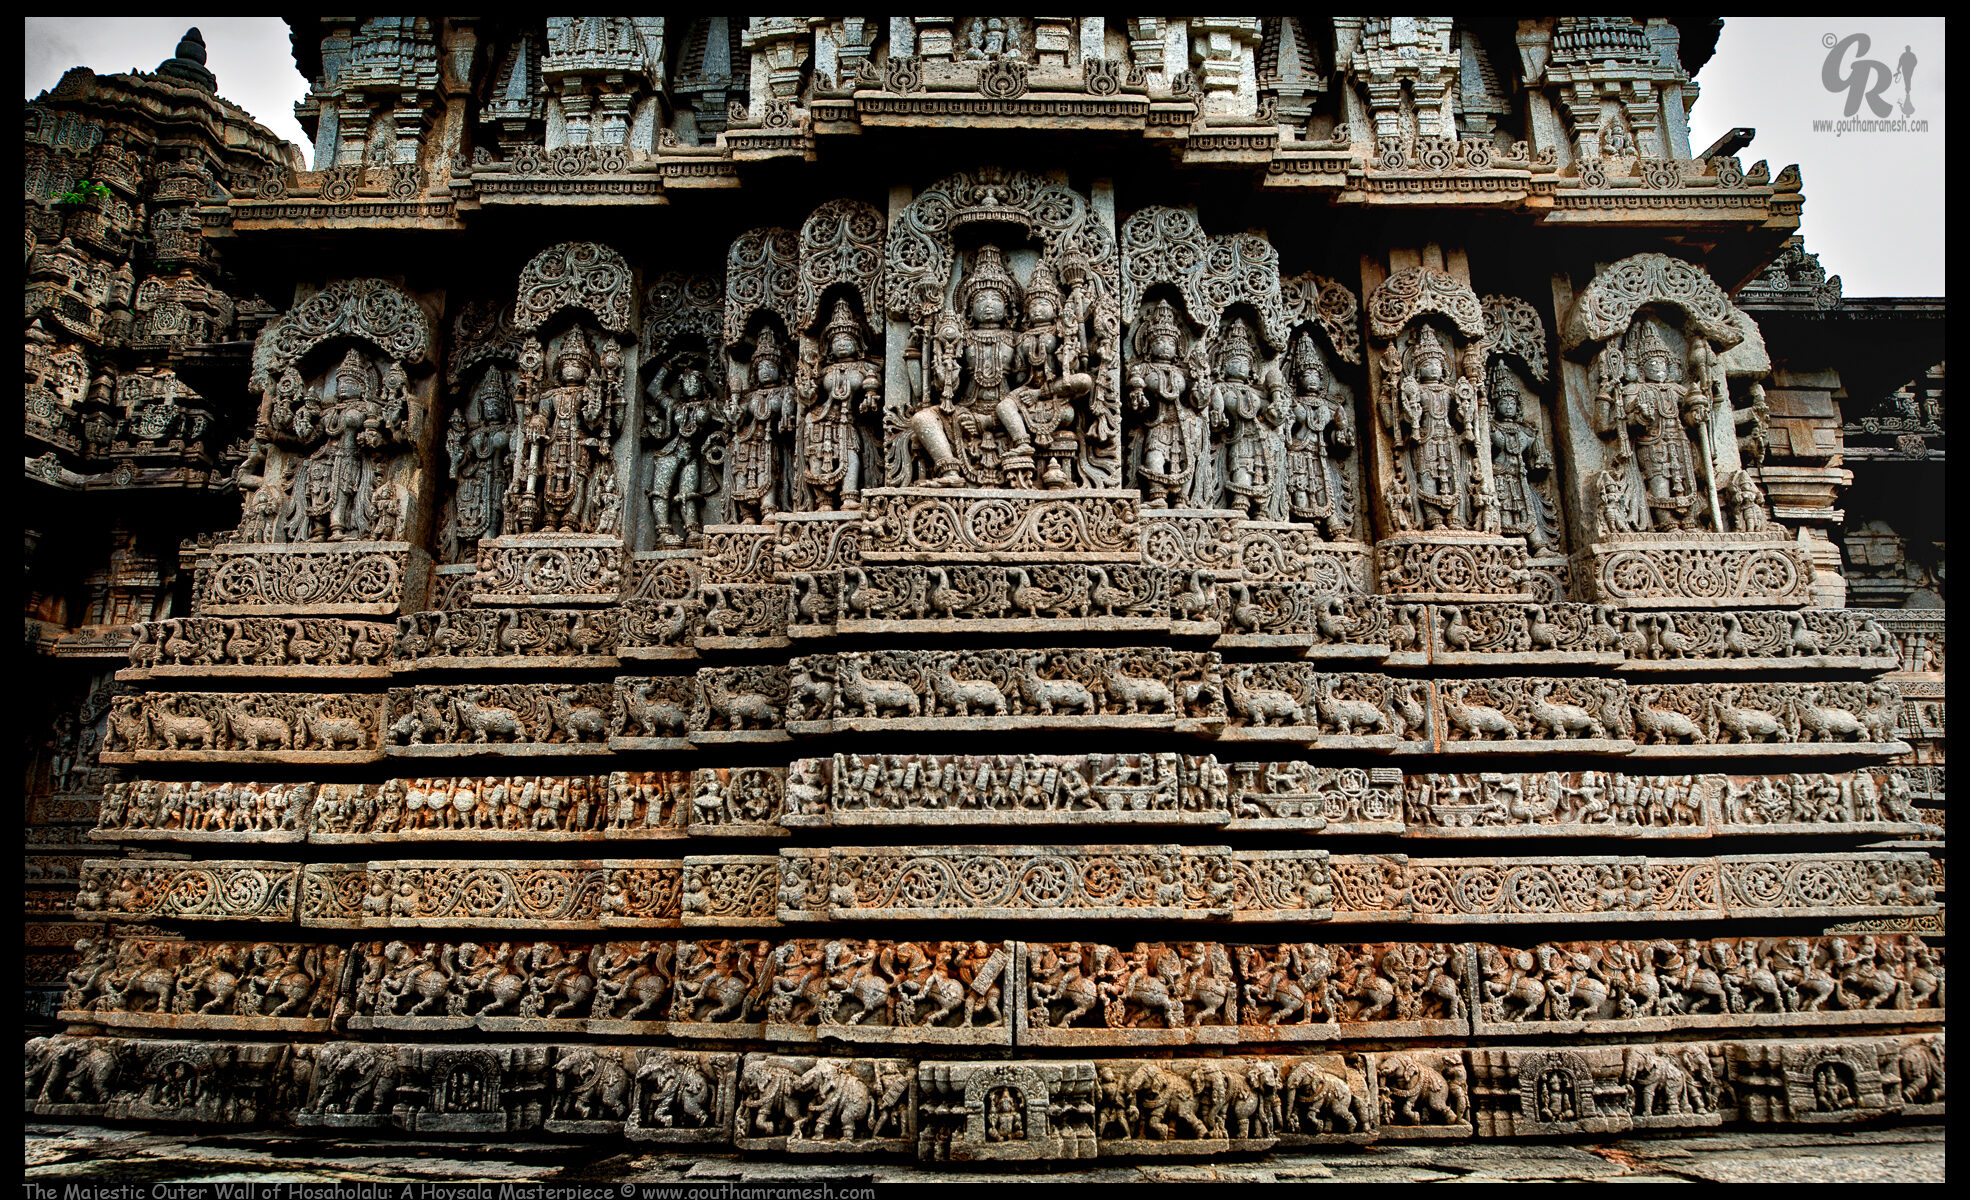
The exterior walls of the Hoysalas’ temples were much more than just defensive structures. They served as a sacrifice, a stone-carved dedication, and a tapestry of spiritual symbols and holy myths that adorn and protect the temples. Every corner speaks a legend, and every wall recounts a tale. Thus, the Hoysalas left behind more than just temples in their intricate sculptures; they also bequeathed a legacy that will inspire future generations with its message of faith and inventiveness. In this blog, I will share a small set of the sculptures from these walls!
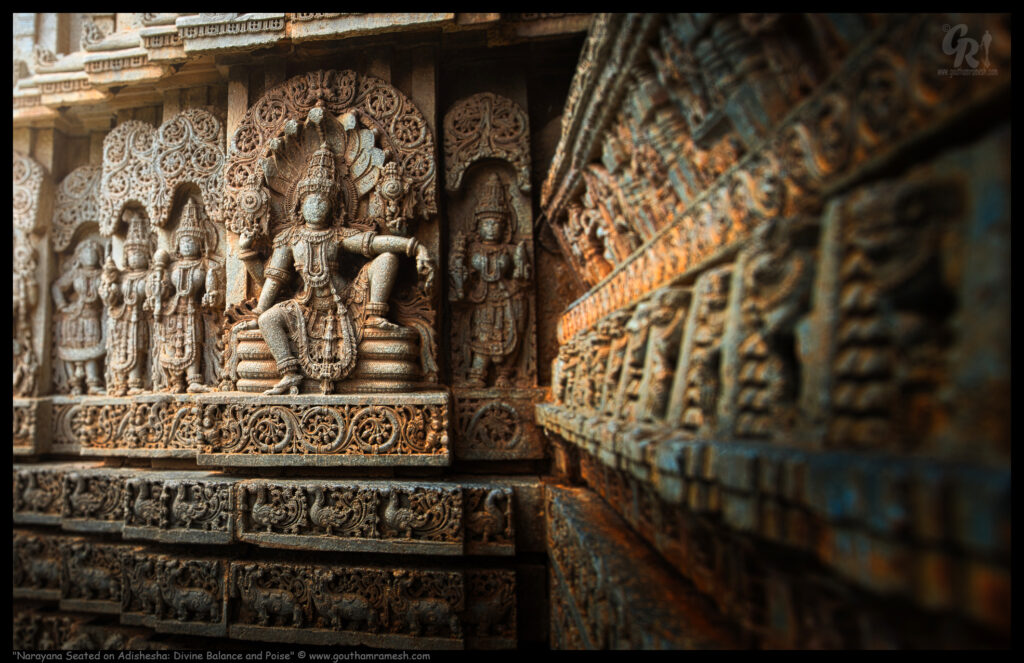
The sculpture of Narayana seated on the seven-headed Adishesha at Hosaholalu radiates a sense of calm authority. Captured with a Nikon 24mm tilt-shift lens using the tilt functionality, the shot emphasizes the depth and detail of Narayana’s divine posture. Narayana sits gracefully, with one leg resting on the ground and the other comfortably positioned on the coiled body of the divine serpent. His left hand rests gently on his knee, adding a relaxed yet powerful posture of authority to his form.
Shot with Nikon 24mm Tilt Shift, The tilt-shift effect enhances Narayana’s balanced poise, isolating the intricate sculpture against the background and drawing the viewer’s focus to the sculptural details. This composition captures Narayana’s balanced poise, embodying his role as the preserver. The sculpture stands as a testament to the devotion and skill of the artisans who brought this vision of divinity to life, transforming stone into a symbol of cosmic order and serenity.
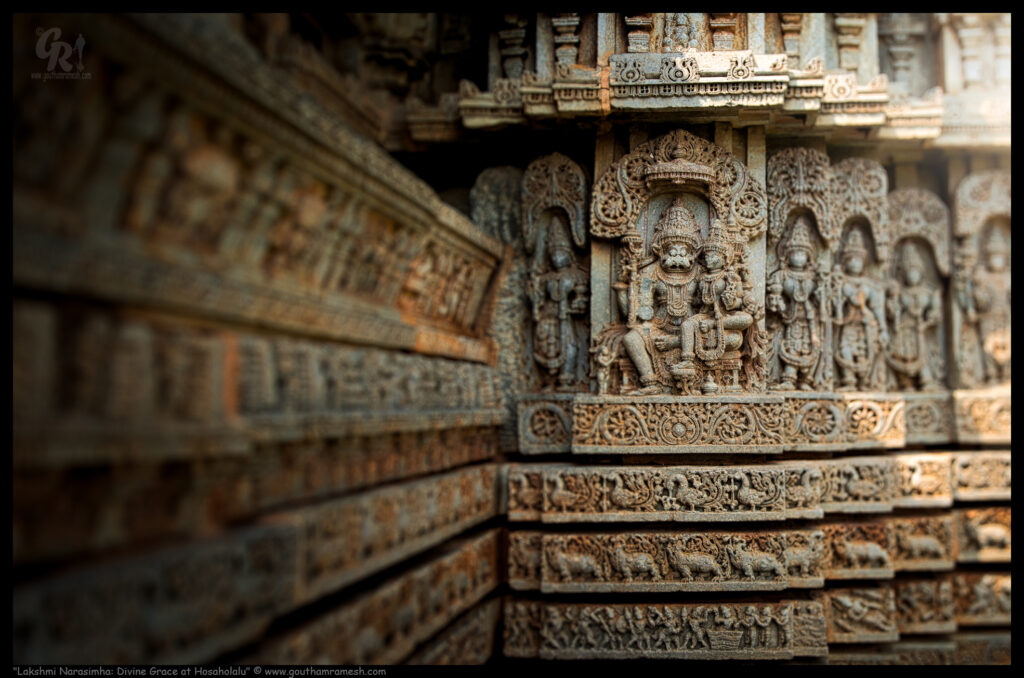
The sculpture of Lakshmi Narasimha at Hosaholalu captures a scene of both gentleness and strength. Goddess Lakshmi sits gracefully on the lap of Lord Narasimha, her serene expression contrasting with Narasimha’s powerful presence. The intricacy of Lakshmi’s delicate features and Narasimha’s fierce, protective form symbolizes their harmonious union, embodying both compassion and valor.
Shot with a Nikon 24mm tilt-shift lens using the tilt functionality, the image draws focus to the divine duo, enhancing their three-dimensional relief and depth against the intricately carved stone backdrop. This perspective sharpens the details—the finely carved jewelry adorning Lakshmi, the lion-like intensity in Narasimha’s posture, and the layers of symbolism in every curve. The tilt effect allows for a unique emphasis on their expressions and fine craftsmanship, celebrating the beauty and complexity that Hoysala artisans sculpted into each detail.
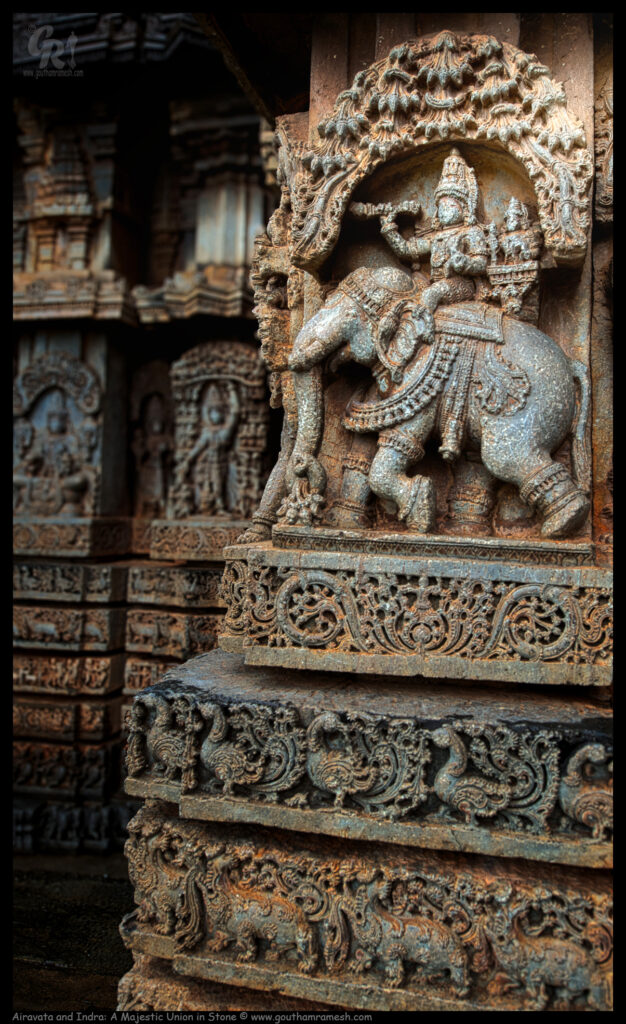
The sculpture of Airavata carrying Indra is a breathtaking representation of divine power and grace. Airavata, the mythical white elephant is carved with majestic details—its muscular frame adorned with ornamental motifs, capturing the grandeur and elegance of this celestial creature. The intricacies of the adornments around its body highlight the skill of the ancient craftsmen.
Seated atop Airavata is Indra, the king of the gods, holding his vajra (thunderbolt) with a regal posture. His divine armor and robes are carved with precision, flowing gracefully as if caught in a celestial breeze. Indra’s expression, one of authority and calm, signifies his role as the protector of the heavens. The union of Airavata and Indra in this sculpture symbolizes strength and leadership, portraying the bond between a god and his vahana (vehicle).
This depiction, with its attention to fine detail and balance, showcases the artistic excellence of Indian sculptors from the era, capturing the divine connection between the deity and his celestial mount.
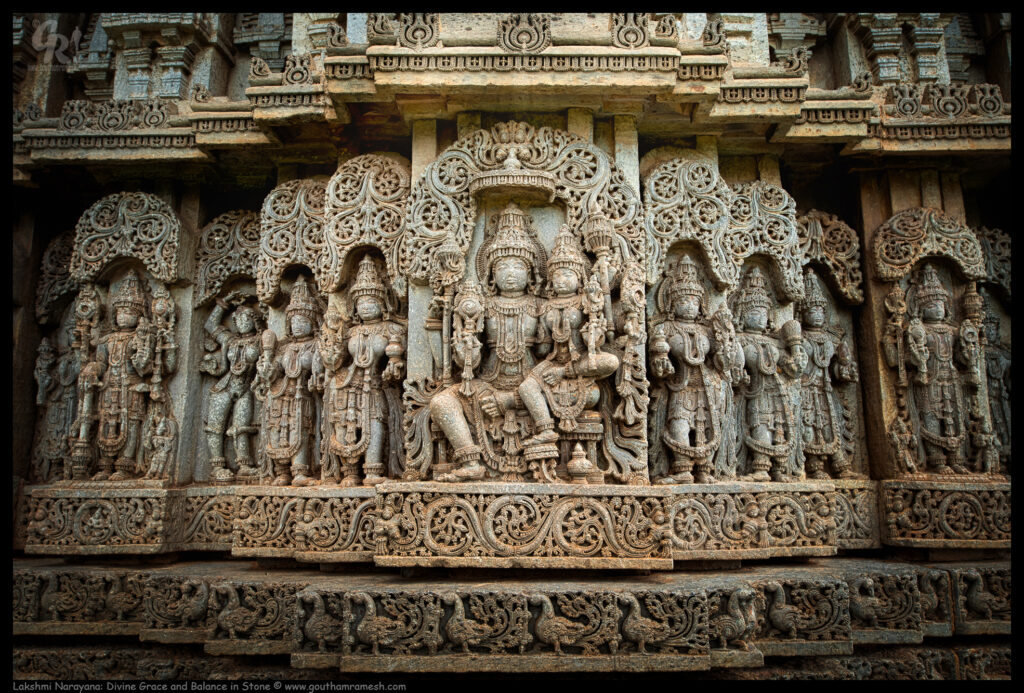
The sculpture of Lakshmi Narayana captures a scene of divine harmony and elegance, where Lakshmi sits gracefully on the lap of Narayana (Vishnu). The depiction showcases a moment of celestial unity, with Lakshmi resting comfortably, her serene expression mirroring the calm and composed demeanor of Narayana. Her feet are delicately placed on a lotus, which is sculpted to appear gently bent, as if bowing under the weight of her divinity, emphasizing the balance between grace and power.
Narayana is carved in a protective and loving posture, his hand supporting Lakshmi while his other arm rests confidently. The intricate details of their attire, from the delicate jewelry to the flowing garments, display the artistry of ancient Indian sculptors. Lakshmi’s crown is adorned with fine floral patterns, while Narayana’s crown is regal, reflecting his status as the preserver.
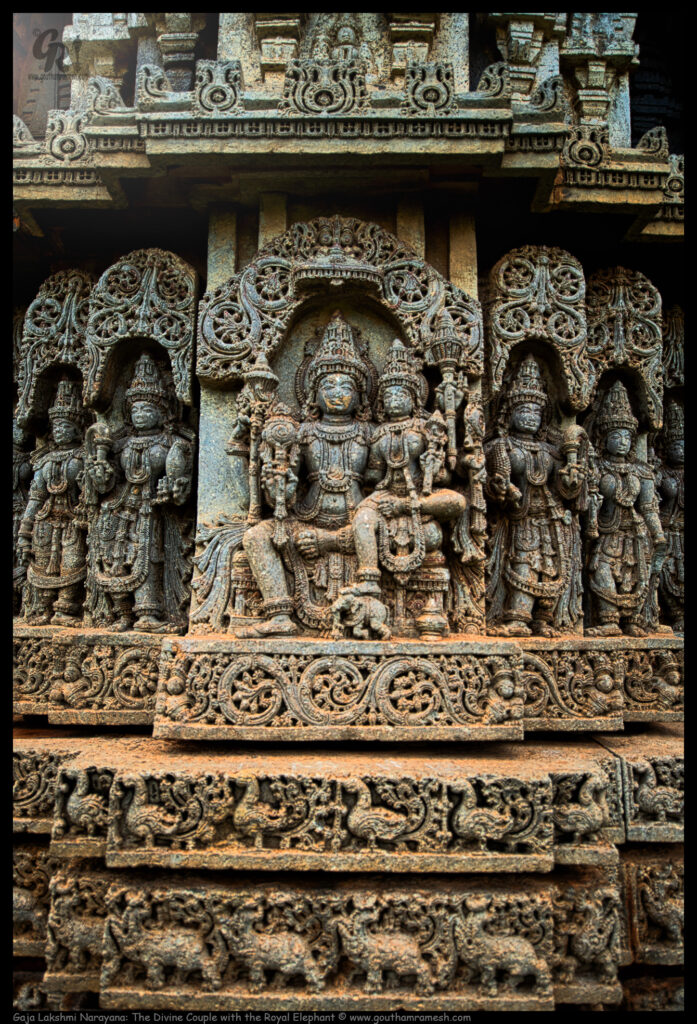
The sculpture of Gaja Lakshmi Narayana depicts the divine union of Lakshmi and Narayana with an added touch of grandeur and symbolism. In this magnificent carving, Lakshmi is seated on Narayana’s lap, her feet resting gracefully on an elephant (Gaja). The elephant, a symbol of prosperity and strength, supports the goddess with a gentle posture.
Narayana, seated in a protective and commanding position, gazes ahead with a composed and serene expression, while his arm holds Lakshmi gently. The jewelry on both deities—cascading necklaces, armlets, and intricately detailed crowns—demonstrates the fine artistry of the sculptors, capturing the elegance and divinity of the pair
In this exquisite sculpture from 1250 AD, Garuda, the mighty bird vehicle, carries Narayana with grace and strength. Seated on Narayana’s lap is the Goddess Lakshmi, radiating divine serenity. The intricate details of their jewelry catch the eye—delicate chains, earrings, and armlets, all meticulously carved into the stone, showcase the brilliance of Indian artisans from this era. Each piece of jewelry, whether it’s the layered necklaces or the ornamental crowns, reveals a mastery of craftsmanship, making the figures appear almost lifelike despite being etched into solid stone.
The artist’s ability to bring out such fine detail in the jewelry, clothing, and expressions of the deities reflects the artistic and spiritual sophistication of the period. This sculpture is not just a portrayal of divinity but also a celebration of the skill and devotion that went into temple art, leaving a timeless legacy of Hoysala brilliance.
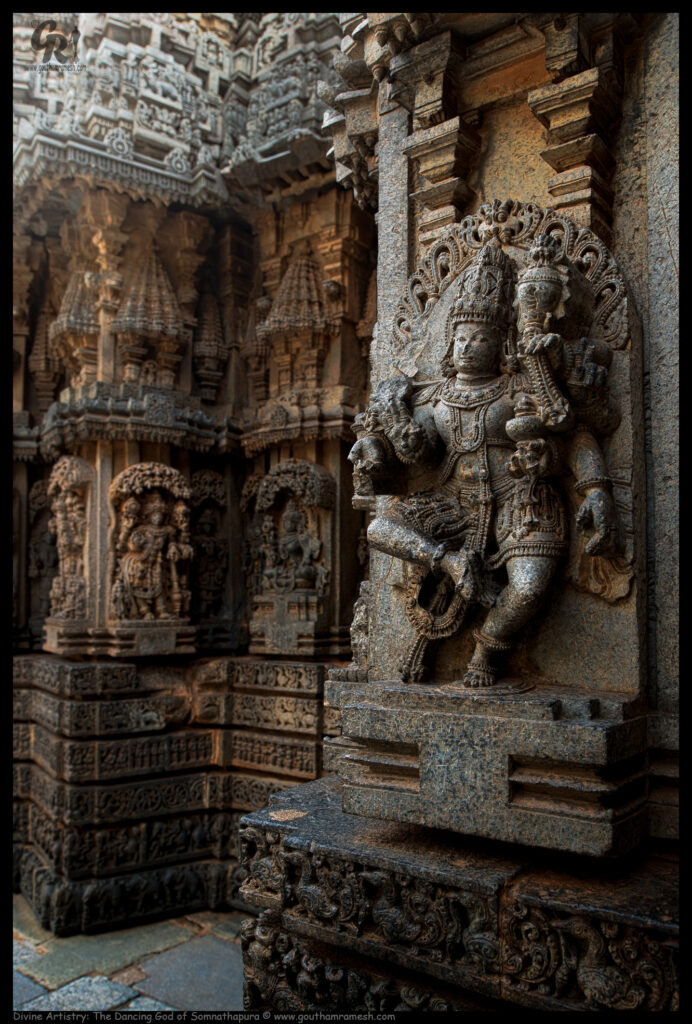
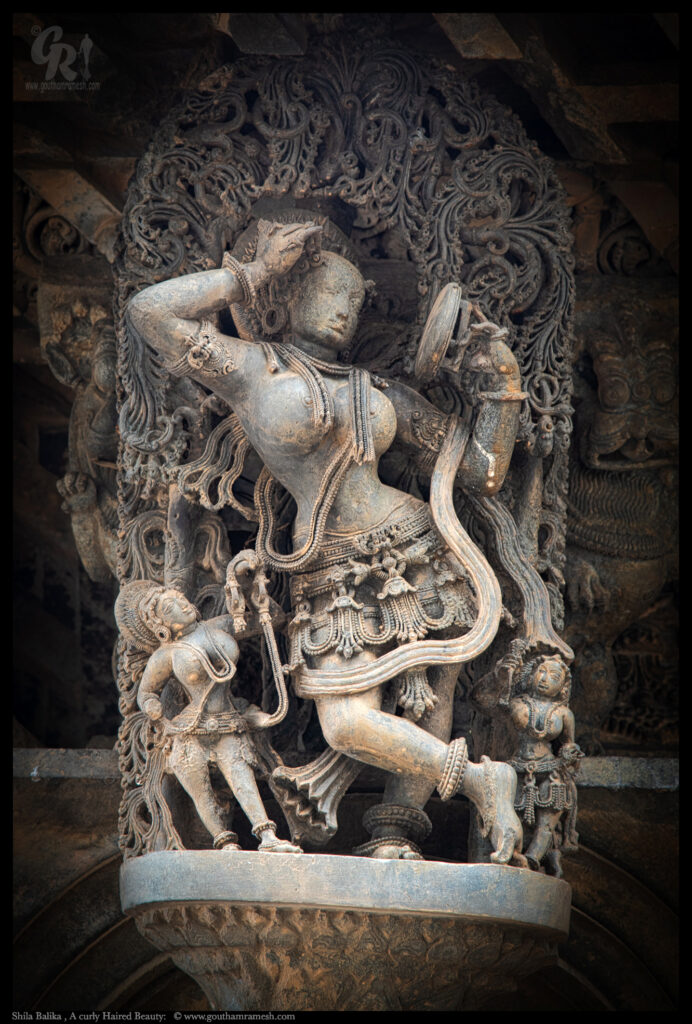
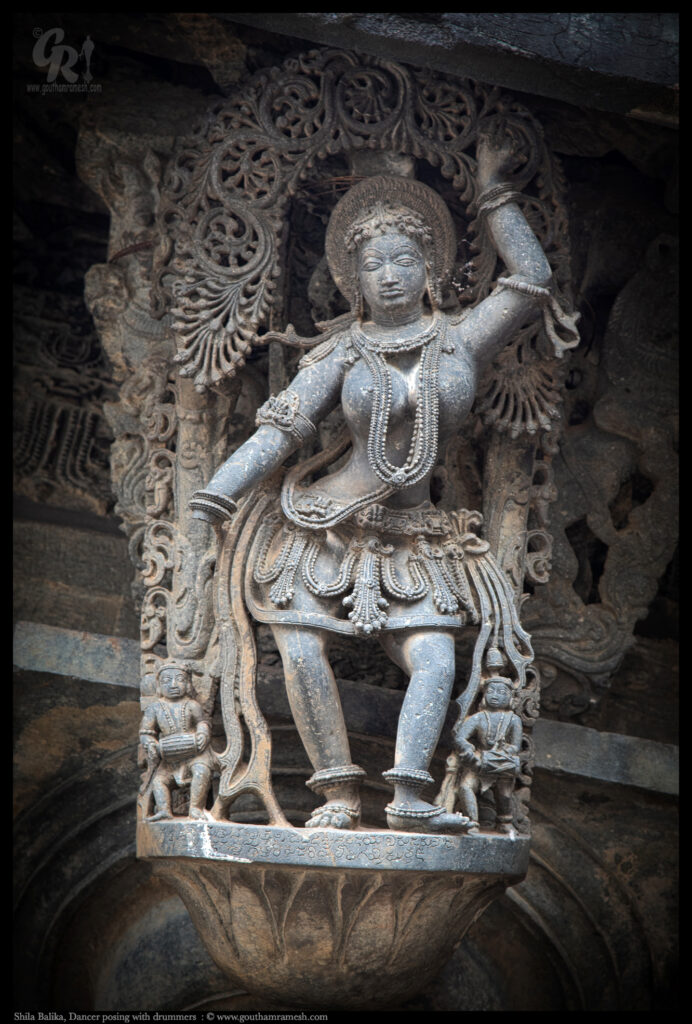
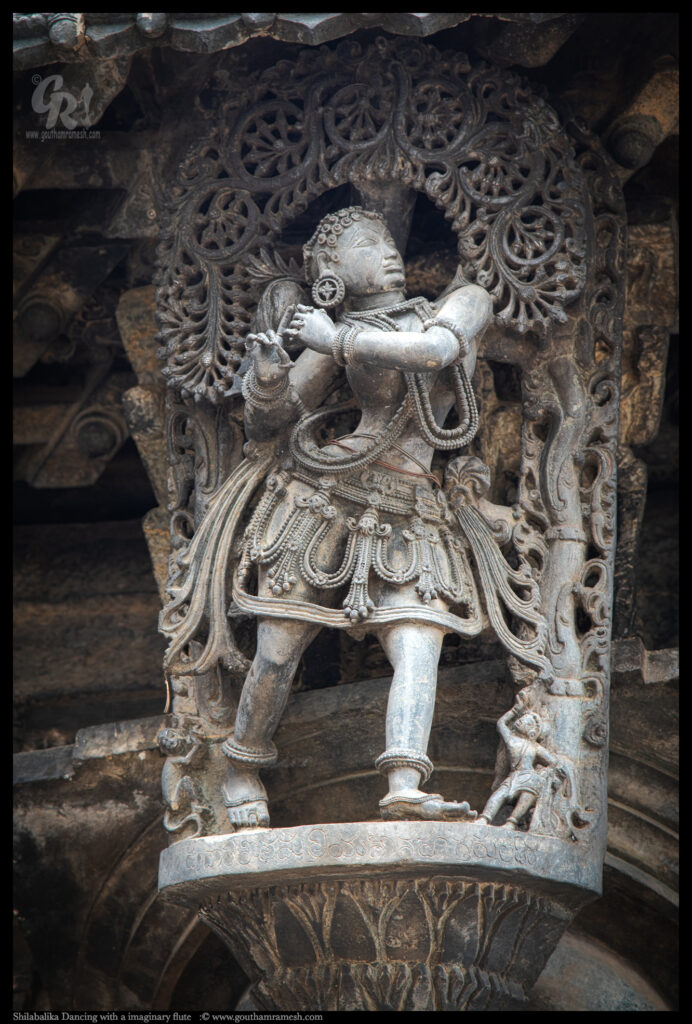
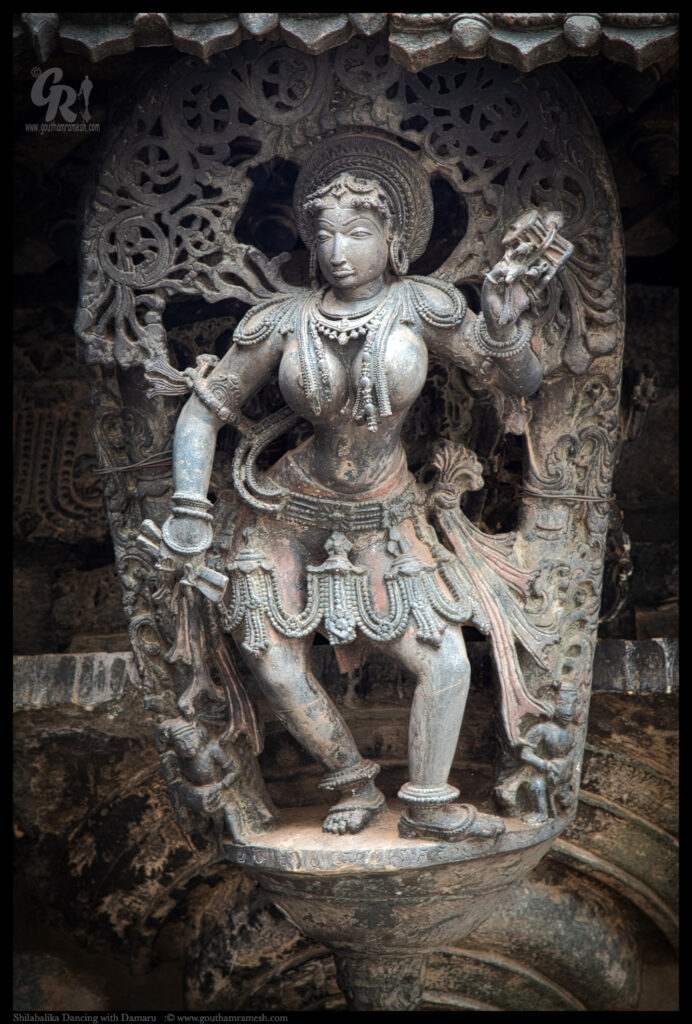
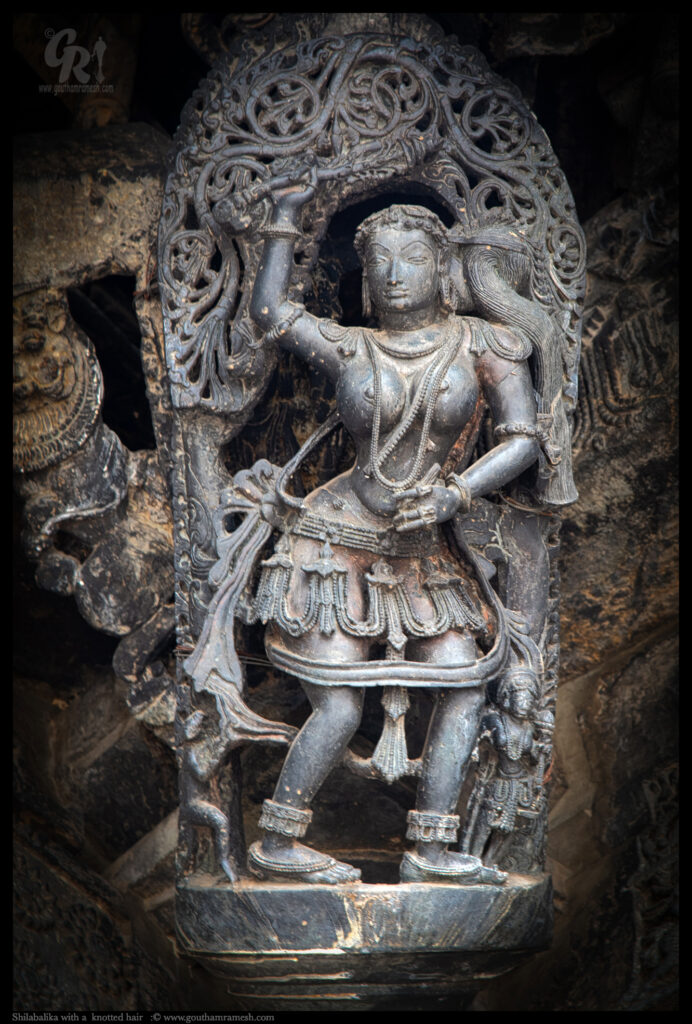
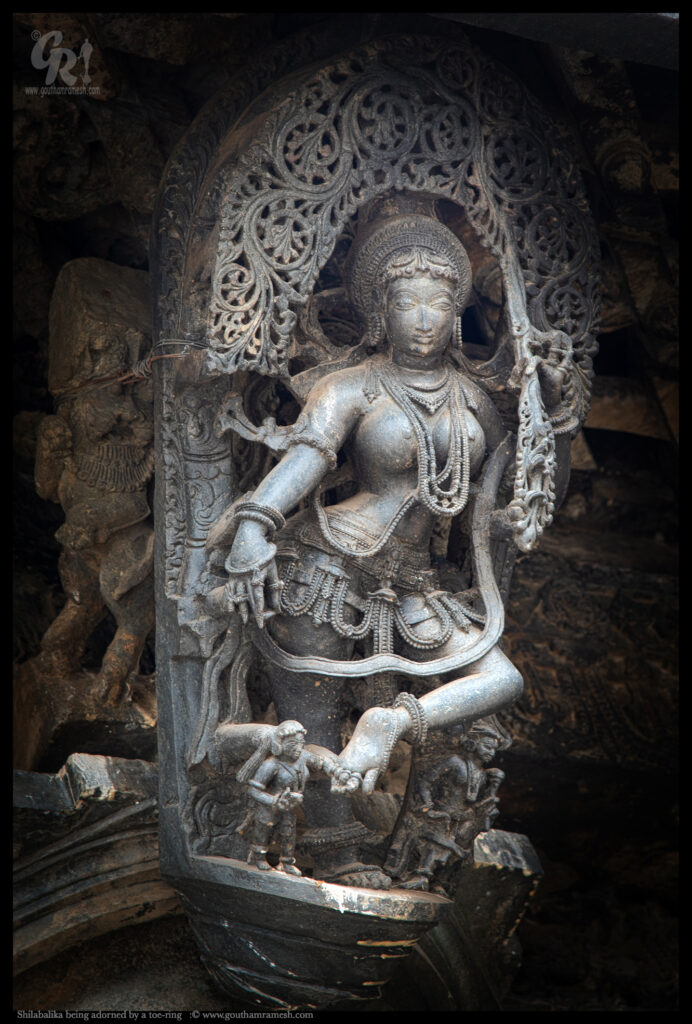
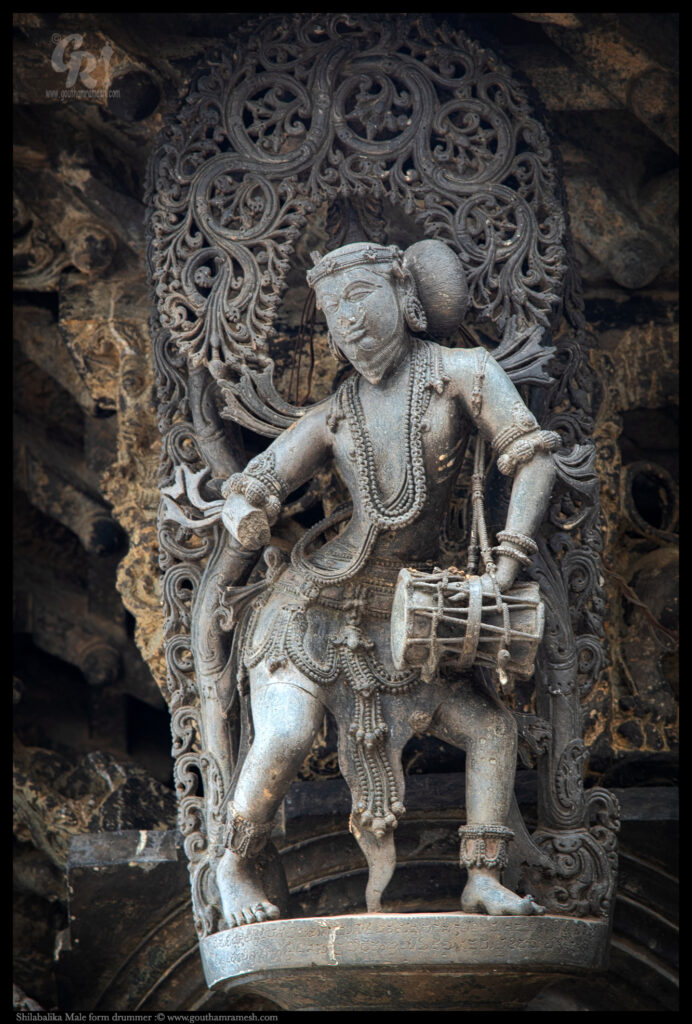
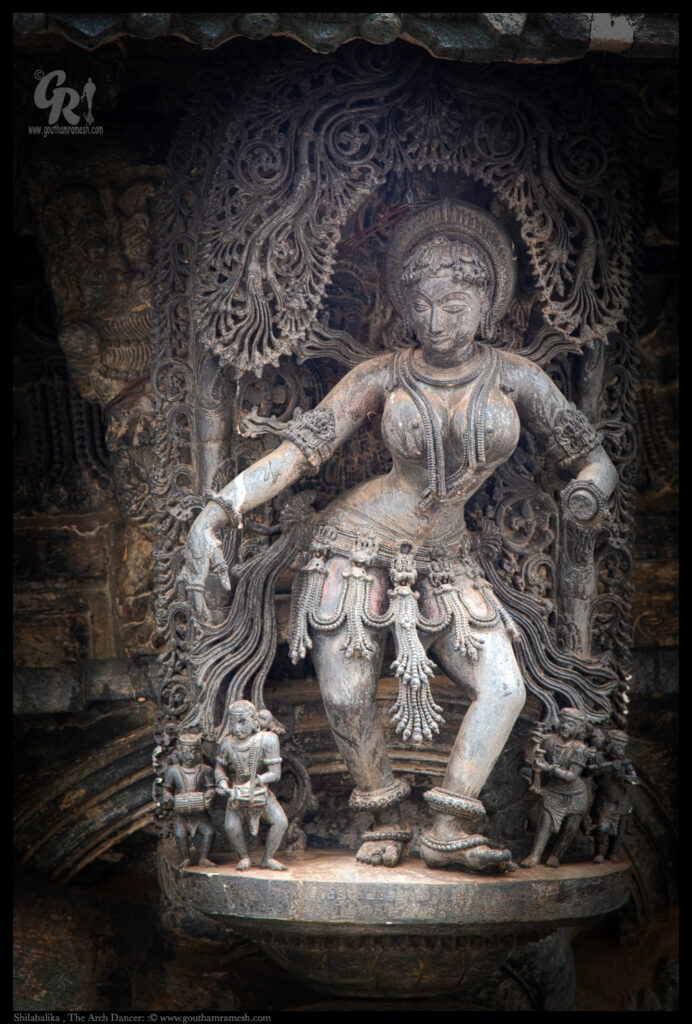
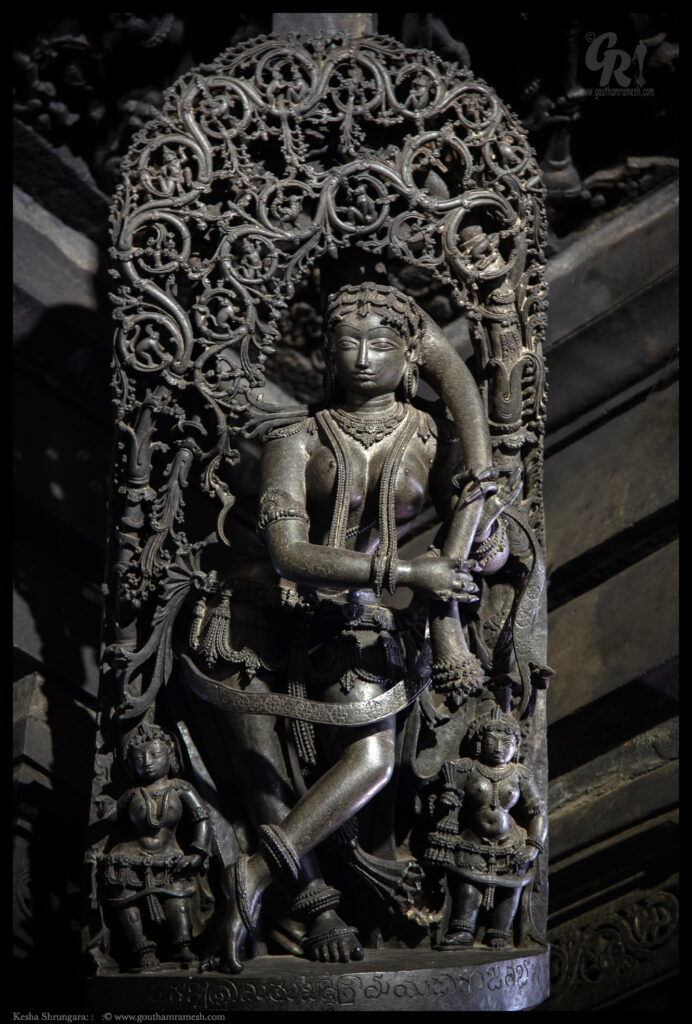
No photograph can truly do justice to the exquisitely carved dancing god at Somnathapura, a masterpiece that was created around 1268 AD, over 750 years ago. The details are breathtaking, with even the finest pieces of jewelry intricately sculpted into the stone. Each curve and contour brings the divine figure to life, showcasing the incredible skill and craftsmanship of our Indian ancestors. This stunning piece of art leaves one in awe, wondering about the dedication and talent that went into its creation.
Somnathapura is not just a temple; it’s a testament to India’s rich cultural heritage and artistic brilliance. For anyone passionate about art, history, or spirituality, this place is a must-visit. It stands as a heaven for art lovers, where every stone tells a story of devotion and artistic mastery.
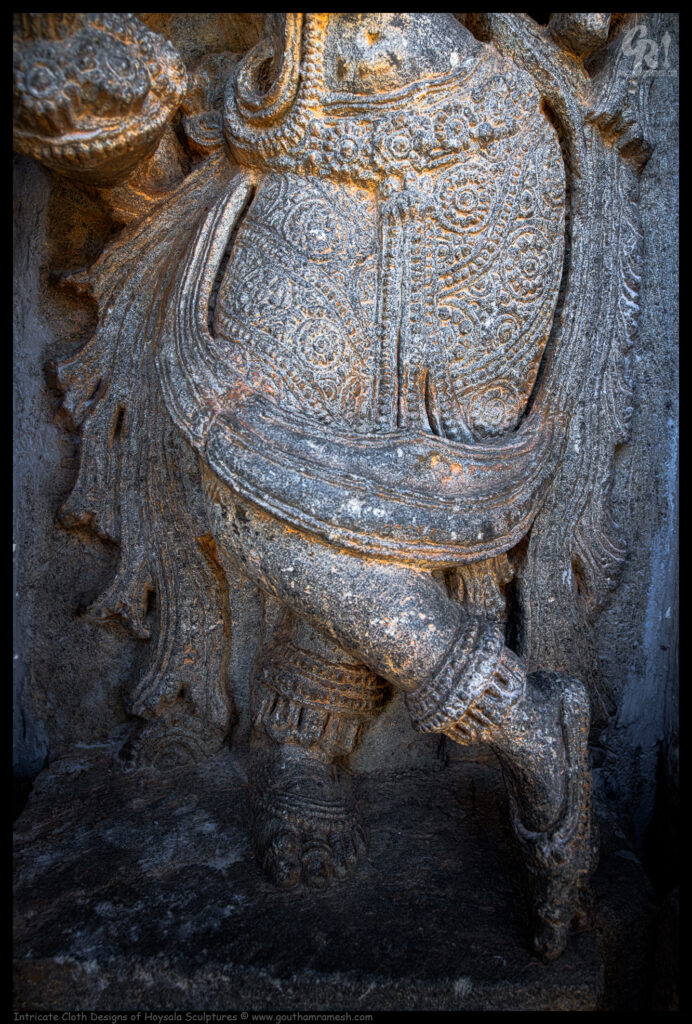
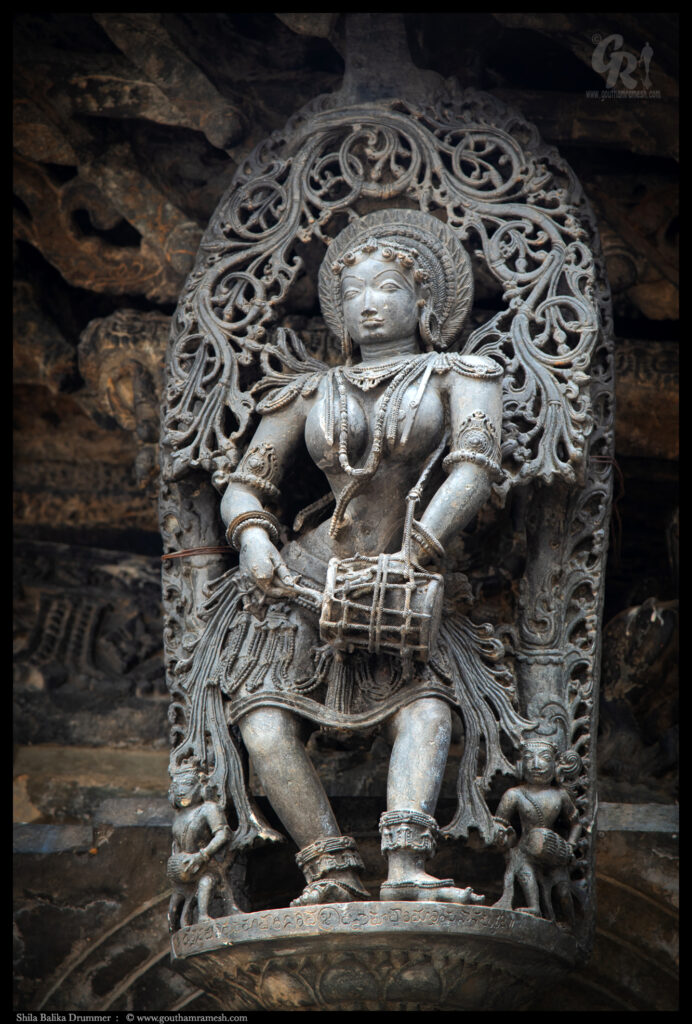
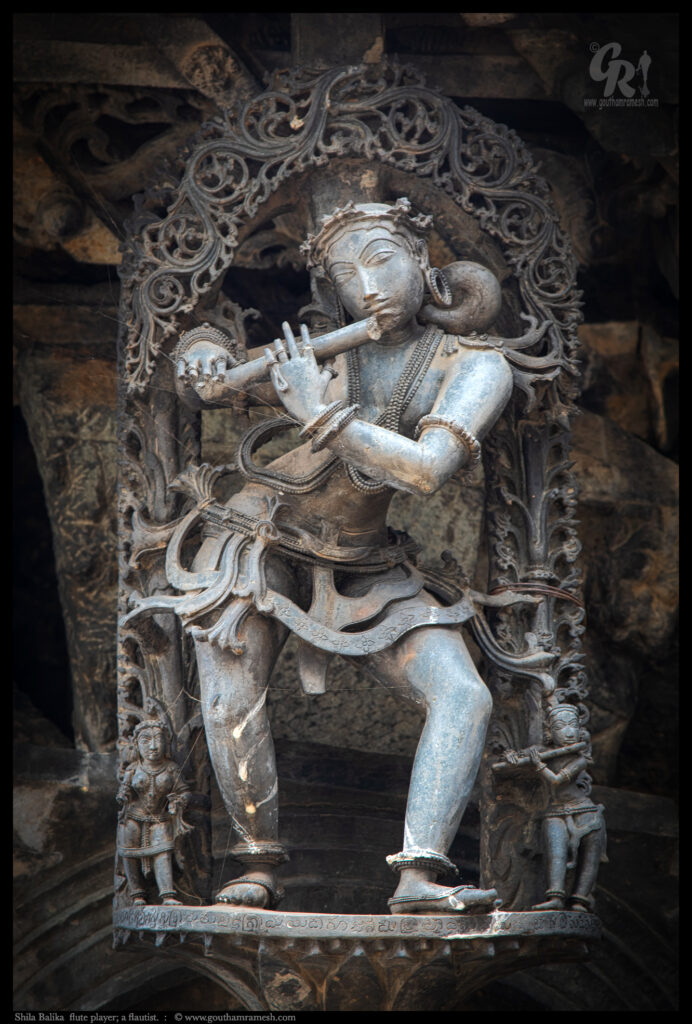
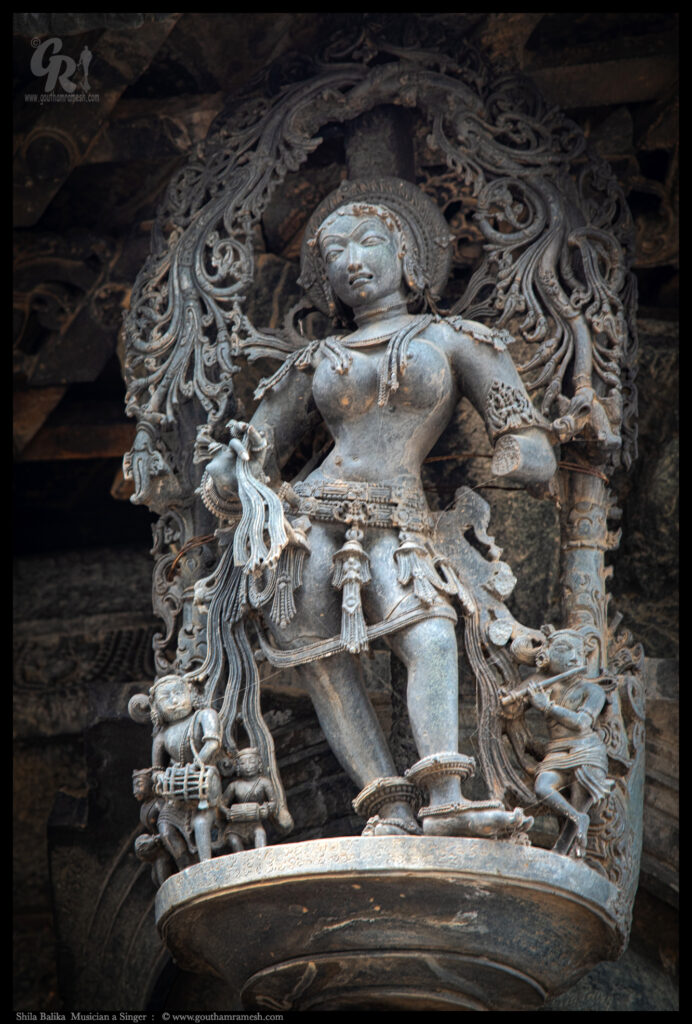
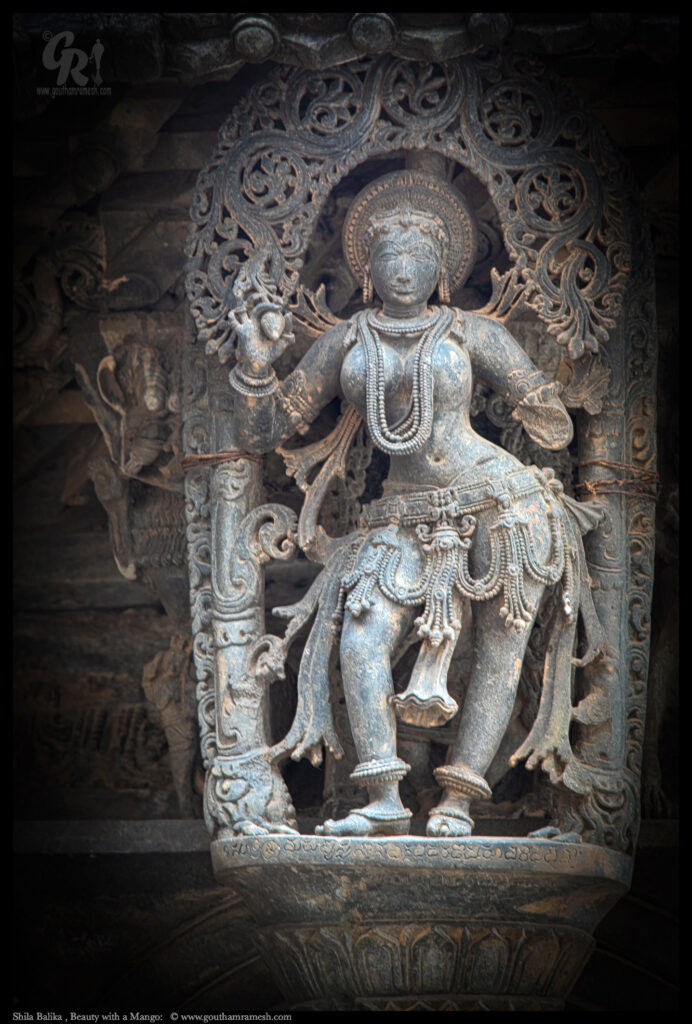
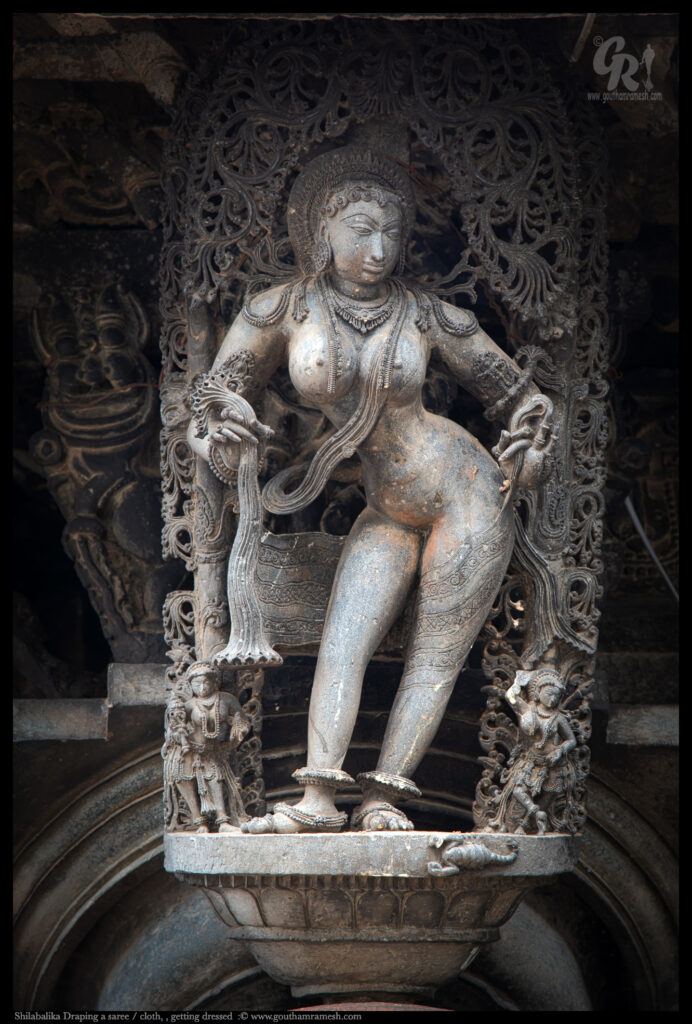
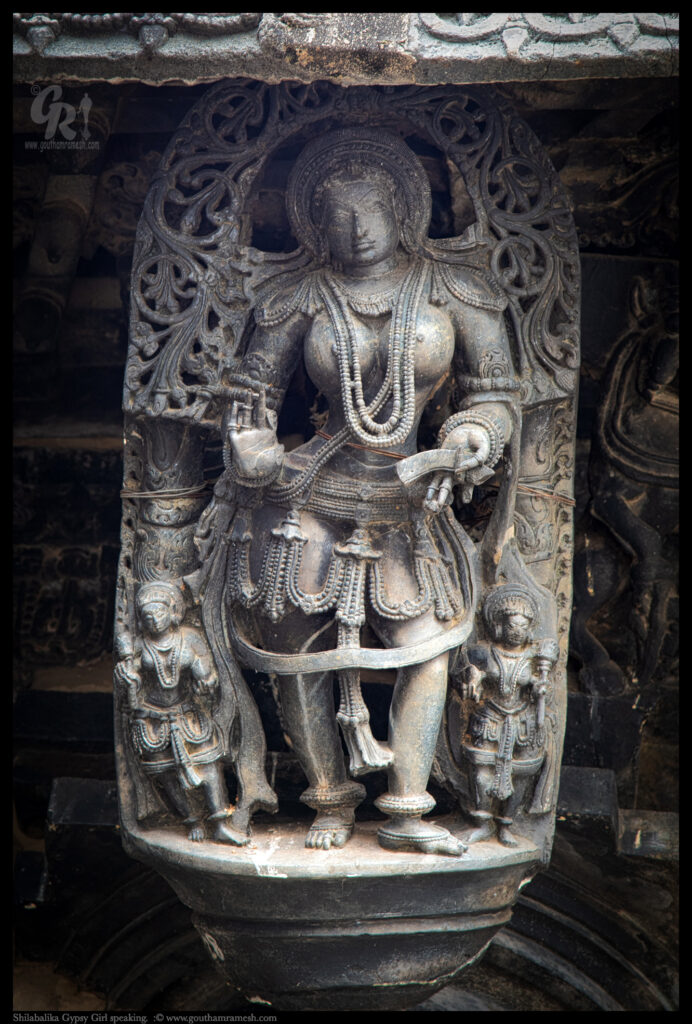
The intricate cloth designs carved by the Hoysala artisans at the Nuggehalli Temple glorify the opulence and elegance of 12th-century India. Each garment sculpted in stone appears to flow naturally over the figures, showcasing an array of floral motifs, geometric patterns, and ornate weaves. The borders of these garments are adorned with symmetrical rows of tiny beaded patterns, giving the appearance of embroidery that seems to defy the rigidity of stone.
The artisans paid meticulous attention to every fold and pleat, creating a sense of movement and texture that breathes life into the stone. The delicate engravings along the borders and the layered textures of the clothing demonstrate the weavers’ art transmuted into stone, making it appear as if these celestial beings are draped in rich fabrics. The interplay of light and shadow on these carvings emphasizes the depth and three-dimensional quality of the designs, making the garments look almost tangible.
These exquisite carvings stand as a tribute to the grandeur of Hoysala artistry and the cultural richness of the era. By immortalizing the textiles of 12th-century India in stone, the sculptures at Nuggehalli glorify the kingdom’s artistic heritage and mastery, offering a timeless representation of divine beauty and elegance.
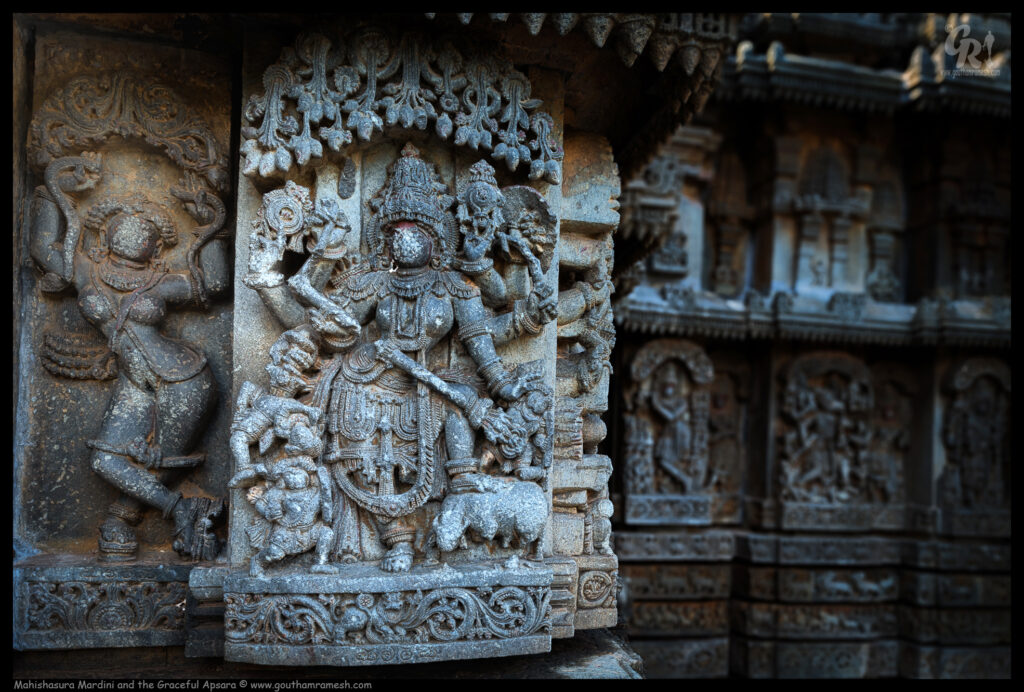
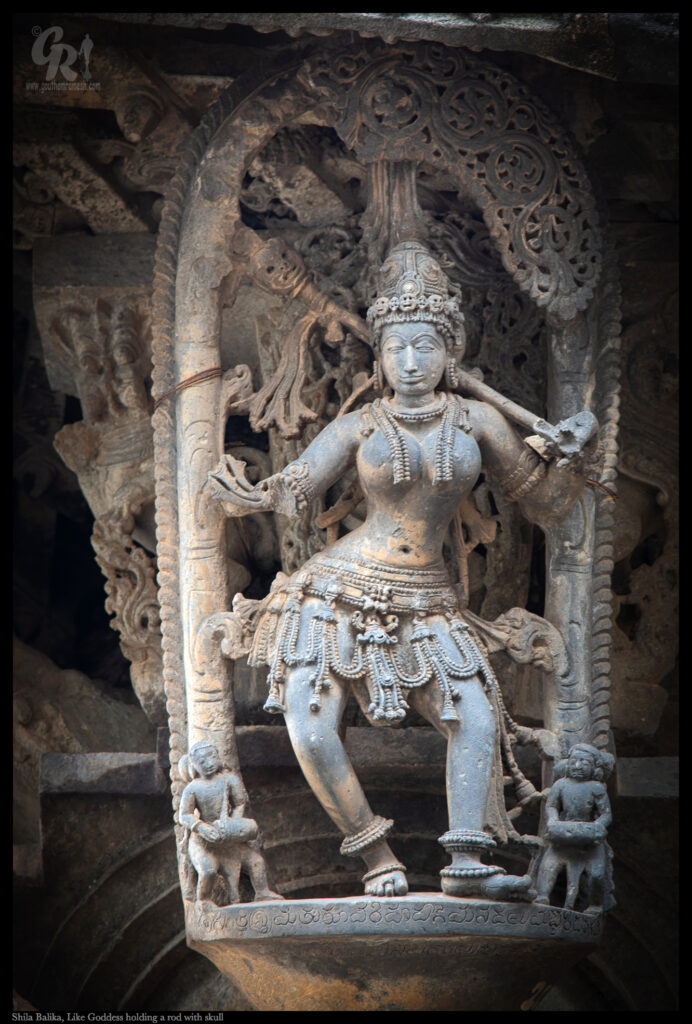
The 12th-century AD sculpture of Mahishasura Mardini (Durga) at the Nuggehalli Hoysala Temple is a stunning depiction of divine power. Durga is shown stabbing the demon Mahishasura with her trident in one hand, while the other hand holds a sword with the lifeless body of a foe hanging from its tip. Her feet are firmly pressed against the bull that Mahishasura is riding, asserting her dominance and triumph over evil. Every detail of her fierce expression and dynamic stance captures the intensity of this divine confrontation.
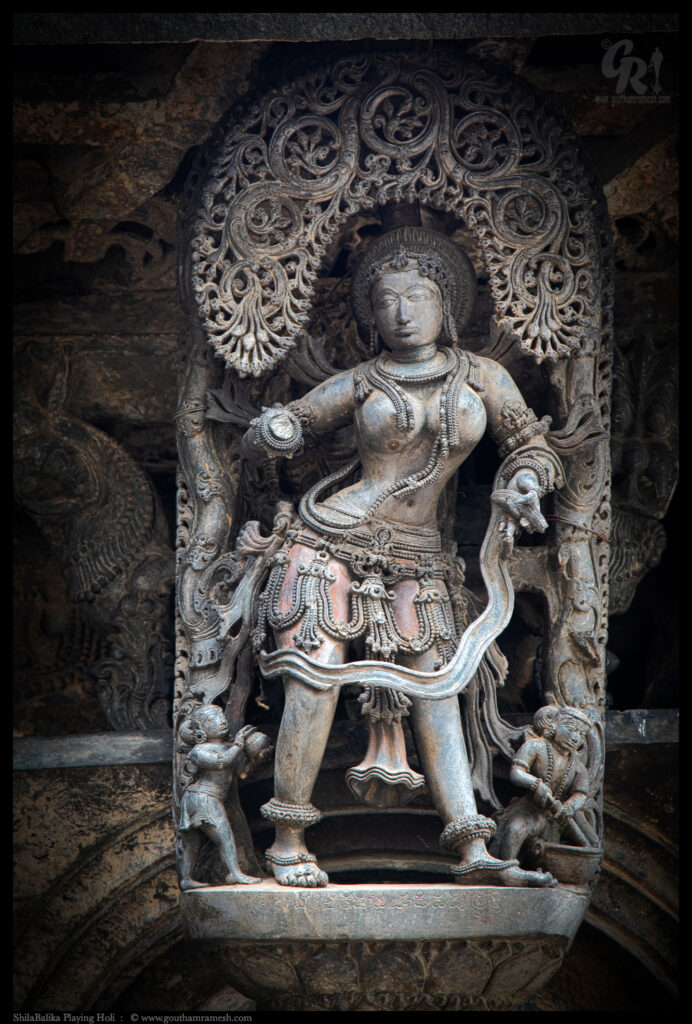
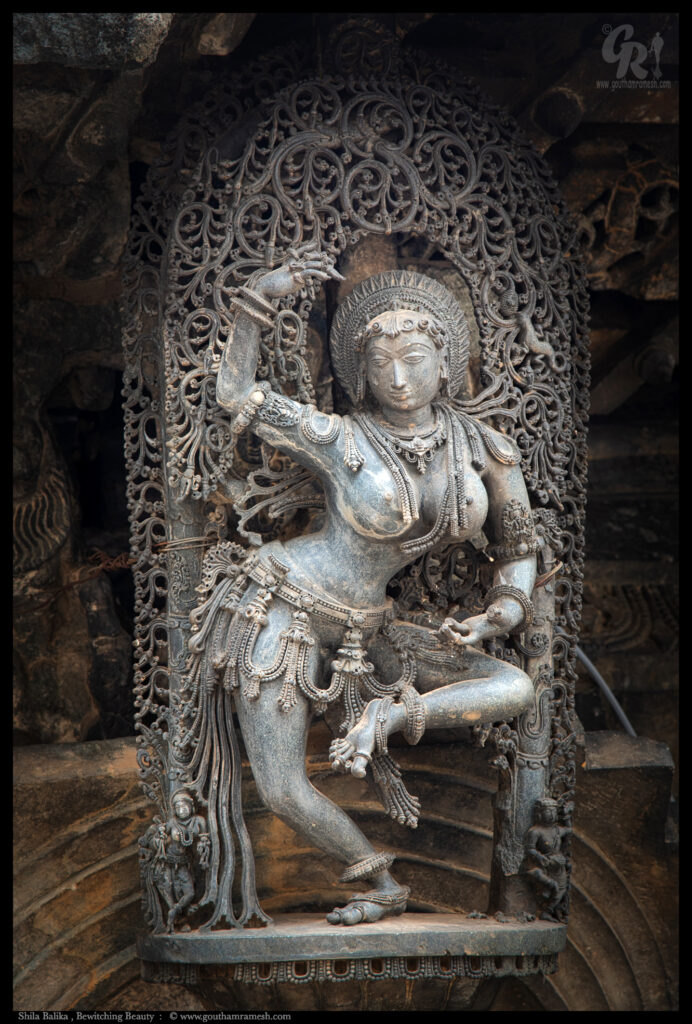
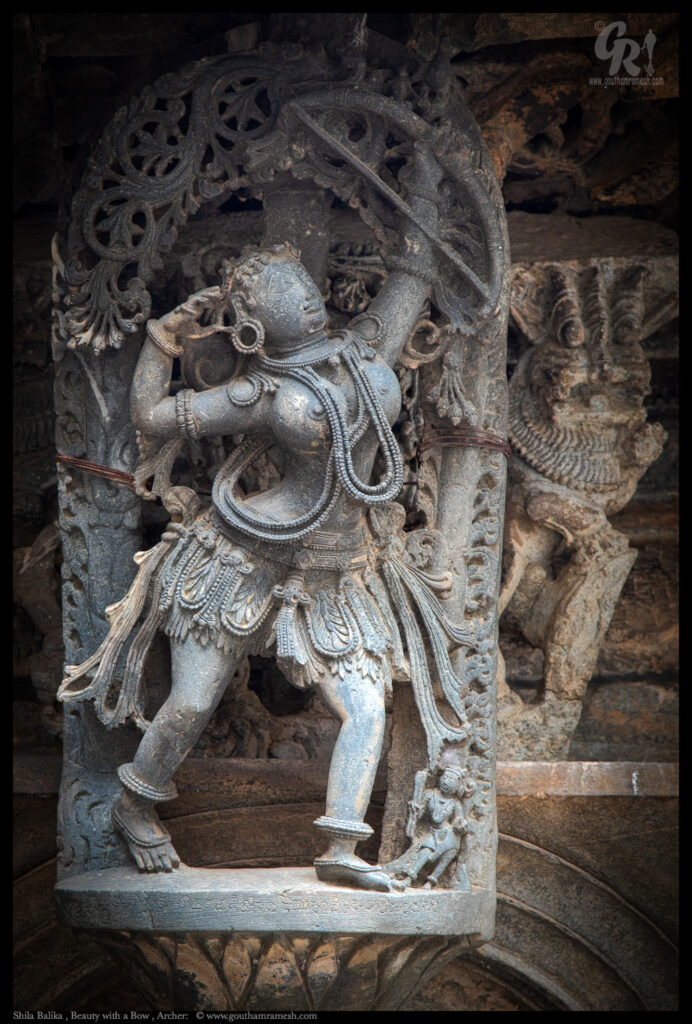
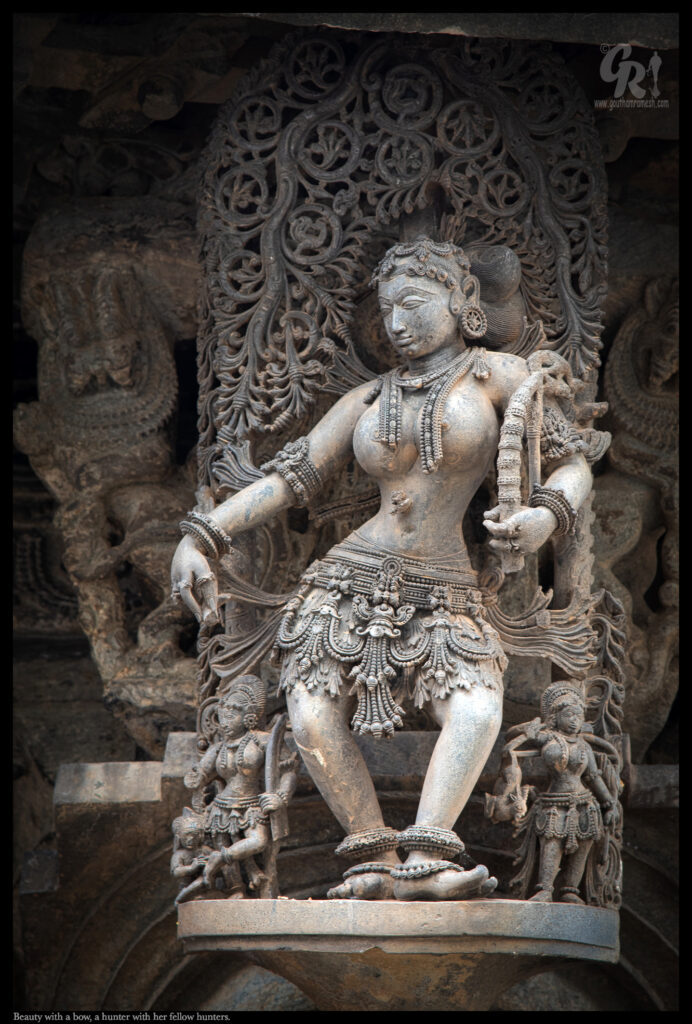
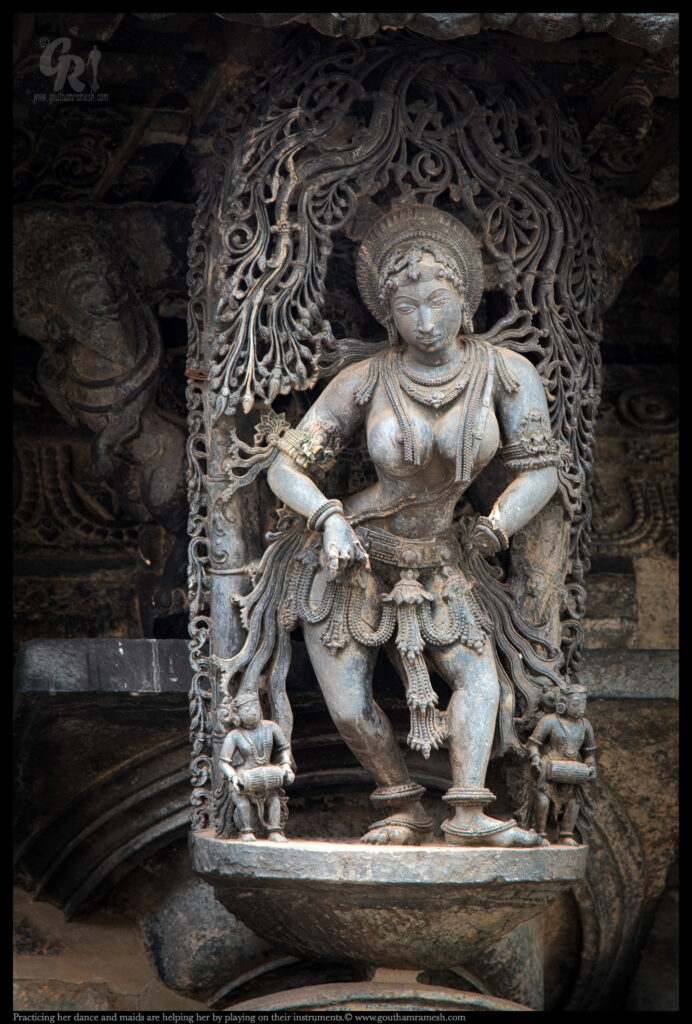
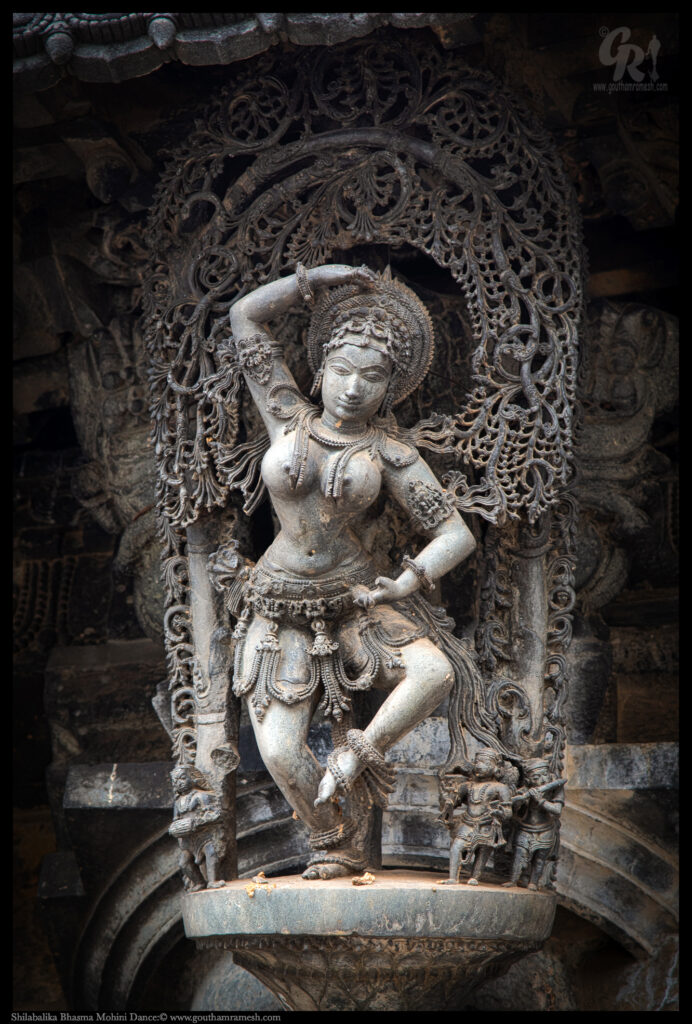
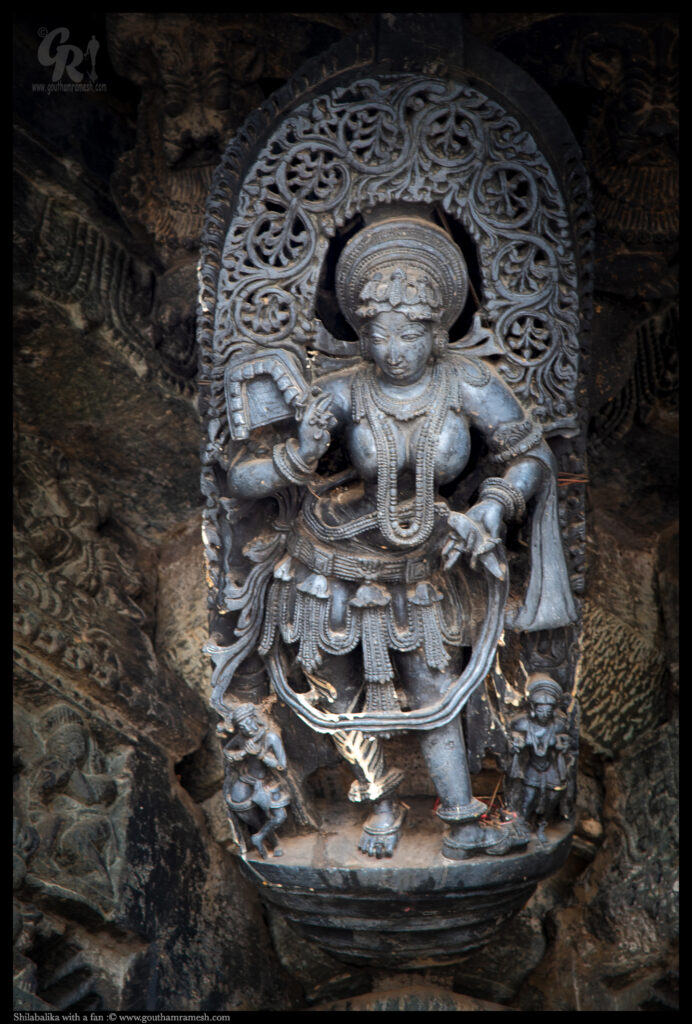
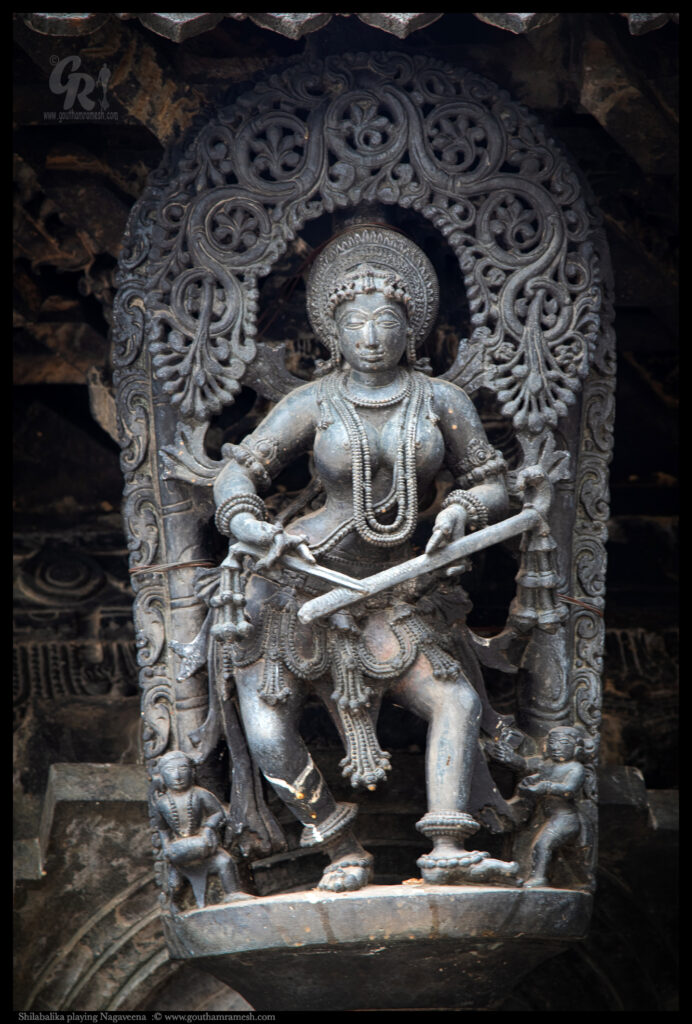
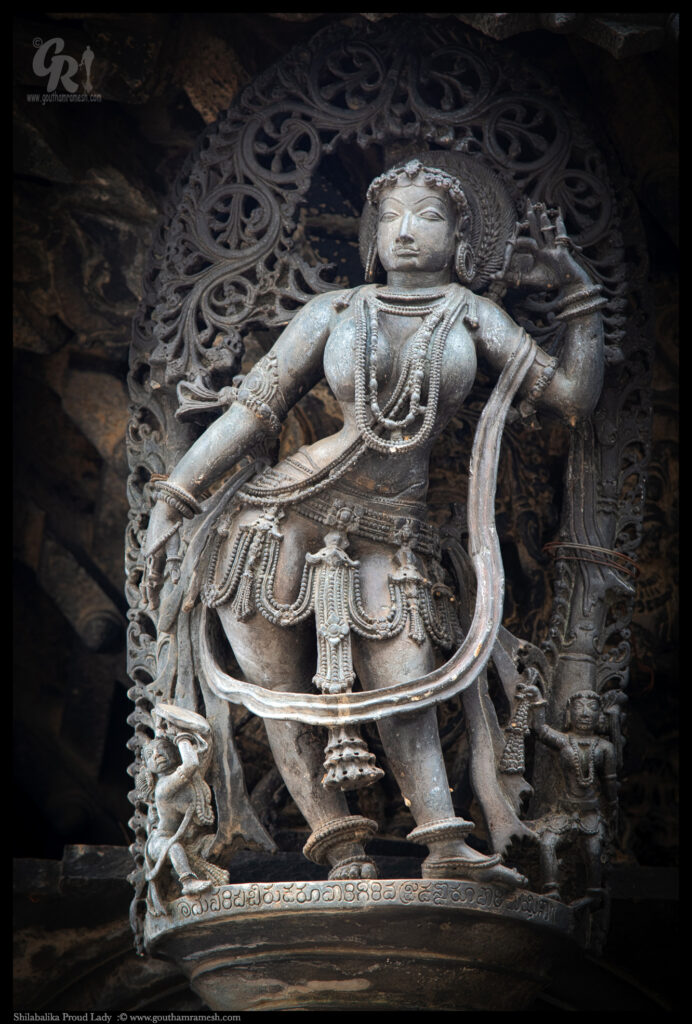
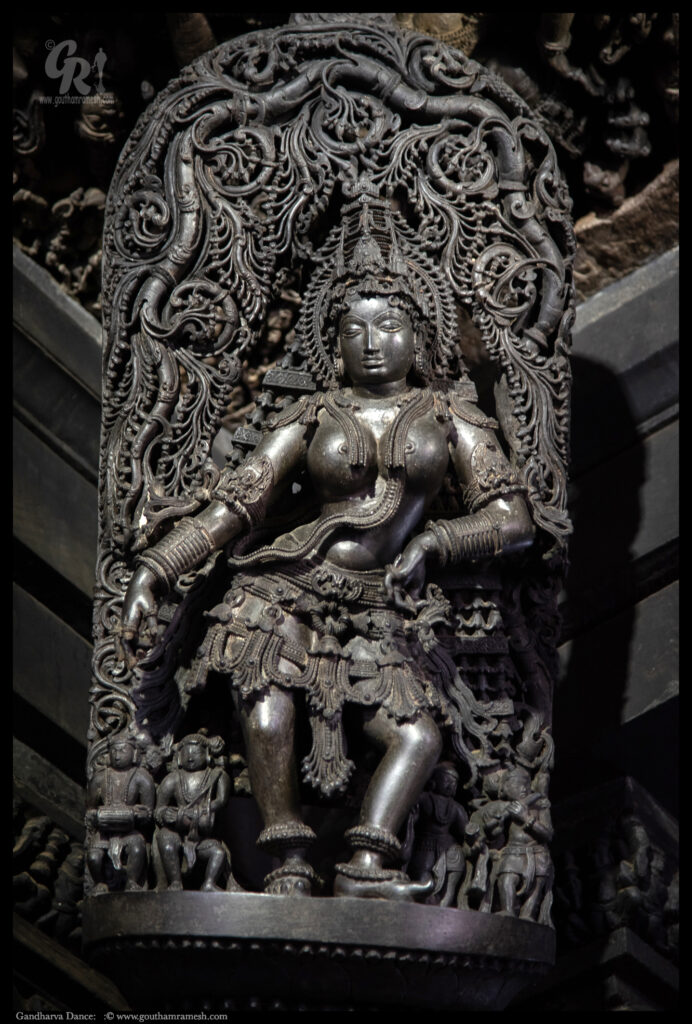
In sharp contrast, the adjacent sculpture of the Apsara exudes an aura of serenity and elegance. She stands in a relaxed pose, completely devoid of any clothing or ornaments, her form flowing naturally as she plays with a delicate creeper in her hands. The lack of adornment draws attention to her ethereal beauty and graceful curves, symbolizing the gentle side of divine femininity.
This juxtaposition of Durga’s formidable power with the Apsara’s tranquil beauty exemplifies the duality of divine femininity, captured masterfully by the Hoysala artisans at Nuggehalli.
Legacy of Art and Spirit
“The sculptures of Hoysala temples are more than relics; they are reminders. They remind us of an age when art was as much a part of worship as prayer, when stone was not merely hewn but transformed into something that could transcend time. Each carving, every motif, is a chapter in a story that the Hoysala artisans crafted to outlast even the temples themselves, offering us today a window into their world, a glimpse of life captured in the dance of shadow and light across stone.
In the presence of these sculptures, we are reminded that art, when made with devotion, lives on forever. The Hoysala walls stand strong, not just as ancient structures but as immortal testaments to the spirit of a people who saw beauty in every inch of stone and who carved their dreams and their gods into the heart of the temple walls.”
if you like the blog, you can leave a comment on Home page.

Cheers ,
Goutham Ramesh