Natural Light Macro with my 180mm.

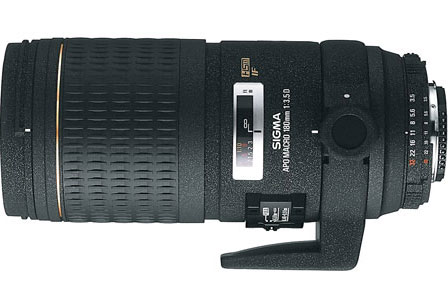
I usually do not give too much importance to the equipment, however if there is one lens that’s been close to my heart it’s been my beloved Sigma 180mm Macro EX HSM ; This lens has been with me for close to 2 decades and has given me great images. In this blog I will share some images shot with this lens in natural light.


Sigma 180mm Macro EX HSM 3.5, a brief overview:

The Sigma APO 180mm F3.5 EX DG lens was (yes, it is no longer manufactured) a telephoto/macro lens produced by Sigma Corporation.

  • Lens style:       Telephoto , Macro
  • Focal length:   180 mm
  • Maximum aperture:    f/3.5
  • Closest focusing distance :     0.46 m
  • Maximum magnification:       1:1
  • Minimum aperture:     32
  • Number of diaphragm blades :9
  • Auto focus type:         AF HSM
  • Lens Construction:     13 elements / 10 groups
  • Filter diameter :72 mm

What I liked about this lens!

  1. Shots  taken with this  lens were quite impressive.
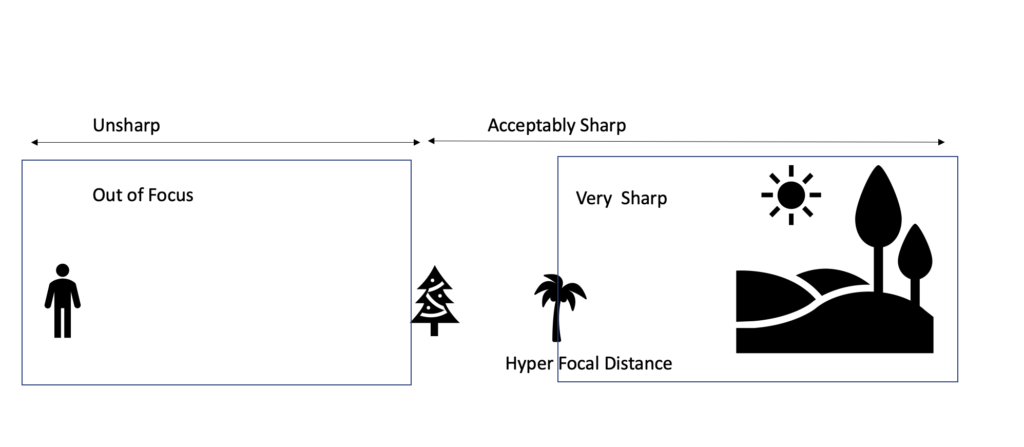
  2. The shallow DOF.
  3. The  working distance has always been excellent.
  4. This lens performs extremely well even when the aperture is fully opened at 3.5.
  5. Excellent build , even though the powder coating matte finish peels off.
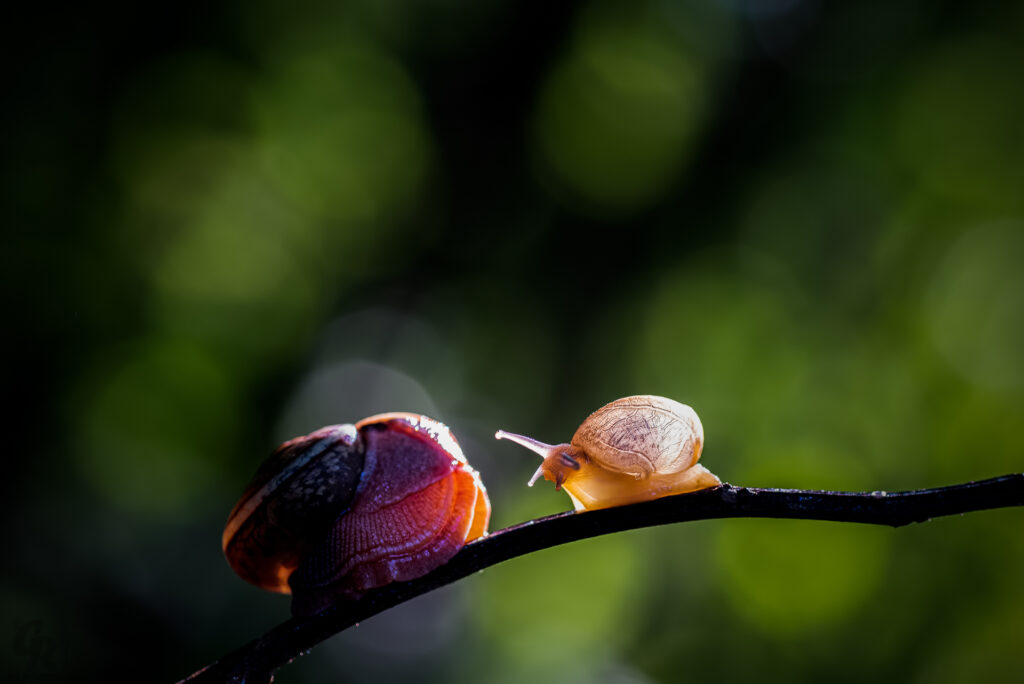
  6. Lovely Circular Bokeh at 3.5

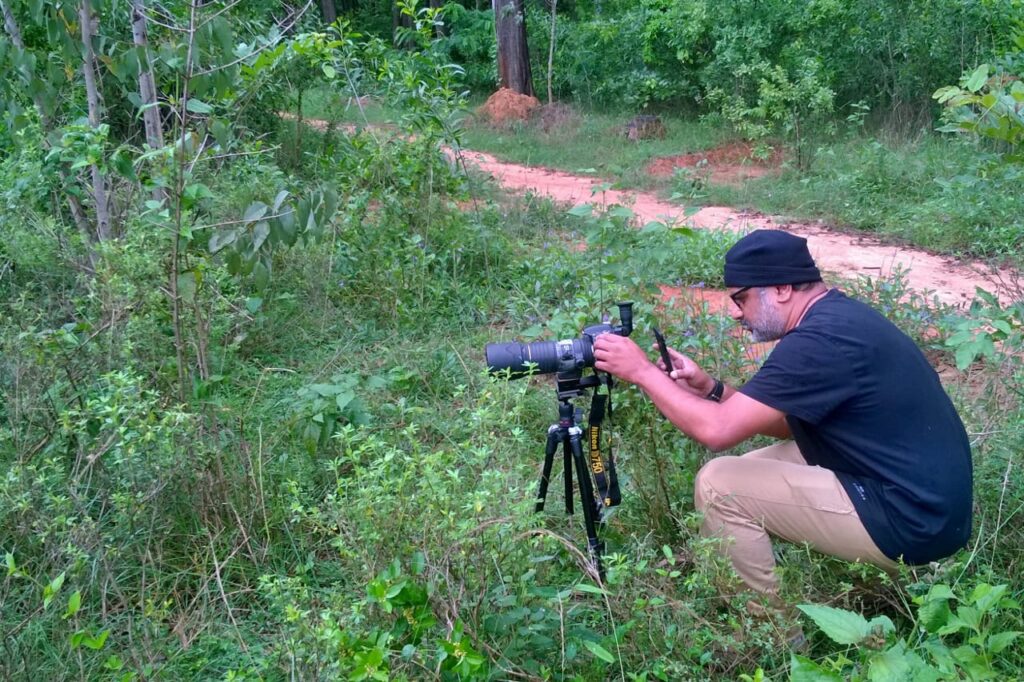
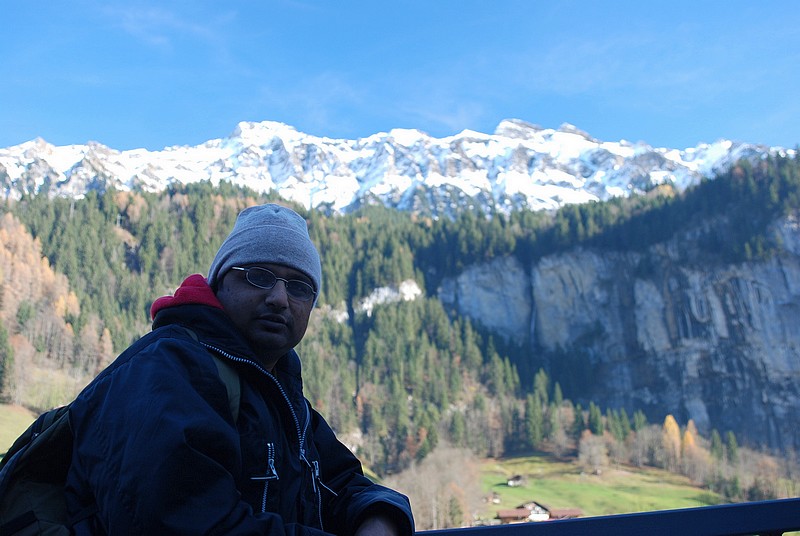
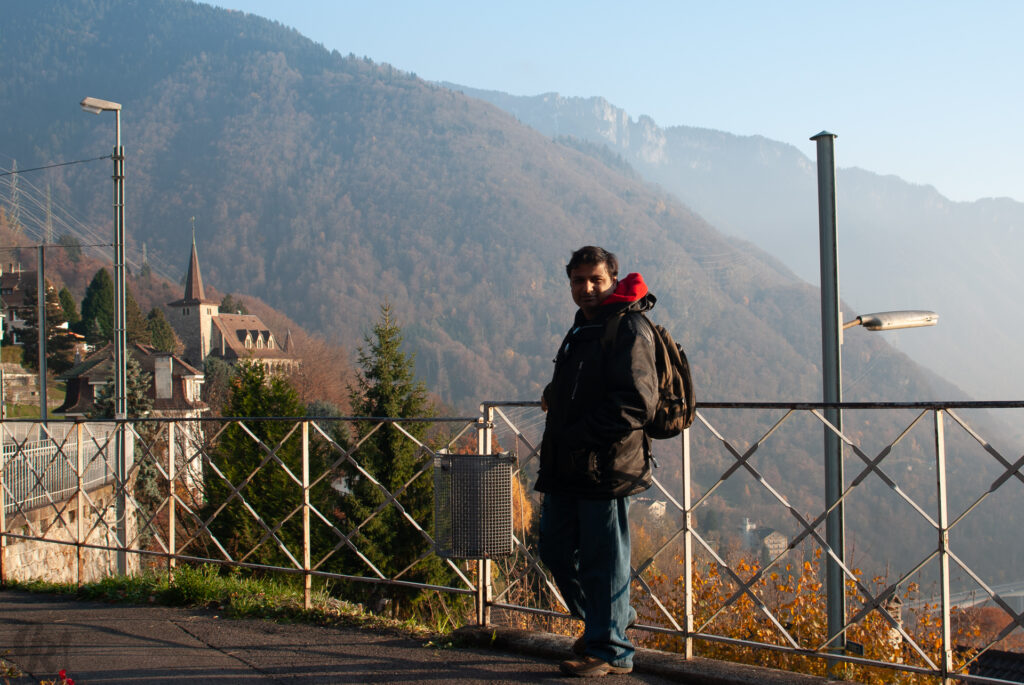
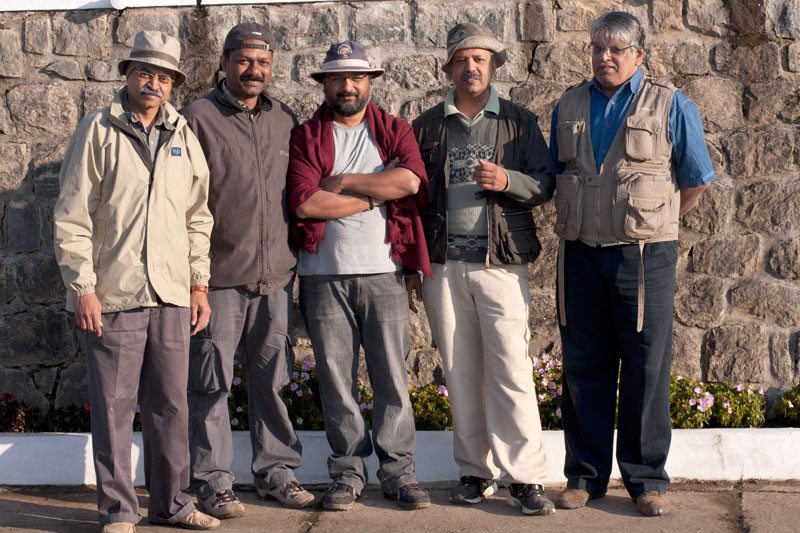
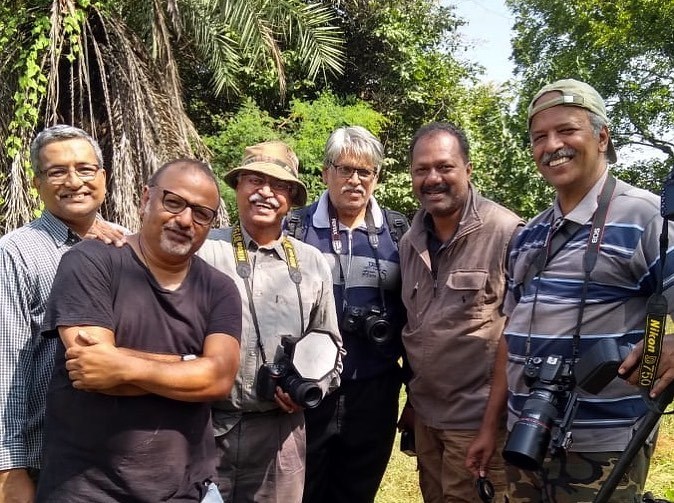
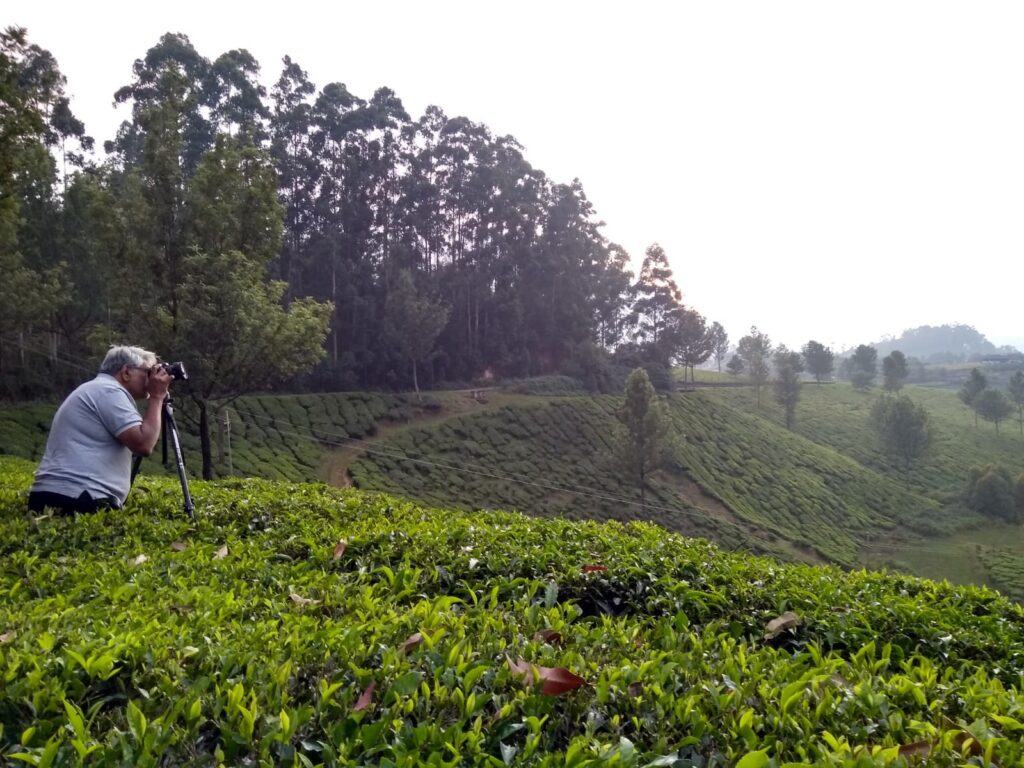
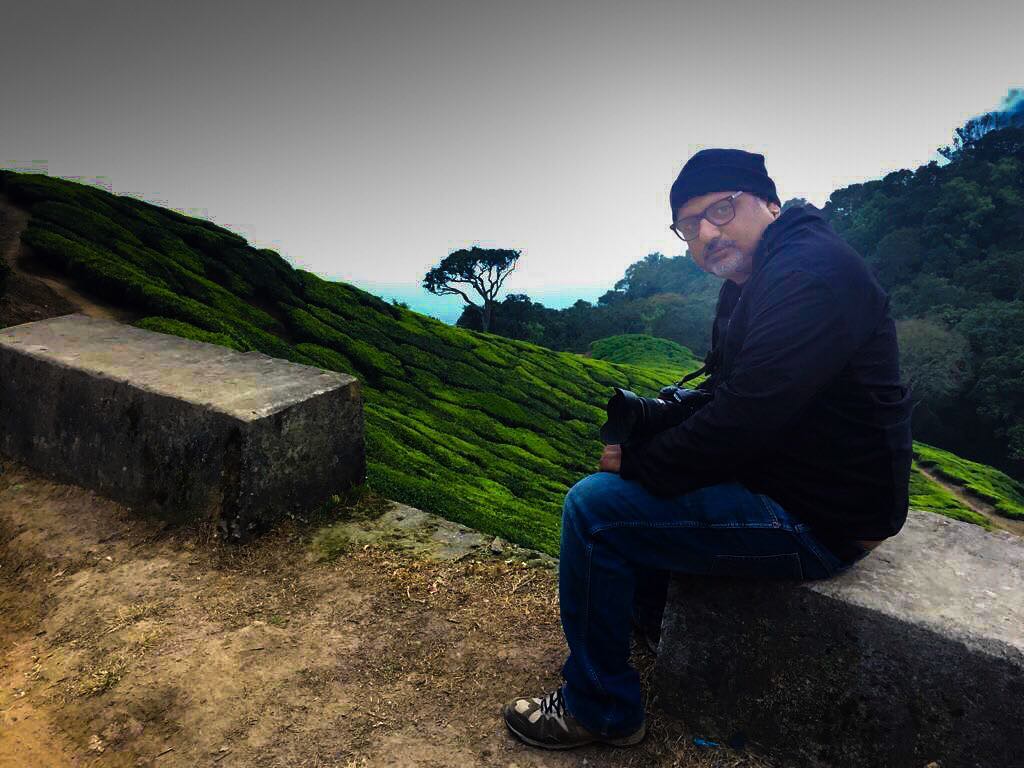
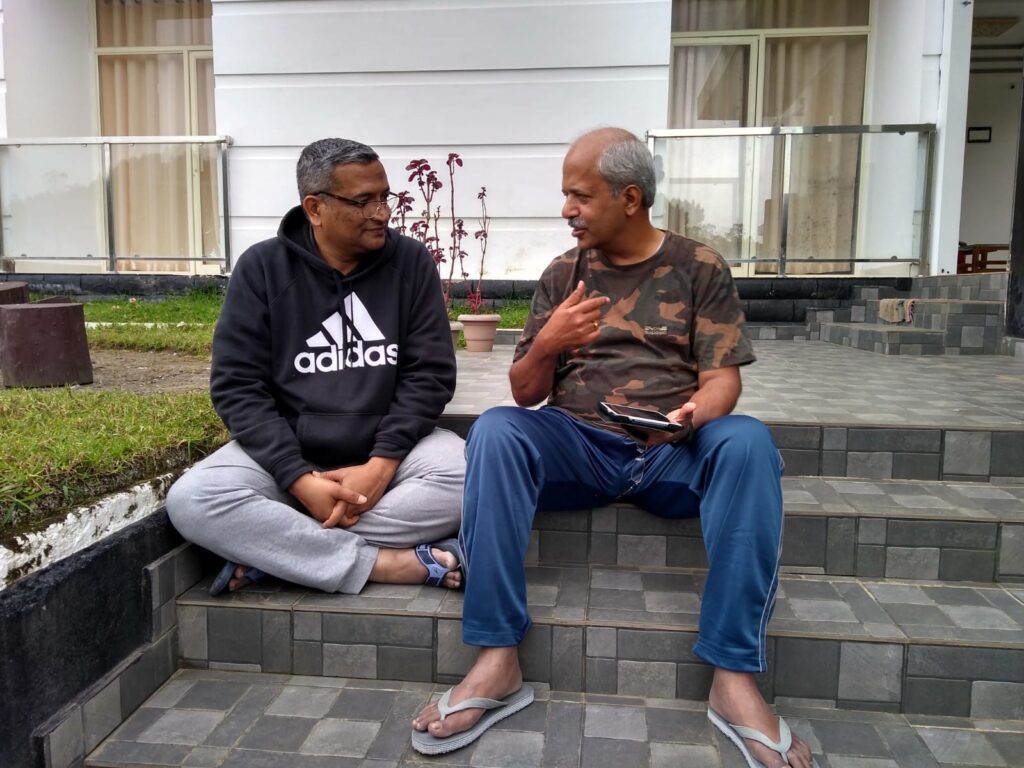
Me , with my Sigma 180mm on field

Some techniques that I follow with this lens:

  1. Always stay parallel to the subject , this allows me to get the subject of interest in the shallow DOF that this lens provides
  2. Always use a tripod stand! This lens is heavy and is not for people who like to do handheld photography
  3. Use a Macro rail
  4. Use a right angle viewfinder , since most of the subjects are at ground level or very close to the ground, this helps a lot and saves my back as well.
  5. Start shooting with a fully open aperture and keep closing the aperture till i get right DOF
  6. Carry a white sheet of paper as a reflector to bounce natural light and use it to fill shadows.
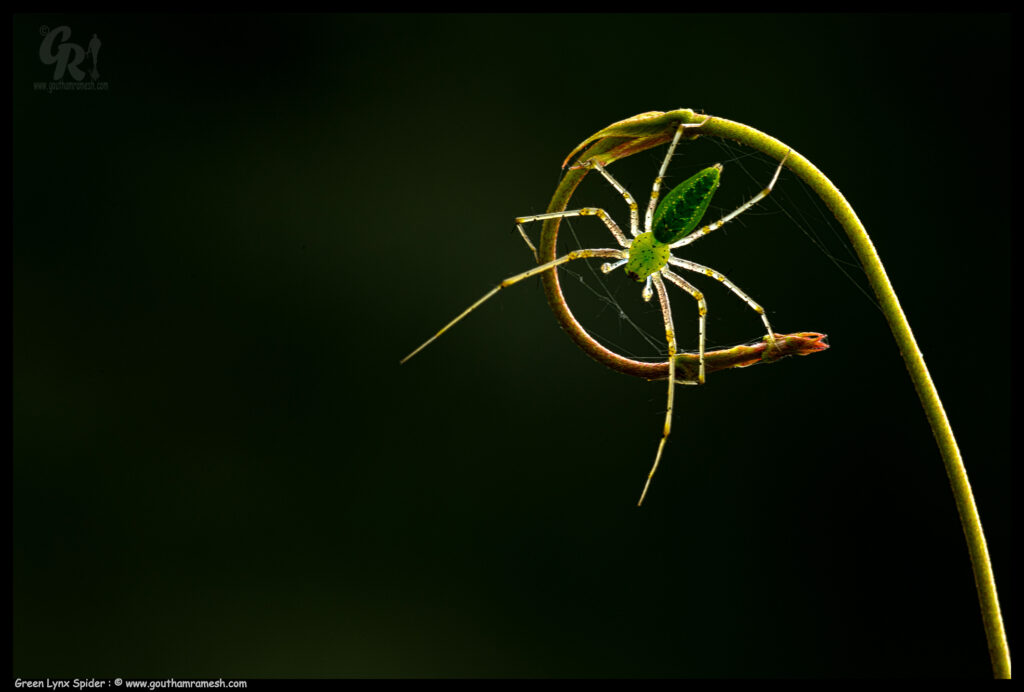
Some Images:

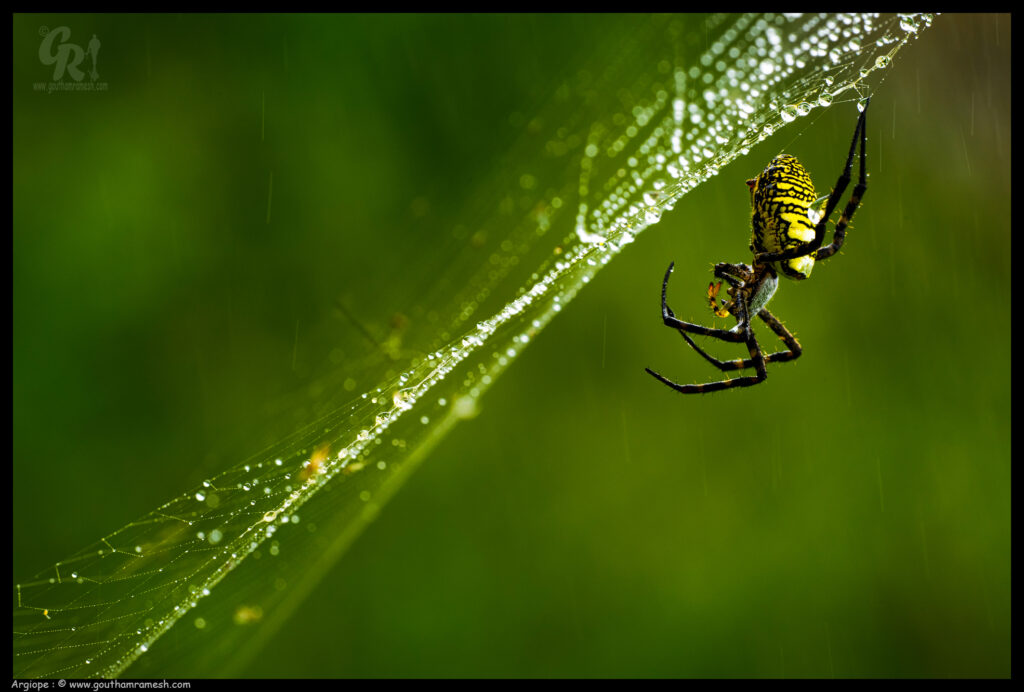
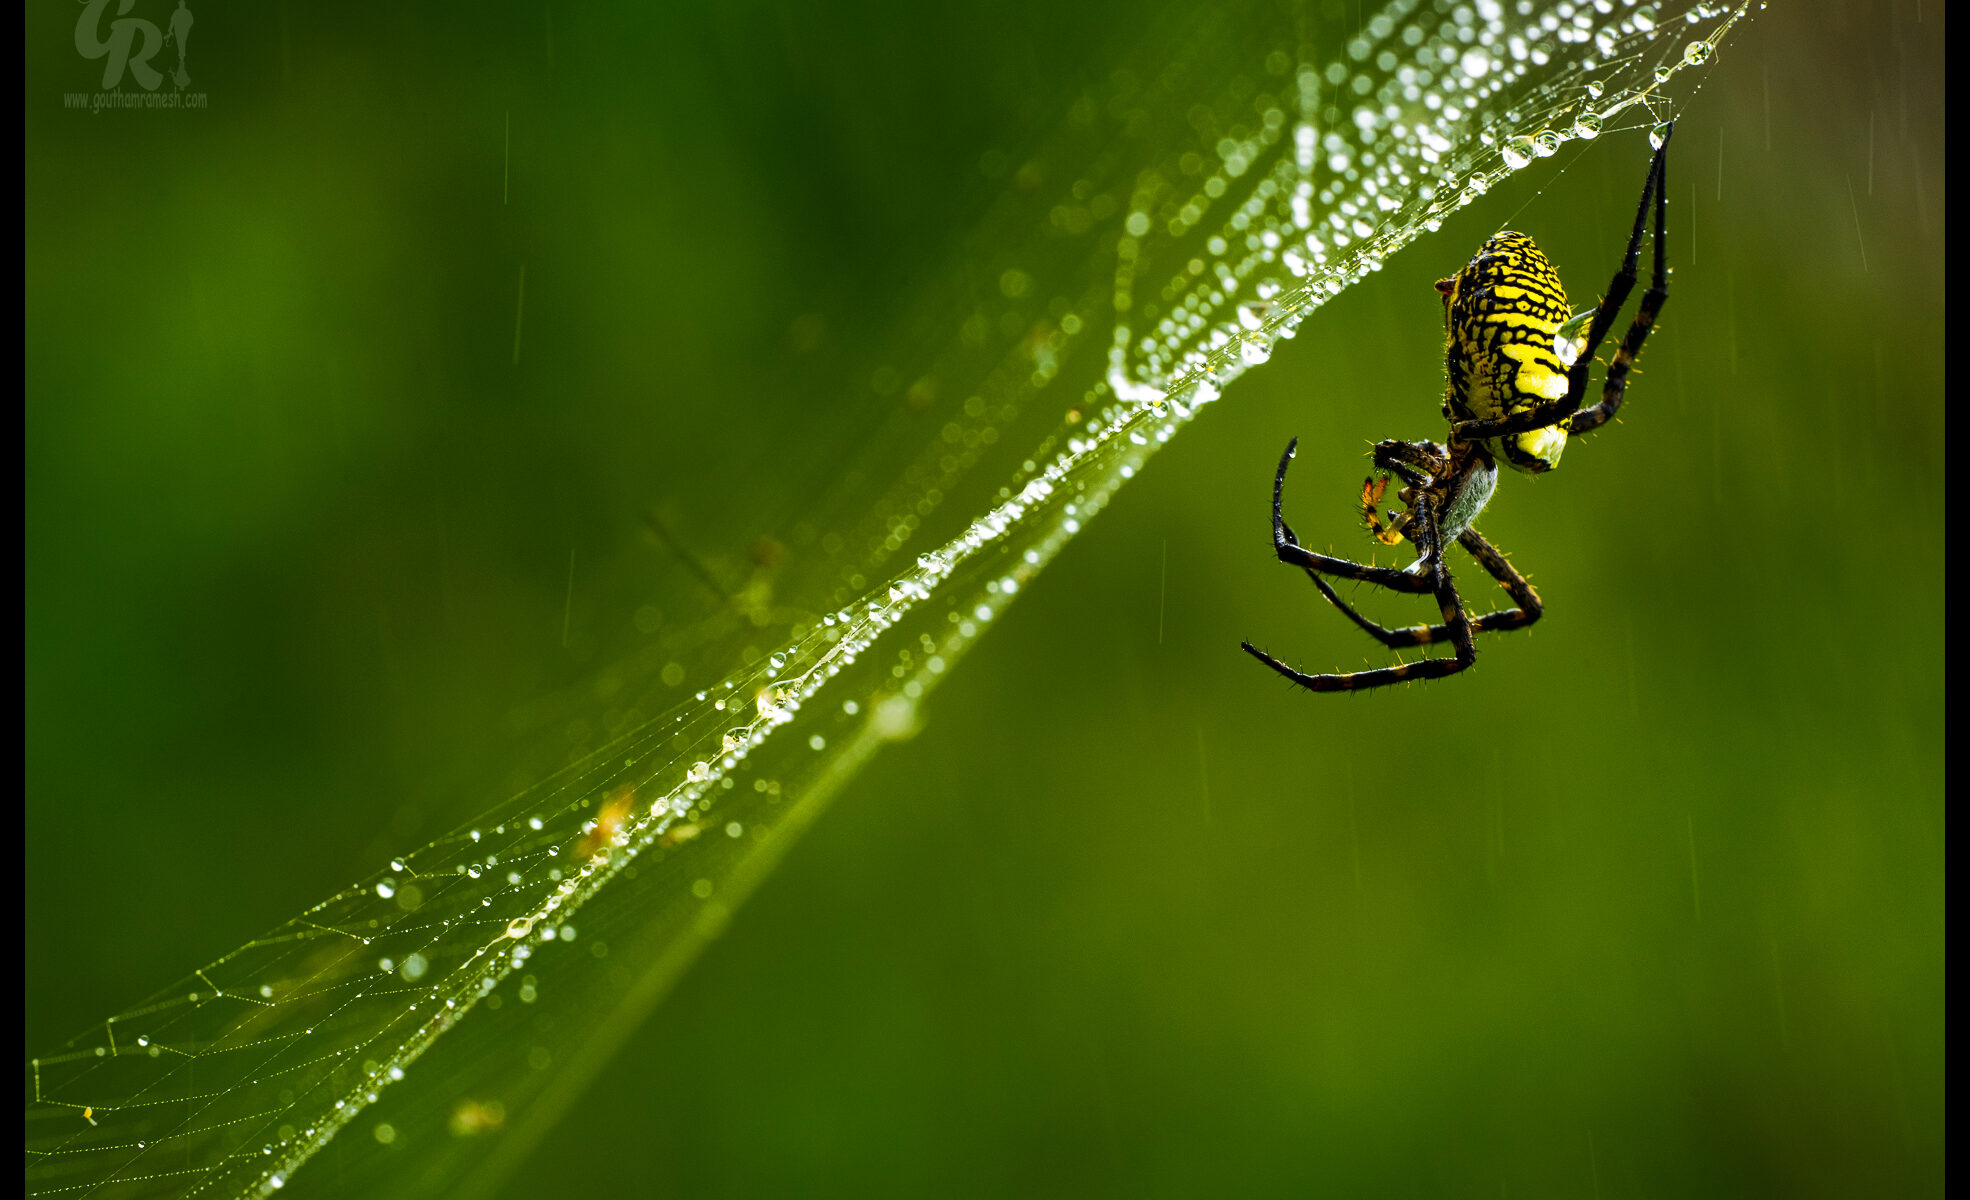
Argiope in light drizzle. This was a challenging shot due to wind and I also wanted to show the raindrops ( Exposure : F14 , 1/125 second , ISO 400, Natural light )

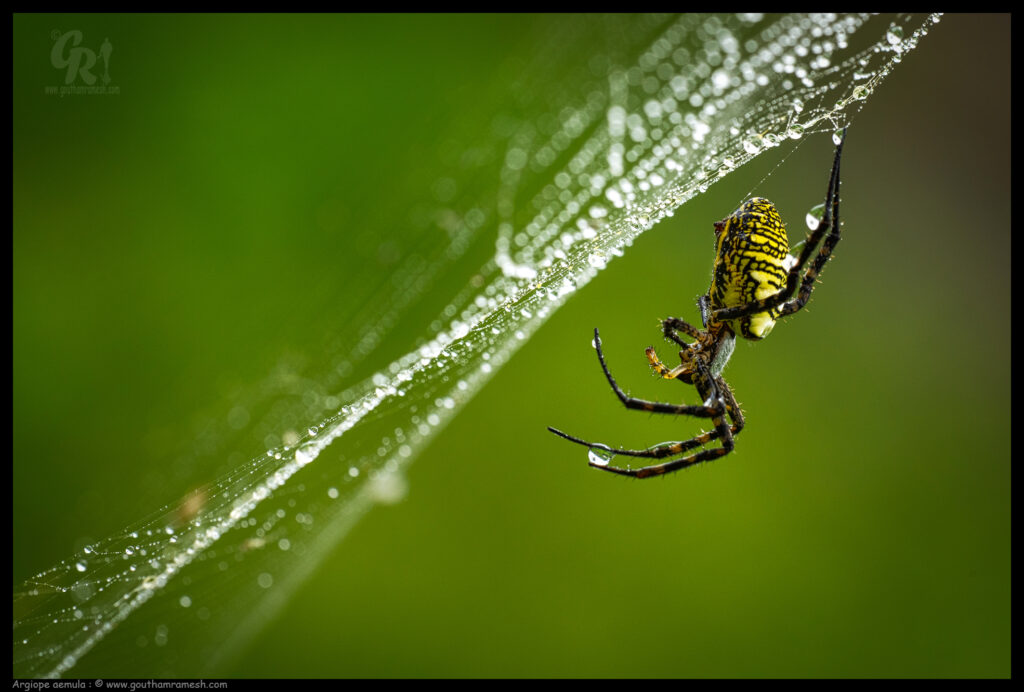
Argiope after the drizzle . ( Exposure : F10 , 1/320 second , ISO 400, Natural light )

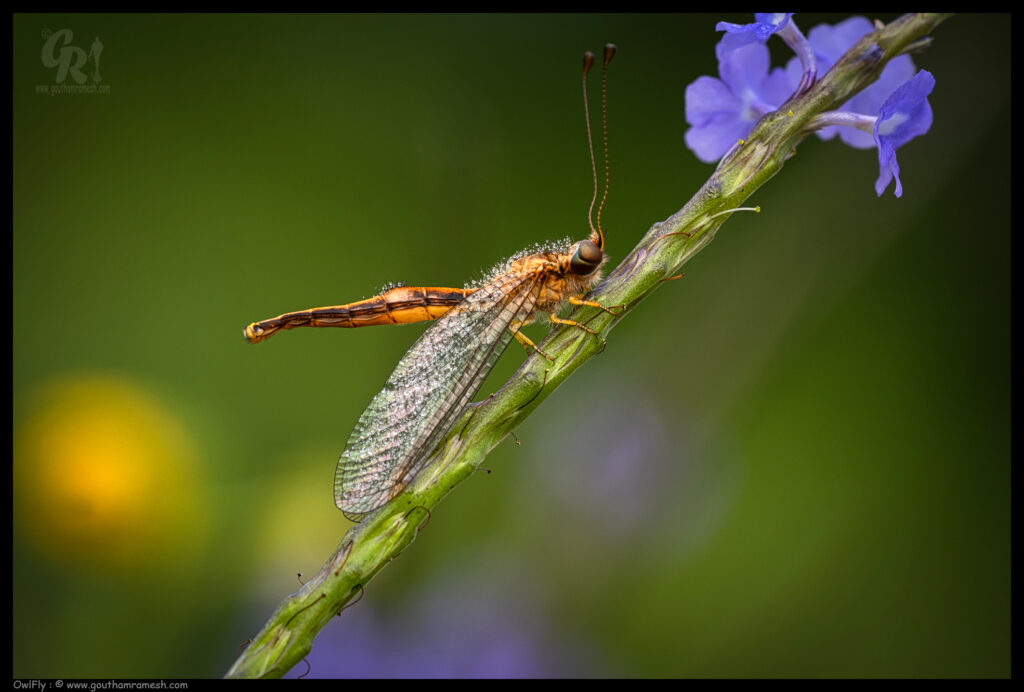
Owl Fly ( Exposure : F10 , 1/320 second , ISO 400, Natural light )

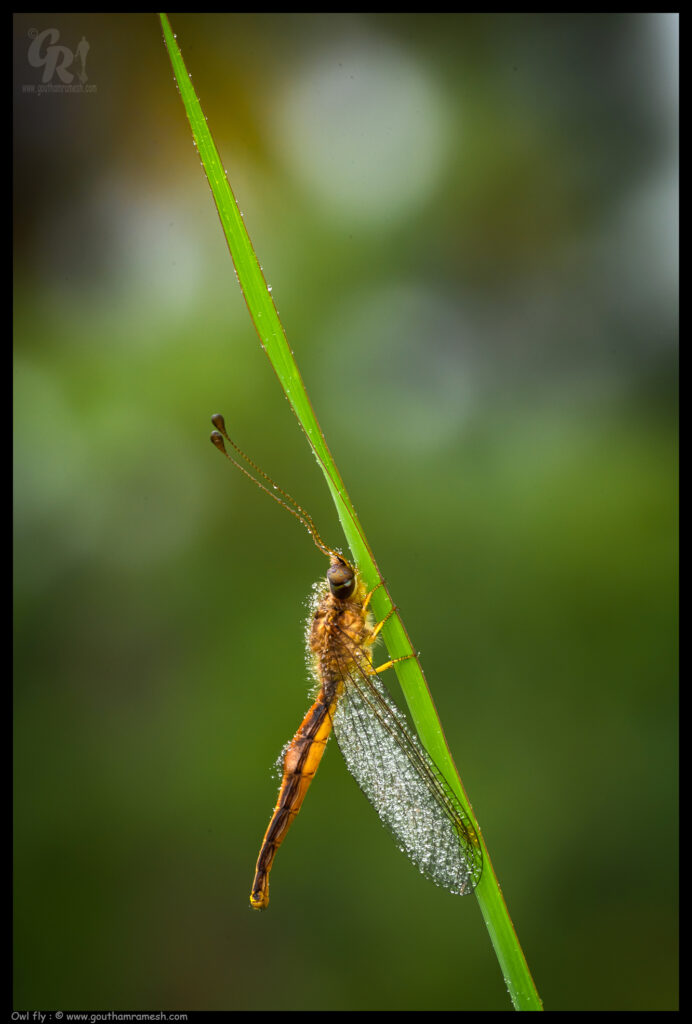
Owl Fly with Bokeh ( Exposure : F16 , 1/50 second , ISO 400, Natural light )

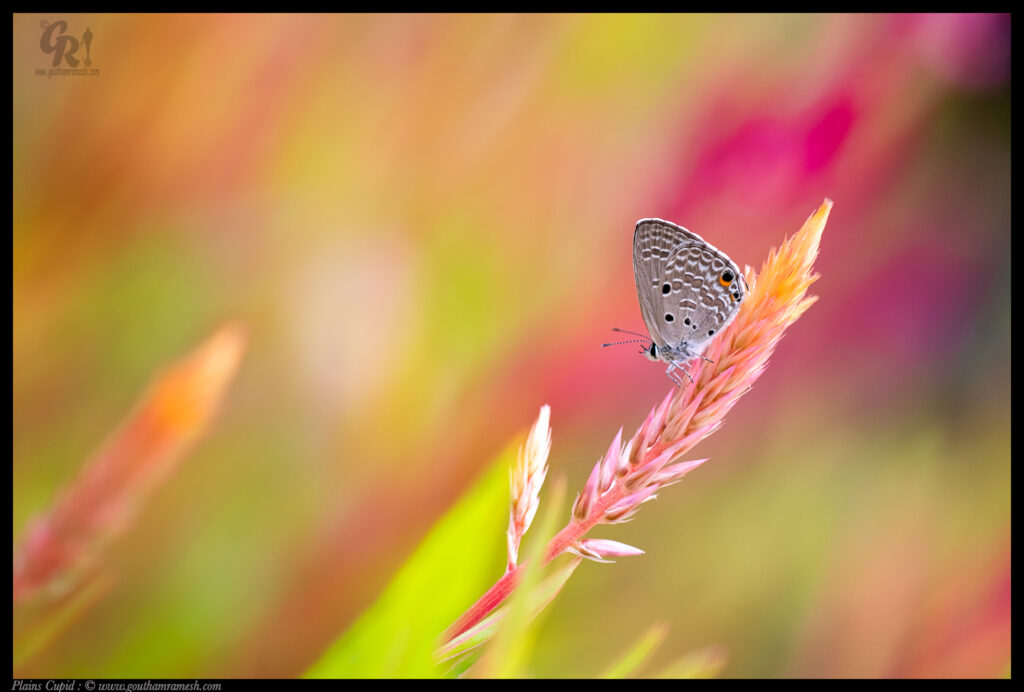
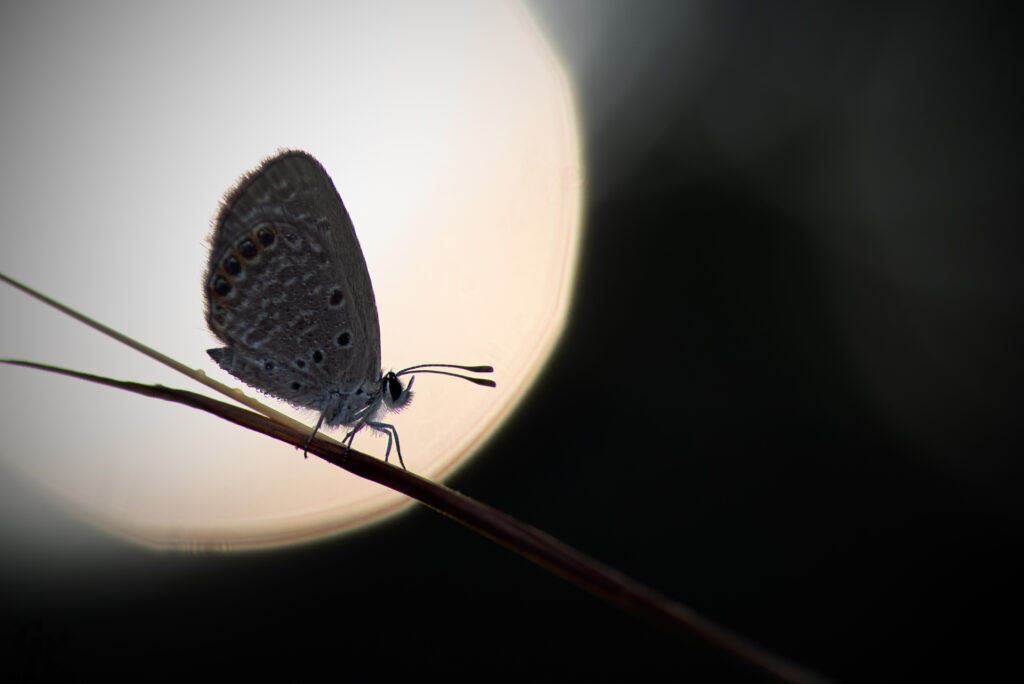
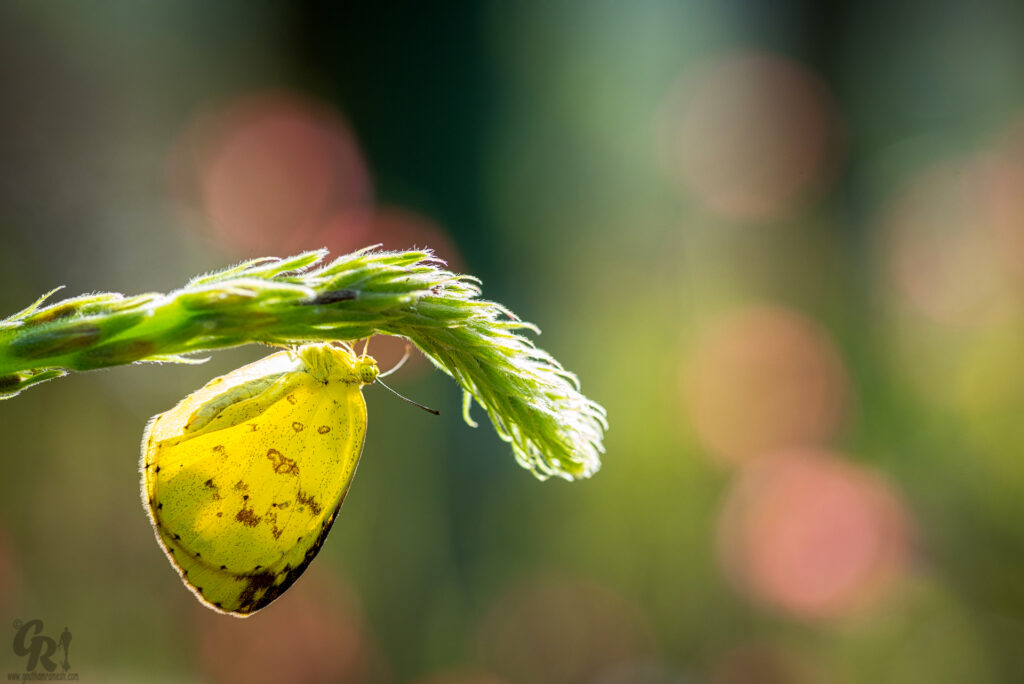
Plains Cupid , Here i have opened the aperture almost full to get a very shallow DOF and have gone almost parallel to the subject ( Exposure : F4 , 1/1250 second , ISO 800, Natural light )

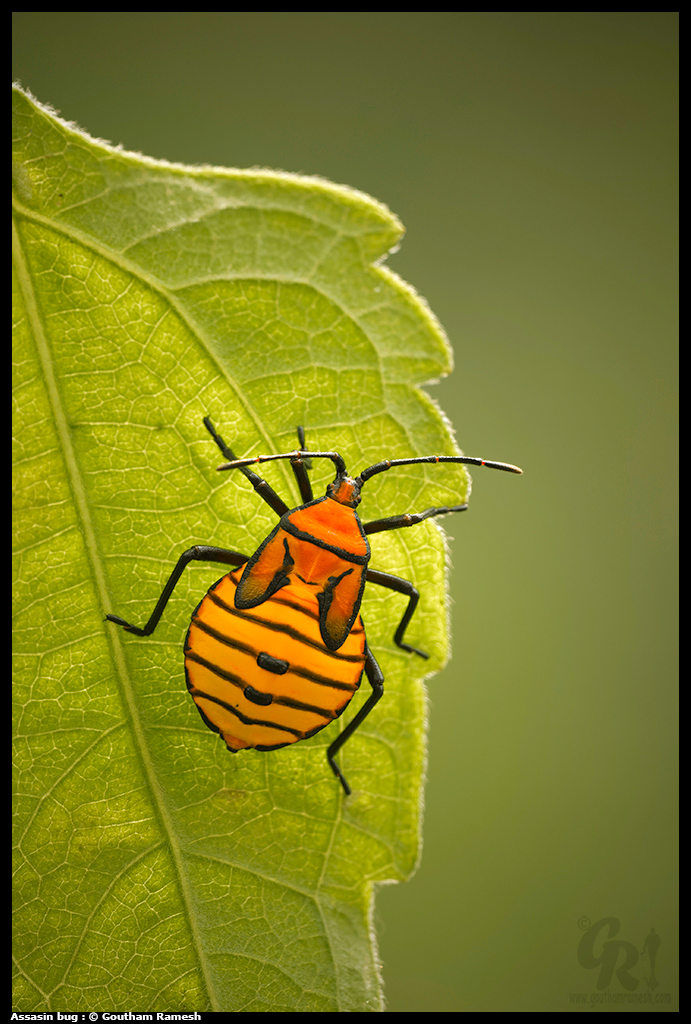
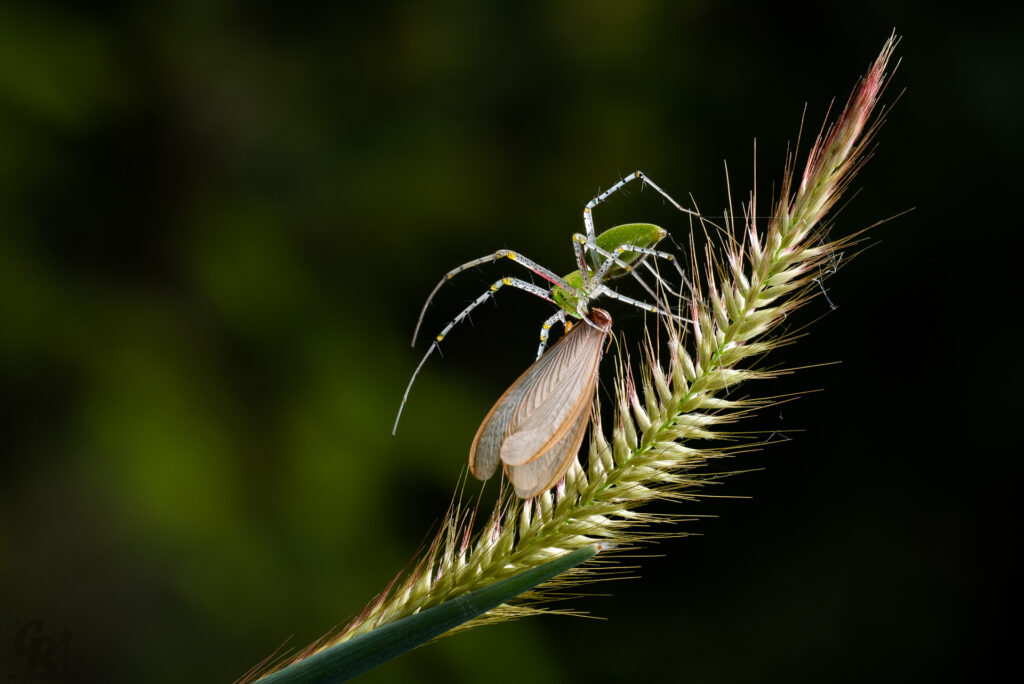
Assassin Bug back lit with a paper reflector in the front ( Exposure : F8 , 1/125 second , ISO 400, Natural light )

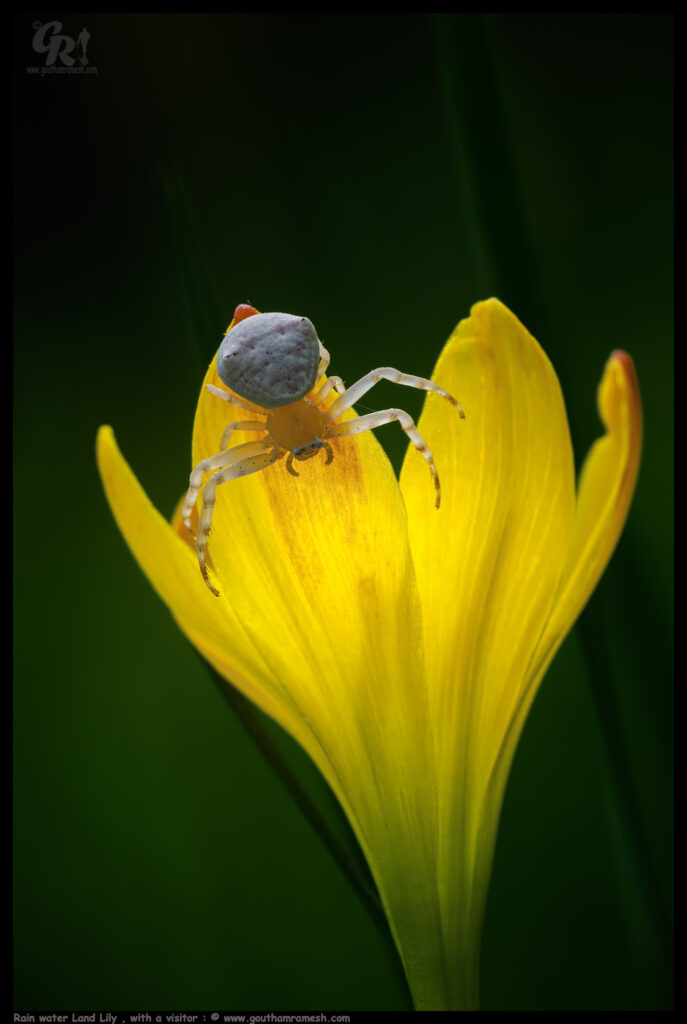
Crab Spider back lit with a paper reflector in the front ( Exposure : F13 , 1/60 second , ISO 100, Natural light )

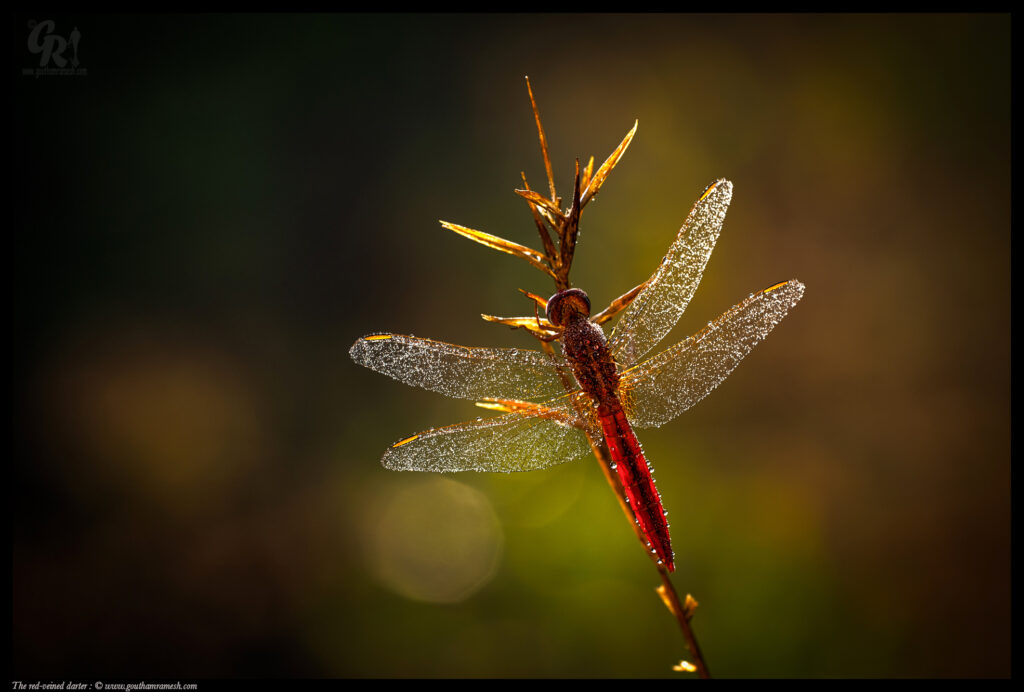
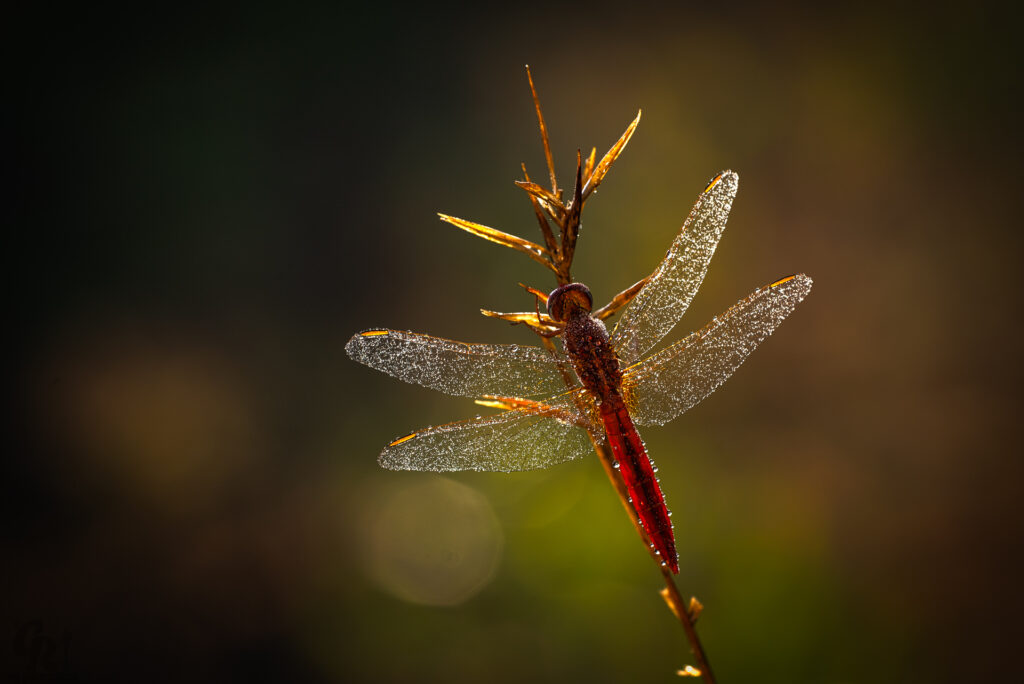
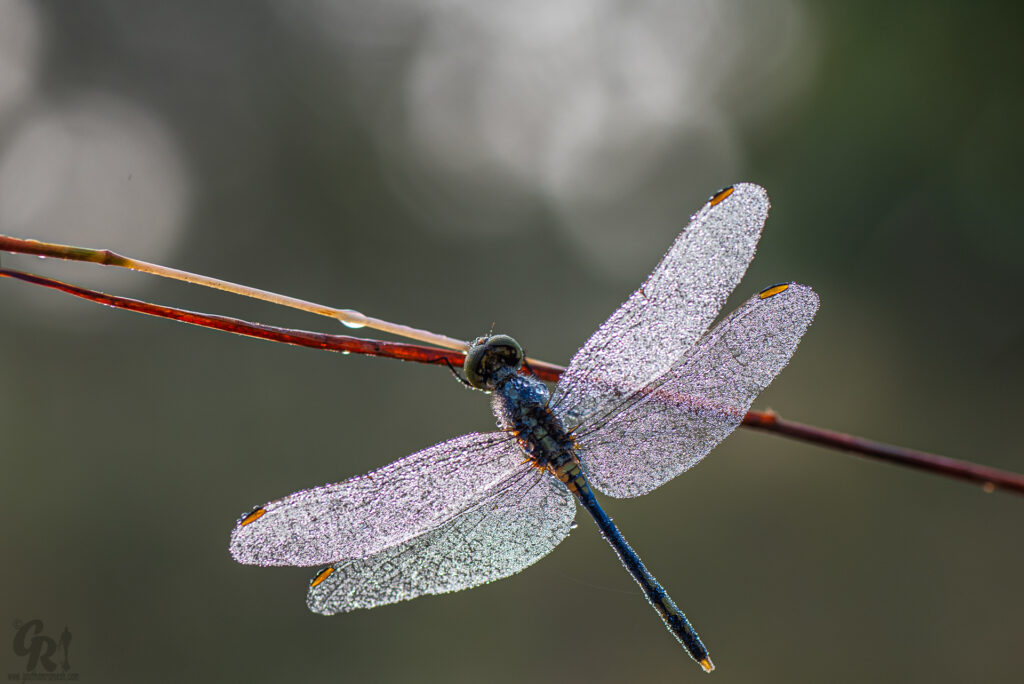
Red Veined darter back lit with a paper reflector in the front ( Exposure : F8 , 1/125 second , ISO 400, Natural light )

Assassin Bug back lit with a paper reflector in the front ( Exposure : F16 , 1/40 second , ISO 400, Natural light )

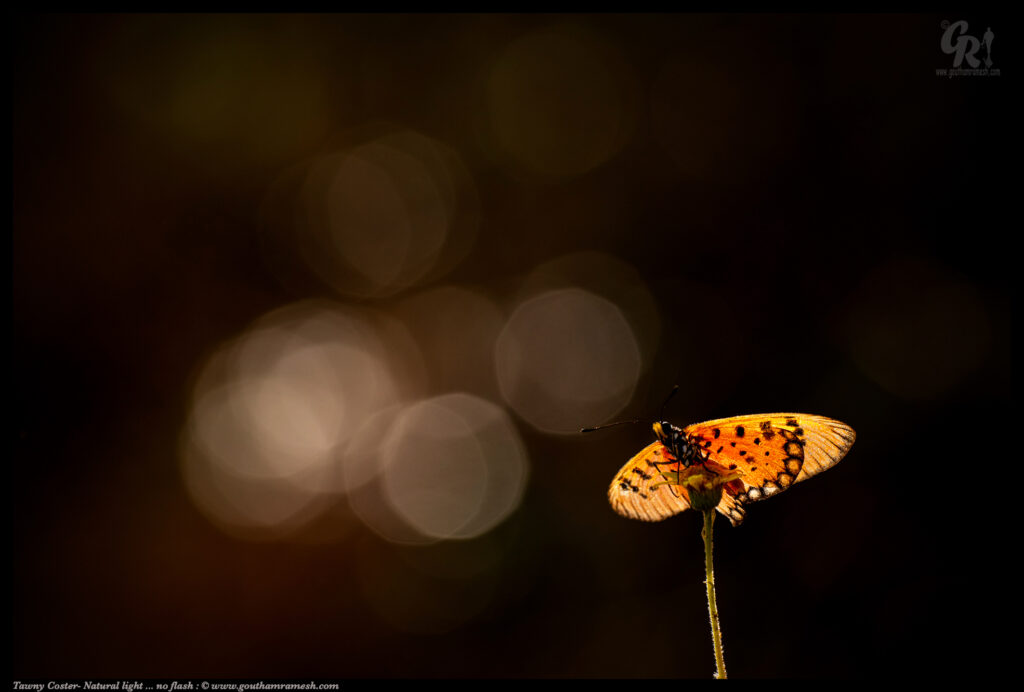
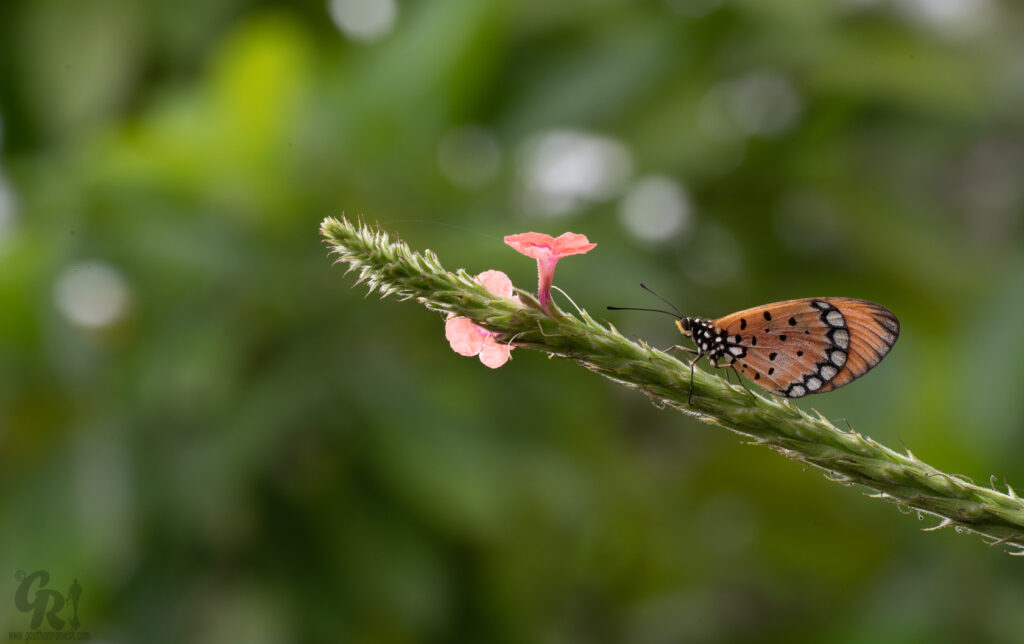
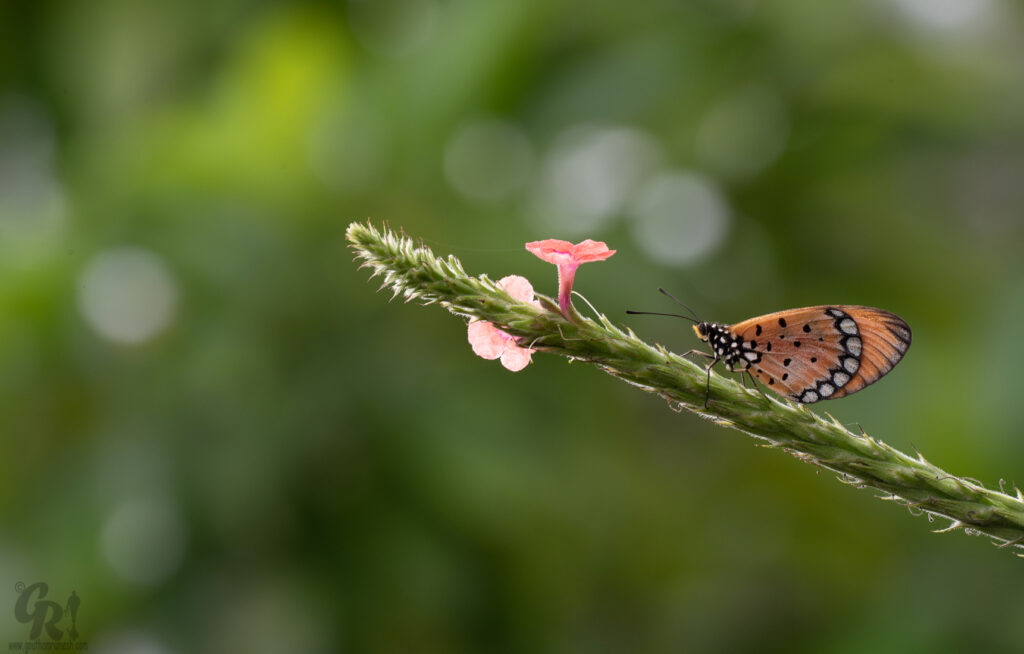
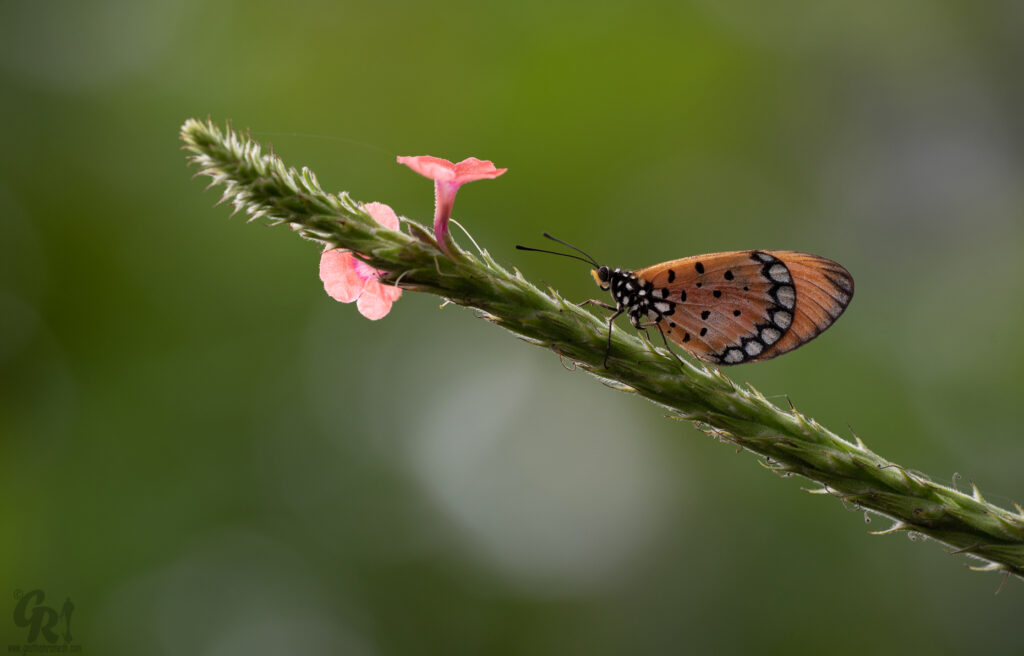
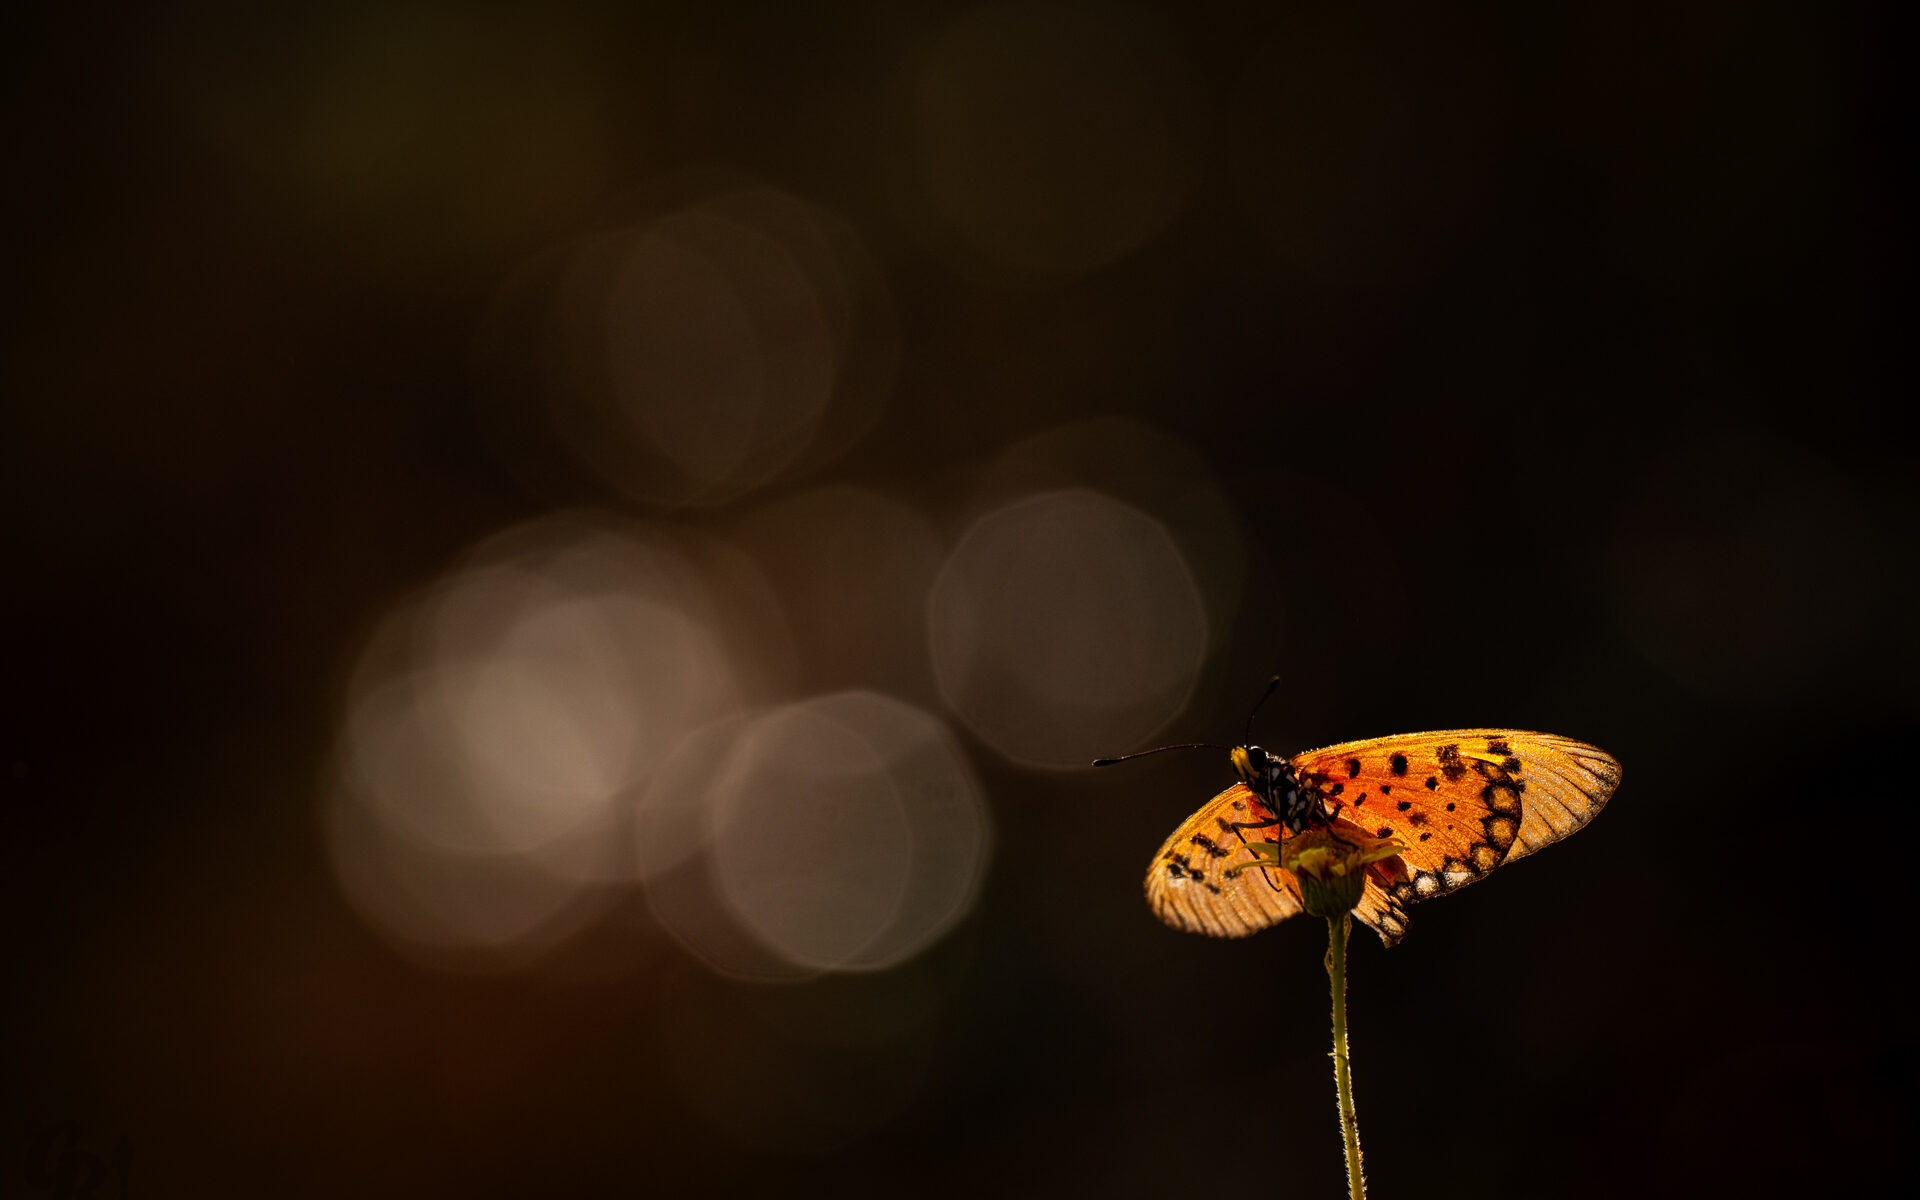
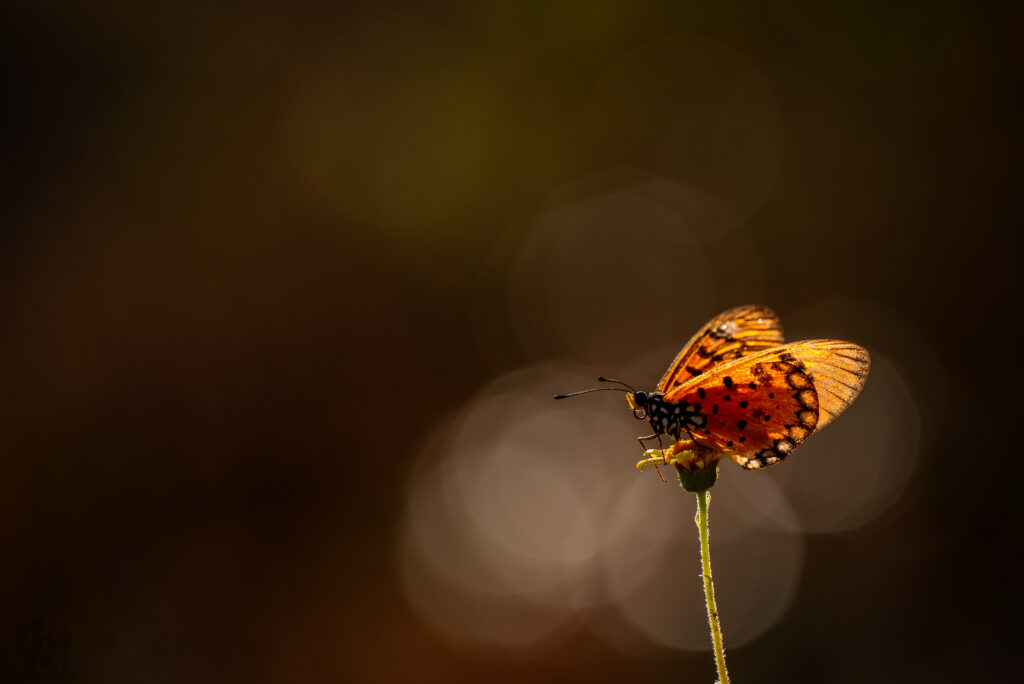
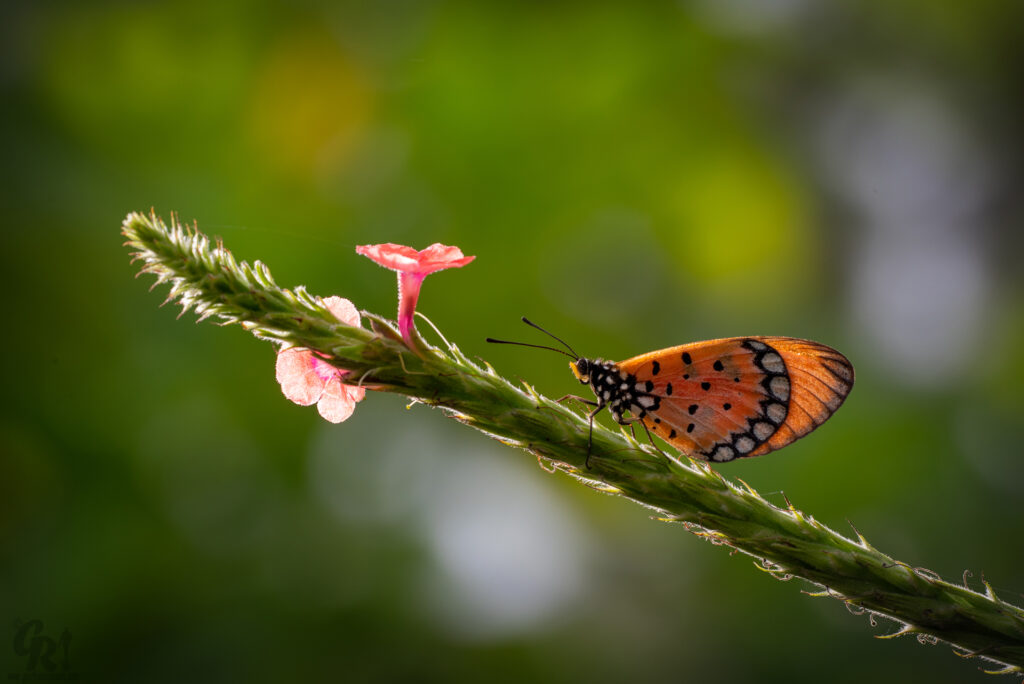
Back lit Tawny Coaster ( Exposure : F6.3, 1/1000 second , ISO 400, Natural light )


Rant!

These days , Macro photography has changed! ; The way we shoot pictures have also changed with good close up lenses , attachments , great diffusers and lighting support and there is a decline in people using natural light ( Even I don’t use this lens and natural light quite often these days ) . Today we can  get much more greater details in the images which is amazing. However personally for me charm of natural light macro is still very close to my heart even though I do shoot  a lot of my recent macro’s with close up attachments and diffusers  and I do love my Raynox and Radiant diffuser.

Having said that these days manufacturers have stopped making lenses like 180mm due to lack of demand and it’s very sad, one day I hope the demand for macro lenses and this focal length is back on track and we get to see some great macro images in natural light .


Thanks if you like the blog, you can leave a comment at Home Page

Cheers

This image has an empty alt attribute; its file name is TransparentImage-4.png
Goutham Ramesh

Long Exposure Photography

Long exposure photography is  recently very popular , due to the dramatic effects produced with the technique. The advent of more advanced digital cameras have made it much easier to produce these images, since the calculations, guesswork and luck have mostly been eliminated from the process.

Long-exposure, time-exposure, or slow-shutter photography involves using a long-duration shutter speed ( from 1/15 of second to minutes ) to sharply capture the stationary elements of images while blurring, smearing, or obscuring the moving elements. Long-exposure photography captures one element that conventional photography does not: an extended period of time.


4 Second exposure to get the blur effect of this fountain on lake Geneva


As mentioned Long exposure is achieved by using slower shutter speed and this longer exposure times allow you to capture clouds, water, or other moving objects in a smooth, flowing manner, while maintaining sharpness and clarity on still objects.

One of the post important aspect to get longer exposure is  to shoot during early morning or late evening when light is little low; However we can also use an ND filter (Neutral density filter ) , which actually cuts down the exposure.

A neutral density filter essentially allows for this extended amount of exposure time, without altering the hue or colour of the image. Adding the filter is equivalent to stopping down one or more f-stops, and allows you to avoid making the photo too hot/bright due to the amount of time the shutter will be open.

Again as I said If you don’t have a ND or polarizing filter available, you’ll need to attempt these captures in lower light, such as in the early morning or late evening . Many photographers use long exposures to capture shots at night also!

Here the main objective is to increase your exposure time for the shot without overexposing the image!

Whether you use ND or get up early in the morning  using a “Tripod” is a must as these shots involve too much open shutter time to attempt holding by hand.


1/5 Second exposure , this was shot around 3 PM , so had to use ND Filter


How to start ( Some Tips )

Begin experimenting with very small apertures during the golden hour (the hour before sunset or after sunrise) such as f/22 or higher, and bump the aperture up to f/8 or larger after night falls.  Please note You’ll end up with several attempts, since nailing a great exposure is largely trial and error. You’ll also need to play around with exposure times, and this depends on what moving object you are capturing.


30 Second exposure to capture moving vehicle tail lamps at KR Circle Mysore


2.5 Second exposure to capture the flowing water


Waves at 1/6 second exposure


1.6 second exposure to capture the BG water stream


Clouds need much longer times to properly capture their trek across the frame of the shot; 5 minutes is a good place to start. Rolling or crashing waves at a beach require much less, sometimes 15 to 30 seconds is enough to create the necessary motion in the image.


20 second exposure at shiva temple Hampi , lit by a flash ( Light Painting )


Due to the sensitivity of the camera during exposure times of this length, a remote shutter release would come in handy. Anything you can do to minimize shake will help preserve the sharpness of the non-moving elements in the photo.


1/2 second exposure to create a blur effect of the moving mist on a lake


1 second exposure to capture the moving mist on a lake


Finally, be sure to do some pre-planning before actually clicking the shutter; try to visualize what the motion of all elements will be in your composition, including flowing elements (clouds, water, car lights), and still elements (rocks, buildings). This can help you better determine what settings you’ll need to capture the image you see in your mind


1/6 second exposure to capture movement of waves


0.4 second exposure to capture moving waves


0.6 second exposure to capture moving waves


Thanks if you like the blog, you can leave a comment at Home Page

Cheers

Goutham Ramesh

Hyperfocal Distance – A required technique in Landscape Photography

Hyperfocal distance can be a confusing topic, both for beginning and expert photographers. However, if you want to take the sharpest possible images, particularly landscape photographs, it is simply invaluable. In this blog I will try to demystify this topic.  

Please Note : Please note: Although the methods I present in this Blog are quite easy to understand, hyperfocal distance itself can be a complex topic. If you are a beginner, I highly recommend reading about aperture and depth of field before you delve into this Blog. Please read about exposure , aperture , shutter speed and ISO  here!

What is Hyperfocal Distance?

  • Hyperfocal distance, at its simplest, is the focusing distance that gives your photos the greatest depth of field. 
  • Hyperfocal distance is a distance beyond which all objects can be brought into an “acceptable” focus.
  • Hyperfocal distance is the focusing distance that provides equal sharpness between the foreground and background.

Role of Aperture

  • Hyperfocal distance of your lens will vary with aperture. Why? Think about it like this – if your aperture is wide, such as f/2, you will need to focus quite far away for objects at infinity to appear in focus. However, at a small aperture of f/11 or f/16, distant objects will continue to be sharp even if your lens is focused more closely. So, in this case, hyperfocal distance moves closer to your lens as you use smaller apertures.

Role of Focal Length

  • Hyperfocal distance of your lens will vary  with your focal length ,Your focal length also has a huge impact on hyperfocal distance. As you zoom in, your hyperfocal distance moves farther and farther away. For a 20mm lens, you may need to focus just a few feet from your lens to get the horizon (distant background at infinity) acceptably sharp. On the other hand, for a 200mm lens, your hyperfocal distance may be hundreds of feet away.

When to Use Hyperfocal Distance?

Not all photographs require that you focus your lens at its hyperfocal distance. Consider, for example, an overlook of a distant mountain. If you are standing on the top of the overlook and there are no objects in your foreground, it would be silly to try and calculate the hyperfocal distance, since your nearest object is effectively at infinity. Just focus on the distant mountains! And your aperture does not really matter either – since the closest object is so far away, you could shoot wide open if you wanted to (probably not a very good idea, since most lenses aren’t as sharp at wide apertures, but this is just in theory). Hyperfocal distance is only important to calculate when you have objects both close and far away from your lens that need to be sharp. Since you are actually focusing between these objects, neither is “perfectly” sharp; they are both simply close enough, or “acceptably sharp.”

Using a Hyperfocal Distance Chart.

One way to calculate Hyper focal distance is to use a chart , here is the chart for calculating hyperfocal distance

15mm at F16, HyperFocal distance of 2.5 FT

Here the Idea was to use stones in the water to be in sharp focus along with subjects in infinity . Shot at 15mm at F-16 made sure the stone was beyond 2.5 ft ( Refer the cart above )

Using Apps.

FotoTool ( Android ) :

FotoTool is a free application that contains several useful tools for both amateurs and professional photographers, This includes a tool to calculated HyperFocal distance.

https://play.google.com/store/apps/details?id=com.alfbishop.software.fototool&hl=en_US&gl=US

Simple DoF Calculator (iOS)

Simple DoF Calculator allows photographers to calculate the depth of field and hyperfocal distance for any given settings.

https://apps.apple.com/us/app/simple-dof-calculator/id301222730

How to use Hyperfocal Distance

  1. Choose a lens, and be sure to note the focal length that you are using.
  2. Pick an aperture value.
  3. Find the hyperfocal distance that corresponds to your chosen focal length and aperture.
  4. Focus your lens at the hyperfocal distance. This can be done by estimation, or by the focusing scale on your lens (if you have one).
  5. Now, everything from half that distance until infinity will be sharp.

Some Pictures using Hyperfocal distance

11mm at F22 , Hyperfocal distance of 1 ft

This is 11mm at F22 , Hyperfocal distance of 1 Ft .. So made sure the leaf is one feet away from the camera

15mm at F8, HyperFocal distance of 5 FT

This is 5mm at F8 , Hyperfocal distance of 5 Ft , so made sure the rock is on5 feet away from the camera


Credits

https://photographylife.com/landscapes/hyperfocal-distance-explained

https://en.wikipedia.org/wiki/Hyperfocal_distance

Thanks if you like the blog, you can leave a comment at Home Page

Cheers

Goutham Ramesh

Basics of Exposure in Photography

One thing you will hear a lot about as you start your journey into the world of photography is Exposure.  So, what exactly is exposure? 

Exposure is the amount of light captured by the image sensor of a camera.  If too much light gets to the sensor, the picture is washed out or too bright.  Conversely, if not enough light gets to the sensor, the image will be underexposed or too dark.

Most cameras have a light meter built in that will automatically determine the correct exposure, but when you know the three basics of exposure and how to use them, you can set your camera on manual, go rogue, and get some very AMAZING results.


Let’s take a look these 3 aspects of Exposure:

Aperture

The size of the lens opening, measured in f/stops.  Aperture controls the depth-of-field which is the area that is in focus in the picture FOR A GIVEN MAGNIFICATION! ( SAME F-STOP WILL NOT LOOK SAME IN DIFFERENT FOCAL LENGTH ! PEOPLE USUALLY GO WRONG HERE ) .  Aperture can be used to draw attention to one part of the picture (like the BUTTERFLY BELOW) by blurring the foreground and background with a large aperture opening.  One thing to remember is that the f/stop numbers are smaller for larger openings and the numbers are larger for smaller aperture openings i.e. f/1.4 is a large opening and f/22 is tiny. 

Look at the images below to see the difference of aperture at same magnification and focal length of 180mm.

Shot at F16
Shot at F11
Shot at F3.5

As you can see , the opening of aperture reduces the DOF ( Depth of field ) , Sometimes a fully open aperture works wonder but you should be aware of shallow DOF and keep parallel to the DOF plane to make sure the subject of interest is within the DOF.


Shutter Speed

The amount of time the sensor is exposed to the light measured in fractions of a second.  Shutter speed can be used to freeze a subject with a fast speed of 1/250 or faster or it can be used to blur motion with a slow speed like 1/4.  You can also adjust shutter speed to capture images in low light scenarios IE: increasing the amount of time the camera sensor is exposed to the image/light.  In this situation, you usually need a tripod so that you don’t blur your photograph ( TRIPOD IS AN IMPORTANT GADGET, IF YOU CAN USE IT , PLEASE USE IT)

Shot at 1/2000 of a second

In the below picture the bird was too fast and i wanted to freeze it skimming through water so used a very high shutter speed!

Shot at 1 Second

I wanted to create a blur effect of water flowing , so used a I ( One ) second exposure.


ISO

The light sensitivity of the image sensor.  The smaller number (like 100) is considered low and is not very sensitive, and a number like 1600 is high and is very sensitive to light.  The higher the ISO speed, the faster the camera gathers light, but it also adds noise to the photograph.  Most of the time you should keep the ISO at the lowest setting if there is enough light around you to get the shot you want.  Sometimes though, the only way to get a shot is to crank up the ISO.  A noisy shot is better than no shot at all.

ISO 2500

Since this was shot before sunrise and I wanted to capture the night sky with stars , I had to increase the ISO to 2500 so that camera gathers light faster


Conclusion

So with these three components of exposure ( APERTURE, SHUTTERSPEED AND ISO ), you can combine them in all sorts of ways to bring out your inner Artist! And in the process,  If you like the results of the combination, then who can say it is  not the correct exposure?  That’s what I love about photography.  It’s up to you!


Thanks if you like the blog, you can leave a comment at Home Page

Cheers

Goutham Ramesh

Switzerland by train

My travels to Switzerland has always been on business , however when you plan your business trip carefully you can enjoy the most breath-taking landscapes by train.

The clients that I used to consult for were either in Lausanne or Geneva , which is south west part of Switzerland and in order to enjoy my Journey , I used to land at Zurich ( North East) and take a train from there! I believe this is one the best ways to see Switzerland.

Trains from Zurich to Geneva are operated by SBB – the main rail operator in Switzerland – who offer plenty of different options to make your journey as comfortable as possible, including one-way, multi-journey and day pass tickets that let you extend your adventure even beyond these two enchanting cities.

Zurich to Geneva

Train details

Journey timeFrom 2h 43m
PriceFrom €23.15
Distance139 miles (224 km)
Frequency37 trains per day
First train03:32
Last train02:34
Departure stationZurich Hb
Arrival stationGeneva
ChangesDirect trains available
Train and bus operatorsSBB CFF FFS

There are lots of places to see and do in this Beautiful Country , However I can only speak about my Journey


Zurich to Lauterbrunnen and Murren:

Lauterbrunnen is a municipality in the Swiss Alps. It encompasses the village of Lauterbrunnen, set in a valley featuring rocky cliffs and the roaring, 300m-­high Staubbach Falls. Nearby, the glacial waters of Trümmelbach Falls gush through mountain crevices past viewing platforms. A cable car runs from Stechelberg village to Schilthorn mountain, for views over the Bernese Alps.

Mürren is a Swiss mountain village at the foot of the Schilthorn peak, which is accessible by cable car. Featured in a James Bond film, the Piz Gloria revolving restaurant contains the Bond World 007 exhibit and has views of Mont Blanc. Near Mürren is the Lauterbrunnen Valley, with its subterranean, glacial Trümmelbach Falls. Themed trails on the Allmendhubel peak include the Flower Panorama and North Face paths.

Start at Zürich : Take a Long distance Intercity train to Geneva or Bern   (56 min non-stop) ->  Bern   

: Take another train to Interlaken OST ( 54 Mins ) -> Interlaken OST : Take a train to Lauterbrunnen (20 Mins ) -> Lauterbrunnen : Take a cable car to Murren (10-15 Mins )

Lauterbrunnen Road
Lauterbrunnen Falls
Eiger and Monch from Murren
Eiger
Jungfrau from Murren
Swiss House Murren
Myself at Murren

Bern to Geneva:

This is one of the most scenic train journeys that take you through amazing countryside and as you get close to the destination, you will see Lake Geneva; some of the pics below were taken from train.

Swiss Scape from Train
Swiss Scape from train
Swiss Home from Train
Swiss Village from train
Swiss village from train
Swiss village home from train
Scape from train

Chillon, Montreux  and Glion:

Chillon Castle is an island castle located on Lake Geneva, south of Veytaux in the canton of Vaud. It is situated at the eastern end of the lake, on the narrow shore between Montreux and Villeneuve, which gives access to the Alpine valley of the Rhône.

Glion is a village in the municipality of Montreux in the canton of Vaud, Switzerland. The village is located 700 m.a.s.l., overlooking Lake Geneva. The position of this village above Montreux and the Chauderon Gorge made it a touristic destination in the 19th century.

Start at Geneva : Take a Long distance Intercity train to Lausanne  (37 min non-stop) ->  Lausanne  

: Take another train to Villeneuve VD ( 30 Mins ) -> Villeneuve VD: Take a train to Veytaux, Château de Chillon (4 Mins ) -> Walk to Chillon Castle

Chillon Castle
Myself at Chillon
Court room , Inside Chillon Castle
Dungeon Inside Chillon Castle
Lake Geneva from Chillon Castle

Chillon to Glion

Start at Chillon: Walk to Veytaux, Château de Chillon (4 Mins ) -> Veytaux, Château de Chillon :  Take a train to Territet, Gare ->  Territet, Gare: Take a Funicular to Gliion

On the way to Glion
Funicular to Gilion
Gilon
Chillon from Glion
Glion
Myself at Glion

Lausanne :

Lausanne is a city on Lake Geneva, in the French-speaking region of Vaud, Switzerland. It’s home to the International Olympic Committee headquarters, as well as the Olympic Museum and lakeshore Olympic Park. Away from the lake, the hilly old city has medieval, shop-lined streets and a 12th-century Gothic cathedral with an ornate facade. The 19th-century Palais de Rumine houses fine art and science museums

Start at Geneva : Take a Long distance Intercity train to Lausanne  (37 min non-stop)

Lausanne from Ouchy
Myself at Olympic headquarters
Lausanne

Geneva :

Geneva is a city in Switzerland that lies at the southern tip of expansive Lac Léman (Lake Geneva). Surrounded by the Alps and Jura mountains, the city has views of dramatic Mont Blanc. Headquarters of Europe’s United Nations and the Red Cross, it’s a global hub for diplomacy and banking. French influence is widespread, from the language to gastronomy and bohemian districts like Carouge

St Peter Cathedral , Geneva
Ferry on Lake Geneva and Jet d Eau
River Rhone , Geneva
Jet d eau
Jet D Eau
St Peter Cathedral

Thanks if you like the blog, you can leave a comment at Home Page

Cheers

Goutham Ramesh

Magical Munnar with Vismaya group

I have been part of team Vismaya, which propagates the thought of helping the needy using our photography skills.  We do conduct photography exhibitions of our pictures and entire income from sales is donated for a cause.

As part of process of making pictures we do go on trips to make pictures; One of our annual trips is a to a beautiful place called Munnar ( We started visiting this place in 2012 ) and this blog is about Munnar and some of the pictures that I have taken at this beautiful place.

Team Vismaya in 2012 AD: ( L-R) Amar, Vinod Balan, Myself, Murali, Venu
Team Vismaya in 2020 : (L-R) Harish, Myself, Amar, Venu, Vinod, Murali ( Sridhar is missing )
Team Vismaya in 2020 Munnar trip : (L-R) Amar, Murali, Harish, Myself, Venu, Sisir)

Munnar

Munnar rises as three mountain streams merge – Mudrapuzha, Nallathanni and Kundala. 1,600 m above sea level, this hill station was once the summer resort of the erstwhile British Government in South India. Sprawling tea plantations, picturesque towns, winding lanes and holiday facilities make this a popular resort town. Among the exotic flora found in the forests and grasslands here is the Neelakurinji. This flower which bathes the hills in blue once in every twelve years, will bloom next in 2030. Munnar also has the highest peak in South India, Anamudi, which towers over 2,695 m.

Trip Route:

Our trip usually starts with a date and checklist by Amar which gives a fair indication of what to carry and what to do. We start from Bangalore and reach Munnar on the same day. The route we usually take is shown below

  • Take Hosur Rd, Bengaluru – Chennai Hwy/Electronic City Flyover/Hosur Rd in Bommanahalli.
  • Follow NH 44 and NH544 to Mangalam Rd/Tiruppur – Vanjipalayam – Avinashi Rd in Avinashi. Exit from NH544.
  • Follow Mangalam Rd and Udumalpet – Palladam Rd to Munnar – Udumalpet Rd in Nullatanni, Kannan Devan Hills.

Team’s Kit:

Apart from our equipment considering that we shoot pretty much whole day starting  as early as 3.00 AM we do carry portable kitchen with stove , table, chair water and lot of ready to cook stuff ( These not only help us survive very cold temperatures , it also fills our stomach and is fun )

Maggie on the road
Chef Sisir and Harish, Munnar
Refreshments on the way

Our Typical Day in Munnar

3.00 AM – 6.30 AM, Top Station: Subjects include Milky way, Sun Kissed peaks , Mist and dawn.

Milkyway , Tops tation
Milky Way Top Station ( There is also a head light lit mist which looks like fire in the distance )
Sun lit peak, Top Station
Above the clouds , Top Station
Top Station after sun rise, we are still above the clouds

6.30 AM – 11.00 AM, Kundala Dam: Subjects include curvy roads, Misty Lake, Misty Canopy and Mountains.

Mist Covered Kundala Lake
Vinod Balan , contemplating a composition
Boats at Kundala
Mist Covered Canopy
Early Morning Mist and Mountains
Sisir thinking about composition
Venu Shooting Lone Tree
Myself at Lone Tree
The result!

11.00 AM – 2.00 PM, Hotel: This is where we cook our own food and discuss the day’s shoot mistakes and what we can do better next day and plan for next day and catchup with sleep

Harish and Murali reviewing images and discussing next shoot

3.00 PM – 7.00 PM:

  • Travel to Devikulam tea gardens, scout for places with sun rays and also shoot sun set.

OR

  • Shoot The sunset at Kundala Dam or Echo point
Tea gardens of Devikulam
Rays and Tea Garden
Rays
Trees and Garden
Sunset on the way to Munnar from Devikulam
Sunset and Kundala
Boats during Sunset at Kundala

7.00PM – 12.00 AM, Top Station: Shoot Star Trails.

Star Trail Munnar
Star Trail Munnar

Link to Star Trail Photography Blog

https://gouthamramesh.com/2021/08/star-trails-photography-method/

12.00 AM – 3.00 AM, Hotel: Much needed rest.

Usually we repeat this every day and plan to shoot differently every day and being in mountains the weather is unpredictable, so we do spend good 3 days doing the same thing.

Heading Back

Our drive back is also fun filled with a customary Masala dosa at Asai Dosa at Saravana Bhavan , Salem.

Harish with his Topi Dosa ( A type of South Indian pancake from a fermented batter of rice and lentils )

If you want a personalised photo tour and workshop at munnar in December/January you can contact me from home page!

Cheers,

Goutham Ramesh

Bokeh

A good photograph is all about the subject  is what people say — but what about the background? My friend Murali Santhanam ( http://framesofmind.co.in/ ) always says it’s the background that makes a picture.

In this blog , I will talk about a background effect called Bokeh!

What is It ?

Bokeh comes from the Japanese word boke,  which means “blur” or “haze”, or boke-aji, the “blur quality.” Bokeh is pronounced BOH-Kə or BOH-kay.

Visit any photography website or forum and you’ll find plenty of folks debating the pleasing bokeh that their favourite fast lenses allow. Adjectives that describe bokeh include: smooth, incredible, superb, good, beautiful, sweet, silky, and excellent… but what exactly is it?

Bokeh is created by using aperture effectively ( Usually wide ) to render a busy background into a soft expanse of colour, turning small points of light into soft circles.

The red-veined darter at F8

Some Points :

Aperture: To achieve bokeh in an image, you typically need to use a fast lens—the faster the better ( But i use all kinds of lens including lensbaby ). Ideally you’ll want to use a lens with at least an f/2.8 aperture, with faster apertures of f/2, f/1.8 or f/1.4 being ideal, Many photographers like to use fast prime lenses when shooting photographs that they want visible bokeh in.

Lens: Although bokeh is actually a characteristic of a photograph, the lens used determines the shape and size of the visible bokeh. Usually seen more in highlights, bokeh is affected by the shape of the diaphragm blades (the aperture) of the lens. A lens with more circular shaped blades will have rounder, softer orbs of out-of-focus highlights, whereas a lens with an aperture that is more hexagonal in shape will reflect that shape in the highlights.

Don’t worry if you don’t own a very fast lens. By increasing the distance between the background and your subject, you can see bokeh in images that are shot at smaller apertures like f/8, You will see many images here shot at different apertures.

Grass Blue

How ?

To increase the likelihood of creating visible bokeh in your photographs do the following

  1. Increase the distance between your subject and the background. You can do this by decreasing the distance between the camera and subject. The more shallow the depth-of-field, or further the background is, the more out-of-focus it will be. Highlights hitting the background will show more visible bokeh too, so if you’re using a backlight, side light or a hair light, the bokeh may be more pleasing to the eye.
  2. Choose a background with visible highlights ( Sun through foliage is what I use most of the times )
  3. You’ll want to shoot with the lens wide open, so you’ll want to use a shooting mode of Aperture Priority or Manual. Manual gives you the ability to choose both your aperture and shutter speed, whereas Aperture Priority allows you to choose the f/stop while the camera chooses the appropriate shutter speed for the exposure. I usually shoot in Aperture Priority mode and start with fully open aperture
Small Grass Yellow at F6.3

Some Quick Tips:

  • Use fast prime lenses
  • Long focal length creates more extreme bokeh
  • Shoot lenses wide open
  • Increase distance between subject and background
  • Move closer to your subject
  • Take close-up portraits and macro images in nature
  • Use a backlight, side light, or hair light

Some Images :

Tawny Coaster
Tawny Coaster at F6.3
Lynx Spider at F16
Tawny Coaster at F6.3
Grass Yellow at F13
Blue Ground Skimmer at F10
Snails at F16
Hump Nosed Viper at F8

Credits :

https://www.nikonusa.com/en/learn-and-explore/a/tips-and-techniques/bokeh-for-beginners.html

https://en.wikipedia.org/wiki/Bokeh

Cheers,

Goutham Ramesh

Star Trails Photography -Method

Star Trail Munnar

What is it?

A star trail is a type of photograph that uses long exposure times to capture the apparent motion of stars in the night sky due to Earth’s rotation. A star-trail photograph shows individual stars as streaks across the image, with longer exposures yielding longer arcs.

Points to ponder:

Some important points to ponder for making a good star trail image are:

  • Camera settings
  • Equipment
  • Shooting locations
  • And more

Camera Equipment for Star Trails Photography.

  • Any camera with manual mode is great for star trails photography. The nice part of this mode is you can use the exact same camera for star & Milky Way photography too; By using manual mode, you can independently control shutter speed, f-stop, and ISO by hand.
  • I recommend a full-frame camera, a full-frame sensor in the camera can “collect” more light over the exposure time, increasing image quality, and reducing noise.

Best Lens for Star Trails Photography.

A wide-angle lens with f-stop values ranging from f/2.8 to f/5.6 will work best for star trails photography.

  • Focal Lengths – Full Frame: 14mm – 20mm are recommended.
  • Focal Lengths – Crop Sensor: 10mm – 18mm are recommended.

Aperture.

The larger the aperture diameter, the more light the camera can collect over a standard exposure. Opening the aperture increases image quality because you can reduce the ISO, thus inducing less noise in the image.

I shoot with the Laowa 15mm, Tokina 11-16 or Samyang 8mm for all my night sky images.

Tripod.

A carbon fiber tripod, with a sturdy, stable adjustable ball-head is the best for star trails photography. Carbon fiber reduces tripod vibration providing sharper images.You can try cheaper tripods the most important thing is a sturdy tripod.

Intervalometer.

An intervalometer connects to your camera allowing you to take exposures longer than 30 seconds. It also allows you to take multiple images, one after another, all at the same settings, for an extended amount of time.

Any intervalometer will work, so long as you can control:

  • Shutter speed
  • Time between shots
  • Number of shots total

Some camera’s come with an inbuilt intervalometer ( This is what I use )

Nikonians refer this link

https://onlinemanual.nikonimglib.com/d7500/en/24_menu_guide_03_24.html

Planning

Doing some basic planning before the shoot will greatly improve the chances of coming home with a good shot.

  1. Determine the moon phase : You can shoot star trails under any moon phase, but the results will drastically differ. During the full moon, it’s almost too bright to shoot star trails at all, and you can barely see them in the sky. When the moon is at half or less is a great time to shoot star trails photography, Ideally new moon day is best.; however half-moon can also provide some nice lighting to the landscape at the same time it does does not dominate the brightness of the scene.
  2. Find a Location without Light Pollution : Choose darker areas, you can use this map ( https://blue-marble.de/nightlights/2019 )
  3. Find the Best Weather : This all depends on the shot you want. You can get great results when there are perfectly clear skies, where the star trails scene dominates the sky. However sometimes It’s also great to shoot on nights with 20-50% cloud cover in the sky, which means fewer trails, but move cloud movement.
  4. Determine Moonrise & Moonset Times : It does not matter if you shoot under moonlight or not, It’s best to shoot during a time when the moon will not be rising or setting during this time the light stays fairly constant on the landscape during your exposure and leads to better results. Tip : Start your shoot at least 2 hours before a moon or sun, rise or set event.

Focusing Your Lens at Night

Always focus your lens before changing any other settings, this makes all the rest of the steps easier. Since the distance between us and the stars is very large, focusing at or near infinity works well for star trails photography . However lens may have an “∞” symbol on it, this is not always the ideal place to focus , so understand your lens and do some infinity shooting (Focus on object > 50mts ) in day light with manual focus to understand the point of focus on your lens

Star trail Himalayas

Method to madness

  1. Mode : Manual
  2. Image Format : RAW
  3. Metering Mode : Not applicable as settings are manual
  4. Colour Balance : Kelvin Values between 4000K-5500K work best for night photography settings, If confusing use auto white balance and correct it during post processing.
  5. Focal Length : Widest ( 11- 50mm is the best range )
  6. F-Stop : f/2.8 to f/5.6
  7. Shutter Speed : Shutter speeds ranging from 20-90 seconds are the best for star trails ; Full Frame (30-60 seconds ) ;Crop Sensor (30-120 seconds ). I use a technique that takes a few hundred-star images, without trails, and overlays them on top of each other, creating a star trails image.
  8. ISO Settings: between 500-1200
  9. Noise reduction and long exposure settings: OFF
  10. Number of exposures : The more exposures you take, the longer your star trails will be; This is where intervalometer help; you can also use a single exposure only thing is you might have to keep the exposure open for minutes (30-60 minutes)
  11. Camera pointing : Always point towards North star or in exact opposite direction ( Use Skyview app to track North star )
Champaka Sarasi
Champaka Sarasi

Merging many images to get star trails :

Once you take multiple images you can use Photoshop to merge multiple images to create a star trail :

Steps :

1. First, load all your base images into Photoshop into a single stack (File -> Script >- Load Images into Stack from Photoshop, load from Bridge, or Lightroom, etc).

2. Second, scroll to the bottom of your stack and select the second to the bottom layer – the first layer you want to set to Lighten, and set the blend mode.

3.Next, Right-Click on your newly set ‘Lighten’ layer, a context menu will open up and scroll up and find ‘Copy Layer Style’

4.Select all the remaining Layers above your current lighten layer – all those annoying many images + layers you want to quickly blend together.

4 .Now for the magic, right click again on your selected layers and find that menu item that says ‘Paste Layer Style’ – try not to fall out of your chair at this point

Conclusion.

This was a long read and hope this blog helps fellow photo artists who want to shoot star trails

Credits

https://www.davemorrowphotography.com/2012/03/StarTrailsPhotographyTutorial.html

https://blue-marble.de/nightlights/2019

https://onlinemanual.nikonimglib.com/d7500/en/24_menu_guide_03_24.html

https://en.wikipedia.org/wiki/Star_trail

Cheers,

Goutham Ramesh

Hoysalas skilled artists of India

Hoysalas (1026 CE – 1343 CE) were a dynasty that ruled present day Karnataka, parts of Tamil Nadu and south-western Telangana; Their contribution to art especially sculpture and temple architecture is unparalleled! Their era was marked by illustrious achievements in art, architecture, and culture. The nucleus of this activity lay in the present-day Hassan district of Karnataka, India. Their  intention of surpassing the Western Chalukyan Empire (973 CE – 1189 CE) in its own sphere provided further impetus for excelling in the field of architecture.

History of the Hoysala Empire

The Hoysala rulers began as local chieftains in the hills of Western Ghats. With time, their fortune began to prosper and within a few decades they achieved the status of a powerful feudatory under Western Chalukyan Emperors. Early in the history of Hoysala dynasty, the capital of their nascent dominion was shifted from the hills of Western Ghats to Belur. The military conquests of Vishnuvardhan (1108 CE – 1152 CE) against the neighboring Chola Empire (c. 300 BCE – 1279 CE) in 1116 CE marks the first major development in the history of these dynasts. A new age ushered with Vishnuvardhan as he built the Chennakesava temple (1117 CE) in Belur to celebrate this victory; furthermore, he decided to shift the capital almost 20 km to the east to Halebidu or Halebid.

The Hoysalas gained their political freedom in 1192 during the reign of Veera Ballala II (1173 CE – 1220 CE). They soon became a leading power in Southern India and enjoyed territorial supremacy and economic well-being over the next century or so. At its height, the empire consisted of present-day Karnataka, parts of Tamil Nadu and south-western Telangana. However, invasions of sultanates from Delhi and Madurai, from 1311 CE onwards, proved fatal to the then reigning monarch, Veera Ballala III (1292 CE – 1343 CE). He eventually succumbed to these repeated onslaughts in 1343 CE.

I have tried to capture some of their architectural marvels in the following images, I would like to call this as poetry in stone.

Poetry in stone

Credits :

https://www.worldhistory.org/article/898/hoysala-architecture/

https://en.wikipedia.org/wiki/Hoysala_architecture

Cheers,

Goutham Ramesh