What is it?
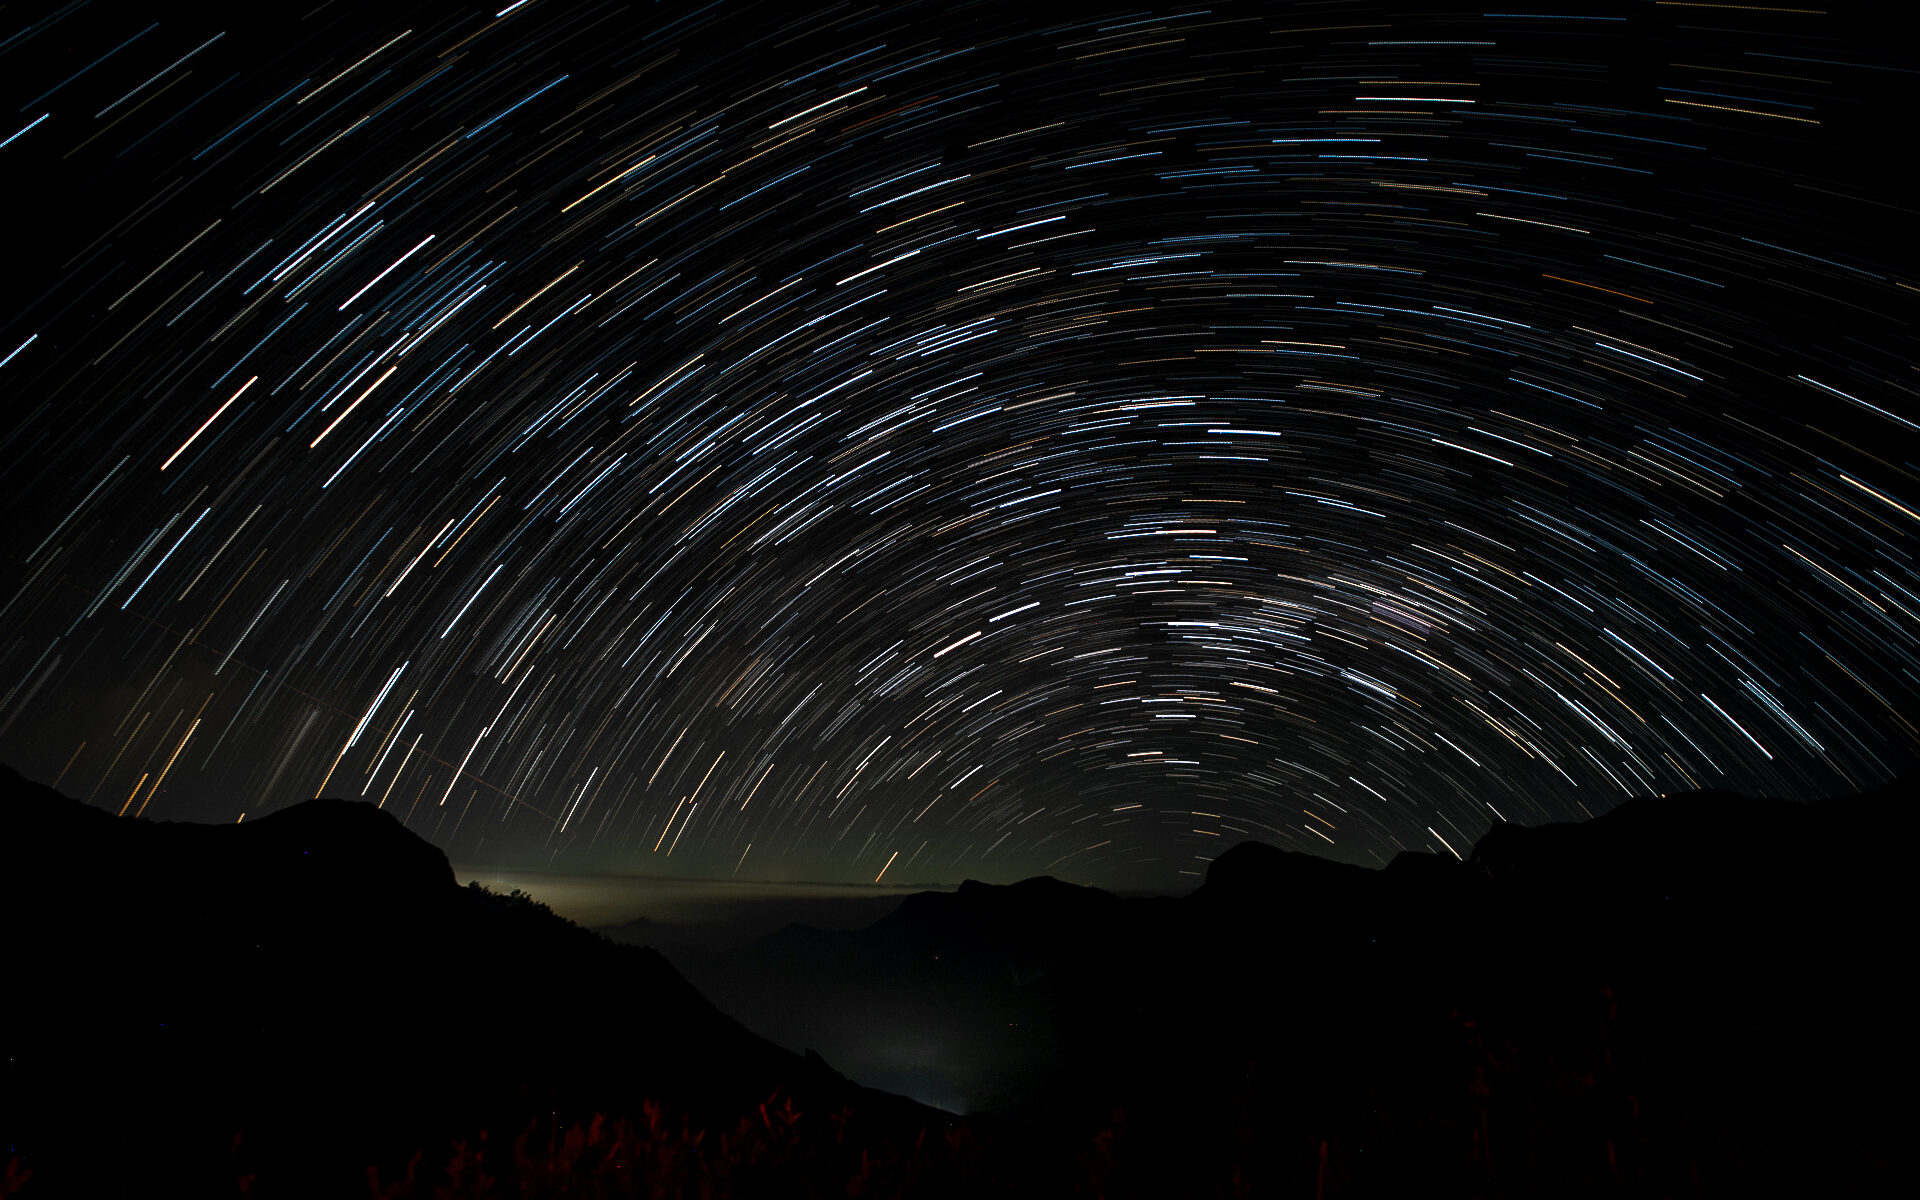
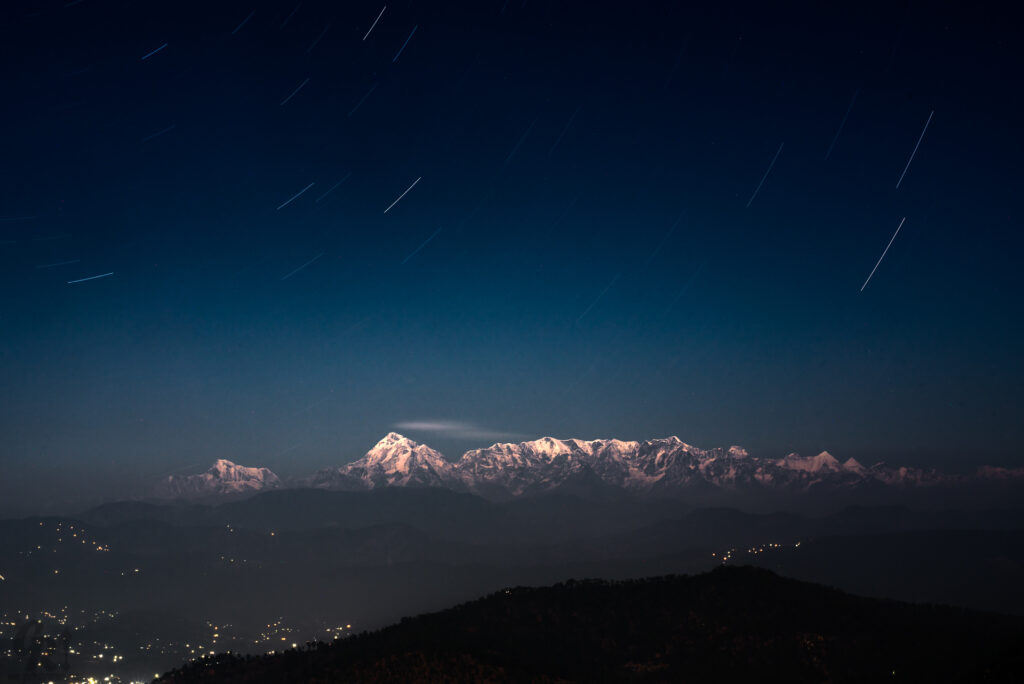
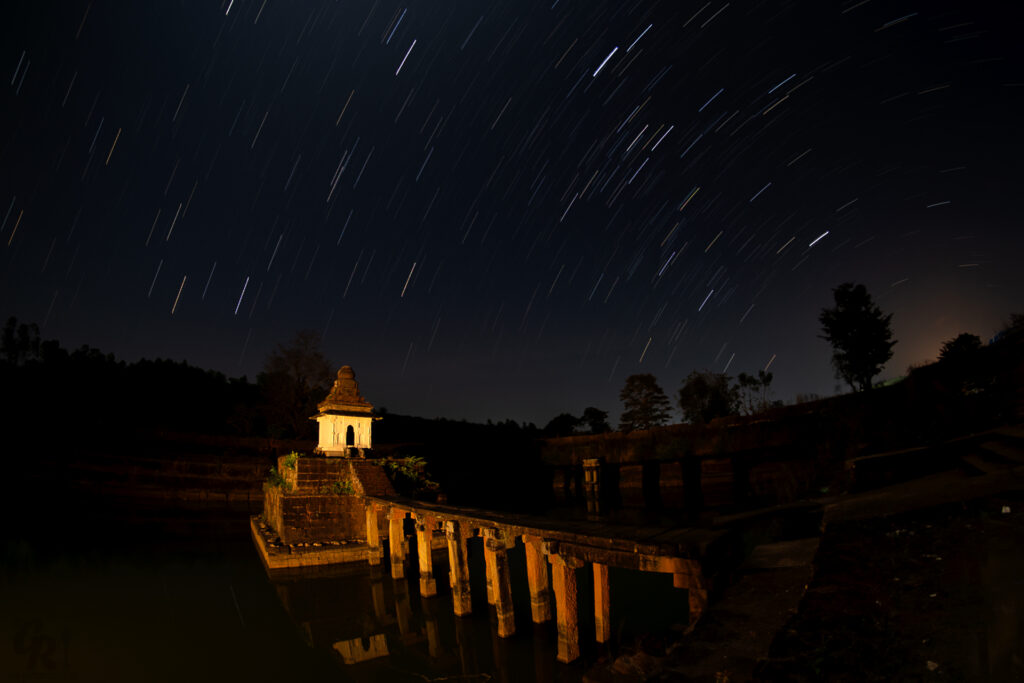
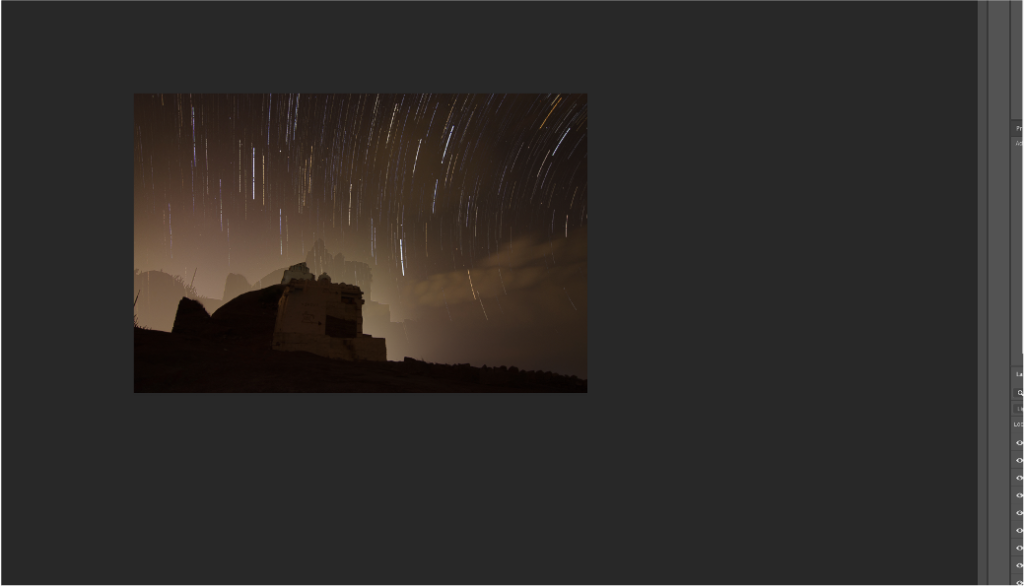
A star trail is a type of photograph that uses long exposure times to capture the apparent motion of stars in the night sky due to Earth’s rotation. A star-trail photograph shows individual stars as streaks across the image, with longer exposures yielding longer arcs.
Points to ponder:
Some important points to ponder for making a good star trail image are:
- Camera settings
- Equipment
- Shooting locations
- And more
Camera Equipment for Star Trails Photography.
- Any camera with manual mode is great for star trails photography. The nice part of this mode is you can use the exact same camera for star & Milky Way photography too; By using manual mode, you can independently control shutter speed, f-stop, and ISO by hand.
- I recommend a full-frame camera, a full-frame sensor in the camera can “collect” more light over the exposure time, increasing image quality, and reducing noise.
Best Lens for Star Trails Photography.
A wide-angle lens with f-stop values ranging from f/2.8 to f/5.6 will work best for star trails photography.
- Focal Lengths – Full Frame: 14mm – 20mm are recommended.
- Focal Lengths – Crop Sensor: 10mm – 18mm are recommended.
Aperture.
The larger the aperture diameter, the more light the camera can collect over a standard exposure. Opening the aperture increases image quality because you can reduce the ISO, thus inducing less noise in the image.
I shoot with the Laowa 15mm, Tokina 11-16 or Samyang 8mm for all my night sky images.
Tripod.
A carbon fiber tripod, with a sturdy, stable adjustable ball-head is the best for star trails photography. Carbon fiber reduces tripod vibration providing sharper images.You can try cheaper tripods the most important thing is a sturdy tripod.
Intervalometer.
An intervalometer connects to your camera allowing you to take exposures longer than 30 seconds. It also allows you to take multiple images, one after another, all at the same settings, for an extended amount of time.
Any intervalometer will work, so long as you can control:
- Shutter speed
- Time between shots
- Number of shots total
Some camera’s come with an inbuilt intervalometer ( This is what I use )
Nikonians refer this link
https://onlinemanual.nikonimglib.com/d7500/en/24_menu_guide_03_24.html
Planning
Doing some basic planning before the shoot will greatly improve the chances of coming home with a good shot.
- Determine the moon phase : You can shoot star trails under any moon phase, but the results will drastically differ. During the full moon, it’s almost too bright to shoot star trails at all, and you can barely see them in the sky. When the moon is at half or less is a great time to shoot star trails photography, Ideally new moon day is best.; however half-moon can also provide some nice lighting to the landscape at the same time it does does not dominate the brightness of the scene.
- Find a Location without Light Pollution : Choose darker areas, you can use this map ( https://blue-marble.de/nightlights/2019 )
- Find the Best Weather : This all depends on the shot you want. You can get great results when there are perfectly clear skies, where the star trails scene dominates the sky. However sometimes It’s also great to shoot on nights with 20-50% cloud cover in the sky, which means fewer trails, but move cloud movement.
- Determine Moonrise & Moonset Times : It does not matter if you shoot under moonlight or not, It’s best to shoot during a time when the moon will not be rising or setting during this time the light stays fairly constant on the landscape during your exposure and leads to better results. Tip : Start your shoot at least 2 hours before a moon or sun, rise or set event.
Focusing Your Lens at Night
Always focus your lens before changing any other settings, this makes all the rest of the steps easier. Since the distance between us and the stars is very large, focusing at or near infinity works well for star trails photography . However lens may have an “∞” symbol on it, this is not always the ideal place to focus , so understand your lens and do some infinity shooting (Focus on object > 50mts ) in day light with manual focus to understand the point of focus on your lens
Method to madness
- Mode : Manual
- Image Format : RAW
- Metering Mode : Not applicable as settings are manual
- Colour Balance : Kelvin Values between 4000K-5500K work best for night photography settings, If confusing use auto white balance and correct it during post processing.
- Focal Length : Widest ( 11- 50mm is the best range )
- F-Stop : f/2.8 to f/5.6
- Shutter Speed : Shutter speeds ranging from 20-90 seconds are the best for star trails ; Full Frame (30-60 seconds ) ;Crop Sensor (30-120 seconds ). I use a technique that takes a few hundred-star images, without trails, and overlays them on top of each other, creating a star trails image.
- ISO Settings: between 500-1200
- Noise reduction and long exposure settings: OFF
- Number of exposures : The more exposures you take, the longer your star trails will be; This is where intervalometer help; you can also use a single exposure only thing is you might have to keep the exposure open for minutes (30-60 minutes)
- Camera pointing : Always point towards North star or in exact opposite direction ( Use Skyview app to track North star )
- https://play.google.com/store/apps/details?id=com.t11.skyviewfree&hl=en_IN&gl=US
- https://apps.apple.com/us/app/skyview-lite/id413936865
Merging many images to get star trails :
Once you take multiple images you can use Photoshop to merge multiple images to create a star trail :
Steps :
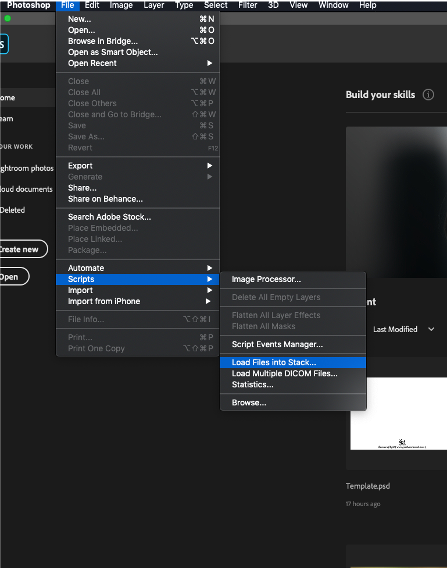
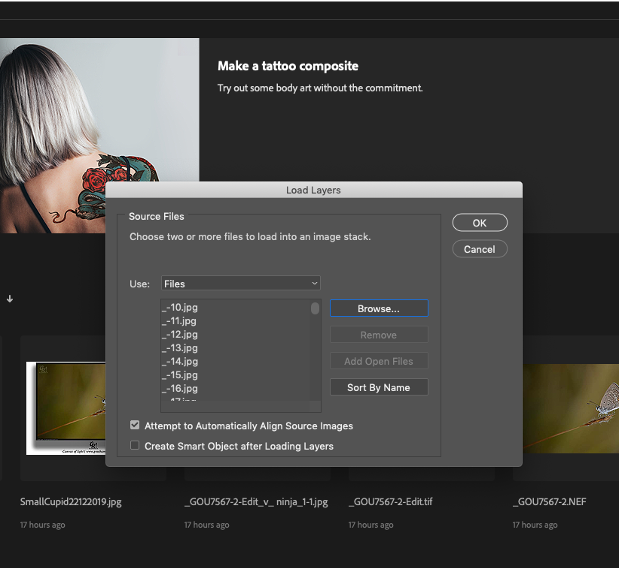
1. First, load all your base images into Photoshop into a single stack (File -> Script >- Load Images into Stack from Photoshop, load from Bridge, or Lightroom, etc).
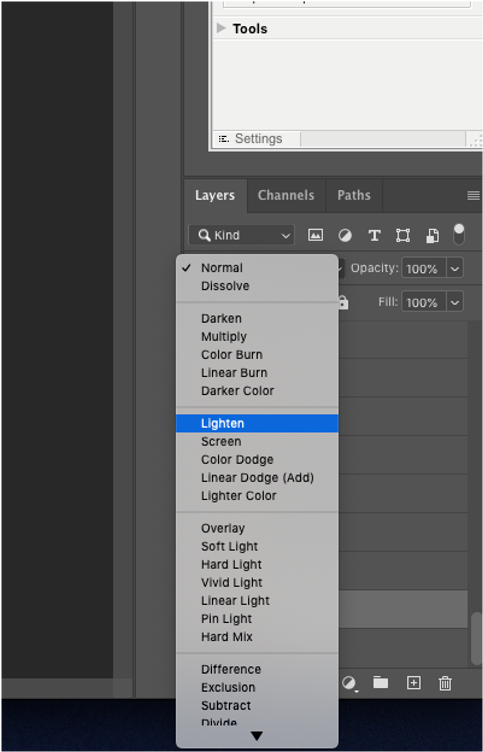
2. Second, scroll to the bottom of your stack and select the second to the bottom layer – the first layer you want to set to Lighten, and set the blend mode.
3.Next, Right-Click on your newly set ‘Lighten’ layer, a context menu will open up and scroll up and find ‘Copy Layer Style’
4.Select all the remaining Layers above your current lighten layer – all those annoying many images + layers you want to quickly blend together.
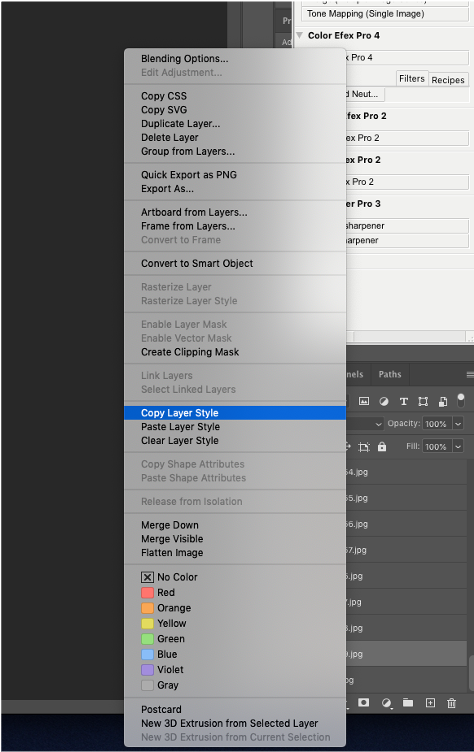
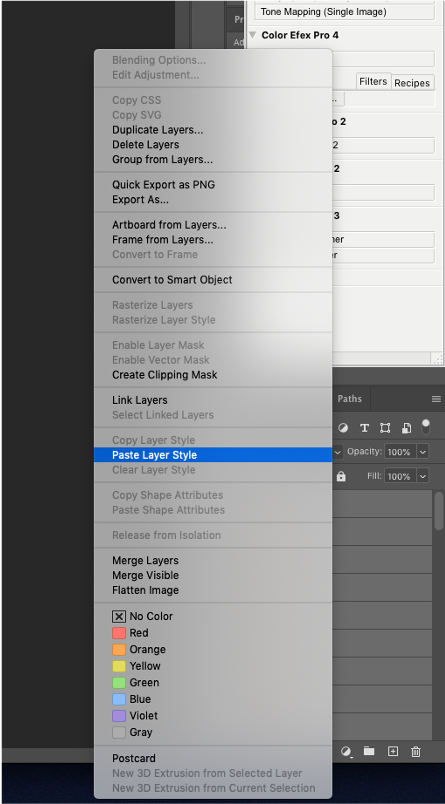
4 .Now for the magic, right click again on your selected layers and find that menu item that says ‘Paste Layer Style’ – try not to fall out of your chair at this point
Conclusion.
This was a long read and hope this blog helps fellow photo artists who want to shoot star trails
Credits
https://www.davemorrowphotography.com/2012/03/StarTrailsPhotographyTutorial.html
https://blue-marble.de/nightlights/2019
https://onlinemanual.nikonimglib.com/d7500/en/24_menu_guide_03_24.html
https://en.wikipedia.org/wiki/Star_trail
Cheers,